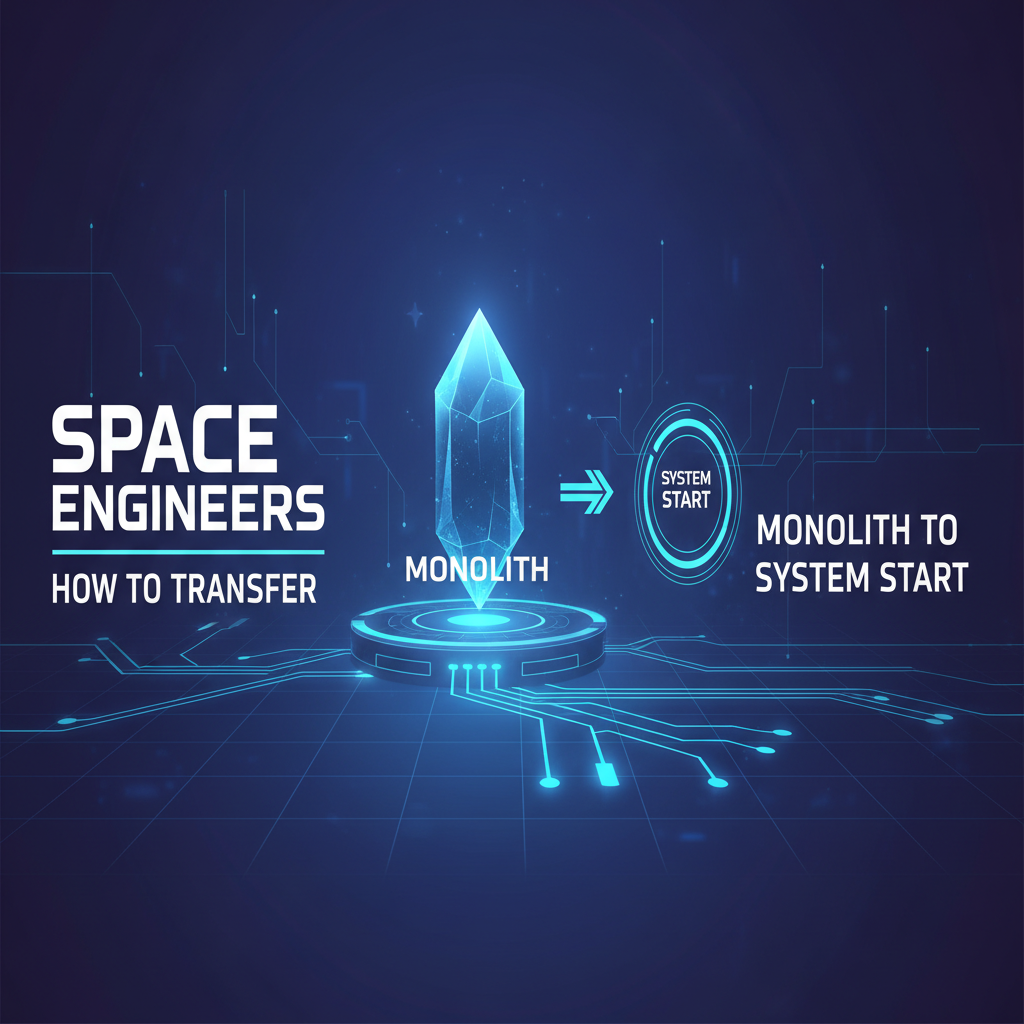
Space Engineers: How to Transfer Monolith to System Start


The vast, intricate cosmos of Space Engineers presents an unparalleled sandbox for creation, exploration, and ingenious engineering. Within this boundless digital frontier, players often dedicate countless hours to constructing magnificent structures – colossal ships, sprawling stations, or meticulously reshaped asteroids. These monumental creations, born from vision and perseverance, often come to be known within the community as "monoliths." They are not just collections of blocks; they represent significant achievements, strategic outposts, and often, the very heart of a player's long-term progress in a particular world. However, the lifecycle of a Space Engineers world is rarely static. Whether driven by a desire for a fresh start, the need to migrate to a new server, the ambition to combine beloved structures from different saves, or simply the urge to share a masterpiece with the broader community, the challenge inevitably arises: how does one effectively transfer such a monolith to a new system start?
This endeavor is far more intricate than merely copying and pasting a file. It demands a deep understanding of the game's underlying mechanics, file structures, and the implications of moving such complex entities. A successful transfer preserves not just the physical form of the monolith, but also its integrity, functionality, and sometimes, even its very essence within the new environment. This comprehensive guide will meticulously walk you through every facet of this advanced operation, from initial planning and preparation to the execution of various transfer methods, culminating in post-transfer optimization. We will delve into the nuances of handling both player-built grid structures and natural voxel-based monoliths, offering detailed step-by-step instructions, essential troubleshooting advice, and insights into ensuring your monumental creations seamlessly integrate into their new cosmic homes. The goal is to empower you, the ambitious engineer, to not only preserve your legacy but to extend its reach across the ever-expanding universe of Space Engineers.
Part 1: Deciphering the Monolith – What Are We Really Transferring?
Before embarking on any transfer operation, it is crucial to clearly define what constitutes a "monolith" within the context of Space Engineers and understand its inherent characteristics. The term itself is flexible, often referring to anything from a gargantuan capital ship that took hundreds of hours to construct, a sprawling orbital station that serves as a central hub, or even a naturally occurring asteroid that has been extensively modified and hollowed out to serve a specific purpose. Each type of monolith presents its own unique challenges and requires tailored transfer methodologies.
1.1 Player-Built Grid Monoliths: The Fabric of Engineering Prowess
The most common understanding of a monolith in Space Engineers revolves around player-built grid structures. These are compositions of various functional blocks, ranging from reactors and thrusters to refineries, assemblers, and intricate conveyor systems, all interconnected to form a single, coherent entity. These can be:
- Massive Capital Ships: Often multi-decked, heavily armed, and designed for deep-space exploration, combat, or resource transportation. Their complexity lies in the sheer number of blocks, intricate internal systems, and sometimes, the presence of subgrids (rotors, pistons, connectors with docked ships).
- Orbital or Planetary Stations: Fixed structures, either anchored in space or to a planetary surface, serving as industrial complexes, trading hubs, defensive fortifications, or even player residences. These can be even larger than ships and frequently incorporate large arrays of production blocks, storage, and utility systems.
- Specialized Facilities: Unique constructs designed for specific tasks, such as automated mining rigs, elaborate factory complexes, or research outposts. Their design often reflects a highly optimized and specialized function.
The fundamental characteristic of these grid-based monoliths is their existence as a collection of interconnected blocks within the game's grid system. When transferred, the goal is to preserve this precise arrangement, along with all associated block data, inventory contents, and subgrid relationships. The challenge escalates with the size and complexity, as more blocks mean more potential for issues like phantom forces, grid collisions, or lost connections during the transfer process. Understanding the internal logic and dependencies of your creation is paramount. For instance, a ship relying on a complex script for automated docking or self-repair will need that script's integrity maintained, along with its physical components, if it is to function correctly in its new environment.
1.2 Voxel-Based Monoliths: The Reworked Natural Landscape
Less frequently, but equally significant, a "monolith" can refer to a naturally occurring asteroid or planetary formation that has been extensively re-sculpted, hollowed out, or built into. These voxel-based entities differ fundamentally from grid structures:
- Modified Asteroids: Often chosen for their rich ore deposits, strategic location, or unique shape, these asteroids are transformed into bases, hangars, or hidden outposts by painstakingly mining out interiors and building structures within their excavated voids. The "monolith" here is the combination of the modified voxel terrain and any internal grid structures.
- Planetary Bases within Natural Formations: Similar to asteroids, players might choose to integrate their bases directly into mountains, canyons, or caves on planets, leveraging the natural defenses and aesthetics.
Transferring a purely voxel-based monolith (an untouched asteroid) is essentially moving a piece of the game world's terrain data. Transferring a modified voxel monolith, however, becomes a dual challenge: preserving the sculpted terrain and the grid structures embedded within it. This often necessitates direct manipulation of world save files, as standard blueprinting mechanisms are primarily designed for grid objects. The integrity of the voxel data is critical; any corruption can lead to unsightly gaps, unexpected material changes, or even entire sections disappearing. Moreover, the interaction between embedded grids and the surrounding voxels (e.g., blocks clipping into terrain) must be considered, as subtle shifts during transfer could cause structural damage or visual anomalies.
1.3 Why Undertake a Monolith Transfer? The Motivations Behind the Migration
The reasons for moving such a significant asset are diverse and deeply rooted in the player experience:
- World Resets/New Starts: After countless hours in a particular save, players often crave a fresh economic challenge or a new procedural landscape to explore. Transferring a beloved ship or station allows them to carry forward their engineering legacy without starting entirely from scratch in a new game world.
- Server Migration: Dedicated servers can have lifespans, or players might wish to move their operations from one community server to another. This necessitates moving entire bases or fleets to the new host.
- Consolidation of Assets: A player might have multiple single-player saves, each containing unique and valuable creations. A transfer operation allows for the consolidation of these prized assets into a single, comprehensive world.
- Sharing and Collaboration: Sharing a meticulously crafted blueprint of a capital ship with friends or the wider Steam Workshop community is a common practice. This is a form of transfer, enabling others to "start" with your creation.
- Troubleshooting and Backup: In rare cases, a world save might become corrupted or problematic. Extracting a monolith and placing it into a new, clean world can be a recovery strategy. Similarly, regularly blueprinting and transferring key assets to a "backup" world acts as a robust safeguard against unforeseen data loss.
Understanding these motivations reinforces the importance of a robust and reliable transfer process. It's not just about moving blocks; it's about preserving effort, enabling new gameplay experiences, and fostering community sharing.
Part 2: Laying the Groundwork – Essential Pre-Transfer Considerations and Preparation
A successful monolith transfer in Space Engineers hinges significantly on meticulous preparation. Rushing this stage can lead to frustrating data loss, corrupted files, or a fragmented creation. This section details the critical steps and considerations necessary before you even think about moving a single block.
2.1 The Unshakeable Rule: Backup, Backup, Backup!
This cannot be stressed enough. Before attempting any modification or transfer of game files, always create a full backup of your world save. This serves as your safety net, allowing you to revert to a pristine state if anything goes awry during the process. Imagine losing hundreds of hours of work because of a single misplaced file – a nightmare scenario easily avoidable with a simple backup.
- Locating Your Save Files:
- For most users, Space Engineers save files are located at:
C:\Users\[YourUsername]\AppData\Roaming\SpaceEngineers\Saves\[SteamID64]\[WorldName] - The
AppDatafolder is often hidden. You may need to enable "Show hidden files, folders, and drives" in your File Explorer options. - Inside the
[WorldName]folder, you'll find numerous files and subfolders crucial to your save.
- For most users, Space Engineers save files are located at:
- Performing the Backup:
- Simply copy the entire
[WorldName]folder and paste it to a safe, easily accessible location, such as your desktop or a dedicated "Space Engineers Backups" folder. - Consider compressing the backup folder (e.g., into a
.zipor.rararchive) to save space, especially for large worlds. - Label your backups clearly with dates or descriptive names (e.g.,
MyMegaBaseWorld_Backup_2023-10-27_PreTransfer).
- Simply copy the entire
2.2 Identifying the Monolith Type and Destination
Revisiting the definition of your monolith from Part 1 is crucial here. The method you employ will depend heavily on whether you're moving a player-built grid or a modified voxel structure.
- Player-Built Grids: These are best handled via the in-game blueprint system, possibly supplemented by creative mode copy-paste. This is generally the safest and most straightforward method.
- Voxel-Based Structures (especially modified ones): These often require more advanced techniques involving direct manipulation of world files, which carries a higher risk and demands greater caution.
Furthermore, clarify your intended destination: * New Single-Player World: Are you integrating the monolith into a brand-new save on your local machine? * Existing Single-Player World: Are you adding it to another one of your current save files? * Dedicated Server: Is the monolith destined for a server you administer, or one hosted by a friend or community? This requires server-side access and potentially different procedures. * Sharing with the Community (Steam Workshop): This is a specific form of blueprint transfer designed for public distribution.
2.3 Required Tools and Resources
Ensure you have the necessary tools at your disposal:
- Space Engineers Game: Obviously, the game itself is essential. Ensure it's updated to avoid version compatibility issues.
- File Explorer: For navigating to save files and managing backups.
- Administrative Privileges: If transferring to a dedicated server, you'll need full administrator access to the server's file system and potentially its in-game console.
- Text Editor (Optional but Recommended): A powerful text editor like Notepad++, VS Code, or Sublime Text can be invaluable for inspecting or (with extreme caution) editing
.sbsfiles, especially when dealing with advanced voxel transfers or troubleshooting. Do NOT use standard Notepad for this, as it can introduce formatting issues. - Third-Party Tools (Situational): Tools like SE Toolbox (though its active development and compatibility might vary) were historically used for advanced world editing. While often deprecated for newer versions of the game, they might still be useful for niche scenarios. Research their current status before use.
2.4 In-Game Preparation: Cleaning Up Your Monolith
Before blueprinting or extracting your monolith, a little in-game housekeeping can save you headaches later.
- Disconnecting Subgrids: While blueprints can handle subgrids, overly complex arrangements (e.g., a ship with 20 docked mining vessels, each with pistons and rotors) can sometimes cause issues. Consider carefully if any subgrids can be temporarily detached or simplified for the transfer, then reconnected in the new world.
- Emptying Inventories (Optional but Recommended): Large inventories can significantly increase blueprint file size and potentially introduce minor glitches. If possible, transfer valuable resources to a temporary container in your original world, or be prepared for a larger blueprint file.
- Grinding Down Unnecessary Components: Are there any temporary scaffolding blocks, experimental components, or abandoned projects attached to your monolith that aren't critical to its core function? Grinding these down reduces complexity and file size.
- Ensuring Power and Integrity: Make sure your monolith is fully powered and structurally sound in its original world. Any loose blocks or unpowered systems might behave unpredictably when pasted into a new environment. Perform an integrity check if available (though mainly for combat damage, it helps ensure block connections).
- Save and Reload: After any significant in-game preparation, save your game, exit, and reload it to ensure all changes have been properly written to the save file and that no lingering bugs are present.
By diligently following these preparatory steps, you establish a solid foundation for a smooth and successful monolith transfer, minimizing risks and maximizing the chances of your creation arriving intact and fully functional in its new cosmic home.
Part 3: The Blueprinting Method – Standard, Safe, and Versatile
For player-built grid monoliths – ships, stations, and other block-based constructions – the in-game blueprint system is unequivocally the most straightforward, safest, and widely utilized method for transfer. It effectively encapsulates your creation into a reusable template, ready to be spawned into any compatible world.
3.1 Crafting Your Blueprint: A Step-by-Step Guide
The process of creating a blueprint is intuitive, but certain details must be observed for optimal results.
- Accessing the Blueprint Menu:
- In-game, aim your crosshair at any block of your monolith.
- Press
Ctrl+B. This action opens the "Blueprint" interface. - You'll see a green bounding box appear around the grid you're targeting. This box dynamically adjusts to encompass the entire connected grid. If your monolith has multiple disconnected grids (e.g., a station with a detached utility ship that should be part of the blueprint), you'll need to ensure they are connected (via connector, landing gear, or merge block) or blueprint them separately.
- Naming Your Blueprint:
- In the blueprint window, enter a descriptive name for your monolith. Choose something clear and unique (e.g., "Argus_Capital_Ship_MkIV", "DeepSpace_Mining_Outpost"). This makes it easy to find later, especially if you accumulate many blueprints.
- Capturing the Thumbnail (Optional but Recommended):
- Position your camera to get a good, clear view of your monolith.
- Click the "Take Screenshot" button within the blueprint menu. This image will serve as the thumbnail in your blueprint library, aiding in visual identification.
- Saving the Blueprint:
- Click the "Save Blueprint" button.
- The game will process your grid, saving all its block data, properties, subgrids, and inventory contents (if enabled in game settings) into a
.sbbfile. This file, along with its metadata and screenshot, is stored in your local blueprint directory:C:\Users\[YourUsername]\AppData\Roaming\SpaceEngineers\Blueprints\local\[BlueprintName].
3.2 Key Considerations During Blueprint Creation
- Size Limits and Complexity: While Space Engineers allows for truly massive blueprints, extremely large or block-dense creations can take longer to save and may result in larger file sizes. This can impact loading times and potentially game performance when pasting.
- Subgrids and Hierarchy: Blueprints are excellent at handling subgrids (rotors, pistons, hinges, connectors, merge blocks) and their attached grids. The entire hierarchy will be preserved. However, ensure that all subgrids are properly assembled and connected before blueprinting. If a subgrid is merely "floating" near the main grid but not physically connected, it won't be included.
- Faction Ownership and Permissions: The blueprint will save the ownership information of blocks. When pasting, ownership typically defaults to the player who pastes it, or it can be set to "Nobody." For server environments, this is an important detail for access control.
- Inventory Contents: By default, blueprints usually save the inventory of blocks. This means your cargo containers, refineries, and assemblers will retain their items. However, some server configurations or game settings might disable this to prevent resource duplication. Verify your settings if inventory preservation is critical.
- Scripts and Programmable Blocks: Programmable blocks and their scripts are saved within the blueprint. However, ensure the script itself is correctly compiled and functional in the original world. After pasting, you might need to recompile or re-run the script for it to become active in the new world, especially if it relies on specific world-state variables.
3.3 Importing Your Blueprint into a New World
Once your monolith is safely blueprinted, the next step is to introduce it to its new environment.
- Loading the Destination World:
- Start Space Engineers and load the world where you intend to paste your monolith. This can be a brand-new save, an existing one, or a dedicated server you have admin access to.
- It's generally recommended to paste blueprints in Creative Mode first, especially for large structures. This allows for free placement without resource cost and simplifies collision detection. You can always switch back to Survival later.
- Accessing the Blueprint Library:
- Press
F10to open the "Blueprint Library." - Navigate to the "Local" tab (unless you've uploaded it to the Workshop).
- Find your monolith blueprint by its name and thumbnail.
- Select the blueprint and click "Load."
- Press
- Positioning and Pasting:
- After loading, a transparent projection of your monolith will appear, attached to your character.
- Placement: Carefully maneuver your character to position the projection.
- Space: Ensure there's ample clear space. Collisions with voxels or other grids will prevent pasting. The projection will turn red if it's invalid.
- Orientation: Use
Ctrl+Scroll Wheelto rotate the projection around its local axes (Ctrl+Alt+Scroll Wheelfor global axes). This is crucial for precise alignment. - Altitude/Depth: For planetary bases, carefully position it to avoid burying parts or leaving large gaps.
- Pasting: Once the projection is green and correctly positioned, press
Ctrl+Vto paste the monolith into the world. - Confirmation: The game will spawn the physical blocks. For very large grids, this might cause a brief pause or framerate drop. Give it a moment to fully render.
3.4 Troubleshooting and Best Practices for Blueprinting
- "Object Too Large" or "Pasting Blocked" Errors:
- Server Limits: On dedicated servers, there are often block limits or physical size limits configured by administrators. If your monolith exceeds these, you won't be able to paste it. Contact the server admin.
- Single-Player Limits: Even in single-player, extreme grid sizes can sometimes trigger performance-related limits. Try splitting your monolith into smaller, connected blueprints if absolutely necessary (e.g., blueprint the main hull, then the internal modules separately, connecting them in-game).
- Collision: Ensure no part of the projection is colliding with terrain, other grids, or dynamic objects. Even a single block intersection will prevent pasting.
- Floating Objects/Disconnected Blocks: If you notice parts of your monolith are missing or floating independently after pasting, it likely means they were not properly connected to the main grid during blueprint creation. Revert to your backup, connect them, and re-blueprint.
- Performance Impact: Very large pasted monoliths can significantly reduce simulation speed (
Sim Speed) or framerate, especially if they are heavily armored, have many active systems, or are laden with inventory.- Mitigation: Consider grinding down non-essential internal armor blocks, reducing the number of active components, or optimizing block choices. Ensure your new world's PC or server has sufficient processing power.
- Ownership Issues: If the pasted monolith is owned by "Nobody" or an unexpected faction, open the terminal of any block, go to the "Info" tab, and change ownership to your character or desired faction. This is vital for interacting with its systems.
- Gravity Alignment: When pasting in space, the monolith will retain its orientation. On a planet, if spawned from space, it might float. Ensure it's properly landed or anchored to the surface if intended as a ground base. If necessary, use thrusters to gently bring it to the ground.
By adhering to these detailed steps and being aware of potential pitfalls, the blueprinting method becomes an incredibly powerful and reliable tool for transferring your most cherished grid-based monoliths across the vast expanse of Space Engineers worlds.
APIPark is a high-performance AI gateway that allows you to securely access the most comprehensive LLM APIs globally on the APIPark platform, including OpenAI, Anthropic, Mistral, Llama2, Google Gemini, and more.Try APIPark now! 👇👇👇
Part 4: World File Manipulation – The Advanced Route for Voxel Monoliths and Full World Transfers
While blueprinting excels for grid-based creations, transferring extensively modified natural terrain (voxel-based monoliths) or entire world elements often necessitates a more direct, hands-on approach: manipulating the game's save files. This method carries a higher risk due to the potential for data corruption but is indispensable for certain transfer scenarios.
4.1 Understanding the Space Engineers World Save Structure
A Space Engineers world save is not a single file but a complex directory containing various interconnected files and folders. Before you begin, a basic understanding of this structure is paramount. (Re-iterate the importance of backups from Part 2.1).
- Main Save Directory:
C:\Users\[YourUsername]\AppData\Roaming\SpaceEngineers\Saves\[SteamID64]\[WorldName] - Key Files within
[WorldName]:Sandbox.sbc: The core world configuration file. It contains global settings, world parameters, game mode, player data, and references to other essential files. This is almost always present.Sandbox_0_0_0_.sbs: This is the main entity data file. It lists all grids (ships, stations, drones), characters, floating objects, projectiles, and their properties (position, orientation, blocks, inventory). There might be multiple such files (Sandbox_1_0_0_.sbs, etc.) for very large worlds, managed by the game.VoxelHands.sbs: This file stores all modifications made to the naturally generated voxel terrain (asteroids, planets). Any mining, building into, or shaping of voxels will be recorded here. This is crucial for modified voxel monoliths.Storagefolder: Contains individual.vx2files for each unique voxel object (asteroids, planets, moons). These are the raw voxel data files.Contentfolder: Can contain additional custom content or scenarios.
4.2 Method A: Transferring an Entire World Save
The simplest form of world file manipulation is transferring an entire world. This is ideal if you want to move your entire game progression, including all grids, voxel modifications, and game state, to a new location (e.g., from your local machine to a dedicated server).
- Backup Both Worlds: Crucially, back up both your source world (containing the monolith) and your destination world (where you want to move it, if it's an existing save you wish to overwrite).
- Locate Source World: Navigate to your source world's directory:
...\Saves\[SteamID64]\[SourceWorldName] - Copy Source World Folder: Copy the entire
[SourceWorldName]folder. - Transfer to Destination:
- New Single-Player Start: If you're creating a truly new local save, you can simply paste the
[SourceWorldName]folder into your...\Saves\[SteamID64]\directory. The game will recognize it as a new playable world. - Overwriting Existing Local Save: If you want to replace an existing local save, delete the
[DestinationWorldName]folder first (after backing it up!), then paste your[SourceWorldName]folder. You might rename[SourceWorldName]to match the old destination name if you prefer. - Dedicated Server: This is the most common use case.
- Access your dedicated server's file system (via FTP, RDP, or server panel).
- Locate the server's save directory (e.g.,
C:\SpaceEngineersDedicated\Saves\World). The exact path varies by hosting provider. - Stop the Server: It is absolutely critical to stop the dedicated server before attempting any file transfers. Modifying live save files will lead to corruption.
- Delete any existing world files in the server's save directory if you are performing a full replacement (again, after backing them up).
- Paste your
[SourceWorldName]folder into the server's save directory. - Configure Server: You will likely need to edit the server's configuration file (e.g.,
SpaceEngineers-Dedicated.cfg) to point to the new world name. Find the<LoadWorld>tag and update it to[SourceWorldName]. - Start the Server: Once files are transferred and configured, start the server. It should now load your transferred world.
- New Single-Player Start: If you're creating a truly new local save, you can simply paste the
4.3 Method B: Selective Voxel Monolith Transfer (Advanced & Risky)
This method is for when you want to transfer only a modified asteroid or a piece of custom terrain, not the entire world, into an existing destination world. This is highly complex and generally discouraged for beginners due to the risk of world corruption. It often requires third-party tools or extremely careful manual editing of .sbs files.
Disclaimer: This method is prone to errors and is best attempted only if you are confident in your understanding of file structures and have robust backups. For most situations, blueprinting embedded grid structures and then manually rebuilding or importing voxels (if the game's voxel tools are sufficient) might be safer.
- Identify the Voxel Monolith: In your source world, identify the specific asteroid or voxel entity that constitutes your monolith.
- Locate its Data:
- Open
Sandbox.sbcfrom your source world with a reliable text editor. - Search for
<MyObjectBuilder_VoxelMap>tags. Each tag represents a voxel object (asteroid, planet, moon). - Look for properties like
<PositionAndOrientation>to help identify your specific monolith. You might need to cross-reference coordinates with your in-game location. - Once identified, note its
<StorageName>(e.g.,Asteroid_123456789.vx2) and its<EntityId>.
- Open
- Transferring
.vx2Files (Raw Voxel Data):- Go into the
Storagefolder of your source world. - Copy the relevant
.vx2file (e.g.,Asteroid_123456789.vx2). - Paste this
.vx2file into theStoragefolder of your destination world.
- Go into the
- Integrating into
Sandbox.sbcandSandbox_0_0_0_.sbs(Critical Step):- This is where it gets highly technical. You need to carefully copy the
<MyObjectBuilder_VoxelMap>entry (and potentially other related entries like<MyObjectBuilder_FloatingObject>if there were specific entities linked to it) from the sourceSandbox.sbcorSandbox_0_0_0_.sbsinto the destinationSandbox.sbcorSandbox_0_0_0_.sbs. - XML Structure: Ensure you paste it within the correct XML parent tag (e.g., under
<SectorObjects>or<Entities>). - Unique Entity IDs: Every entity in Space Engineers has a unique
<EntityId>. If you simply copy an entry, its<EntityId>might conflict with an existing entity in the destination world. This can cause severe issues. You might need to generate a new, unique<EntityId>(a random 19-digit number) for the transferred voxel map. This requires specialized knowledge or a tool that can safely re-ID entities. - Positioning: The
<PositionAndOrientation>tags define where the voxel map spawns. You will likely need to adjust these coordinates to place your monolith correctly in the destination world. This is often trial-and-error. - Voxel Modifications: If your monolith had extensive modifications (mining, shaping), its
VoxelHands.sbsmight also need careful merging. This is exceedingly complex asVoxelHands.sbsoften refers to entities by ID, and simply copying can lead to mismatched references. A full merge usually requires specialized tools.
- This is where it gets highly technical. You need to carefully copy the
A simpler alternative for modified voxel monoliths: If the modified voxel structure is complex but has a clear "interior" with grid structures, a more practical approach is: 1. Blueprint the internal grid structures using Method 3. 2. Manually rebuild or carve out the voxel shape in the new world using the voxel hand tools in creative mode. 3. Paste your blueprint into the newly carved voxel space. This is time-consuming for large structures but significantly safer.
4.4 Challenges and Risks of World File Manipulation
- Data Corruption: The most significant risk. Incorrect XML syntax, conflicting entity IDs, or misplaced tags can render your world save unplayable.
- Version Incompatibility: World files from older game versions might not be compatible with newer ones, or vice-versa, without proper game-level conversion.
- Missing Dependencies: Copying only a portion of data might lead to missing references. For example, a
VoxelMapmight reference a specificStoragefile that wasn't copied. - Time Consuming and Tedious: Manual editing is slow and error-prone, especially for large files.
- Loss of Immersive Details: Transferring only an asteroid doesn't transfer player character data, inventory, faction relations, or other world-specific progression.
Recommendation: Utilize world file manipulation primarily for full world transfers to dedicated servers or for very specific scenarios where blueprinting is truly impossible. For selective transfers of complex voxel structures, assess if blueprinting embedded grids and re-creating the voxel environment manually is a safer, albeit more labor-intensive, alternative. Always double-check your work and prioritize your backups.
Part 5: Server-Specific Strategies for Monolith Transfers
Dedicated servers introduce a distinct layer of complexity and capability to monolith transfers. As an administrator, you have direct access to the server's file system and in-game commands, offering both powerful tools and additional responsibilities.
5.1 Direct World File Transfer (Admin-Level)
As discussed in Part 4.2, transferring an entire world save to a dedicated server is the most common and robust method for server migrations.
- Stop the Server: This is non-negotiable. Any manipulation of world files while the server is running will lead to data corruption. Use your server host's control panel or remote desktop to shut down the Space Engineers server application.
- Access Server Files:
- FTP (File Transfer Protocol): Most hosting providers offer FTP access. Use a client like FileZilla to connect to your server and browse its file structure.
- Remote Desktop (RDP): If you have a VPS or dedicated machine, you can connect via RDP to access the server's desktop and file explorer directly.
- Server Control Panel: Some providers offer web-based file managers within their custom control panels.
- Navigate to Save Directory: Locate the server's Space Engineers save directory. Common paths include
C:\SpaceEngineersDedicated\Saves\Worldor similar, but verify with your host. - Backup Existing Server World (Critical): Before deleting or overwriting anything, download and back up the entire existing server world folder to your local machine. This is your insurance policy.
- Upload Your World:
- Delete the contents of the server's current world save folder (or move them to a backup location on the server).
- Upload your entire
[SourceWorldName]folder (the one containing your monolith and all your progression) into the server's save directory.
- Update Server Configuration:
- Locate your server's main configuration file, typically
SpaceEngineers-Dedicated.cfg. This might be in the root of the server application folder or within a specific "Instance" folder. - Open it with a text editor.
- Find the
<LoadWorld>tag. It will likely point to the previous server world's name. - Change the value within this tag to the exact name of the folder you just uploaded (e.g., if you uploaded a folder named
MyAwesomeNewWorld, change it to<LoadWorld>MyAwesomeNewWorld</LoadWorld>). - Save the configuration file.
- Locate your server's main configuration file, typically
- Start the Server: Start the Space Engineers server application. It should now load your transferred world. Monitor the server logs for any errors during startup.
5.2 Admin Commands for Blueprint Pasting
For transferring individual grid monoliths (ships, stations) to an existing server world, administrators can utilize in-game commands, which leverage the blueprint system. This is far less disruptive than a full world transfer.
- Load the Blueprint:
- As an administrator in-game, ensure you have the blueprint loaded in your local blueprint library (see Part 3.3).
- Type
/bpin the chat to open the blueprint library. Select your monolith and click "Load." - This will attach a transparent projection of your monolith to your character.
- Position the Monolith:
- Fly to the desired location in the server world.
- Carefully position the projection. Use
Ctrl+Scroll Wheelto rotate it. Ensure it's not colliding with anything (green projection). - If you need to paste it far away, fly to the general area first.
- Paste the Monolith:
- Once positioned, press
Ctrl+V. The monolith will spawn. - For very large structures, there might be a noticeable server lag spike as the thousands of blocks are created and initialized. Be patient.
- The pasted monolith will typically be owned by "Nobody" or the server admin. You will need to change its ownership if players are to interact with it.
- Once positioned, press
5.3 Considerations for Server Performance and Stability
Transferring large monoliths, especially to a live server, demands careful consideration of performance.
- Sim Speed (Simulation Speed): Large grids, especially those with many active blocks (thrusters, production, scripts), can significantly degrade the server's
Sim Speed. A healthy Sim Speed is close to 1.0. If it drops below 0.5 consistently, players will experience noticeable lag and desynchronization. - Block Limits: Many servers, especially public ones, implement block limits per player or per grid to maintain performance. Be aware of these limits. Your monolith might exceed them, preventing pasting or causing server enforcement actions.
- Optimized Design: Encourage players (and yourself) to design monoliths with performance in mind.
- Less Armor: Avoid excessively thick, purely aesthetic armor layers if they add thousands of unnecessary blocks.
- Less PCU (Performance Cost Unit): Each block has a PCU value. Complex, functional blocks have higher PCU. Monitor your monolith's PCU.
- Merge Blocks: Use merge blocks where possible to combine grids that don't need independent movement, reducing subgrid overhead.
- Grind Down Redundancy: Remove any redundant or unused systems that contribute to block count without providing tangible benefit.
- Regular Server Backups: Just as you back up your local saves, establish a robust schedule for server backups. Many hosting providers offer automated backups, but always verify their functionality and retention policies.
Table: Comparison of Monolith Transfer Methods
| Feature / Method | Blueprinting (Grid) | Full World Transfer (Voxel/Grid) | Selective Voxel Transfer (Manual) |
|---|---|---|---|
| Monolith Type | Player-built grids (ships, stations) | Entire world (grids, voxels, player data, state) | Specific modified voxel map (asteroid, terrain) |
| Complexity | Low-Medium | Medium | High (Advanced) |
| Risk of Corruption | Low | Low (if server stopped & config updated correctly) | Very High (Manual file editing, ID conflicts) |
| Tools Required | In-game blueprint menu | File Explorer, FTP/RDP, Text Editor (for config) | File Explorer, Advanced Text Editor, (Potential) Third-Party Tools |
| Data Preserved | Grid structure, block properties, inventory, subgrids | All world data, player progression, voxel modifications | Voxel map shape, embedded entities (if done correctly) |
| Primary Use Case | Sharing individual creations, adding to existing worlds | Server migration, starting new game with full progression | Highly specialized recovery or merging of specific terrain |
| Server Admin Needed? | No (for local), Yes (for pasting on server with /bp) | Yes (for full server migration) | Yes (for server files, though rarely used) |
| Time Investment | Quick (minutes) | Medium (depending on upload speed) | Very High (hours of careful work, iteration) |
Server administration and monolith transfers, particularly at scale, can become quite involved. Imagine managing a vast network of Space Engineers servers, each hosting unique worlds and player creations. Such a complex infrastructure, especially if it were to evolve into a platform for sharing intricate community-made scenarios or game modifications, would undoubtedly benefit from robust backend tools. For instance, if Space Engineers or its modding community were to build an open platform for content creators to submit and manage their server deployments or complex in-game "monolith" assets programmatically, they might utilize an API to interact with these systems. And to secure and streamline these interactions, an API gateway would be indispensable, managing access, traffic, and ensuring stability for a multitude of simultaneous connections and data transfers. While Space Engineers doesn't expose such an API directly for general players, the analogy highlights the real-world challenges of managing complex digital ecosystems.
Part 6: Advanced Techniques and Community Tools
Beyond the standard in-game methods, the Space Engineers community has, over the years, developed various advanced techniques and tools to push the boundaries of world manipulation. While some tools may be deprecated or less actively maintained for current game versions, understanding their principles offers insight into the game's underlying structure and potential future possibilities.
6.1 SE Toolbox (Historical Context)
SE Toolbox was once the go-to external tool for advanced Space Engineers world editing. It allowed users to: * Edit entities directly: Change positions, ownership, block counts, and properties of grids. * Manipulate voxels: Copy, paste, and modify asteroid shapes with greater precision than in-game tools. * Fix corrupted worlds: Sometimes able to recover elements from problematic saves. * Batch edit: Perform operations on multiple entities simultaneously.
Current Status: As of recent Space Engineers updates, SE Toolbox's compatibility can be hit-or-miss. It was primarily developed for older versions of the game, and continuous game updates often break its functionality. Use with extreme caution, if at all, and always with robust backups. While it might still function for basic entity moving on very specific older game versions, its reliability for current builds, especially with new block types or game mechanics, is not guaranteed. For the purpose of transferring monoliths in modern Space Engineers, the in-game blueprint system and careful manual world file editing (for full world transfers) are generally more reliable.
6.2 In-Game Scripting (Programmable Blocks)
While programmable blocks and their C# scripts are phenomenal for automating in-game processes, they are generally not designed for transferring entire structures or modifying core world data like voxel shapes. Their scope is primarily within the realm of manipulating existing blocks and entities within the game's exposed API (Application Programming Interface) for scripts.
- Relevant Use Cases (Indirect):
- Pre-Transfer Optimization: A script could automate the grinding down of specific components or organize inventory contents before you blueprint a monolith.
- Post-Transfer Initialization: After pasting a monolith, a script could automatically power up specific systems, set up timers, or re-establish connections with other grids (if the script logic supports it and the new environment allows).
- Monitoring: Scripts can monitor the performance of your pasted monolith (e.g., power consumption, block integrity) and alert you to issues.
Programmable blocks are a powerful feature, but they operate within the safety constraints of the game engine, not as external world-editing tools for deep file manipulation.
6.3 Modding Frameworks and Community-Driven Platforms
The true "advanced techniques" for Space Engineers often emerge from the modding community. Mods can introduce new blocks, mechanics, and even tools that extend the game's native capabilities. Some mods might offer: * Enhanced Copy-Paste Tools: Mods that improve the in-game copy-paste functions, potentially allowing larger selections or more flexible placement options. * World Management Utilities: While rare, some mods might offer server administrators more streamlined ways to manage entities or world sectors, though this often requires specific mod installations on the server. * Content Management Platforms: Imagine a hypothetical future where the Space Engineers community evolves to host incredibly complex, interconnected server networks, perhaps even enabling players to "publish" entire, self-contained game scenarios or massive custom planets. Such an ecosystem would undoubtedly require a sophisticated backbone for managing all this user-generated content, ensuring its integrity, and facilitating its seamless deployment across different server instances. In such a scenario, the underlying infrastructure would likely involve a robust open platform that allows creators to interact with it programmatically. This interaction would occur via an API, enabling automated submission, version control, and distribution of assets, whether they be custom blocks, scripts, or even entire server configurations representing unique game experiences. To secure and scale these interactions, an API gateway would be crucial, managing authentication, rate limiting, and traffic routing to ensure that the platform remains stable and responsive even with a vast influx of creative content and deployment requests.
This concept of an "open platform" managed by an "API gateway" is a powerful model in real-world software development, where diverse applications and services need to securely communicate and exchange data. Just as a complex game like Space Engineers has internal systems that manage its thousands of blocks and entities, a robust external platform for its community content would require equally sophisticated management.
For enterprises and large-scale digital initiatives, a product like APIPark provides exactly this kind of comprehensive solution. APIPark is an open-source AI gateway and API management platform designed to help developers and businesses manage, integrate, and deploy AI and REST services with ease. Its capabilities, such as end-to-end API lifecycle management, performance rivaling Nginx, and detailed API call logging, highlight the level of sophistication needed to manage complex digital assets and services. While not directly for in-game Space Engineers file manipulation, the principles APIPark embodies – streamlined integration, robust management, and secure access for diverse digital services – are precisely what would be necessary for any large-scale, community-driven "open platform" to thrive, ensuring that the transfer and management of even the most monumental digital "monoliths" (be they AI models or vast game content) are handled with efficiency and security. ApiPark demonstrates how a dedicated platform can unlock vast potential by providing the tools for complex digital asset governance.
Part 7: Optimizing for Performance and Stability After Transfer
Successfully transferring your monolith is a significant achievement, but the journey isn't over. Integrating a massive structure into a new world, especially a live server, often requires post-transfer optimization to ensure sustained performance, stability, and enjoyable gameplay for everyone. Ignoring this step can lead to crippling lag, reduced simulation speed, and a less engaging experience.
7.1 Assessing Initial Performance Impact
Upon pasting your monolith, immediately observe the game's performance metrics:
- Simulation Speed (Sim Speed): Press
Shift+F11to open the debug menu, then navigate to "Performance" -> "Sim Speed." Aim for a Sim Speed as close to 1.00 as possible. Values consistently below 0.85 can indicate issues, and below 0.50 will be noticeable. - Framerate (FPS): While not directly tied to the monolith's impact on the server, a low FPS on your client might indicate render-heavy components or local issues.
- Block Count and PCU (Performance Cost Unit): In the terminal of any block on your monolith, under the "Info" tab, you can see the total number of blocks and the PCU value. Higher numbers directly correlate with potential performance strain.
- Ping (for servers): High ping to a server might not be due to your monolith but can exacerbate lag perception if the server is already struggling.
7.2 Strategies for Optimization
Addressing performance issues involves a multi-pronged approach, balancing aesthetics, functionality, and computational cost.
- Reduce Unnecessary Blocks and Complexity:
- Excessive Armor: While robust, 10 layers of heavy armor on a non-combat-critical section of a station are often overkill and a major PCU drain. Consider thinning armor in non-critical areas or using a mix of light and heavy armor.
- Internal Redundancy: Are there 50 reactors when 20 would suffice? Redundant components (if not needed for fail-safes) add to block count.
- Decorative Blocks: Intricate internal detailing with thousands of small decorative blocks can be beautiful but expensive. Prioritize functional blocks.
- Hidden Grids: Check for any "lost" or hidden subgrids (e.g., a piston head detached from its base but still present as an entity) within your monolith's bounding box. These can sometimes be invisible performance drains.
- Grind Down and Weld Up: Use the grind/weld mechanic to quickly remove and replace blocks. Grind down sections, assess performance, and rebuild if needed.
- Optimize Subgrid Management:
- Merge Blocks: Where possible, use merge blocks to temporarily or permanently merge separate grids that don't need independent movement (e.g., a hangar door connected to the main station). This reduces the number of active physics entities the game needs to track.
- Rotor/Piston Safety: Ensure rotors and pistons are properly configured, especially their limits and braking. Unconstrained or rapidly oscillating subgrids are notorious for causing physics instability and Sim Speed drops. Lock them down when not in use.
- Stationary Connections: For docking ships, prefer connectors and landing gear, ensuring they are locked when stationary. Avoid leaving ships "floating" inside a hangar without being connected, as they become separate, physics-intensive entities.
- Power Management and System Efficiency:
- Efficient Power Generation: Ensure your monolith's power generation (reactors, solar panels, hydrogen engines) is efficient and sufficient, but not wildly over-provisioned if it adds significant block count.
- Automatic Shut-offs: Use sensors or programmable blocks to automatically shut down power-hungry systems (refineries, assemblers, jump drives, large thrusters) when not in use. This reduces the number of actively processing blocks.
- Lighting: While minor, excessive dynamic lighting can contribute to rendering load. Use judiciously.
- LOD (Level of Detail) Considerations:
- Space Engineers uses LODs to simplify rendering distant objects. However, very complex grids can still strain the rendering engine even with LODs.
- Consider simplifying outer hull shapes or internal structures that are rarely seen if your FPS is consistently low.
- Regular Backups (Post-Transfer):
- Even after a successful transfer and optimization, continue a rigorous backup schedule for your new world. This guards against unforeseen bugs, player errors, or subsequent game updates that might introduce new issues.
7.3 Advanced Debugging and Monitoring
For more persistent performance issues, especially on a dedicated server:
- Profiler (
Shift+F1): In-game, theShift+F1profiler can show you which game systems are consuming the most processing time. Look for spikes inPhysics,Grids, orVoxelsthat might be related to your monolith. - Server Logs: Dedicated server logs (
SpaceEngineersDedicated.log) are invaluable. They often record errors, warnings, or performance-related events that can pinpoint specific issues with grids, scripts, or physics interactions. - Community Forums/Discord: If you're struggling, share your situation (including Sim Speed, block count, and relevant logs) on the official Space Engineers forums or community Discord channels. Experienced players and server administrators can often offer specific advice.
Successfully integrating a monolith into a new Space Engineers environment is a testament to an engineer's skill. It's a process that spans from the initial spark of creation to the meticulous details of file management and performance tuning. By understanding the game's mechanics, employing the right transfer methods, and diligently optimizing your creations, you ensure that your monumental achievements not only survive but thrive, becoming an enduring part of your ongoing adventures in the boundless reaches of space. May your transferred monoliths stand as beacons of your ingenuity, inspiring awe and facilitating new chapters in your interstellar saga.
Frequently Asked Questions (FAQs)
1. What is the safest way to transfer a large player-built ship or station in Space Engineers? The safest and most recommended method for transferring player-built grid structures (ships, stations) is using the in-game blueprint system. You can create a blueprint of your monolith by aiming at any block and pressing Ctrl+B, then saving it. To transfer, load the destination world, open the blueprint library (F10), load your blueprint, and paste it using Ctrl+V. This method preserves all blocks, subgrids, and often inventory, with minimal risk of file corruption compared to manual file editing.
2. Can I transfer a natural asteroid that I've heavily modified (e.g., hollowed out into a base)? Transferring heavily modified natural terrain (voxel monoliths) is significantly more complex than grid structures. While blueprinting can capture any grid structures built inside the asteroid, it generally does not capture the asteroid's modified voxel shape itself. To transfer the modified asteroid, you would typically need to move the entire world save (if you want everything) or attempt advanced, risky manual manipulation of .vx2 and .sbs files. For most players, it's safer to blueprint internal grid bases and then manually re-carve a similar asteroid in the new world using in-game voxel tools before pasting your blueprint.
3. What should I do if my monolith is too large to paste onto a dedicated server? If you encounter an "Object Too Large" or "Pasting Blocked" error on a dedicated server, it's likely due to server-side block limits or PCU (Performance Cost Unit) limits configured by the administrator. * Contact the Admin: First, reach out to the server administrator to inquire about their specific limits and if an exception can be made for your monolith. * Optimize Your Monolith: Try to reduce the overall block count and PCU of your monolith. This can involve thinning non-critical armor, removing unnecessary redundant systems, or simplifying decorative elements. * Split the Monolith: As a last resort, consider splitting your monolith into smaller, manageable sections that can be blueprinted and pasted individually, then connected in the new world using merge blocks or connectors.
4. Will my monolith's inventory (e.g., resources in cargo containers) be transferred with the blueprint? Yes, generally, blueprints in Space Engineers do save the inventory contents of cargo containers, refineries, assemblers, and other storage blocks. This means your resources will be transferred along with the physical structure. However, be aware that some dedicated server configurations or specific game settings might disable inventory saving in blueprints to prevent resource duplication or for performance reasons. Always verify this if inventory preservation is critical.
5. How can I improve the performance of a large monolith after transferring it to a new world or server? Large transferred monoliths can impact game performance (Sim Speed, FPS). To optimize: * Reduce Block Count & PCU: Thin excessive armor, remove redundant systems, and simplify decorative elements. Focus on functional necessity. * Manage Subgrids: Ensure rotors and pistons are correctly configured and locked when not in use. Use merge blocks to combine grids where independent movement isn't required. * Optimize Power & Systems: Shut down power-hungry systems (e.g., refineries, assemblers, large thrusters) when not actively in use. * Monitor Performance: Use the in-game debug menu (Shift+F11 for Sim Speed) and server logs (for dedicated servers) to identify performance bottlenecks. * Regular Backups: Maintain a consistent backup schedule for your new world to safeguard against any unforeseen issues.
🚀You can securely and efficiently call the OpenAI API on APIPark in just two steps:
Step 1: Deploy the APIPark AI gateway in 5 minutes.
APIPark is developed based on Golang, offering strong product performance and low development and maintenance costs. You can deploy APIPark with a single command line.
curl -sSO https://download.apipark.com/install/quick-start.sh; bash quick-start.sh

In my experience, you can see the successful deployment interface within 5 to 10 minutes. Then, you can log in to APIPark using your account.

Step 2: Call the OpenAI API.