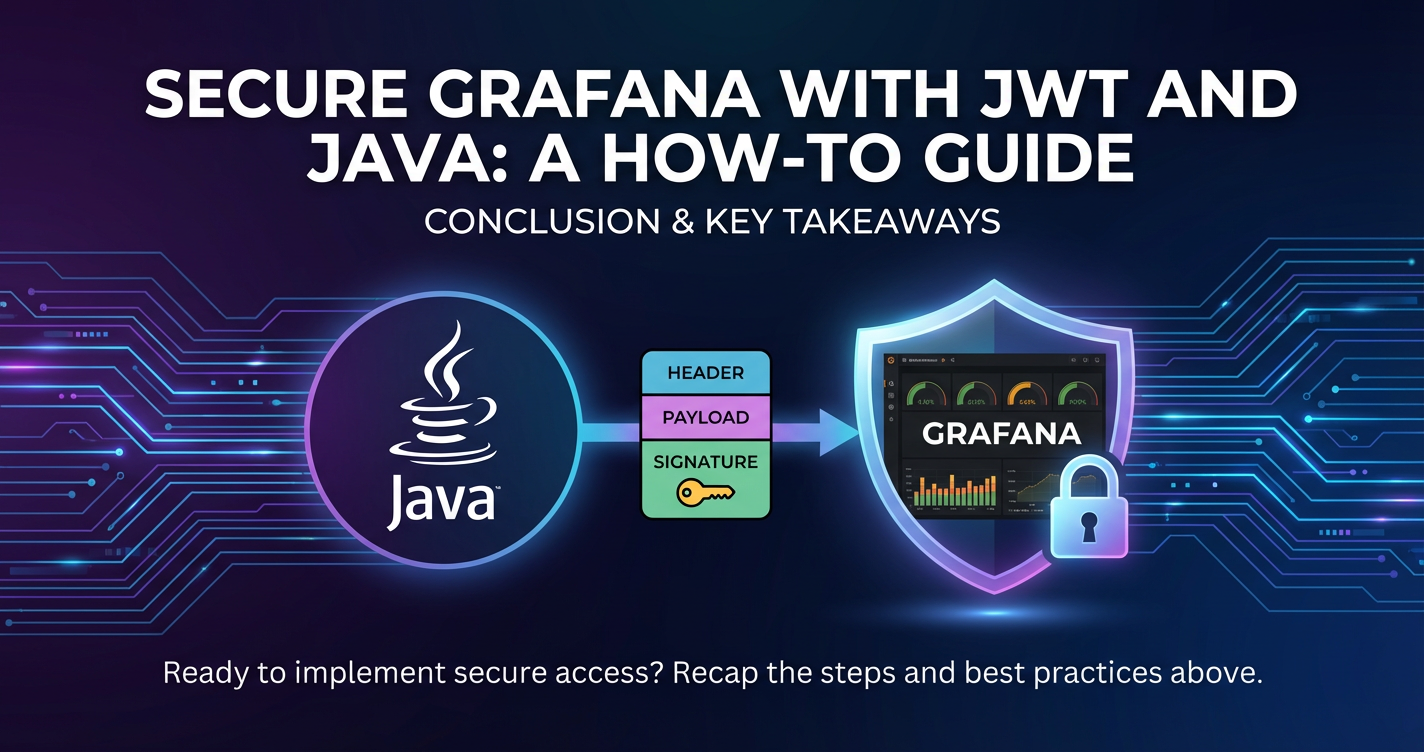
Secure Grafana with JWT and Java: A How-To Guide


In the rapidly evolving landscape of data-driven decision-making, tools like Grafana have become indispensable for visualizing complex metrics, logs, and traces. Grafana empowers organizations to transform raw data into actionable insights through intuitive dashboards and powerful querying capabilities. However, as data becomes the new gold, the security of platforms handling this data, especially those revealing critical operational and business intelligence, cannot be overstated. Ensuring that only authorized individuals can access, view, or modify these crucial dashboards is paramount. While Grafana offers various authentication mechanisms, integrating JSON Web Tokens (JWT) with a Java backend provides a robust, scalable, and stateless solution perfectly suited for modern microservices architectures and distributed environments.
Traditional session-based authentication can introduce complexities, particularly when dealing with cross-domain requests, mobile clients, or scaling a fleet of backend services. JWT addresses these challenges by encapsulating user identity and permissions within a cryptographically signed token, allowing for efficient, secure, and stateless communication between clients and services. This comprehensive guide will meticulously walk you through the process of securing your Grafana instance using JWTs, with a Java application serving as the authoritative issuer and validator of these tokens. We will delve into the foundational concepts of Grafana, JWT, and Java, elucidate the architectural considerations, provide detailed setup instructions, and equip you with the knowledge to implement this secure authentication flow from the ground up, ensuring your data visualizations remain protected against unauthorized access. This approach not only enhances security but also streamlines the authentication experience across diverse applications within your ecosystem, potentially leveraging a centralized api gateway for overarching governance and management.
Understanding the Core Technologies: Pillars of Secure Visualization
Before diving into the implementation details, a solid understanding of the individual components — Grafana, JSON Web Tokens (JWT), and Java — is crucial. Each plays a distinct yet interconnected role in establishing a secure and efficient authentication system.
Grafana: The Observability Powerhouse
Grafana is an open-source data visualization and analytics software that allows you to query, visualize, alert on, and understand your metrics no matter where they are stored. It provides a powerful and elegant way to create dashboards from multiple data sources, making it a cornerstone for monitoring and observability across various industries. From system health metrics to application performance insights, business intelligence, and IoT data, Grafana offers a unified interface to consolidate and present information. Its extensive plugin architecture supports a wide array of data sources, including Prometheus, InfluxDB, Elasticsearch, PostgreSQL, MySQL, and many more, making it incredibly versatile.
At its heart, Grafana operates as a web application, serving interactive dashboards that users can explore. Access to these dashboards and the underlying data sources is inherently a security concern. Without proper authentication and authorization, sensitive operational data, performance bottlenecks, or even critical business statistics could be exposed to unauthorized parties, leading to potential data breaches, competitive disadvantages, or operational disruptions. Grafana’s native user management system allows for the creation of users, organizations, and roles, providing a granular control mechanism. However, in environments with existing identity management systems or complex authentication requirements, integrating an external provider like a JWT issuer becomes a more flexible and scalable solution. This allows organizations to centralize user management and authentication policies, ensuring a consistent security posture across all their applications, including data visualization tools like Grafana. The ability to seamlessly integrate with external authentication mechanisms underscores Grafana's adaptability as a powerful component within a larger, secure api ecosystem.
JSON Web Tokens (JWT): The Standard for Stateless Security
JSON Web Token (JWT, pronounced "jot") is an open standard (RFC 7519) that defines a compact and self-contained way for securely transmitting information between parties as a JSON object. This information can be verified and trusted because it is digitally signed. JWTs are commonly used for authentication and authorization in modern web applications, particularly in microservices architectures where statelessness is highly valued.
A JWT consists of three parts, separated by dots, each encoded in Base64Url: 1. Header: Typically consists of two parts: the type of the token (JWT) and the signing algorithm being used (e.g., HS256, RS256). json { "alg": "HS256", "typ": "JWT" } 2. Payload: Contains the claims, which are statements about an entity (typically, the user) and additional data. There are three types of claims: * Registered Claims: Predefined claims like iss (issuer), exp (expiration time), sub (subject), aud (audience), iat (issued at time). These are not mandatory but recommended. * Public Claims: Claims defined by users for public consumption, requiring collision-resistant names (e.g., using an IANA Registry or a URI that contains a collision-resistant namespace). * Private Claims: Custom claims created to share information between parties that agree on their meaning. In the context of Grafana, these might include email, username, name, and role claims, which Grafana uses for user provisioning and role mapping. json { "sub": "user@example.com", "name": "John Doe", "email": "user@example.com", "role": "Admin", "exp": 1678886400 } 3. Signature: To create the signature, you take the encoded header, the encoded payload, a secret, and the algorithm specified in the header, and sign them. The signature is used to verify that the sender of the JWT is who it says it is and to ensure that the message hasn't been changed along the way.
How JWTs Work for Authentication: 1. Authentication: The user logs in with their credentials (e.g., username and password) to an authentication api (our Java backend in this case). 2. Token Issuance: Upon successful authentication, the server creates a JWT, signs it with a secret key, and sends it back to the client. 3. Token Storage: The client stores this JWT (e.g., in localStorage, sessionStorage, or an HTTP-only cookie). 4. Resource Access: For subsequent requests to protected resources (like Grafana dashboards), the client sends the JWT, typically in the Authorization header as a Bearer token. 5. Token Validation: The resource server (Grafana in this scenario) receives the JWT, verifies its signature using the same secret key (or public key if asymmetric encryption is used), checks its expiration, and extracts the claims. 6. Authorization: Based on the claims (e.g., user roles, permissions), Grafana grants or denies access to the requested resource.
Benefits of JWTs: * Statelessness: The server doesn't need to store session information. This simplifies horizontal scaling, as any server can validate the token independently. * Scalability: Perfect for microservices, as different services can validate tokens without central session management. * Security: Cryptographically signed tokens ensure integrity and authenticity. * Cross-Domain Functionality: Easily used across different domains and subdomains. * Compactness: Small size allows for efficient transmission.
Security Considerations for JWTs: While powerful, JWTs are not without their security considerations. The secret key used for signing must be kept highly confidential. If compromised, an attacker could forge tokens. Furthermore, JWTs typically don't offer an easy way to revoke tokens before their expiration; therefore, a short expiration time combined with refresh tokens is a common pattern. Secure storage on the client-side is also crucial to prevent XSS (Cross-Site Scripting) attacks from stealing tokens.
Java: The Backend Powerhouse for Token Management
Java, a ubiquitous, object-oriented, and platform-independent programming language, is an excellent choice for developing the backend service responsible for generating and validating JWTs. Its robust ecosystem, extensive libraries, strong community support, and mature security features make it ideal for building secure and scalable apis. Specifically, frameworks like Spring Boot simplify the development of RESTful web services, allowing developers to focus on business logic rather than boilerplate configuration.
For JWT handling in Java, several excellent libraries are available. The jjwt (Java JWT) library is a popular choice, providing a fluent API for creating and parsing JWTs, supporting various algorithms, and handling claims efficiently. Spring Security can be seamlessly integrated to manage authentication flows, user details, and authorization roles, complementing the JWT generation process.
Our Java backend will serve a critical function: 1. User Authentication: It will authenticate users against a data store (e.g., a database, LDAP, or an external identity provider). 2. JWT Generation: Upon successful authentication, it will construct a JWT, populate it with relevant user claims (e.g., email, username, roles that Grafana expects), and sign it using a secure secret key. 3. Token Provision: It will then return this signed JWT to the client application.
By leveraging Java’s robust capabilities and its rich set of security libraries, we can build a secure, reliable, and high-performance api for managing our JWT lifecycle, which is a fundamental component of securing our Grafana instance. This Java service, acting as a trusted issuer, becomes a central piece in a secure api ecosystem, potentially managed and monitored by an api gateway.
Why Secure Grafana? The Imperative of Data Governance and Risk Mitigation
The act of securing Grafana is not merely a technical exercise; it's a critical component of an organization's broader data governance strategy and an imperative for mitigating significant business risks. Grafana dashboards often expose a wealth of information, ranging from operational performance metrics and infrastructure health to sensitive business key performance indicators (KPIs), customer data trends, and even financial insights. Allowing unauthorized access to such a powerful visualization tool can have profound and detrimental consequences across multiple facets of an organization.
Firstly, data breaches and information exposure represent the most immediate and significant threat. Without robust authentication and authorization, an attacker or an insider with malicious intent could gain access to dashboards revealing proprietary algorithms, customer personally identifiable information (PII), intellectual property (IP), or critical system vulnerabilities. Such exposure can lead to severe reputational damage, loss of customer trust, and substantial financial penalties due to regulatory non-compliance. Imagine a scenario where a competitor gains access to your sales trends or product performance metrics; the strategic disadvantage could be catastrophic.
Secondly, regulatory compliance is a non-negotiable aspect for many businesses. Industries subject to regulations like GDPR (General Data Protection Regulation), HIPAA (Health Insurance Portability and Accountability Act), PCI DSS (Payment Card Industry Data Security Standard), or CCPA (California Consumer Privacy Act) have stringent requirements for protecting sensitive data. Unauthorized access to data visualized in Grafana, even if it's aggregated or anonymized, could still contribute to non-compliance if the underlying access controls are weak. Regulators can impose hefty fines for violations, underscoring the necessity for comprehensive security measures, including strong authentication for all data access points. Our JWT-based approach, by providing auditable and verifiable access tokens, significantly aids in demonstrating compliance with access control policies.
Thirdly, operational integrity and stability depend heavily on the accuracy and confidentiality of monitoring data. Grafana dashboards are often the first line of defense for identifying system outages, performance degradation, or security incidents. If these dashboards are tampered with, or if an attacker gains access to them, they could manipulate data, inject false alerts, or suppress genuine warnings, thereby creating blind spots that could lead to extended downtime, service interruptions, or missed security threats. The ability to trust the data and the visualizations within Grafana is fundamental to maintaining continuous and reliable operations.
Furthermore, insider threats, whether malicious or accidental, pose a substantial risk. Employees, contractors, or former personnel who retain access to internal systems can intentionally or unintentionally compromise sensitive data. Implementing strong authentication, role-based access control (RBAC), and mechanisms like JWTs that enforce token expiration and require re-authentication significantly reduces this risk. By clearly defining roles and permissions within JWT claims and mapping them to Grafana's internal authorization, we ensure that users only view what they are authorized to see, adhering to the principle of least privilege.
Finally, the integrity of decision-making is directly tied to the integrity of the data presented. Business leaders, engineers, and analysts rely on Grafana dashboards to make informed decisions about product development, infrastructure scaling, marketing strategies, and risk assessment. If the data or its presentation is compromised, decisions based on this flawed information could lead to costly mistakes, misallocated resources, or missed opportunities. Ensuring that the insights derived from Grafana are secure and trustworthy is therefore a strategic business imperative.
In summary, securing Grafana with a robust mechanism like JWT authentication powered by a Java backend transcends mere technical hygiene. It is a fundamental requirement for protecting sensitive information, complying with legal and regulatory mandates, maintaining operational continuity, mitigating insider risks, and ensuring that strategic decisions are based on accurate and untampered data. A secure Grafana instance, integrated into a comprehensive api management strategy, reinforces an organization's overall security posture, safeguarding its most valuable asset: information.
Architectural Overview: A Secure JWT-based Authentication Flow for Grafana
Implementing JWT-based authentication for Grafana involves orchestrating several components to work in harmony, creating a secure and streamlined access flow. The architecture is designed to centralize user authentication and token issuance, while Grafana itself becomes a stateless consumer of these trusted tokens. Understanding this flow is critical for a successful implementation.
The core components involved are:
- Client Application: This could be a web browser, a mobile application, a command-line tool, or any application that needs to access Grafana dashboards.
- Java Backend Service (JWT Issuer/Authenticator): This is our custom Java application responsible for authenticating users and generating signed JWTs. It acts as the authoritative source of truth for user identities within our ecosystem.
- Grafana Server: The instance of Grafana that hosts the dashboards and data visualizations. It is configured to accept and validate JWTs for authentication.
- Optional: API Gateway: An
api gatewaycan sit in front of the Java Backend Service and/or Grafana, providing an additional layer of security, traffic management, and centralizedapigovernance.
Here’s a detailed breakdown of the authentication flow:
Phase 1: User Authentication and JWT Issuance
- User Initiates Login: A user opens the client application (e.g., a web
apiportal, a dedicated mobile app) and attempts to log in using their credentials (username/email and password). This initial request is sent to the Java Backend Service's authenticationapiendpoint. - Java Backend Authenticates User: The Java Backend Service receives the login request. It validates the provided credentials against its internal user store (e.g., a database, an LDAP server, or by delegating to an external Identity Provider like Auth0 or Keycloak).
- JWT Generation: If the credentials are valid, the Java Backend Service constructs a new JWT. This token will include essential claims:
- Registered Claims:
iss(issuer, e.g., our Java service's URL),sub(subject, typically the user's unique ID or email),exp(expiration time, ensuring tokens are short-lived),iat(issued at time). - Grafana-Specific Claims:
email(user's email for Grafana user provisioning),username(user's username),name(user's display name), and crucially,roleorgroupsclaims that map to Grafana's desired organizational roles (Viewer, Editor, Admin) or team memberships.
- Registered Claims:
- JWT Signing: The constructed JWT is then digitally signed using a cryptographic secret key (or a private key for asymmetric algorithms) known only to the Java Backend Service and Grafana. This signature ensures the token's integrity and authenticity.
- JWT Sent to Client: The signed JWT is returned to the client application as part of the successful login response.
Phase 2: Accessing Grafana with the JWT
- Client Stores JWT: The client application securely stores the received JWT. Best practices typically involve storing it in
localStorage,sessionStorage, or as an HTTP-only cookie, depending on the application's security requirements and browser limitations. - Client Requests Grafana Resource: When the user wishes to access a Grafana dashboard or any protected Grafana resource, the client application makes a request to the Grafana server. Crucially, it includes the JWT in a designated HTTP header. By default, Grafana's JWT authentication often looks for the token in the
X-JWT-Assertionheader, but it can be configured to useAuthorization: Bearer <token>or other custom headers. - Grafana Validates JWT: Upon receiving the request, the Grafana server detects the presence of the JWT in the configured header.
- It extracts the token.
- It uses the pre-configured secret key (or public key) to verify the token's signature. If the signature is invalid, the token is rejected.
- It checks the token's
exp(expiration) claim. If the token has expired, it's rejected. - It optionally checks other claims, such as
issoraud, if configured. - It extracts the
email,username,name, androle/groupsclaims.
- Grafana User Provisioning and Authorization:
- If the JWT is valid, Grafana attempts to find an existing user matching the
emailorusernamefrom the token. - If no user exists and
jwt_allow_sign_upis enabled in Grafana's configuration, Grafana automatically provisions a new user with the details extracted from the JWT (email, username, name). - The user is then assigned roles and organization memberships based on the
roleorgroupsclaims in the JWT and Grafana's configuration (e.g.,jwt_auto_sign_up_role,jwt_auto_sign_up_org). - Based on the user's assigned roles and permissions within Grafana, access to the requested dashboard or resource is granted or denied.
- If the JWT is valid, Grafana attempts to find an existing user matching the
- Grafana Serves Resource: If authorization is successful, Grafana serves the requested dashboard or data.
The Role of an API Gateway (Optional but Recommended):
An api gateway can significantly enhance this architecture, particularly in complex microservices environments. An api gateway sits at the edge of your network, acting as a single entry point for all incoming api requests.
- Centralized Authentication/Authorization: While our Java backend handles the core JWT issuance, an
api gatewaycan enforce initial authentication or validate tokens for all services, including the Grafana instance. For instance, anapi gatewaymight verify the presence and basic validity of any token before forwarding a request to Grafana or even to our Java backend. This offloads authentication logic from individual services. - Traffic Management: Rate limiting, load balancing, routing, and circuit breaking can be managed centrally by the
api gateway, protecting Grafana and the Java backend from overload and ensuring high availability. - Security Policies: An
api gatewaycan apply Web Application Firewall (WAF) rules, IP whitelisting/blacklisting, and other security policies to incoming requests, adding a layer of defense before they reach internal services. - Observability: Centralized logging, monitoring, and tracing capabilities of an
api gatewayprovide a unified view of traffic flow and performance across allapis, including those interacting with Grafana.
For instance, an advanced api gateway solution like APIPark could sit in front of this entire setup, providing robust API management, centralized authentication management, rate limiting, and additional security layers before requests even reach our JWT generation service or Grafana. APIPark's comprehensive logging and data analysis capabilities would offer unparalleled insight into API calls, ensuring system stability and data security across your integrated applications.
This architectural pattern provides a powerful, secure, and scalable way to manage access to Grafana, aligning perfectly with modern cloud-native principles and microservices designs. By decentralizing session management and relying on cryptographically verifiable tokens, the system gains resilience and simplifies scaling without compromising on security.
Setting Up Your Environment: Laying the Foundation
Before we can begin coding and configuring, we need to ensure our development and deployment environments are correctly set up. This involves installing necessary software, preparing our project structure, and understanding key configuration files.
Prerequisites: Essential Tools and Software
To follow this guide, you will need the following installed and configured on your system:
- Java Development Kit (JDK): Version 11 or higher is recommended. You can download it from Oracle, OpenJDK, or AdoptOpenJDK. Ensure
JAVA_HOMEis set and Java is accessible from your command line. - Apache Maven or Gradle: A build automation tool for Java projects. We will primarily use Maven for this guide due to its widespread adoption, but Gradle is an equally valid alternative.
- Maven: Download from the Apache Maven website and follow the installation instructions. Verify by running
mvn -v. - Gradle: Download from the Gradle website or install via a package manager. Verify by running
gradle -v.
- Maven: Download from the Apache Maven website and follow the installation instructions. Verify by running
- Grafana Installation: You need a running Grafana instance. You can install Grafana in several ways:
- Docker: The easiest way to get started for development.
docker run -d -p 3000:3000 --name grafana grafana/grafana-oss:latest - Native Installation: Download packages for your operating system (Debian/Ubuntu, RedHat/CentOS, Windows, macOS) from the Grafana Labs website.
- Kubernetes: If you're in a Kubernetes environment, use the official Helm chart. Ensure Grafana is accessible, typically on
http://localhost:3000. The default login isadmin/admin.
- Docker: The easiest way to get started for development.
- An Integrated Development Environment (IDE):
- IntelliJ IDEA (Ultimate or Community Edition): Highly recommended for Java and Spring Boot development.
- Eclipse: Another popular choice for Java development.
- VS Code: With Java extensions, it can also be a powerful tool.
- A Client for Testing:
- Postman or Insomnia: Excellent for testing REST
apis and sending custom headers. - A simple frontend application: (e.g., using React, Vue, or Angular) if you want to test the full client-side integration. For this guide, we'll primarily focus on the backend and Grafana configuration.
- Postman or Insomnia: Excellent for testing REST
Java Project Setup: Building the JWT Issuer
We'll create a new Spring Boot project using the Spring Initializr, which simplifies the setup process immensely.
- Generate Project with Spring Initializr: Navigate to start.spring.io in your web browser.
- Project: Maven Project
- Language: Java
- Spring Boot: Choose a stable version (e.g., 3.x.x)
- Project Metadata:
- Group:
com.example(or your desired group) - Artifact:
grafana-jwt-auth(or a descriptive name) - Name:
grafana-jwt-auth - Description: "Grafana JWT Authentication Service"
- Package Name:
com.example.grafanajwtauth - Packaging: Jar
- Java: 17 (or your preferred JDK version, matching your installed JDK)
- Group:
- Dependencies: Add the following dependencies:
Spring Web: Provides RESTful capabilities.Spring Security: For basic user authentication and potentially securing endpoints.Lombok(Optional but highly recommended for reducing boilerplate code). Click "Generate" and download the ZIP file.
- Import into IDE: Unzip the downloaded project and import it into your preferred IDE (e.g., IntelliJ IDEA:
File -> Open, navigate to the project directory, and open thepom.xmlfile). Your IDE will download all necessary Maven dependencies. - Add JJWT Library Dependencies: Open the
pom.xmlfile in your project root. We need to add thejjwtlibrary for creating and parsing JWTs. Add the following dependencies within the<dependencies>block:xml <dependency> <groupId>io.jsonwebtoken</groupId> <artifactId>jjwt-api</artifactId> <version>0.11.5</version> <!-- Use the latest stable version --> </dependency> <dependency> <groupId>io.jsonwebtoken</groupId> <artifactId>jjwt-impl</artifactId> <version>0.11.5</version> <!-- Same as API --> <scope>runtime</scope> </dependency> <dependency> <groupId>io.jsonwebtoken</groupId> <artifactId>jjwt-jackson</artifactId> <version>0.11.5</version> <!-- Same as API --> <scope>runtime</scope> </dependency>(Note: Check JJWT GitHub for the latest versions.) - Configure Application Properties: Open
src/main/resources/application.properties(orapplication.yml). We'll add some basic configurations here, including a placeholder for our JWT secret key.properties server.port=8080 jwt.secret=ThisIsAVeryStrongAndSecureSecretKeyForJWTGenerationThatMustBeAtLeast32BytesLongForHS256Encryption jwt.expiration.ms=3600000 # 1 hour in millisecondsImportant: Thejwt.secretmust be a strong, randomly generated string. In a production environment, this secret should never be hardcoded or stored directly in a properties file checked into source control. It should be injected via environment variables, a secrets management service (like HashiCorp Vault, AWS KMS, Azure Key Vault), or Kubernetes Secrets. For HS256, the secret key should be at least 256 bits (32 bytes) long.
Grafana Configuration: Enabling JWT Authentication
The primary configuration for Grafana's JWT integration is done in its main configuration file, grafana.ini. The location of this file depends on your installation method:
- Docker: You often mount a custom
grafana.inior configure via environment variables. If using a bind mount, it's typically/etc/grafana/grafana.ini. - Linux (Deb/RPM):
/etc/grafana/grafana.ini - Windows:
[Grafana Installation Directory]\conf\defaults.ini(copy tocustom.inior modifydefaults.inicautiously).
You'll need to locate the [auth.jwt] section in grafana.ini (or create it if it doesn't exist). We'll go into the detailed parameters in a later section. For now, ensure you know where to find and modify this file.
After making changes to grafana.ini, you must restart the Grafana service for the changes to take effect.
Example grafana.ini (partial snippet):
[auth.jwt]
enabled = true
# Further configuration details will be added here
By completing these setup steps, you will have prepared the necessary environment for both your Java backend and Grafana. The next phase will involve developing the Java api to handle user authentication and JWT issuance, and then configuring Grafana to trust and validate these tokens.
Developing the Java Backend for JWT Handling: Crafting the Token Issuer
This is the core of our secure authentication system. The Java backend will serve as an api for user login, generating JWTs upon successful authentication. We'll use Spring Boot for rapid development and the JJWT library for token manipulation.
1. Defining the JWT Secret and Expiration
First, let's inject our JWT configuration from application.properties into our Java application.
Create a class JwtConfig.java to hold these values:
package com.example.grafanajwtauth.config;

import org.springframework.beans.factory.annotation.Value;
import org.springframework.context.annotation.Configuration;

@Configuration
public class JwtConfig {

    @Value("${jwt.secret}")
    private String secret;

    @Value("${jwt.expiration.ms}")
    private long expirationMs;

    public String getSecret() {
        return secret;
    }

    public long getExpirationMs() {
        return expirationMs;
    }
}
2. JWT Service: Generation and Validation Logic
Now, let's create a service responsible for the actual JWT operations.
package com.example.grafanajwtauth.service;

import com.example.grafanajwtauth.config.JwtConfig;
import io.jsonwebtoken.Claims;
import io.jsonwebtoken.Jwts;
import io.jsonwebtoken.SignatureAlgorithm;
import io.jsonwebtoken.io.Decoders;
import io.jsonwebtoken.security.Keys;
import org.springframework.beans.factory.annotation.Autowired;
import org.springframework.stereotype.Service;

import javax.crypto.SecretKey;
import java.util.Date;
import java.util.HashMap;
import java.util.Map;
import java.util.function.Function;

@Service
public class JwtService {

    private final JwtConfig jwtConfig;
    private final SecretKey signingKey;

    @Autowired
    public JwtService(JwtConfig jwtConfig) {
        this.jwtConfig = jwtConfig;
        this.signingKey = Keys.hmacShaKeyFor(Decoders.BASE64.decode(jwtConfig.getSecret()));
    }

    // --- JWT Generation ---

    public String generateToken(String username, String email, String name, String role) {
        Map<String, Object> claims = new HashMap<>();
        claims.put("email", email);
        claims.put("name", name);
        claims.put("role", role); // Grafana often expects a 'role' claim or 'groups'

        return createToken(claims, username);
    }

    private String createToken(Map<String, Object> claims, String subject) {
        return Jwts.builder()
                .setClaims(claims)
                .setSubject(subject) // 'sub' claim, often used for username
                .setIssuedAt(new Date(System.currentTimeMillis()))
                .setExpiration(new Date(System.currentTimeMillis() + jwtConfig.getExpirationMs()))
                .signWith(signingKey, SignatureAlgorithm.HS256)
                .compact();
    }

    // --- JWT Validation (useful for internal microservices, or if you expose a validation endpoint) ---

    public Boolean validateToken(String token, String username) {
        final String extractedUsername = extractUsername(token);
        return (extractedUsername.equals(username) && !isTokenExpired(token));
    }

    public String extractUsername(String token) {
        return extractClaim(token, Claims::getSubject);
    }

    public Date extractExpiration(String token) {
        return extractClaim(token, Claims::getExpiration);
    }

    public <T> T extractClaim(String token, Function<Claims, T> claimsResolver) {
        final Claims claims = extractAllClaims(token);
        return claimsResolver.apply(claims);
    }

    private Claims extractAllClaims(String token) {
        return Jwts.parserBuilder()
                .setSigningKey(signingKey)
                .build()
                .parseClaimsJws(token)
                .getBody();
    }

    private Boolean isTokenExpired(String token) {
        return extractExpiration(token).before(new Date());
    }
}
Explanation: * JwtService Constructor: Initializes the signingKey using the jwt.secret from JwtConfig. We use Keys.hmacShaKeyFor(Decoders.BASE64.decode(...)) to properly handle the secret as a Base64 encoded string. * generateToken: This is the primary method for creating a JWT. It takes username, email, name, and role as parameters. These are crucial claims that Grafana will use for user provisioning and role assignment. * createToken: Builds the JWT using Jwts.builder(). It sets the custom claims, sub (subject, which is usually the username), iat (issued at), exp (expiration), and signs the token with our signingKey using HS256 algorithm. * Validation Methods: validateToken, extractUsername, extractExpiration, extractClaim, extractAllClaims, isTokenExpired provide utility functions to parse and validate existing JWTs. While Grafana itself will validate the tokens, these methods are invaluable if you have other internal services that need to consume and verify tokens issued by this Java backend, making this service a comprehensive gateway for JWT management.
3. User Service (Mock Implementation)
For this example, we'll use a simple in-memory user store. In a real application, this would interact with a database, LDAP, or an external IdP.
package com.example.grafanajwtauth.service;

import com.example.grafanajwtauth.model.User;
import org.springframework.stereotype.Service;

import java.util.HashMap;
import java.util.Map;
import java.util.Optional;

@Service
public class UserService {

    // In-memory user store for demonstration purposes
    private final Map<String, User> users = new HashMap<>();

    public UserService() {
        // Add some dummy users
        users.put("admin@example.com", new User("admin@example.com", "admin_user", "Admin User", "password123", "Admin"));
        users.put("editor@example.com", new User("editor_user", "editor@example.com", "Editor User", "securepass", "Editor"));
        users.put("viewer@example.com", new User("viewer_user", "viewer@example.com", "Viewer User", "pass123", "Viewer"));
    }

    public Optional<User> findByEmail(String email) {
        return Optional.ofNullable(users.get(email));
    }

    public Optional<User> findByUsername(String username) {
        return users.values().stream()
                .filter(user -> user.getUsername().equals(username))
                .findFirst();
    }

    public boolean authenticate(String email, String password) {
        return findByEmail(email)
                .map(user -> user.getPassword().equals(password)) // In real app, use BCryptPasswordEncoder
                .orElse(false);
    }
}
And the User model:
package com.example.grafanajwtauth.model;

import lombok.AllArgsConstructor;
import lombok.Data;
import lombok.NoArgsConstructor;

@Data
@AllArgsConstructor
@NoArgsConstructor
public class User {
    private String username;
    private String email;
    private String name;
    private String password; // Store hashed passwords in production!
    private String role; // e.g., Admin, Editor, Viewer
}
Important Security Note: In a production application, passwords must never be stored in plain text. Use a strong hashing algorithm like BCrypt or Argon2 via BCryptPasswordEncoder from Spring Security.
4. Authentication Controller: Login Endpoint
This REST controller will expose the login api endpoint.
package com.example.grafanajwtauth.controller;

import com.example.grafanajwtauth.model.AuthRequest;
import com.example.grafanajwtauth.model.AuthResponse;
import com.example.grafanajwtauth.model.User;
import com.example.grafanajwtauth.service.JwtService;
import com.example.grafanajwtauth.service.UserService;
import org.springframework.beans.factory.annotation.Autowired;
import org.springframework.http.ResponseEntity;
import org.springframework.web.bind.annotation.*;

import java.util.Optional;

@RestController
@RequestMapping("/auth")
public class AuthController {

    private final UserService userService;
    private final JwtService jwtService;

    @Autowired
    public AuthController(UserService userService, JwtService jwtService) {
        this.userService = userService;
        this.jwtService = jwtService;
    }

    @PostMapping("/login")
    public ResponseEntity<?> createAuthenticationToken(@RequestBody AuthRequest authRequest) {
        if (userService.authenticate(authRequest.getEmail(), authRequest.getPassword())) {
            Optional<User> userOptional = userService.findByEmail(authRequest.getEmail());
            if (userOptional.isPresent()) {
                User user = userOptional.get();
                String jwt = jwtService.generateToken(user.getUsername(), user.getEmail(), user.getName(), user.getRole());
                return ResponseEntity.ok(new AuthResponse(jwt));
            }
        }
        return ResponseEntity.status(401).body("Invalid credentials");
    }
}
And the AuthRequest/AuthResponse models:
package com.example.grafanajwtauth.model;

import lombok.AllArgsConstructor;
import lombok.Data;
import lombok.NoArgsConstructor;

@Data
@AllArgsConstructor
@NoArgsConstructor
public class AuthRequest {
    private String email;
    private String password;
}
package com.example.grafanajwtauth.model;

import lombok.AllArgsConstructor;
import lombok.Data;
import lombok.NoArgsConstructor;

@Data
@AllArgsConstructor
@NoArgsConstructor
public class AuthResponse {
    private String jwt;
}
5. Spring Security Configuration (Optional but Recommended)
For a simple JWT issuer, we might not need Spring Security to secure the token generation endpoint itself, as it's the gateway for authentication. However, if this backend had other protected resources, Spring Security would be essential. For our /auth/login endpoint, we typically want it to be publicly accessible to allow users to log in.
If you added Spring Security dependency, Spring Boot will auto-configure basic security, which might block our /auth/login endpoint. We need to disable or configure it.
package com.example.grafanajwtauth.config;

import org.springframework.context.annotation.Bean;
import org.springframework.context.annotation.Configuration;
import org.springframework.security.config.annotation.web.builders.HttpSecurity;
import org.springframework.security.config.annotation.web.configuration.EnableWebSecurity;
import org.springframework.security.web.SecurityFilterChain;

@Configuration
@EnableWebSecurity
public class SecurityConfig {

    @Bean
    public SecurityFilterChain securityFilterChain(HttpSecurity http) throws Exception {
        http
            .csrf(csrf -> csrf.disable()) // Disable CSRF for API endpoints
            .authorizeHttpRequests(authorize -> authorize
                .requestMatchers("/auth/login").permitAll() // Allow unauthenticated access to login
                .anyRequest().authenticated() // All other requests require authentication
            );
        return http.build();
    }
}
This configuration allows /auth/login to be accessed without authentication, while any other endpoint would require it (which is fine for now, as we only have the login endpoint).
Running the Java Backend
- Open the main application class (e.g.,
GrafanaJwtAuthApplication.java). - Run the application from your IDE.
- The application should start on
http://localhost:8080.
Testing the Login API: Use Postman or Insomnia to send a POST request to http://localhost:8080/auth/login with a JSON body:
{
    "email": "admin@example.com",
    "password": "password123"
}
You should receive a 200 OK response with a JWT in the body:
{
    "jwt": "eyJhbGciOiJIUzI1NiJ9.eyJzdWIiOiJhZG1pbl91c2VyIiwicm9sZSI6IkFkbWluIiwibmFtZSI6IkFkbWluIFVzZXIiLCJlbWFpbCI6ImFkbWluQGV4YW1wbGUuY29tIiwiaWF0IjoxNzA0MDY3MjAwLCJleHAiOjE3MDQwNzAwMDB9.some_jwt_signature"
}
This JWT is what we will use to authenticate with Grafana.
This Java backend effectively acts as an api entry point for authentication, providing a secure gateway for users to obtain their access tokens. It can be integrated into a larger ecosystem, where an api gateway like APIPark could further manage its exposure, apply rate limits, and provide centralized analytics on authentication attempts.
APIPark is a high-performance AI gateway that allows you to securely access the most comprehensive LLM APIs globally on the APIPark platform, including OpenAI, Anthropic, Mistral, Llama2, Google Gemini, and more.Try APIPark now! 👇👇👇
Configuring Grafana for JWT Authentication: Accepting the Tokens
With our Java backend successfully issuing JWTs, the next crucial step is to configure Grafana to accept and validate these tokens. This involves modifying the grafana.ini configuration file, specifically within the [auth.jwt] section. Each parameter plays a vital role in how Grafana processes incoming JWTs, provisions users, and assigns roles.
Access your grafana.ini file. As mentioned earlier, its location depends on your installation: * Docker: Often /etc/grafana/grafana.ini within the container, or bind-mounted from your host. * Linux (Deb/RPM): /etc/grafana/grafana.ini * Windows: [Grafana Installation Directory]\conf\defaults.ini (prefer a custom.ini or environment variables for changes).
Once you've located the file, add or modify the [auth.jwt] section as follows:
[auth.jwt]
# Enable JWT authentication
enabled = true

# The name of the HTTP header where Grafana expects to find the JWT.
# Common choices are "X-JWT-Assertion" or "Authorization" (for Bearer tokens).
# If using "Authorization", the token should be prefixed with "Bearer ".
header_name = X-JWT-Assertion
# Alternatively, if you want to use standard "Authorization: Bearer <token>"
# header_name = Authorization
# url_login = true # Only enable if you want to pass JWT via URL for specific use cases (less secure)

# The secret key used to sign and verify the JWT.
# THIS MUST MATCH THE SECRET KEY USED BY YOUR JAVA BACKEND.
# It's highly recommended to use an environment variable (GF_AUTH_JWT_SECRET)
# rather than hardcoding it in grafana.ini for production.
secret = ThisIsAVeryStrongAndSecureSecretKeyForJWTGenerationThatMustBeAtLeast32BytesLongForHS256Encryption

# Path to a file containing the secret key. If specified, 'secret' is ignored.
# Useful for storing keys securely outside the config file.
# key_file = /etc/grafana/jwt_secret.key

# The signing algorithm expected in the JWT header. Default is HS256.
# If your Java backend uses a different algorithm (e.g., RS256), specify it here.
# sign_alg = HS256

# Claim names that Grafana will look for to extract user information.
# These must match the claims you're putting into your JWT from the Java backend.
email_claim = email
username_claim = sub # Or 'username' if you explicitly set it in JWT 'sub' field
name_claim = name
# role_claim = role # If you use a single claim for Grafana roles (Viewer, Editor, Admin)
groups_claim = role # Often more flexible, maps to Grafana roles or Teams

# Automatically provision new users if they don't exist in Grafana.
# Set to true for initial setup or if your user base is dynamic.
# Consider setting to false in highly controlled environments after initial provisioning.
allow_sign_up = true

# The default organization name for newly provisioned users.
# Users will be added to this organization automatically.
auto_sign_up_org = Main Org.

# The default role for newly provisioned users within the auto_sign_up_org.
# Can be Viewer, Editor, or Admin.
auto_sign_up_role = Viewer

# Optional: Require specific claims to be present in the JWT.
# If these claims are missing, the JWT will be rejected.
# expect_claims = email,role

# Optional: Specify a valid issuer (iss claim) for the JWT.
# If specified, only tokens with a matching issuer will be accepted.
# issuer = http://localhost:8080

# Optional: Specify a valid audience (aud claim) for the JWT.
# If specified, only tokens with a matching audience will be accepted.
# audience = grafana
Detailed Explanation of Each Parameter:
enabled = true: This is the master switch. Set totrueto activate JWT authentication. Iffalse, this section is ignored.header_name = X-JWT-Assertion: This defines which HTTP header Grafana will inspect for the JWT.X-JWT-Assertion: A common choice for custom JWT integration. Your client application must send the raw JWT string in this header.Authorization: If you set this, your client must send the token in the formatAuthorization: Bearer <your_jwt_token>. This is the standard for OAuth 2.0 Bearer tokens and is often preferred for consistency. Make sure your Java backend returns the token without the "Bearer" prefix if you chooseX-JWT-Assertion, and the client adds the prefix if you chooseAuthorization.
secret = ThisIsAVeryStrongAndSecureSecretKey...: CRITICAL! This secret key must exactly match thejwt.secretconfigured in your Java backend (application.properties). If they do not match, Grafana will fail to verify the JWT's signature, and all authentication attempts will fail. For production, use an environment variable likeGF_AUTH_JWT_SECRETto inject this value, never hardcode it.key_file = /path/to/your/secret/file.key: As an alternative tosecret, you can provide a path to a file containing the secret key. Ifkey_fileis specified,secretis ignored. This is generally more secure, as file permissions can be strictly controlled.sign_alg = HS256: Specifies the expected signing algorithm (e.g., HS256, RS256, ES256). Ensure this matches the algorithm used by your Java backend when signing the JWT (SignatureAlgorithm.HS256in our Java code).email_claim = email: The name of the claim in the JWT payload that holds the user's email address. Grafana uses this for identification and new user provisioning.username_claim = sub: The name of the claim that holds the user's username. Grafana will use this for the user's login name. Our Java backend usessubfor the username.name_claim = name: The name of the claim that holds the user's display name.role_claim = role: (Mutually exclusive withgroups_claim). If your JWT includes a single claim defining the user's role (e.g., "Viewer", "Editor", "Admin"), specify its name here.groups_claim = role: (Mutually exclusive withrole_claim). This is often more flexible. It specifies a claim that can be an array of strings or a single string, representing roles or group memberships. Grafana can map these to its internal roles. In our Java example, we used a singleroleclaim, sogroups_claim = roleworks ifrolecontains "Viewer", "Editor", or "Admin". If your JWT had agroupsclaim like["Admin", "TeamA"], you would setgroups_claim = groups.allow_sign_up = true: Iftrue, Grafana will automatically create a new user account if a valid JWT is presented for an email/username combination that doesn't exist in Grafana's database. This streamlines user onboarding. Set tofalseif you want to pre-provision all users manually or via other means.auto_sign_up_org = Main Org.: The name of the organization to which automatically provisioned users will be added. Ensure this organization exists in Grafana.auto_sign_up_role = Viewer: The default role assigned to automatically provisioned users within theauto_sign_up_org. This role will be overridden ifrole_claimorgroups_claimprovides a higher privilege role (e.g., "Admin").expect_claims = email,role: An optional comma-separated list of claims that must be present in the JWT. If any specified claim is missing, the token will be rejected, even if otherwise valid.issuer = http://localhost:8080: (Optional) If specified, Grafana will check theiss(issuer) claim in the JWT. Theissclaim in your JWT must exactly match this value. Useful for ensuring tokens come from a trusted source.audience = grafana: (Optional) If specified, Grafana will check theaud(audience) claim in the JWT. Theaudclaim in your JWT must contain this value. Useful for ensuring tokens are intended for Grafana.
Important Considerations and Best Practices:
- Security of
secret/key_file: This is the single most critical security aspect. Protect this secret with the utmost care. Use environment variables (e.g.,GF_AUTH_JWT_SECRET="YOUR_SECRET") or a secrets management solution in production. - Role Mapping: Carefully consider how you map roles from your JWT claims to Grafana's roles (
Viewer,Editor,Admin). Ensure the Java backend issues the correct role claims. - Restart Grafana: After any changes to
grafana.ini, you must restart the Grafana service for the changes to take effect. - Logs: Monitor Grafana's logs (
/var/log/grafana/grafana.logor Docker logs) for any errors related to JWT authentication. They provide invaluable debugging information if tokens are rejected.
After configuring grafana.ini and restarting Grafana, your instance will now be ready to accept and validate JWTs issued by your Java backend. The next step is to demonstrate how a client would send this token to Grafana.
Client-Side Implementation: Sending the JWT to Grafana
With the Java backend issuing JWTs and Grafana configured to accept them, the final piece of the puzzle is the client application's responsibility: obtaining the JWT and sending it to Grafana with subsequent requests. While this guide primarily focuses on the backend and Grafana configuration, a brief overview of client-side implementation is essential.
The client application could be a single-page application (SPA) built with frameworks like React, Angular, or Vue.js, a mobile application, or even a simple tool like Postman for testing. The fundamental steps remain consistent:
1. Obtaining the JWT
After a successful login attempt to your Java backend (e.g., http://localhost:8080/auth/login), the client application will receive the JWT in the response body.
Example (from Java backend):
{
    "jwt": "eyJhbGciOiJIUzI1NiJ9.eyJzdWIiOiJhZG1pbl91c2VyIiwicm9sZSI6IkFkbWluIiwibmFtZSI6IkFkbWluIFVzZXIiLCJlbWFpbCI6ImFkbWluQGV4YW1wbGUuY29tIiwiaWF0IjoxNzA0MDY3MjAwLCJleHAiOjE3MDQwNzAwMDB9.some_jwt_signature"
}
The client application needs to extract this jwt string from the JSON response.
2. Storing the JWT Securely
Once obtained, the JWT needs to be stored client-side so it can be attached to subsequent requests. The choice of storage mechanism impacts security significantly:
localStorageorsessionStorage:- Pros: Easy to use, accessible via JavaScript.
localStoragepersists across browser sessions,sessionStoragelasts only for the current tab/window. - Cons: Vulnerable to Cross-Site Scripting (XSS) attacks. If an attacker can inject malicious JavaScript into your page, they can steal the token. This is a significant risk.
- Pros: Easy to use, accessible via JavaScript.
- HTTP-only Cookies:
- Pros: Not accessible via JavaScript, making them highly resistant to XSS attacks. Can be marked
Secure(sent only over HTTPS) andSameSite(prevents CSRF). - Cons: Can be vulnerable to Cross-Site Request Forgery (CSRF) if
SameSiteis not properly configured. Requires the backend to set the cookie. - Recommended approach: If possible, have your Java backend set the JWT as an
HttpOnly,Secure, andSameSite=Lax(orStrict) cookie after successful login. This way, the browser automatically attaches it to requests to the same domain (or specified domain) without JavaScript intervention.
- Pros: Not accessible via JavaScript, making them highly resistant to XSS attacks. Can be marked
For this guide's X-JWT-Assertion header approach, localStorage is often used for demonstration, but be aware of the XSS risks in production.
Example (JavaScript using localStorage):
// Assuming 'response' is the JSON response from your login API
const jwtToken = response.jwt;
localStorage.setItem('jwt_token', jwtToken);
3. Attaching the JWT to Requests for Grafana
For every request made to the Grafana server that requires authentication, the client must include the stored JWT in the specific HTTP header that Grafana is configured to look for (header_name in grafana.ini).
Scenario A: Grafana header_name = X-JWT-Assertion
The client should send the raw JWT string directly in the X-JWT-Assertion header.
Example (JavaScript using fetch):
const jwtToken = localStorage.getItem('jwt_token');

fetch('http://localhost:3000/api/dashboards/uid/your-dashboard-uid', {
    method: 'GET',
    headers: {
        'Content-Type': 'application/json',
        'X-JWT-Assertion': jwtToken // Custom header
    }
})
.then(response => response.json())
.then(data => console.log(data))
.catch(error => console.error('Error:', error));
Scenario B: Grafana header_name = Authorization
The client should send the JWT prefixed with "Bearer " in the Authorization header. This is the more common and standardized approach for JWTs.
Example (JavaScript using fetch):
const jwtToken = localStorage.getItem('jwt_token');

fetch('http://localhost:3000/api/dashboards/uid/your-dashboard-uid', {
    method: 'GET',
    headers: {
        'Content-Type': 'application/json',
        'Authorization': `Bearer ${jwtToken}` // Standard Bearer token header
    }
})
.then(response => response.json())
.then(data => console.log(data))
.catch(error => console.error('Error:', error));
Testing with Postman/Insomnia:
- Make a
POSTrequest to your Java backend's login endpoint (http://localhost:8080/auth/login) to get a JWT. - Copy the
jwtvalue from the response. - Make a
GETrequest to a Grafana API endpoint, for example,http://localhost:3000/api/user/orgs. - In the request headers, add:
Key: X-JWT-Assertion(orAuthorization)Value: <your_jwt_token>(orBearer <your_jwt_token>)
- Send the request. If everything is configured correctly, Grafana should respond with the user's organization details, indicating successful authentication. If authentication fails, you'll likely get a
401 Unauthorizedresponse.
Handling Token Expiration
JWTs have an expiration time (exp claim). Once expired, Grafana will reject them. Clients must implement a strategy to handle this:
- Refresh Tokens: When the original access token (JWT) is issued, a longer-lived "refresh token" is also issued. When the access token expires, the client uses the refresh token to request a new access token (and potentially a new refresh token) from the Java backend without requiring the user to re-enter credentials.
- Proactive Refresh: The client can check the token's expiration time (which can be extracted from the token's payload on the client side, as JWTs are self-contained) and proactively request a new token before the current one expires, refreshing it in the background.
- Re-authentication: If refresh tokens are not used, the client must prompt the user to log in again once the token expires.
This client-side implementation completes the full loop of JWT-based authentication for Grafana, allowing users to securely access their dashboards through a seamless, token-driven mechanism.
Advanced Considerations and Best Practices: Elevating Security and Scalability
Implementing JWT authentication for Grafana with a Java backend provides a robust foundation. However, to build a truly production-ready and resilient system, several advanced considerations and best practices should be integrated. These aspects enhance security, improve user experience, and ensure scalability in complex environments.
1. Token Refresh and Revocation Strategy
One inherent characteristic of JWTs is their statelessness. Once issued and signed, a JWT is generally valid until its expiration. This statelessness, while beneficial for scalability, makes immediate revocation challenging without additional mechanisms.
- Short-Lived Access Tokens with Refresh Tokens: This is the most common and recommended pattern.
- Access Token (JWT): Short expiration time (e.g., 5-60 minutes). Used for accessing protected resources (like Grafana). If stolen, its utility is limited by its short lifespan.
- Refresh Token: Long expiration time (e.g., days, weeks, or months). Stored securely (e.g., HTTP-only cookie). When the access token expires, the client sends the refresh token to the Java backend's refresh
apito obtain a new access token (and potentially a new refresh token). - Revocation: Refresh tokens can be revoked by the backend (e.g., by storing them in a database or a blocklist). If a refresh token is compromised, it can be immediately invalidated, preventing new access tokens from being issued.
- JWT Blacklisting/Blocklisting (for immediate revocation): For critical situations where an access token must be immediately invalidated (e.g., user logs out, security breach), a distributed blocklist (e.g., using Redis) can be employed. When a JWT is blacklisted, every service (including Grafana, if it were to implement a custom validation logic) would need to check against this list before granting access. This adds statefulness back, but can be necessary for high-security scenarios. Grafana's native JWT implementation does not support this out-of-the-box.
2. Role-Based Access Control (RBAC) and Granular Permissions
While JWTs provide authentication, effective authorization relies on a robust RBAC strategy within Grafana.
- Mapping JWT Claims to Grafana Roles: As demonstrated, the
role_claimorgroups_claimin the JWT is crucial. Ensure your Java backend dynamically assigns the correct Grafana-compatible roles (Viewer,Editor,Admin) or maps users to specific Grafana teams based on their actual permissions within your system. - Grafana Teams and Data Source Permissions: Leverage Grafana's built-in team management. Instead of just assigning organization-wide roles, you can assign users to specific teams. Then, grant these teams access to particular dashboards or data sources. Your JWT can include a
teamsclaim (or extend thegroupsclaim) that your Java backend populates, and Grafana can be configured to map these claims to existing Grafana teams during user provisioning. - Multi-Org Support: Grafana supports multiple organizations. Your JWT can include claims that dictate which Grafana organization a user belongs to, enabling multi-tenant Grafana setups.
3. Security Hardening Measures
Beyond JWT implementation, overall system security is paramount.
- HTTPS Everywhere: All communication, especially between the client, Java backend, and Grafana, must occur over HTTPS. This prevents eavesdropping and man-in-the-middle attacks. Obtain valid SSL/TLS certificates for all services.
- Strong Secret Management: The JWT signing secret is your Achilles' heel.
- Environment Variables: Minimum standard for production.
- Secrets Management Services: Use dedicated solutions like HashiCorp Vault, AWS KMS, Azure Key Vault, or Kubernetes Secrets to securely store and inject your JWT secret into the Java backend and Grafana.
- Asymmetric Keys (RS256/ES256): For larger deployments or scenarios where the issuer and validator are distinct and don't share a secret, consider asymmetric algorithms. The Java backend signs with a private key, and Grafana validates with the corresponding public key. This public key can be safely distributed.
- Input Validation and Sanitization: Ensure all inputs to your Java backend (especially login credentials) are properly validated and sanitized to prevent injection attacks (SQL injection, XSS).
- Rate Limiting: Implement rate limiting on your Java backend's login
apiendpoint to mitigate brute-force password attacks. Anapi gatewayis an ideal place to enforce this. - Content Security Policy (CSP): Implement a strict CSP on your client application to reduce the impact of XSS attacks.
- Secure HTTP Headers: Configure appropriate security headers (e.g.,
Strict-Transport-Security,X-Content-Type-Options,X-Frame-Options) for all web services, including Grafana and your Java backend.
4. Monitoring, Logging, and Auditing
Comprehensive observability is key to detecting and responding to security incidents.
- Centralized Logging: Aggregate logs from your Java backend (JWT issuance, authentication attempts, failures) and Grafana (JWT validation, access logs, user actions) into a centralized logging system (e.g., ELK Stack, Splunk, Loki).
- Security Information and Event Management (SIEM): Feed relevant security events (failed logins, token validation errors, unusual access patterns) into a SIEM system for anomaly detection and alerting.
- Auditing: Ensure your system can produce audit trails of who accessed what, when, and from where. JWT claims facilitate this by providing user identity.
- APIPark's Role: An
api gatewaylike APIPark excels in this area. It provides powerful data analysis and detailed API call logging, recording every detail of each API call. This feature allows businesses to quickly trace and troubleshoot issues in API calls and analyze historical data to display long-term trends and performance changes, which is invaluable for ensuring system stability, data security, and proactive maintenance.
5. Integration with Identity Providers (IdP)
For organizations already using an enterprise IdP (e.g., Okta, Azure AD, Keycloak, Auth0), the Java backend can integrate with these providers using standards like OAuth 2.0 or OpenID Connect.
- Flow: The client authenticates with the IdP, receives an IdP-issued token. The client then sends this IdP token to your Java backend. Your Java backend validates the IdP token and, based on the user information obtained, issues your application-specific JWT for Grafana access. This creates a bridge, allowing your IdP to be the ultimate source of identity while retaining control over your application-specific JWT format and claims.
6. Scalability and Performance
JWTs are inherently scalable due to their stateless nature.
- Horizontal Scaling: Both your Java backend and Grafana can be horizontally scaled without complex session management.
- Load Balancing: Place load balancers in front of multiple instances of your Java backend and Grafana to distribute traffic. An
api gatewaycan also serve this function efficiently, potentially rivaling Nginx in performance for high-traffic environments.
By carefully considering and implementing these advanced practices, you can build an authentication system for Grafana that is not only secure and functional but also robust, scalable, and maintainable in a demanding enterprise environment. The strategic use of components like an api gateway can further unify and strengthen your security posture across all your apis and services.
Troubleshooting Common Issues: Navigating Potential Pitfalls
Even with careful planning and implementation, you might encounter issues when setting up JWT authentication for Grafana. Debugging can be challenging due to the distributed nature of the system. Here's a list of common problems and their potential solutions:
1. Grafana Fails to Start or Shows Configuration Errors
- Symptom: Grafana service fails to start, or you see "Configuration error" messages in its logs.
- Possible Cause: Malformed
grafana.inifile, incorrect syntax, or invalid values. - Solution:
- Check
grafana.inicarefully for typos, missing[auth.jwt]section headers, or incorrect value formats (e.g.,enabled = truenotenabled: true). - Verify that file paths specified (e.g.,
key_file) are correct and accessible by the Grafana user. - Consult Grafana's startup logs (e.g.,
journalctl -u grafana-serveron Linux, or Docker logs) for specific error messages.
- Check
2. "Invalid JWT Signature" or "Unauthorized" from Grafana
- Symptom: Grafana responds with
401 Unauthorizedor logs indicate "Invalid JWT signature" or similar errors. - Possible Cause: Mismatched secret keys between your Java backend and Grafana.
- Solution:
- Verify Secret Key: Double-check that the
jwt.secretin your Java backend'sapplication.properties(or environment variable) is exactly the same as thesecret(or content ofkey_file) in Grafana'sgrafana.ini(or environment variableGF_AUTH_JWT_SECRET). Even a single character difference or an extra space will cause validation to fail. - Encoding: Ensure the secret is handled consistently. If your
jwt.secretin Java is Base64 encoded, Grafana's secret should also be interpreted correctly (JJWT typically uses Base64 forhmacShaKeyFor, so Grafana's secret should be the raw string that encodes to the same Base64). - Restart Services: Always restart both your Java backend and Grafana after changing any secret keys or configuration files.
- Verify Secret Key: Double-check that the
3. "JWT Expired" or "Token Lifetime Invalid" Errors
- Symptom: Grafana rejects tokens with messages indicating expiration.
- Possible Cause: The
expclaim in the JWT has passed, or there's a clock skew issue. - Solution:
- Check Token Expiration: Decode your JWT (using tools like
jwt.io) to inspect theexpclaim. Compare it to the current time. - Adjust Expiration Time: If tokens are expiring too quickly, increase
jwt.expiration.msin your Java backend. - Clock Skew: Ensure that the system clocks of your Java backend server, Grafana server, and the client are synchronized (e.g., using NTP). A significant time difference can cause tokens to be considered expired prematurely or still valid when they should have expired.
- Check Token Expiration: Decode your JWT (using tools like
4. User Not Created in Grafana or Incorrect Roles/Permissions
- Symptom: Users successfully authenticate but cannot access dashboards, or their roles are incorrect. Grafana logs might show "User not found" or "Permission denied."
- Possible Cause: Incorrect claim mapping in
grafana.ini,allow_sign_upisfalse, or mismatch in role names. - Solution:
allow_sign_up: Ensuregrafana.inihasallow_sign_up = trueif you want new users to be automatically provisioned.- Claim Names: Verify that
email_claim,username_claim,name_claim,role_claim, andgroups_claimingrafana.iniexactly match the claim names being put into the JWT by your Java backend. Case sensitivity matters! - Claim Values: Check the actual values of the claims in the JWT. For example, if
role_claim = role, ensure your JWT has a claim{"role": "Admin"}and not{"user_role": "Admin"}or{"roles": ["Admin"]}. - Role Mismatch: If
auto_sign_up_roleis set (e.g.,Viewer), but your JWT'sroleclaim isAdmin, Grafana should apply the higher privilege. If it's not, check the Grafana logs for any role mapping issues. - Grafana Logs: Look for messages like "JWT: Failed to find user for email..." or "JWT: Provisioning new user..." to understand the user creation process.
5. Grafana Doesn't Recognize the JWT Header
- Symptom: Grafana always treats requests as unauthenticated, even when a JWT is sent.
- Possible Cause: Incorrect
header_nameconfigured ingrafana.ini, or the client isn't sending the header correctly. - Solution:
header_name: Confirm thatheader_nameingrafana.ini(e.g.,X-JWT-AssertionorAuthorization) exactly matches the header name used by your client.- Header Format: If using
header_name = Authorization, ensure the client sendsAuthorization: Bearer <your_jwt>. If using a custom header likeX-JWT-Assertion, ensure the client sends the raw token string without "Bearer ". - Browser Developer Tools: Use your browser's developer tools (Network tab) to inspect the HTTP requests being sent to Grafana. Confirm that the JWT header is present and correctly formatted.
6. CORS (Cross-Origin Resource Sharing) Issues
- Symptom: Client-side JavaScript requests to Grafana fail with CORS errors (e.g., "Access-Control-Allow-Origin" header missing).
- Possible Cause: Your client application is hosted on a different domain/port than Grafana, and Grafana's CORS settings aren't configured.
- Solution:
- Grafana CORS Configuration: In
grafana.ini, usually in the[server]section, configurehttp_port,domain, and potentially[security.cors]settings if Grafana needs to serve content to different origins directly. - Proxy: A common solution is to set up a reverse proxy (like Nginx, Apache, or an
api gateway) in front of both your client application and Grafana, ensuring they appear to be on the same origin. The proxy can handle CORS headers.
- Grafana CORS Configuration: In
7. Java Backend Issues
- Symptom: The Java backend fails to start, returns errors on login, or doesn't issue JWTs.
- Possible Cause: Incorrect Spring Boot configuration, missing dependencies, or logical errors in the JWT generation code.
- Solution:
- Java Application Logs: Check the logs of your Java application. Spring Boot provides detailed startup logs and error messages.
- Dependencies: Ensure all
jjwtand Spring Security dependencies are correctly added topom.xmland downloaded by Maven. - User Service: Verify that your
UserServicecan correctly authenticate users against its (mock) store. jwt.secret: Again, ensure thejwt.secretinapplication.propertiesis long enough and properly formatted (e.g., Base64-encoded for HS256 if you intend it to be, or ensure it's a simple string that JJWT can use directly).
By systematically addressing these common troubleshooting points, you can efficiently diagnose and resolve issues, leading to a successful and secure JWT integration with Grafana. Remember that logs are your best friend in debugging distributed systems!
Conclusion: Empowering Secure Data Visualization
The journey to securing Grafana with JSON Web Tokens and a Java backend is a testament to the power of modern architectural patterns in enhancing both security and scalability. Throughout this comprehensive guide, we've dissected the foundational technologies—Grafana's visualization prowess, JWT's stateless security, and Java's robust backend capabilities—to construct a resilient authentication system.
We began by establishing the critical imperative for securing Grafana, highlighting the significant risks of data breaches, non-compliance, and operational vulnerabilities that unauthorized access can unleash. This foundational understanding underscored why a robust authentication mechanism, such as the one we've built, is not just a technical feature but a strategic business necessity.
Our architectural deep dive illuminated the seamless flow from client authentication through a Java backend, to the secure issuance and subsequent validation of JWTs by Grafana. This multi-layered approach ensures that user identities are verified by a trusted authority before granting access to sensitive dashboards. We meticulously walked through the environment setup, preparing both our Java development environment and the Grafana instance for the integration.
The heart of our solution lay in the development of the Java backend, where we crafted the api responsible for authenticating users and minting cryptographically signed JWTs, meticulously populating them with claims essential for Grafana's user provisioning and role-based access control. Following this, we provided a detailed configuration for Grafana's grafana.ini, demystifying each parameter to ensure Grafana correctly interprets and validates the incoming tokens. Finally, we touched upon the client-side implementation and delved into advanced considerations, ranging from token refresh strategies and robust RBAC to crucial security hardening measures and the invaluable role of comprehensive monitoring and logging.
By adopting this JWT-based authentication pattern, organizations unlock a multitude of benefits: * Enhanced Security: Cryptographically signed tokens provide strong assurance of integrity and authenticity, reducing the risk of unauthorized access. * Scalability: The stateless nature of JWTs simplifies the scaling of both your authentication service and Grafana, making it ideal for microservices and cloud-native deployments. * Streamlined User Experience: A single sign-on experience can be achieved across multiple applications, with users obtaining a token once and using it to access various services, including Grafana. * Flexibility: The system integrates seamlessly with existing identity providers and can be customized to fit diverse organizational security policies and role structures. * Auditability: JWTs carry user information, making it easier to track user activities and enhance audit trails across your data visualization platform.
While the implementation demands careful attention to detail, particularly regarding secret management and claim mapping, the benefits far outweigh the complexities. This guide has equipped you with the comprehensive knowledge and practical steps to implement a secure and scalable JWT authentication system for Grafana, fortifying your data visualization capabilities against the ever-evolving threat landscape. As you deploy and manage your secure Grafana instance, remember that continuous monitoring, regular security audits, and adherence to best practices will be your strongest allies in maintaining an impenetrable defense. The future of data-driven insights is secure, accessible, and resilient.
Frequently Asked Questions (FAQs)
1. What is the main advantage of using JWT for Grafana authentication over traditional session-based methods?
The primary advantage of JWT for Grafana authentication, especially in modern architectures, is its statelessness. Unlike session-based methods that require the server to store session data, JWTs are self-contained. The token itself holds all necessary user information and is cryptographically signed, allowing Grafana (the resource server) to validate it independently without needing to query a central session store. This significantly improves scalability for microservices, simplifies cross-domain authentication, and reduces the server's memory footprint. It also means any server instance can validate the token, making horizontal scaling much easier.
2. How should the JWT secret key be managed in a production environment?
The JWT secret key is paramount to the security of your system; if compromised, an attacker can forge tokens. In production, it must never be hardcoded or committed to version control. Best practices include: * Environment Variables: Inject the secret into your Java application and Grafana instances via environment variables (e.g., GF_AUTH_JWT_SECRET for Grafana). * Secrets Management Services: Utilize dedicated secrets management platforms like HashiCorp Vault, AWS Key Management Service (KMS), Azure Key Vault, or Kubernetes Secrets. These services securely store, rotate, and deliver secrets to applications at runtime, minimizing exposure. * Asymmetric Keys: For higher security, consider using asymmetric (public/private key) algorithms like RS256 or ES256. The Java backend signs tokens with a private key (kept secret), and Grafana verifies them with the corresponding public key (which can be safely distributed).
3. What are the key claims needed in a JWT for Grafana to correctly provision users and assign roles?
For Grafana to effectively provision users and assign roles, the JWT payload should include several specific claims: * email_claim: The user's email address (e.g., email). Grafana uses this as a unique identifier and for new user creation. * username_claim: The user's username (e.g., sub or username). This will be the user's login name in Grafana. * name_claim: The user's display name (e.g., name). * role_claim or groups_claim: These claims are crucial for authorization. role_claim typically expects a single string like "Viewer", "Editor", or "Admin". groups_claim can be more flexible, accepting an array of strings or a single string that Grafana can map to its internal roles or team memberships. Ensure these claims match what your Java backend sends and what Grafana is configured to expect in grafana.ini.
4. How does Grafana handle user provisioning if a user with a valid JWT doesn't exist in its database?
Grafana's JWT authentication mechanism supports automatic user provisioning based on the allow_sign_up setting in grafana.ini. * If allow_sign_up = true (recommended for seamless integration): When a valid JWT is presented for a user who does not yet exist in Grafana's database, Grafana will automatically create a new user account. The user's email, username, and display name will be extracted from the corresponding JWT claims (email_claim, username_claim, name_claim). The new user will be assigned to the organization specified by auto_sign_up_org and given the role defined by auto_sign_up_role, unless overridden by role_claim or groups_claim in the JWT. * If allow_sign_up = false: Grafana will only allow access to users who are already provisioned in its database. If a valid JWT is presented for a non-existent user, the authentication will fail.
5. Can an API Gateway enhance the security and management of this Grafana JWT setup?
Absolutely. An api gateway can significantly enhance the security, performance, and management of a Grafana JWT setup by acting as a central enforcement point. An api gateway can: * Centralized Authentication: While our Java backend issues the JWT, the api gateway can perform initial validation (e.g., checking token existence, expiration) before forwarding requests to Grafana, offloading this from Grafana itself. * Traffic Management: Implement rate limiting, load balancing, and circuit breakers to protect Grafana and the Java backend from overload and abuse. * Security Policies: Apply Web Application Firewall (WAF) rules, IP whitelisting/blacklisting, and other security policies at the edge. * Unified Logging and Monitoring: Provide a single point for comprehensive logging, monitoring, and analytics of all api calls, including those to Grafana and your JWT issuer. This helps in quick troubleshooting and proactive security threat detection. For example, an api gateway like APIPark offers powerful data analysis and detailed API call logging, making it easier to manage and secure all integrated services.
🚀You can securely and efficiently call the OpenAI API on APIPark in just two steps:
Step 1: Deploy the APIPark AI gateway in 5 minutes.
APIPark is developed based on Golang, offering strong product performance and low development and maintenance costs. You can deploy APIPark with a single command line.
curl -sSO https://download.apipark.com/install/quick-start.sh; bash quick-start.sh

In my experience, you can see the successful deployment interface within 5 to 10 minutes. Then, you can log in to APIPark using your account.

Step 2: Call the OpenAI API.