Optimize Your Dockerfile Build: Best Practices Guide


In the rapidly evolving landscape of software development, containerization has emerged as a cornerstone practice, fundamentally changing how applications are built, deployed, and managed. At the heart of this revolution lies Docker, and its foundational blueprint, the Dockerfile. A Dockerfile is more than just a script; it's the recipe that dictates every step of your application's journey from source code to a deployable, isolated container image. While the initial goal is simply to get an application running inside a container, true efficiency and scalability in modern infrastructure demand a deeper understanding and application of Dockerfile optimization.
An unoptimized Dockerfile can lead to a cascade of problems: bloated image sizes that consume excessive storage and slow down deployments, prolonged build times that hinder CI/CD pipelines, increased attack surfaces due to unnecessary components, and a general drain on development and operational resources. In today's competitive environment, where every millisecond and byte counts, neglecting Dockerfile optimization is akin to leaving performance and security on the table. This comprehensive guide will delve deep into the multifaceted world of Dockerfile optimization, providing a structured approach to building lean, fast, and secure container images. We will explore best practices ranging from intelligent base image selection and the power of multi-stage builds to meticulous layer caching strategies and robust security considerations. By the end of this journey, you will possess the knowledge and practical techniques to transform your Dockerfiles from mere instructions into highly efficient, production-ready blueprints.
The Unignorable Imperative: Why Optimize Your Dockerfile?
Before diving into the "how," it's crucial to fully grasp the "why." Dockerfile optimization isn't just a matter of technical elegance; it delivers tangible, impactful benefits across the entire software development lifecycle and into production operations. Understanding these advantages will provide the motivation to invest the time and effort into refining your Docker build processes.
1. Accelerating Build Times: Time is Money
One of the most immediate and appreciated benefits of an optimized Dockerfile is significantly faster build times. In a continuous integration/continuous deployment (CI/CD) pipeline, every minute spent waiting for an image to build translates directly into lost developer productivity and slower time-to-market for new features or bug fixes. * Reduced Feedback Loops: Faster builds mean developers get quicker feedback on their changes, enabling them to iterate more rapidly and catch issues earlier in the development cycle. This agility is paramount in modern agile methodologies. * Efficient CI/CD Pipelines: CI/CD systems, whether Jenkins, GitLab CI, GitHub Actions, or others, rely heavily on Docker builds. Shorter build times free up build agents, reduce queue times, and lower the operational costs associated with maintaining these pipelines. Imagine a scenario where a large project with numerous microservices builds several times a day; even a few minutes saved per build can accumulate into hours of valuable time over a week. * Resource Conservation: Less time spent building means less CPU, memory, and network resources consumed by your build infrastructure. This can translate into significant cost savings, especially for organizations running large-scale CI/CD operations on cloud platforms.
2. Drastically Reducing Image Sizes: The Leaner, The Better
Perhaps the most universally recognized goal of Dockerfile optimization is to produce smaller container images. Bloated images are a common anti-pattern with far-reaching negative consequences. * Faster Image Pulls and Pushes: Larger images take longer to transfer across networks. Whether pulling images from a Docker registry to your local machine, a staging server, or a production Kubernetes cluster, smaller images lead to dramatically faster deployment times. In auto-scaling scenarios, quick image pulls are critical for rapid horizontal scaling. * Reduced Storage Costs: Container images consume disk space on registries, build servers, and host machines. For organizations managing hundreds or thousands of images, often with multiple versions, storage costs can quickly become substantial. Minimizing image size directly contributes to lower infrastructure expenses. * Improved Security Posture: A smaller image typically contains fewer unnecessary packages, libraries, and executables. This directly translates to a reduced attack surface. Every additional component in an image is a potential vulnerability point that needs to be managed, patched, and scanned. By stripping down an image to only what's absolutely necessary, you inherently enhance its security. * Enhanced Reliability in Constrained Environments: In edge computing scenarios, IoT devices, or environments with limited bandwidth and storage, small image sizes are not just a best practice but a necessity for reliable operation.
3. Fortifying Security: Minimizing the Attack Surface
Security is not an afterthought in containerization; it must be baked into the very foundation of your images. Optimized Dockerfiles inherently lead to more secure containers. * Fewer Vulnerabilities: As mentioned, a lean image with only essential components means fewer packages to contain known (and unknown) vulnerabilities. If a package isn't present, it cannot be exploited. * Reduced Complexity: Simpler images are easier to audit, scan, and understand. This transparency aids in identifying and mitigating potential security risks more effectively. * Principle of Least Privilege: Optimization practices often encourage running applications as non-root users and limiting the scope of executable commands, aligning with the principle of least privilege, a fundamental security tenet.
4. Boosting Runtime Performance and Stability
While much of the focus is on build time and image size, optimization also positively impacts runtime characteristics. * Faster Container Startup: Smaller images load faster into memory, leading to quicker container startup times. This is vital for applications requiring rapid scaling or quick recovery from failures. * Reduced Memory Footprint: Though not always a direct consequence of image size, optimizing Dockerfiles often involves removing unnecessary components that might consume runtime memory. A leaner application might translate to a lower memory footprint, allowing more containers to run on the same host or reducing resource requests in orchestration systems like Kubernetes. * Greater Stability: Images stripped of non-essential dependencies and carefully constructed are often more predictable and stable, reducing the likelihood of unexpected conflicts or errors stemming from unused packages.
By understanding these profound benefits, we can approach Dockerfile optimization not as a burdensome task, but as an essential practice that yields significant returns in terms of efficiency, cost, security, and overall application quality.
Core Principles of Dockerfile Optimization: Laying the Foundation
Effective Dockerfile optimization isn't about applying a random set of tricks; it's about understanding the fundamental mechanisms of how Docker builds images and then leveraging that knowledge to your advantage. These core principles form the bedrock of all advanced optimization techniques.
1. Harnessing Docker's Layer Caching Mechanism
One of Docker's most powerful features is its intelligent layer caching. Every instruction in a Dockerfile (e.g., FROM, RUN, COPY, ADD, ENV) creates a new layer on top of the previous one. When Docker builds an image, it checks if it has already built a layer identical to the current instruction. If it finds a match in its cache, it reuses that existing layer instead of executing the instruction again. This significantly speeds up subsequent builds.
- How it Works: Docker compares the instruction itself and the "context" for that instruction. For
RUNcommands, it's the exact command string. ForCOPYorADDcommands, it calculates a checksum of the files being copied. If the command or the file contents haven't changed, the cache is hit. - The Golden Rule: Place the most stable and least frequently changing instructions earlier in your Dockerfile. Instructions that are likely to change frequently (e.g.,
COPYing your application's source code) should come later. This ensures that Docker can reuse as many cached layers as possible before encountering a change that invalidates the cache, forcing it to rebuild from that point onwards. - Example: Installing system dependencies (like
apt-get install) usually changes less frequently than copying application code. Therefore, installing dependencies should typically precedeCOPY . ..
2. Minimizing the Number of Layers (With Nuance)
While every instruction creates a layer, it's not always about having the absolute fewest layers. The goal is to optimize for cache hits and readability. * Consolidating RUN Commands: Multiple RUN commands that perform related tasks (e.g., installing several packages, then cleaning up) can often be chained together using && and backslashes \ for readability. This creates a single layer for that sequence of operations, making it easier to manage and ensuring that the cleanup step is part of the same transaction, reducing intermediate image sizes. * Why Fewer Layers Can Be Good: Each layer adds to the overall image size overhead, even if it's empty. While Docker uses a union file system to only store the differences between layers, having too many tiny, inefficient layers can slightly increase image metadata and potentially lead to less efficient cache utilization if not managed carefully. * The Trade-off with Caching: Consolidating too many commands into one RUN instruction can reduce caching opportunities. If one small part of a large chained RUN command changes, the entire layer has to be rebuilt. This is why the "least frequently changing first" rule is paramount. For instance, installing core system dependencies in one RUN command, and then application-specific dependencies in another RUN command might be a good balance if the application dependencies change more often.
3. Embracing Multi-Stage Builds: The Game Changer
Multi-stage builds are arguably the single most effective technique for reducing final image sizes and improving security. They address a fundamental problem: often, you need a rich set of tools and dependencies to build your application (compilers, SDKs, testing frameworks), but these tools are completely unnecessary for the application to run. * The Concept: A multi-stage Dockerfile uses multiple FROM instructions. Each FROM instruction starts a new build stage. You can copy artifacts (compiled binaries, static files) from one stage to a later stage, effectively discarding all the build-time dependencies and intermediate files that are not needed in the final runtime image. * Benefits: * Massive Image Size Reduction: This is the primary benefit. By only copying the necessary runtime artifacts, you eliminate gigabytes of build-time tools, source code, and temporary files. * Reduced Attack Surface: Since build tools and development libraries are not present in the final image, potential vulnerabilities associated with them are eliminated. * Cleaner Dockerfiles: Multi-stage builds allow for a clearer separation of concerns between build logic and runtime configuration, making Dockerfiles easier to read and maintain. * Example: A Go application might use one stage with a Go SDK to compile the binary, and a second, very lean stage (e.g., FROM scratch or FROM alpine) to merely run that compiled binary.
4. Choosing the Right Base Image: Foundations Matter
The FROM instruction is the very first step in your Dockerfile, and the choice of your base image profoundly impacts the final image size, security, and build complexity. * Smallest Viable Image: Always strive to use the smallest possible base image that satisfies your application's runtime requirements. * scratch: The absolute smallest, an empty image. Only useful for truly static binaries (like Go, Rust) that have no external dependencies. * alpine: A popular choice for many applications. It's based on Alpine Linux, which uses musl libc and BusyBox, resulting in extremely small image sizes (often ~5-10 MB). However, its non-GNU libc can sometimes cause compatibility issues with certain compiled binaries or libraries. * debian / ubuntu (slim/stretch/buster/bullseye): More common distributions. Look for slim tags (e.g., debian:bullseye-slim) which are stripped-down versions without unnecessary utilities, offering a good balance between size and compatibility. * distroless (GoogleContainerTools): These images contain only your application and its direct runtime dependencies, completely stripping out package managers, shells, and other utilities typically found in standard Linux distributions. They are excellent for security and size but can make debugging harder as there's no shell. * Official Images: Always prefer official images from trusted sources (e.g., Docker Hub's official images) as they are generally well-maintained, secure, and follow best practices. * Pinning Versions: Always pin your base image to a specific version (e.g., node:16-alpine instead of node:alpine or node:latest). This ensures reproducible builds, preventing unexpected breakages when the latest tag updates.
5. Leveraging .dockerignore Effectively: Only Include What's Needed
The .dockerignore file works similarly to .gitignore but for your Docker build context. When Docker builds an image, it first collects all files and directories in the build context (typically the directory where your Dockerfile resides) and sends them to the Docker daemon. * Preventing Bloat: Without .dockerignore, Docker would send all files, including node_modules, .git directories, README.md files, .DS_Store, and temporary build artifacts, to the daemon. This increases the build context size, prolongs the initial COPY step, and potentially pollutes your image with unnecessary files if you use COPY . .. * Improved Build Performance: A smaller build context means less data needs to be sent to the Docker daemon, especially in remote build scenarios or when building inside a VM. This can significantly speed up the context transfer phase. * Security: Excluding sensitive files (e.g., API keys, configuration files from your local environment) from the build context prevents them from accidentally being copied into the final image.
By adhering to these core principles, you lay a solid foundation for highly optimized Dockerfiles, paving the way for faster builds, smaller images, and more secure containerized applications.
Deep Dive into Best Practices: Practical Techniques for Optimization
With the core principles firmly established, let's explore detailed best practices and techniques that translate those principles into actionable Dockerfile commands and strategies.
I. Base Image Selection: The Starting Line
The choice of your base image (FROM instruction) is arguably the single most impactful decision for image size and security. It defines the initial layers upon which all subsequent instructions are built.
- Alpine Linux (
alpinetag):- Pros: Extremely small (typically 5-8MB for the base image). Uses BusyBox and musl libc, which are designed for minimal footprint. Excellent for Go, Rust, or Python applications that don't rely heavily on glibc.
- Cons: Musl libc can sometimes cause compatibility issues with binaries compiled for glibc (e.g., certain Python packages with native extensions, or specific C/C++ libraries). Less common system utilities might be missing or behave differently.
- Use Case: Ideal for applications with few external C dependencies, or when using multi-stage builds to compile binaries that link statically or dynamically against musl.
- Example:
FROM python:3.9-alpineorFROM node:16-alpine
- Debian/Ubuntu Slim (
-slimtag):- Pros: Significantly smaller than full Debian/Ubuntu images, while still offering the familiarity and glibc compatibility of a popular distribution. Good balance between size and compatibility.
- Cons: Still larger than Alpine or distroless images.
- Use Case: A safe and common choice for most applications requiring a standard Linux environment, especially when glibc compatibility is important.
- Example:
FROM debian:bullseye-slimorFROM node:16-bullseye-slim
- Distroless (
gcr.io/distroless/<language>):- Pros: Ultra-small images containing only your application and its immediate runtime dependencies. No shell, no package manager, drastically reduced attack surface. Excellent for security and smallest possible size for applications requiring dynamic linking.
- Cons: Extremely difficult to debug inside the container (no
bash,ls,ps, etc.). Requires a very mature build and monitoring setup. - Use Case: Production environments where security and minimal size are paramount, and debugging is handled through external logging and monitoring tools. Best suited for languages like Go, Java, Node.js, Python.
- Example:
FROM gcr.io/distroless/python3-debian11
scratch:- Pros: The smallest possible image – literally empty.
- Cons: Can only be used for completely static binaries (e.g., Go applications compiled with
CGO_ENABLED=0). No OS, no libraries, nothing. - Use Case: Highly specialized for self-contained, statically linked executables.
- Example:
FROM scratch
- Pinning Base Image Versions:
- Always specify a precise tag, not just
latestor a broad version likepython:3. - Bad:
FROM node:latest(could break with new Node.js versions) - Better:
FROM node:16-alpine(specific Node.js major version, specific base OS) - Best (for reproducibility):
FROM node:16.14.0-alpine3.15(pinning to specific minor/patch version and Alpine version, though this can be overly rigid for security updates) - A good balance is often pinning to the major or minor version (
node:16-alpine), allowing for patch updates which usually contain security fixes. For critical production systems, re-evaluating and manually updating versions with a clear pipeline is often preferred.
- Always specify a precise tag, not just
II. Multi-Stage Builds: The Ultimate Image Shrinker
Multi-stage builds are a cornerstone of modern Dockerfile optimization. They elegantly separate the build environment from the runtime environment, ensuring that only the essential artifacts make it into the final production image.
- Conceptual Overview:
- Build Stage: Start with a fat image that has all the compilers, SDKs, testing tools, and development dependencies needed to compile your application.
- Runtime Stage: Start a new, very lean base image (e.g.,
alpine,debian-slim,distroless). - Copy Artifacts: Use the
COPY --from=<stage_name_or_index>instruction to copy only the compiled binaries, configuration files, static assets, or other necessary runtime artifacts from the build stage into the runtime stage. - Discard Everything Else: All the temporary files, build tools, and source code from the build stage are discarded, never making it into the final image.
- In the
builderstage, we installnpm ciwhich also installs dev dependencies implicitly if not specified, then runnpm run buildwhich requires tools like Webpack, Babel, etc. - In the second stage, we start fresh with
node:16-alpine. We then useCOPY --from=builderto only bring overnode_modules(production only, as specified innpm ci --only=production), thebuilddirectory (containing static assets), andserver.js. All the build tools, source code, and intermediate files are left behind.
- Benefits Revisited:
- Dramatic Size Reduction: This is the primary driver. The final image will be orders of magnitude smaller than an image built without multi-stage.
- Enhanced Security: Build tools and source code are not present in the final image, reducing the attack surface.
- Clearer Separation of Concerns: Your Dockerfile becomes more modular and easier to reason about.
- Improved Caching: Each stage can leverage its own caching rules, potentially leading to more efficient rebuilds.
Detailed Example (Node.js Application):```dockerfile
Stage 1: Build environment
FROM node:16-alpine AS builderWORKDIR /app
Install production dependencies first (leverage cache)
COPY package.json package-lock.json ./ RUN npm ci --only=production
Copy all source code (will invalidate cache if anything changes)
COPY . .
Build the application (e.g., React, Vue, Angular build)
RUN npm run build
Stage 2: Runtime environment
FROM node:16-alpineWORKDIR /app
Copy only the necessary production dependencies from the builder stage
COPY --from=builder /app/node_modules ./node_modules
Copy the built application (e.g., static assets, compiled JS)
COPY --from=builder /app/build ./build COPY --from=builder /app/public ./public # If applicable
Copy server-side entry point (e.g., server.js)
COPY --from=builder /app/server.js ./server.jsEXPOSE 8080 CMD ["node", "server.js"] ```
III. Layer Caching Strategies: Mastering the Order
Docker's layer caching is a powerful optimization, but it requires careful thought about the order of instructions. The principle is simple: once a layer is invalidated (due to a change in the instruction or its context), all subsequent layers must be rebuilt.
- Order of Operations:
- Least Frequently Changing First: Place instructions that rarely change at the beginning of your Dockerfile.
FROM(base image)ENV(static environment variables)RUN apt-get update && apt-get install -y <core_dependencies>(system-level dependencies)WORKDIR(setting the working directory)
- More Frequently Changing Later: Instructions that frequently change should be placed towards the end.
COPY . .(copying application source code)RUN npm installorRUN pip install -r requirements.txt(application-specific dependencies)CMDorENTRYPOINT
- Least Frequently Changing First: Place instructions that rarely change at the beginning of your Dockerfile.
BuildKit's RUN --mount=type=cache: BuildKit (Docker's next-generation build engine, often enabled by default) introduces advanced caching features, including RUN --mount=type=cache. This allows you to cache specific directories between builds without adding them to the final image layer. This is incredibly useful for package managers (like npm, yarn, pip, go mod) that download many files.```dockerfile
syntax=docker/dockerfile:1.4 # Enable BuildKit features
FROM node:16-alpine AS builderWORKDIR /appCOPY package.json package-lock.json ./
Cache npm modules directory
RUN --mount=type=cache,target=/root/.npm \ npm ci --only=productionCOPY . . RUN npm run build `` This ensuresnpm ci` uses a persistent cache volume during the build, but the cache itself isn't part of the final image.
Consolidating RUN Commands for Cleanup: When installing packages or performing temporary operations, always clean up in the same RUN command to ensure the cleanup happens in the same layer. If cleanup is in a subsequent RUN command, the temporary files from the previous RUN command will still exist in the intermediate layer, adding to the final image size.```dockerfile
BAD: Temporary files persist in an intermediate layer
RUN apt-get update && apt-get install -y some-package RUN rm -rf /var/lib/apt/lists/*
GOOD: Cleanup happens in the same layer
RUN apt-get update && apt-get install -y some-package \ && rm -rf /var/lib/apt/lists/ \ && apt-get clean # For Debian/Ubuntu-based images `` Forapt-get, essential cleanup commands includerm -rf /var/lib/apt/lists/andapt-get clean. Foryum/dnf, it's oftenyum clean all`.
Example (Python application pip install): ```dockerfile FROM python:3.9-slim-busterWORKDIR /app
Install system dependencies (less frequent changes)
RUN apt-get update && apt-get install -y build-essential \ && rm -rf /var/lib/apt/lists/*
Copy requirements.txt separately to leverage cache for pip install
If requirements.txt doesn't change, this layer is cached.
COPY requirements.txt . RUN pip install --no-cache-dir -r requirements.txt
Copy the rest of the application code (most frequent changes)
COPY . .CMD ["python", "app.py"] `` In this example,requirements.txtis copied andpip installis run *before* the entire application code is copied. If only the application code changes, butrequirements.txtremains the same, thepip install` layer will be retrieved from cache, saving significant time.
IV. Reducing Image Size: Aggressive Trimming
Beyond multi-stage builds and layer cleanup, there are specific techniques to further slim down your images.
- Removing Unnecessary Tools and Documentation: Many package installations include documentation, man pages, and development files (
-devpackages) that are not needed at runtime.- Example (Debian/Ubuntu):
dockerfile RUN apt-get update && apt-get install -y --no-install-recommends \ some-package \ another-package \ && rm -rf /var/lib/apt/lists/* \ && apt-get clean \ && apt-get autoremove -y # Remove automatically installed dependencies that are no longer neededThe--no-install-recommendsflag prevents installation of "recommended" packages that aren't strictly required dependencies.
- Example (Debian/Ubuntu):
- Minimizing
ENVandLABEL: While not a huge impact, every environment variable and label adds a tiny bit to metadata. Be judicious. - Using
COPY --fromfor specific files: When copying from a build stage, be as granular as possible. Don't copy entire directories if only a few files are needed.- Bad:
COPY --from=builder /app /app(copies everything from builder's/app) - Good:
COPY --from=builder /app/bin/my-app /usr/local/bin/my-app(copies only the executable)
- Bad:
- Compressing Static Assets: If your application serves static assets (HTML, CSS, JS), consider pre-compressing them (e.g., with gzip) during the build stage. This reduces the size of files stored in the image and can speed up delivery.
V. Efficient Copying and Adding: Mind the Context
The COPY and ADD instructions are critical for bringing your application code and assets into the image. Using them wisely is key to both performance and security.
- Mastering
.dockerignore: This file is your first line of defense against bloated build contexts. It prevents unnecessary files from being sent to the Docker daemon and subsequently copied into your image.- Common Entries:
.git .gitignore .DS_Store *.log npm-debug.log node_modules/ # If you install them in a specific layer, or use multi-stage tmp/ *.tmp Dockerfile .dockerignore build/ # If build artifacts are generated locally but not intended for image dist/ venv/ # Python virtual environments __pycache__/ # Python cache files - Important Note on
node_modules: If you havenode_modulesin your.dockerignorebut thenCOPY . .and subsequently runnpm install, this is fine. Thenode_modulesfrom your local machine won't be copied. However, if yournpm installrelies on those existing, you need to be careful. In multi-stage builds, you typically installnode_modulesin the builder stage, and then copy only the installednode_modulesfrom the builder to the final stage.
- Common Entries:
COPYvs.ADD:COPY: The preferred instruction. It simply copies local files or directories from your build context to the container. It's transparent and predictable.ADD: Has additional functionality: it can handle URLs (downloading files) and automatically extract compressed archives (tar, gzip, bzip2) if the source is a local tarball. This extra magic can sometimes be unpredictable or hide details.- Recommendation: Use
COPYfor all file transfers unless you specifically needADD's archive extraction or URL download capabilities. If you need to download a file, it's often more transparent to useRUN wgetorRUN curlin a separate layer, allowing for better control over caching and cleanup.
- Copying Only What's Needed: Instead of
COPY . ., be more explicit.- Example (Python):
dockerfile COPY requirements.txt . RUN pip install --no-cache-dir -r requirements.txt COPY app/ app/ COPY scripts/ scripts/ # ... and so on for specific directories/filesThis prevents unnecessary files from being copied if the application structure is complex.
- Example (Python):
VI. Security Considerations: Building a Hardened Image
Optimization for security goes hand-in-hand with size reduction. A lean image is inherently more secure, but specific practices further harden your containers.
- Running as a Non-Root User: By default, Docker containers run processes as the root user. This is a significant security risk, as a compromised application could gain root access to the host or other containers (though isolated, it's still a privilege escalation).
- Best Practice: Create a dedicated, non-root user and group within your Dockerfile and switch to it using the
USERinstruction.
- Best Practice: Create a dedicated, non-root user and group within your Dockerfile and switch to it using the
- Limiting Attack Surface:
- No SSH Server: Do not include SSH servers in your images. If you need to debug a running container, use
docker exec. An SSH server adds a large attack vector that is usually unnecessary. - Remove Sensitive Data: Ensure no API keys, private keys, or other sensitive information is baked into the image. Use Docker secrets or environment variables for these at runtime. Build arguments (
ARG) can be used for build-time secrets, but be careful not to persist them in the final image. - Regular Vulnerability Scanning: Integrate image scanning tools (e.g., Trivy, Clair, Anchore) into your CI/CD pipeline to automatically detect known vulnerabilities in your base image and installed packages.
- No SSH Server: Do not include SSH servers in your images. If you need to debug a running container, use
- Principle of Least Privilege: Beyond the user, ensure your application only has the minimum necessary permissions within the container filesystem. This reinforces security.
Example: ```dockerfile FROM node:16-alpine
Create a non-root user and group
RUN addgroup -S appgroup && adduser -S appuser -G appgroupWORKDIR /app
Ensure the user has write permissions to the workdir if needed
RUN chown -R appuser:appgroup /app
... (copy files, install dependencies) ...
Switch to the non-root user
USER appuserEXPOSE 8080 CMD ["node", "server.js"] ``` * Permissions: Ensure that any directories or files your application needs to write to are owned by the non-root user.
VII. Build Performance Enhancements: Leveraging Advanced Features
Modern Docker engines (especially with BuildKit) offer features that further enhance build performance beyond basic layer caching.
- BuildKit for Parallel Builds and Remote Caching: BuildKit is Docker's next-generation builder. It supports:
- Parallel execution: It can execute independent build steps in parallel.
- Efficient caching: More granular control over caching, including external cache sources.
- Secrets management: Securely pass secrets during the build without baking them into the image.
- Syntax: To enable BuildKit features, add
# syntax=docker/dockerfile:1.xat the top of your Dockerfile. - Example (Secrets): ```dockerfile # syntax=docker/dockerfile:1.4 FROM alpineRUN --mount=type=secret,id=mysecret \ cat /run/secrets/mysecret
`` Then run withdocker build --secret id=mysecret,src=./mysecret.txt .`
- Build Arguments (
ARG): UseARGto pass variables to your Dockerfile at build time. This allows for flexible builds without hardcoding values.- Example: ```dockerfile ARG NODE_VERSION=16 FROM node:${NODE_VERSION}-alpineARG BUILD_COMMIT=unknown LABEL org.opencontainers.image.revision=${BUILD_COMMIT}
`` Build withdocker build --build-arg NODE_VERSION=18 --build-arg BUILD_COMMIT=$(git rev-parse HEAD) .* **Important:**ARGvalues are *not* automatically available at runtime as environment variables, unlikeENV. If you need anARGvalue at runtime, you must explicitly set it as anENVvariable after itsARG` definition.
- Example: ```dockerfile ARG NODE_VERSION=16 FROM node:${NODE_VERSION}-alpineARG BUILD_COMMIT=unknown LABEL org.opencontainers.image.revision=${BUILD_COMMIT}
VIII. Runtime Performance & Configuration: Optimizing Beyond the Build
While the Dockerfile primarily dictates the build, some instructions directly influence runtime characteristics.
EXPOSE: Documents which ports the container listens on. It doesn't actually publish the port; that's done withdocker run -por orchestration configurations. Always specify the ports your application uses.HEALTHCHECK: Define how Docker (and orchestrators like Kubernetes) can check if your containerized application is actually healthy and responsive, not just running. This prevents traffic from being routed to unhealthy instances.- Example (HTTP application):
dockerfile HEALTHCHECK --interval=30s --timeout=5s --start-period=5s --retries=3 \ CMD wget -qO /dev/null http://localhost:8080/health || exit 1 - Choose a reliable command (e.g.,
curl,wget, or a simple script) that checks the application's readiness, not just the process's existence.
- Example (HTTP application):
ENTRYPOINTvs.CMD:ENTRYPOINT: Defines the executable that will always be run when the container starts. It's typically set to the main application binary or a wrapper script. Use the exec form (["executable", "param1"]) for better signal handling.CMD: Provides default arguments to theENTRYPOINT. IfENTRYPOINTis not defined,CMDdefines the executable and its arguments.- Best Practice: Use
ENTRYPOINTfor the fixed command (your application) andCMDfor its default, overridable arguments. - Example:
dockerfile ENTRYPOINT ["/usr/local/bin/my-app"] CMD ["--config", "/etc/my-app/config.yaml"]You can then rundocker run my-image --config /var/my-app/custom-config.jsonto override theCMDarguments.
- Volume Management: While not strictly a Dockerfile instruction, understanding how volumes interact with your image is important. Avoid baking data into images that should be persistent or external. Use
VOLUMEinstructions in your Dockerfile to signal expected mount points for persistent data.
By meticulously applying these best practices, you can construct Dockerfiles that are not only functional but also highly optimized for speed, size, and security, paving the way for more efficient and robust containerized deployments.
APIPark is a high-performance AI gateway that allows you to securely access the most comprehensive LLM APIs globally on the APIPark platform, including OpenAI, Anthropic, Mistral, Llama2, Google Gemini, and more.Try APIPark now! 👇👇👇
Practical Example: From Bloated to Brilliant
To illustrate the impact of these best practices, let's consider a simple (but common) Node.js application Dockerfile and then transform it using the optimization techniques discussed.
Scenario: A basic Node.js Express application that serves an API.
The "Bad" Dockerfile (Bloated & Inefficient)
This Dockerfile is functional but ignores almost all best practices.
# Bad Dockerfile: Inefficient, large, slow to build
FROM node:latest

# Set working directory
WORKDIR /app

# Copy all files into the container.
# This includes node_modules from local dev, .git, etc.
COPY . .

# Install dependencies (will reinstall if app code changes)
RUN npm install

# Expose the application port
EXPOSE 3000

# Start the application
CMD ["node", "server.js"]
Issues with this Dockerfile: 1. FROM node:latest: Not pinned, susceptible to breaking changes. Uses a full Node.js image, not a slim one. 2. COPY . . early: Copies everything, including unnecessary local node_modules, .git folders, Dockerfile itself, etc., polluting the build context and image. Also invalidates cache for npm install if any file changes. 3. npm install after COPY . .: If server.js changes, npm install has to run again, even if package.json didn't change. 4. No cleanup: No attempts to reduce image size or secure it. 5. Runs as root: Default behavior, security risk. 6. No .dockerignore: Exacerbates the COPY . . issue.
The "Good" Dockerfile (Optimized & Efficient)
Now, let's apply the best practices: base image selection, multi-stage build, layer caching, .dockerignore, and user management.
./.dockerignore file:
.git
.gitignore
node_modules
npm-debug.log
Dockerfile
.dockerignore
build/
dist/
tmp/
*.log
Optimized Dockerfile:
# syntax=docker/dockerfile:1.4 # Enable BuildKit features like cache mounts

# Stage 1: Builder - for installing dependencies and building assets
FROM node:16-alpine AS builder

# Create a non-root user and group for the build stage if needed for permissions,
# though typically build stage runs as root for simplicity.
# However, for consistency and security practices, let's define it.
RUN addgroup -S appgroup && adduser -S appuser -G appgroup

WORKDIR /app

# Copy package.json and package-lock.json first to leverage layer caching.
# If these files don't change, npm ci will be cached.
COPY package.json package-lock.json ./

# Install production dependencies using npm ci (clean install, faster, more reliable)
# Use BuildKit's cache mount for npm modules to speed up subsequent builds.
# The cache is for the build environment, not part of the final image.
RUN --mount=type=cache,target=/app/.npm \
    npm ci --only=production

# Copy the rest of the application source code.
# This step will invalidate cache for subsequent layers if code changes.
COPY . .

# If you have client-side assets that need building (e.g., React/Vue app)
# RUN npm run build

# Stage 2: Runner - the final lean production image
FROM node:16-alpine

# Define working directory
WORKDIR /app

# Create a non-root user for the runtime environment.
# This user will run the application.
RUN addgroup -S appgroup && adduser -S appuser -G appgroup

# Set appropriate permissions for the application directory
# so the non-root user can read/execute its files.
RUN chown -R appuser:appgroup /app

# Copy only the necessary files from the builder stage
# Production node_modules
COPY --from=builder /app/node_modules ./node_modules

# Application code (e.g., server.js, API routes)
COPY --from=builder /app/server.js ./server.js
COPY --from=builder /app/routes/ ./routes/ # Example for specific directories
COPY --from=builder /app/config/ ./config/

# If you built static assets in the builder stage
# COPY --from=builder /app/build ./build
# COPY --from=builder /app/public ./public


# Set the non-root user to run the application
USER appuser

# Expose the port the application listens on
EXPOSE 3000

# Healthcheck to ensure the application is truly running and responsive
HEALTHCHECK --interval=30s --timeout=5s --start-period=5s --retries=3 \
  CMD wget -qO /dev/null http://localhost:3000/health || exit 1

# Define the command to run the application
CMD ["node", "server.js"]
Improvements in the "Good" Dockerfile: 1. FROM node:16-alpine: Specific, pinned version and a lightweight base image. 2. Multi-stage build (AS builder): Separates build dependencies from runtime, dramatically reducing final image size. 3. .dockerignore: Prevents unnecessary files from entering the build context and image. 4. Optimized layer caching: package.json/package-lock.json are copied first, allowing npm ci to be cached if dependencies haven't changed. Application code changes won't invalidate the dependency installation layer. 5. npm ci --only=production: Installs only production dependencies, further slimming node_modules. 6. RUN --mount=type=cache: Leverages BuildKit for faster npm ci on subsequent builds. 7. Granular COPY --from=builder: Only copies essential runtime node_modules and application files, leaving build tools and source code behind. 8. Non-root user (appuser): Enhances security by not running the application as root. 9. EXPOSE and HEALTHCHECK: Improves runtime clarity and reliability.
This transformation demonstrates how a mindful application of Dockerfile best practices can lead to a significantly more efficient, secure, and maintainable container image.
Beyond the Dockerfile: Tools and Ecosystem for Optimization
While a well-crafted Dockerfile is paramount, the broader Docker ecosystem offers a suite of tools that can further assist in optimizing and analyzing your container images.
1. Docker BuildKit: The Next-Generation Builder
As touched upon, BuildKit is not just an alternative; it's the future of Docker builds. It's designed to improve performance, security, and extensibility. * Key Features: * Parallel build steps: Automatically detects and executes independent stages or instructions concurrently. * Efficient caching: More robust caching mechanisms, including external cache sources and fine-grained control with cache mounts. * Secrets management: Securely passes secrets during the build process without persisting them in intermediate or final images. * SSH forwarding: Allows build steps to securely access private repositories. * Custom frontends: Enables using alternative Dockerfile syntaxes or domain-specific build definitions. * Usage: Often enabled by default in newer Docker versions (DOCKER_BUILDKIT=1 docker build ...). You can explicitly enable it in your Dockerfile with # syntax=docker/dockerfile:1.x.
2. Docker Slim: Post-Build Image Reduction
Docker Slim is a powerful tool that performs a dynamic analysis of your running container to identify precisely which files and dependencies are actually used by your application. It then creates a new, incredibly small image containing only those essential components. * How it works: Docker Slim instruments your container, observes its filesystem and network activity, and then generates a new Dockerfile or directly creates a slimmed-down image. * Benefits: Can often reduce image sizes by another 10x or more after your initial Dockerfile optimizations. It's a "belt-and-suspenders" approach to achieve maximum leanness. * Caveats: Requires your application to run for a period during the analysis phase, which can add to build time. May require careful configuration for complex applications.
3. Dive: Exploring Docker Image Layers
Dive is a command-line tool for exploring Docker image layers, analyzing their contents, and identifying potential areas for size reduction. * Features: * Visualizes each layer's contents, showing what files were added, removed, or modified. * Highlights wasteful layers (e.g., large temporary files that weren't cleaned up). * Estimates the "efficiency" of your image based on layer contents. * Use Case: Excellent for debugging why an image is larger than expected or for reviewing a Dockerfile after a build to find hidden inefficiencies.
4. Image Scanners (Trivy, Clair, Anchore Engine)
Security is an integral part of optimization. These tools scan your container images for known vulnerabilities. * Trivy (Aqua Security): A popular, easy-to-use, and fast open-source scanner that checks OS packages, application dependencies, and even misconfigurations. * Clair (Quay.io/CoreOS/Red Hat): Another widely used open-source vulnerability analyzer for container images. Often integrated into container registries. * Anchore Engine: A more comprehensive enterprise-grade solution that provides detailed image analysis, policy enforcement, and compliance checks. * Integration: These scanners should be integrated into your CI/CD pipeline to automatically flag images with critical vulnerabilities before they reach production.
5. Docker Linter (e.g., Hadolint)
Linters analyze your Dockerfile syntax and check for adherence to best practices, common pitfalls, and potential errors. * Hadolint: A popular Dockerfile linter that integrates well with CI/CD. It checks for issues like missing labels, unnecessary RUN commands, unpinned base images, and running as root. * Benefits: Catches mistakes early, promotes consistent Dockerfile quality, and educates developers on best practices.
6. Container Registries with Built-in Features
Many commercial and open-source container registries (e.g., Docker Hub, Google Container Registry, AWS ECR, Azure Container Registry, GitLab Container Registry) offer built-in features that aid optimization and security: * Vulnerability Scanning: Many registries automatically scan images pushed to them for known vulnerabilities. * Image Layer Details: Provide UI or API access to view image layers and their sizes. * Lifecycle Management: Rules to automatically delete old or untagged images, helping manage storage costs.
By combining an optimized Dockerfile with these powerful tools, you establish a robust pipeline for building, maintaining, and securing container images, ensuring that your applications run efficiently and reliably in any environment.
The Role of API Management in the Optimized Container Ecosystem
Once your applications are beautifully containerized with lean, secure, and fast-building Docker images, the next critical step is how these applications are exposed and managed as services. Especially for microservices or backend APIs, an API Gateway and management platform becomes indispensable. This is where a product like APIPark seamlessly integrates into the optimized container ecosystem, extending the benefits of your efficient builds into the realm of API delivery and governance.
Imagine you've meticulously optimized a Dockerfile for a new microservice that performs a specific function, say, a sentiment analysis API. You've ensured the image is small, builds quickly, and runs securely as a non-root user. Now, this service needs to be accessible to other internal teams or even external partners. This is no longer just about the container itself, but about how that containerized service is presented, secured, monitored, and scaled as a valuable API.
APIPark steps in to bridge this gap. As an all-in-one AI gateway and API management platform, it allows you to take your efficiently built Docker containers, which might house REST services or AI models, and integrate them into a unified, managed system. With APIPark, your optimized container image, once deployed, benefits from:
- Unified API Exposure: Regardless of how many different optimized Docker images you have for various microservices or AI models, APIPark provides a single, consistent entry point. This abstracts away the underlying container infrastructure, presenting a clean API interface to consumers.
- Enhanced Security: Your Dockerfile optimization efforts already lay a strong security foundation for individual containers. APIPark complements this by adding another layer of robust API security features such as authentication, authorization, rate limiting, and access approval workflows, ensuring that only legitimate requests reach your finely tuned containerized services. For example, APIPark enables subscription approval features, ensuring callers must subscribe to an API and await administrator approval, preventing unauthorized calls even if they manage to get past initial network security.
- Traffic Management and Load Balancing: An optimized Docker image means your service can start fast and potentially consume fewer resources. APIPark can then efficiently manage incoming traffic, perform load balancing across multiple instances of your optimized containers (perhaps running in a Kubernetes cluster), and even route traffic based on various rules, ensuring high availability and performance for your containerized APIs.
- Monitoring and Analytics: While Docker provides basic container metrics, APIPark offers comprehensive API call logging and powerful data analysis specifically tailored for API traffic. This allows you to monitor the performance of your containerized APIs, identify trends, troubleshoot issues quickly, and gain insights into API usage patterns, ensuring the operational health of the services that your optimized Dockerfiles produce.
- Simplified Integration for AI Services: If your optimized Docker images contain AI inference services, APIPark offers quick integration of 100+ AI models and a unified API format for AI invocation. This ensures that even as you update or swap out the AI models within your Docker containers, the external API remains consistent, simplifying maintenance and reducing costs.
In essence, an optimized Dockerfile delivers a high-quality, efficient building block. APIPark then acts as the sophisticated management system that takes these blocks and constructs a resilient, secure, and performant API ecosystem. It ensures that the speed, leanness, and security you achieve at the Dockerfile level are extended and leveraged for the effective delivery and governance of your API services in a larger enterprise context.
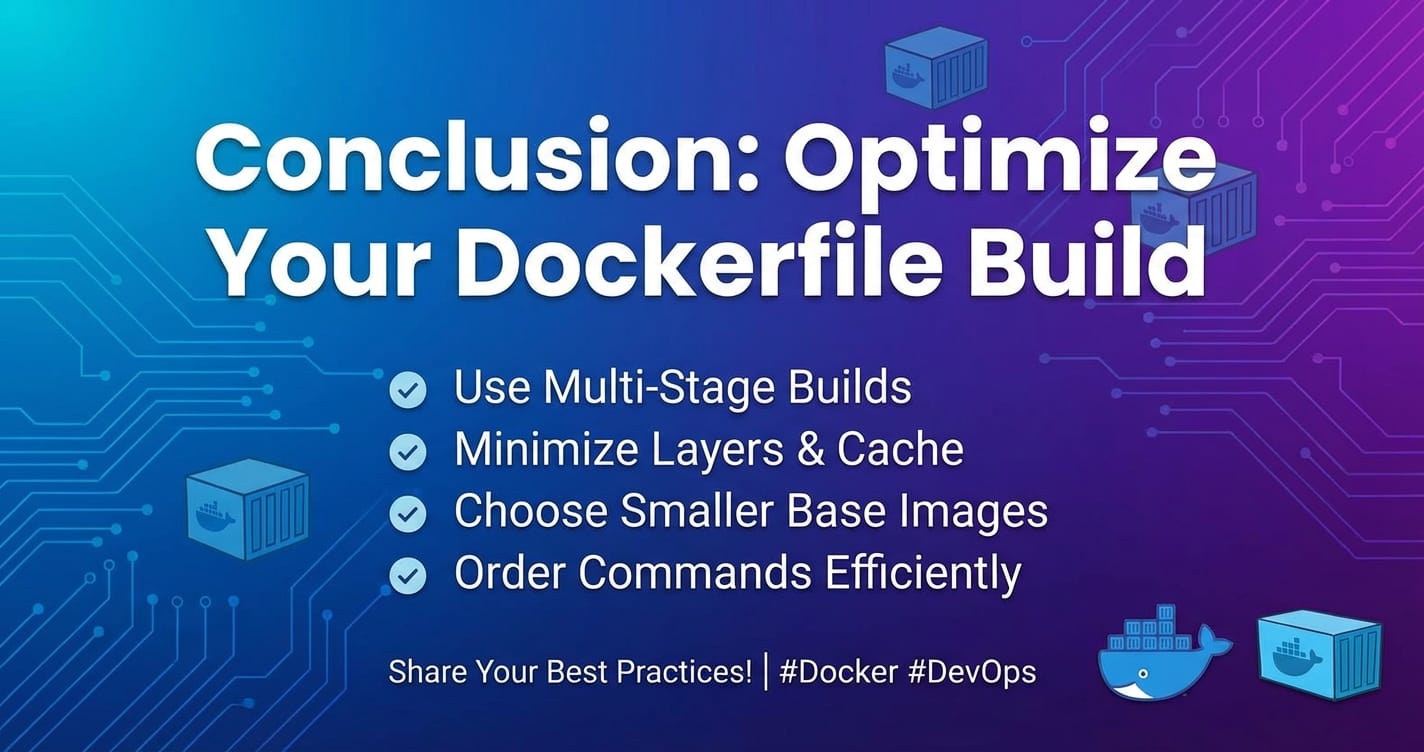
Conclusion: The Continuous Journey of Dockerfile Optimization
The journey of Dockerfile optimization is not a one-time task but a continuous process of refinement and adaptation. As applications evolve, dependencies change, and new Docker features emerge, revisiting and enhancing your Dockerfiles becomes an integral part of maintaining a healthy and efficient development pipeline. The principles and practices outlined in this comprehensive guide—from the foundational choices of base images and the transformative power of multi-stage builds, to meticulous layer caching, stringent security measures, and leveraging advanced build tools—provide a robust framework for building container images that are fast, lean, and secure.
By embracing these best practices, developers and operations teams can significantly reduce build times, leading to quicker feedback loops and more agile development cycles. They can shrink image sizes, resulting in lower storage costs, faster deployments, and more efficient resource utilization across development, staging, and production environments. Crucially, an optimized Dockerfile inherently leads to a more secure container, minimizing attack surfaces and reducing potential vulnerabilities.
Remember, every line in your Dockerfile has implications for performance, size, and security. Treat your Dockerfiles as critical components of your application, deserving the same level of care and attention as your source code. Integrate Dockerfile linting, image scanning, and build analysis tools into your CI/CD pipelines to automate compliance with best practices and catch issues early. And as your highly optimized containerized services mature, consider how platforms like APIPark can further enhance their value by providing comprehensive API management, security, and analytics, ensuring your meticulously crafted images translate into high-performance, well-governed API endpoints.
The effort invested in Dockerfile optimization pays dividends across the entire software lifecycle, fostering a culture of efficiency, security, and operational excellence. Embrace these practices, and unlock the full potential of containerization for your applications.
Frequently Asked Questions (FAQs)
Q1: What is the single most effective technique for reducing Docker image size?
A1: The single most effective technique for reducing Docker image size is multi-stage builds. This approach separates the build environment (which often requires many tools and dependencies like compilers, SDKs, and development libraries) from the runtime environment. By copying only the necessary compiled artifacts or production-ready files from an initial "builder" stage to a new, much leaner "runner" stage, you effectively discard all the temporary build files and unnecessary development tools, resulting in a dramatically smaller final image. This often leads to reductions of 10x or more compared to single-stage builds.
Q2: Why is the order of instructions in a Dockerfile important for build speed?
A2: The order of instructions is critical because of Docker's layer caching mechanism. Each instruction in a Dockerfile creates a new layer. Docker caches these layers. When building an image, Docker checks if it has already built an identical layer. If it finds a match, it reuses that cached layer, skipping the execution of the instruction. If an instruction (or its context, like copied files) changes, that layer and all subsequent layers must be rebuilt. Therefore, placing the most stable and least frequently changing instructions (e.g., base image, system dependencies) earlier in the Dockerfile allows Docker to leverage the cache for those layers more often, speeding up subsequent builds when only application code or application-specific dependencies change.
Q3: What is the difference between COPY and ADD in a Dockerfile, and which should I prefer?
A3: Both COPY and ADD transfer files from the build context to the container image. However, ADD has additional capabilities that COPY does not: it can handle URLs (downloading files from a remote location) and can automatically extract compressed archives (like tar, gzip, bzip2) if the source is a local tarball. You should generally prefer COPY because it is more transparent and predictable. Its behavior is straightforward: copy files/directories as-is. Using ADD for its URL download or archive extraction features can sometimes lead to unexpected behavior or hide details that are better handled explicitly with RUN wget or RUN tar -xf, which gives you more control over caching and cleanup in separate layers.
Q4: How does running a Docker container as a non-root user improve security?
A4: Running a Docker container as a non-root user significantly improves security by adhering to the principle of least privilege. By default, processes inside a Docker container run as the root user, which has full administrative privileges. If an attacker manages to exploit a vulnerability in your application or a library within the container, they would gain root access to that container. While containers provide isolation, a root compromise increases the potential for privilege escalation to the host system or other containers. By running your application as a dedicated, non-root user, you limit the damage an attacker can do, as their compromised process would have restricted permissions within the container filesystem and network, making it harder to interact with the host or other sensitive resources.
Q5: What is .dockerignore and why is it important for Dockerfile optimization?
A5: The .dockerignore file works similarly to a .gitignore file but for your Docker build context. When you execute a docker build command, Docker collects all the files and directories in the build context (typically the directory where your Dockerfile resides) and sends them to the Docker daemon. The .dockerignore file specifies patterns for files and directories that should be excluded from this build context. Its importance for optimization lies in several areas: 1. Reduced Build Context Size: Prevents unnecessary files (like .git folders, node_modules from local development, temporary files, etc.) from being sent to the Docker daemon, especially important in remote build scenarios. 2. Faster COPY Operations: A smaller build context means less data needs to be processed and transferred during COPY or ADD instructions, speeding up these operations. 3. Smaller Image Size: Prevents unwanted files from being accidentally copied into the final image, reducing bloat. 4. Improved Caching: If your application code changes but a large ignored directory (like node_modules) does not, the COPY instruction might still hit the cache more often if that directory was excluded rather than included and then ignored.
🚀You can securely and efficiently call the OpenAI API on APIPark in just two steps:
Step 1: Deploy the APIPark AI gateway in 5 minutes.
APIPark is developed based on Golang, offering strong product performance and low development and maintenance costs. You can deploy APIPark with a single command line.
curl -sSO https://download.apipark.com/install/quick-start.sh; bash quick-start.sh

In my experience, you can see the successful deployment interface within 5 to 10 minutes. Then, you can log in to APIPark using your account.

Step 2: Call the OpenAI API.