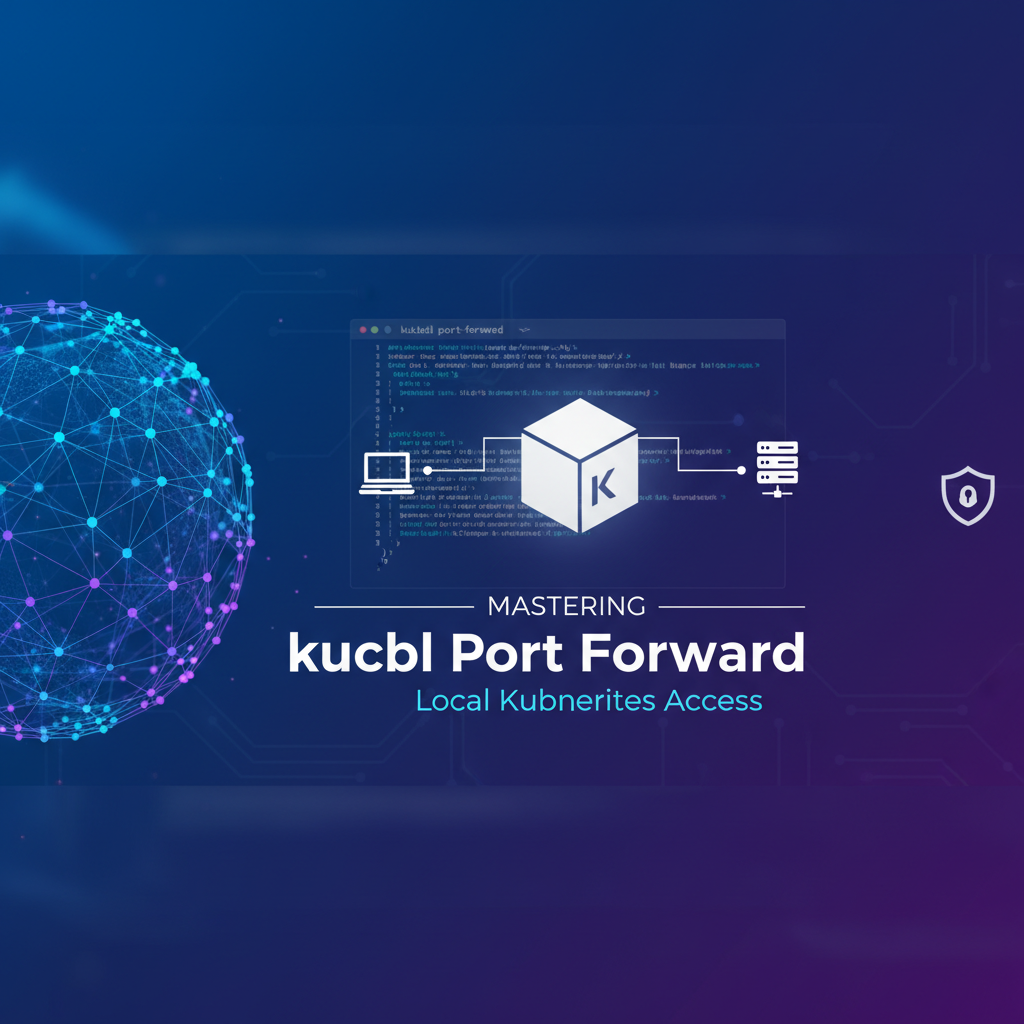
Mastering kubectl Port Forward: Local Kubernetes Access


In the sprawling and often intricate world of cloud-native development, Kubernetes stands as the undisputed champion of container orchestration. It offers unparalleled power to deploy, scale, and manage applications with remarkable resilience and efficiency. However, this power comes with a fundamental challenge for developers: how do you seamlessly connect your local development environment to services running within the isolated confines of a Kubernetes cluster? How do you debug a microservice, test a new UI against a live backend component, or simply inspect data in a database pod without exposing it publicly? This is where the deceptively simple yet profoundly powerful kubectl port-forward command emerges as an indispensable tool, serving as a direct, secure, and temporary conduit between your local machine and the heart of your Kubernetes applications.
This comprehensive guide will meticulously unravel the intricacies of kubectl port-forward. We will embark on a journey that begins with understanding the fundamental isolation principles of Kubernetes networking, progresses through the basic syntax and mechanics of the command, delves into advanced usage scenarios, and culminates in a discussion of best practices, security considerations, and its crucial role within a broader development workflow. By the end of this exploration, you will not only master kubectl port-forward but also appreciate its strategic importance in making Kubernetes a truly accessible and productive Open Platform for application development and troubleshooting. This command effectively acts as your personal, on-demand gateway to the internal apis and services residing within your cluster, empowering you to debug with precision and develop with agility.
The Intricate Landscape of Kubernetes Networking: Why Direct Access is a Developer's Lifeline
To truly appreciate the utility of kubectl port-forward, one must first grasp the inherent network isolation that Kubernetes meticulously enforces around its workloads. When you deploy an application into a Kubernetes cluster, individual application components—typically encapsulated within Pods—are assigned their own private IP addresses. These Pod IPs are unique within the cluster but are generally not routable from outside the cluster network. This isolation is a cornerstone of Kubernetes' security model, preventing direct, unsolicited external access to your application's internal workings.
Furthermore, Kubernetes employs a Service abstraction layer to provide stable networking for a set of Pods. A Service acts as a logical grouping of Pods and exposes a single, stable IP address and DNS name within the cluster. Other Pods within the same cluster can easily discover and communicate with this Service. However, much like Pod IPs, Service IPs are also internal to the cluster by default. While Kubernetes offers mechanisms like Ingress controllers, LoadBalancers, and NodePorts to expose Services externally, these are typically designed for production environments or broader testing, involving public IP addresses, DNS entries, and often more complex configuration. They are robust solutions for making your application accessible to end-users or other external systems, essentially acting as the public-facing gateway to your application's apis.
However, for a developer actively working on a feature, diagnosing an issue, or simply exploring the state of an application, these external exposure methods often introduce unnecessary overhead. Imagine you're developing a new frontend feature on your local machine that needs to interact with a backend microservice running inside Kubernetes. You don't want to deploy an Ingress or a LoadBalancer just for your local testing, as this would involve DNS updates, potentially public exposure, and a more cumbersome development loop. Similarly, if you need to attach a debugger to a specific application instance within a Pod or dump the contents of a database, you need a direct, unmediated channel. This is precisely the gap that kubectl port-forward fills. It bypasses the need for permanent external routing solutions, creating a temporary, secure tunnel that brings a specific port from a Pod or Service directly to your local machine. This direct line of sight into the cluster's internal network is not just convenient; it's often absolutely critical for efficient local development and debugging on what is designed to be an Open Platform for distributed applications.
Deep Dive into kubectl port-forward Fundamentals: Establishing Your Local Connection
At its core, kubectl port-forward establishes a secure, bidirectional TCP tunnel between a specified port on your local machine and a target port within a Pod or Service in your Kubernetes cluster. This tunnel allows applications running on your local machine to communicate directly with the target resource as if it were running natively on your local network, making it an invaluable tool for development and debugging.
The most fundamental syntax for kubectl port-forward is deceptively simple:
kubectl port-forward [RESOURCE_TYPE]/[RESOURCE_NAME] [LOCAL_PORT]:[REMOTE_PORT] -n [NAMESPACE]
Let's break down each component of this command:
[RESOURCE_TYPE]/[RESOURCE_NAME]: This specifies the Kubernetes resource you wish to target. Most commonly, this will be apod/POD_NAMEorservice/SERVICE_NAME. You can also targetdeployment/DEPLOYMENT_NAMEorreplicaset/REPLICASET_NAME, in which casekubectlwill automatically pick an available Pod managed by that resource.[LOCAL_PORT]: This is the port on your local machine that you want to use to access the remote service. When you send traffic to this local port,kubectlwill forward it through the tunnel.[REMOTE_PORT]: This is the port within the target Pod or Service that your application exposes. This is the port your local traffic will ultimately reach.-n [NAMESPACE]: (Optional but highly recommended) Specifies the Kubernetes namespace where your target resource resides. If omitted,kubectldefaults to the currently configured namespace in yourkubeconfig.
How the Tunnel Works: A Behind-the-Scenes Look
When you execute kubectl port-forward, several intricate steps occur to establish this critical connection:
- Client-Side Request: Your
kubectlclient sends a request to the Kubernetes API server, indicating its intention to establish a port-forwarding session to a specific Pod or Service. - API Server Proxying: The Kubernetes API server, acting as a central control plane, validates your request and user permissions (RBAC). If authorized, it then proxies the request to the
kubeletagent running on the Node where the target Pod is scheduled. - Kubelet's Role: The
kubeletis the agent that runs on each Node and is responsible for managing Pods. Upon receiving the API server's request,kubeletinitiates a connection to the specific container within the Pod that exposes the[REMOTE_PORT]. - TCP Stream Establishment: A secure, raw TCP stream is established between your local
kubectlclient, through the API server, to thekubelet, and finally into the target container. This stream effectively creates a "pipe" through which data can flow. - Traffic Forwarding: Any traffic you send to
[LOCAL_PORT]on your machine is encapsulated and sent through this TCP stream.kubectlon your local machine receives this traffic, sends it to the API server, which forwards it to thekubelet, which then injects it into the target container on[REMOTE_PORT]. Responses from the container follow the same path in reverse, appearing back on your[LOCAL_PORT].
This entire process is transparent to your local application, which simply sees a service running on localhost:[LOCAL_PORT]. This secure, on-demand tunnel is a powerful mechanism for bridging the gap between your local development environment and the isolated services within your cluster, allowing you to access their internal apis as if they were local resources.
Practical Examples: Connecting to Pods, Deployments, and Services
Let's illustrate the usage with common scenarios:
1. Port-forwarding to a Specific Pod:
This is the most direct method. You target a specific running Pod by its name. Assume you have a Pod named my-backend-app-789c6f789d-abcde that exposes a web server on port 8080. You want to access it locally on localhost:8000.
kubectl port-forward pod/my-backend-app-789c6f789d-abcde 8000:8080
Now, anything you send to localhost:8000 on your machine will be forwarded to port 8080 inside that specific my-backend-app Pod. This is incredibly useful for debugging a particular instance of an application or examining its logs.
2. Port-forwarding to a Deployment (or ReplicaSet):
Often, you don't care about a specific Pod instance; you just want to access any healthy Pod managed by a Deployment. kubectl makes this easy:
Assume you have a Deployment named my-frontend-deployment that manages Pods exposing a UI on port 3000. You want to access it locally on localhost:3000.
kubectl port-forward deployment/my-frontend-deployment 3000:3000
In this case, kubectl intelligently finds a running Pod associated with my-frontend-deployment and establishes the port-forward to it. If that Pod is terminated and a new one is created, you would typically need to restart the port-forward command as it's tied to a specific Pod.
3. Port-forwarding to a Service:
This is often the preferred method when you want stable access to an application, as it leverages Kubernetes' Service abstraction. When you port-forward to a Service, kubectl uses the Service's selector to find a healthy Pod and forwards traffic to it. If the targeted Pod dies, kubectl will automatically attempt to find another healthy Pod managed by that Service to maintain the connection.
Suppose you have a Service named my-database-service that exposes a database on port 5432. You want to connect your local database client to it on localhost:5432.
kubectl port-forward service/my-database-service 5432:5432
This command provides a more robust and resilient way to access your application's apis, as it abstracts away the underlying Pod churn. It ensures your local client always connects to a live instance of the database, making it ideal for continuous development and testing cycles.
By mastering these fundamental commands, you unlock a direct line of communication with your Kubernetes-hosted applications, transforming your cluster into a truly accessible development environment that acts as an Open Platform for innovation.
Why port-forward is Indispensable for Developers: Fueling Agility and Precision
The kubectl port-forward command transcends mere convenience; it is a foundational pillar for efficient and effective development and debugging within Kubernetes. Its unique capabilities address several critical pain points that developers face when working with distributed, containerized applications, ultimately fostering greater agility and precision in the development lifecycle.
Empowering Local Development Workflows
One of the most common and powerful use cases for kubectl port-forward is facilitating hybrid development environments. Imagine you are building a new feature for a web application. You've got your frontend running locally, benefiting from hot-reloading and instant feedback. However, this frontend needs to communicate with a backend microservice that lives within your Kubernetes cluster. Without port-forward, your options are limited: you could try to run the backend locally (which might have complex dependencies), or you could deploy every change to the frontend into Kubernetes for testing (a slow and frustrating loop).
kubectl port-forward elegantly solves this dilemma. By forwarding the backend service's port to your local machine, your locally running frontend can simply make API calls to localhost:[LOCAL_PORT]. This makes it appear as if the backend is running right beside your frontend, allowing you to iterate rapidly on your local code while leveraging the authenticity of a Kubernetes-deployed backend. This approach ensures that your local development precisely mirrors the cluster environment, minimizing discrepancies that often lead to "works on my machine, but not in prod" scenarios. This ability to integrate local components with remote ones seamlessly transforms Kubernetes into a more fluid and responsive Open Platform for rapid feature development.
Unlocking Advanced Debugging Capabilities
Debugging distributed applications is notoriously challenging. When an issue arises in a microservice running inside a Pod, you need more than just logs; you often need to attach a debugger, inspect runtime state, or interact directly with the application's internal apis. kubectl port-forward makes this possible:
- Remote Debugging: Many IDEs (like IntelliJ, VS Code, or Eclipse) support remote debugging protocols (e.g., Java's JDWP, Node.js's Inspector protocol). You can configure your application in Kubernetes to expose its debug port, then use
kubectl port-forwardto tunnel that port to your local machine. Your IDE's debugger can then connect tolocalhost:[DEBUG_PORT], allowing you to set breakpoints, step through code, and inspect variables in real-time, all within the context of the running cluster environment. This is a game-changer for diagnosing complex, environment-specific bugs that are difficult to reproduce locally. - Database Inspection: Need to check the contents of a database running in a Pod? Instead of struggling with database clients inside the Pod or exposing the database publicly,
port-forwardthe database port to your machine. You can then use your favorite local database management tool (DBeaver, DataGrip, pgAdmin, MySQL Workbench) to connect directly tolocalhost:[DB_PORT]and query the database as if it were local. This provides immediate, granular access to your data, which is invaluable for data validation, migration testing, or troubleshooting data-related application issues. - Accessing Internal UIs/APIs: Many applications or infrastructure components expose administrative web UIs or internal management
apis on specific ports. Examples include Prometheus exporters, monitoring dashboards, or custom application health endpoints.kubectl port-forwardallows you to temporarily access these internal interfaces from your web browser orcurlcommand line, providing invaluable insights into the application's operational state without requiring any persistent external exposure.
Expediting Troubleshooting and Diagnostics
When an application misbehaves, quick access to its internal state is paramount. kubectl port-forward accelerates the troubleshooting process by:
- Network Diagnostics: It helps confirm that a service is indeed listening on its expected port and responding to requests, separate from any Ingress or LoadBalancer issues. If your
port-forwardworks, but external access doesn't, you know the problem lies upstream of the Service. - Service Health Checks: You can
port-forwardto a Pod's health check endpoint (if exposed) to manually verify its readiness or liveness probes, bypassing the Kubelet's automated checks and gaining a direct view. - Rapid Iteration: Instead of redeploying an entire Service or Ingress to test a configuration change, you can often
port-forwardto a new Pod instance to quickly validate changes before rolling them out more broadly.
The Advantage of Ephemeral, On-Demand Access
Unlike Ingress or LoadBalancer services, which typically configure persistent routes and often require public IPs or DNS entries, kubectl port-forward creates a purely temporary and local tunnel. This "on-demand" nature is a huge benefit:
- Minimal Footprint: It doesn't modify your cluster configuration or create any persistent network resources. The tunnel exists only for the duration of the
kubectl port-forwardcommand. - Security by Design: By default, the forwarded port is only accessible from
localhoston your machine, drastically limiting the attack surface compared to publicly exposing a service. This inherent security makes it a safer choice for gaining direct access to sensitive internalapis during development. - Cost-Effective: No need to provision external IP addresses or pay for LoadBalancer resources simply for development or debugging.
In essence, kubectl port-forward transforms the Kubernetes cluster from a remote, abstract entity into an immediate, interactive extension of your local development environment. It empowers developers to work with the same agility and directness they would experience with purely local applications, making Kubernetes a truly productive Open Platform for modern software engineering. It acts as a specialized, developer-centric gateway that bypasses the complexities of a full-fledged external api gateway solution when all that's needed is a quick, direct, and temporary local connection.
Advanced kubectl port-forward Techniques and Scenarios: Beyond the Basics
While the fundamental kubectl port-forward command is powerful, its true versatility shines through in more advanced usage patterns and scenarios. Mastering these techniques allows developers to tailor their local access to specific needs, enhance their debugging capabilities, and streamline their workflow within the Kubernetes Open Platform.
Port-Forwarding to Multiple Services or Pods Concurrently
It's a common scenario in microservices architectures to need simultaneous access to several backend services. kubectl port-forward is designed to handle this. You can simply open multiple terminal windows or tabs and run a separate port-forward command in each, targeting different Pods or Services and assigning them distinct local ports.
For example, to access a database and a message queue concurrently:
# Terminal 1: Forward database (e.g., PostgreSQL)
kubectl port-forward service/my-postgres-db 5432:5432 -n dev

# Terminal 2: Forward message queue (e.g., RabbitMQ)
kubectl port-forward service/my-rabbitmq 5672:5672 -n dev
Your local application can then connect to localhost:5432 for the database and localhost:5672 for the message queue, effectively creating a local replica of your backend environment. This multi-tunneling capability is crucial for integration testing of microservices, allowing local components to interact with multiple remote apis.
Backgrounding port-forward Commands
Having a terminal window perpetually occupied by port-forward can be inconvenient. For longer-running sessions, you might want to run the command in the background.
- Using
&(Bash/Zsh): The simplest way to run a process in the background is by appending&to the command.bash kubectl port-forward service/my-app 8080:80 &This will immediately return control to your terminal. You can later bring it back to the foreground withfgor terminate it withkill %1(where1is the job number). - Using
nohup(No Hang Up): For more persistent backgrounding that survives terminal closures,nohupis useful.bash nohup kubectl port-forward service/my-app 8080:80 > /dev/null 2>&1 &This redirects all output to/dev/nulland detaches the process from the terminal. You'll need to find and kill the process by its PID (ps aux | grep 'kubectl port-forward') to stop it. - Scripting for Robustness: For more complex scenarios, you might write a small shell script to manage multiple port-forwards, perhaps using
trapto ensure cleanup on exit.
Specifying Local IP Addresses
By default, kubectl port-forward binds to localhost (127.0.0.1) on your local machine. This means only processes on your machine can access the forwarded port. In rare cases, you might want to bind to a different local IP address, for example, if you have multiple network interfaces or if you want other machines on your local network to access the forwarded port (though this significantly increases the security risk).
You can specify the local IP address using the --address flag:
# Bind to a specific local IP (e.g., an internal network adapter)
kubectl port-forward service/my-service 192.168.1.100:8080:80

# Bind to all network interfaces (DANGEROUS if not on a secure network)
kubectl port-forward service/my-service --address 0.0.0.0 8080:80
Caution: Binding to 0.0.0.0 makes the forwarded port accessible from any machine that can reach your local IP address. Only use this on trusted, isolated networks, and understand the significant security implications of potentially exposing internal cluster apis externally. This negates some of the inherent security benefits of port-forward.
Letting the System Choose a Local Port
Sometimes, you don't care about the specific local port, or you want to avoid port conflicts. You can let the system dynamically assign an available local port by omitting the LOCAL_PORT value:
kubectl port-forward service/my-service :80
kubectl will then print the chosen local port (e.g., Forwarding from 127.0.0.1:49152 -> 80). This is particularly useful in scripts or when you just need quick, temporary access without managing port numbers.
Targeting Specific Containers in Multi-Container Pods
If your Pod contains multiple containers, and you need to forward a port from a specific container (because different containers might expose the same port number), you can use the -c or --container flag:
kubectl port-forward pod/my-multi-container-pod 8080:80 -c my-specific-container
This ensures that your traffic is directed to the correct application instance within a complex Pod, making it a precise tool for debugging and interacting with specific apis within a multi-component Pod.
Troubleshooting Failed Port Forwards
When port-forward fails, it's typically due to one of a few common issues:
- Resource Not Found: Double-check the spelling of the Pod, Service, or Deployment name, and ensure you're in the correct namespace (
-n). - Port Conflict: The
LOCAL_PORTyou've chosen might already be in use on your machine. You can uselsof -i :LOCAL_PORT(Linux/macOS) ornetstat -ano | findstr :LOCAL_PORT(Windows) to identify the conflicting process. Choose a differentLOCAL_PORT. - Remote Port Not Listening: The application inside the Pod might not be running or not listening on the
REMOTE_PORT. Usekubectl logsandkubectl execto debug the application within the Pod. - RBAC Permissions: Your Kubernetes user might not have the necessary permissions to
port-forward. You needget,list, andwatchpermissions on Pods, andportforwardpermissions on thekubeletendpoint. Consult your cluster administrator. - Network Policies: While
port-forwardbypasses typical Kubernetes Service network policies (as it's a direct Kubelet connection), very restrictive network configurations or host firewalls on the Node could potentially interfere, though this is less common.
Mastering these advanced techniques elevates kubectl port-forward from a basic utility to a sophisticated debugging and development gateway. It provides a powerful set of options for connecting your local environment to the intricate apis and services on your Kubernetes Open Platform, allowing for highly targeted and efficient interaction with your deployed applications.
Comparison with Other Access Methods: Choosing the Right Tool
Kubernetes offers a rich array of mechanisms for accessing services, each designed for specific purposes and catering to different levels of exposure, persistence, and security. Understanding how kubectl port-forward fits into this ecosystem, and when to choose it over alternatives, is crucial for effective Kubernetes operations and development. While port-forward is an excellent temporary, local gateway, it's not a one-size-fits-all solution.
Let's compare kubectl port-forward with the most common Kubernetes service exposure methods:
| Feature/Method | kubectl port-forward |
NodePort Service |
LoadBalancer Service |
Ingress Controller |
|---|---|---|---|---|
| Purpose | Local development, debugging, troubleshooting, ephemeral access to internal apis. |
Expose a Service on a static port on each Node's IP address. | Expose a Service externally via a cloud provider's load balancer. | HTTP/HTTPS routing, virtual hosts, SSL termination for multiple Services. |
| Access Scope | Local machine only (by default), direct to a Pod/Service. | Accessible from anywhere that can reach the Node's IP. | Publicly accessible via a dedicated external IP. | Publicly accessible via a dedicated external IP and domain. |
| Persistence | Temporary (lasts as long as the command runs). | Permanent (as long as the Service exists). | Permanent (as long as the Service exists). | Permanent (as long as the Ingress resource exists). |
| Protocol Support | TCP (raw stream). | TCP, UDP. | TCP, UDP. | HTTP/HTTPS primarily (Layer 7). |
| Configuration | Simple command-line execution. | Service manifest (type: NodePort). |
Service manifest (type: LoadBalancer), cloud provider integration. |
Ingress resource manifest, Ingress controller deployment. |
| Security | High (localhost-only by default, RBAC required). | Low (exposes service on every Node, potential for open ports). | Moderate (external IP, often behind cloud firewalls, but publicly exposed). | High (can enforce TLS, authentication, WAF, etc., depending on controller). |
| Complexity | Very low. | Low to moderate. | Moderate (depends on cloud provider integration). | Moderate to high (requires controller, rules, TLS management). |
| Cost | Free (no cluster resources consumed for exposure). | Free (no direct cost, but uses Node resources). | Varies by cloud provider (costs for external IP/load balancer). | Varies (Ingress controller resource costs, potentially external IP/LB costs). |
| Use Case Highlight | Debugging specific apis, connecting local tools, quick tests. |
Simple non-HTTP exposure for specific applications, internal tools. | Exposing public-facing applications requiring a dedicated IP. | Managing external access to multiple web services, microservices api gateway. |
kubectl port-forward vs. NodePort
A NodePort Service exposes a specific port on every node in your cluster. Any traffic sent to <NodeIP>:<NodePort> is routed to the Service. * When to use NodePort: If you need to expose a service to other machines on your local network (e.g., for internal testing) and you don't mind the service being accessible from any node IP. It's a stepping stone to more robust external exposure. * When to use port-forward: For strictly local, developer-specific access. It’s more secure as it doesn’t open ports on all cluster nodes and is simpler for quick, ephemeral access.
kubectl port-forward vs. LoadBalancer
A LoadBalancer Service provisions a cloud provider's load balancer, assigning a dedicated external IP address to your service. * When to use LoadBalancer: For production-grade public exposure of TCP/UDP services that require high availability, scalability, and a stable, publicly accessible IP. It truly acts as a robust external gateway. * When to use port-forward: For local development and debugging before services are ready for public consumption or when public exposure is simply not required. It's a cost-effective alternative for internal access.
kubectl port-forward vs. Ingress
An Ingress resource manages external access to HTTP/HTTPS services within a cluster, typically providing advanced routing rules, SSL termination, and virtual hosting capabilities. It acts as an intelligent HTTP/HTTPS api gateway. * When to use Ingress: For complex web applications, microservices with many endpoints, or when you need sophisticated HTTP routing, path-based routing, host-based routing, or centralized SSL management. It’s the go-to for production-grade API exposure and for transforming internal services into a coherent Open Platform api. * When to use port-forward: When you're developing and testing a single service or debugging a specific api locally without the overhead of configuring Ingress rules. It's for direct, non-HTTP specific, internal access.
kubectl port-forward vs. kubectl exec
kubectl exec allows you to execute commands directly inside a container within a Pod (e.g., kubectl exec -it my-pod -- bash). * When to use kubectl exec: For shell access, running one-off commands, inspecting file systems, or starting processes inside the container. It's for direct interaction with the container's environment. * When to use port-forward: For network access to a service running inside a container. You can't directly curl a port from your local machine to a container via exec; you need port-forward for that network bridge.
In summary, kubectl port-forward is a surgical tool for precise, temporary, and local network access, primarily for developers and troubleshooters. It's an internal gateway for testing internal apis, offering unparalleled agility. The other methods are designed for more permanent, external, and often production-grade exposure, transforming individual services into components of a larger, publicly accessible Open Platform. Choosing the right tool depends entirely on your goal: immediate, local interaction versus persistent, external availability.
APIPark is a high-performance AI gateway that allows you to securely access the most comprehensive LLM APIs globally on the APIPark platform, including OpenAI, Anthropic, Mistral, Llama2, Google Gemini, and more.Try APIPark now! 👇👇👇
Best Practices and Troubleshooting: Navigating Common Pitfalls
While kubectl port-forward is a remarkably reliable tool, adhering to best practices and understanding common troubleshooting steps can save considerable time and frustration. Mastering these aspects ensures smooth operations and efficient debugging within your Kubernetes Open Platform.
Best Practices for Effective port-forward Usage
- Always Specify a Target (
-nNamespace): Whilekubectldefaults to your current context's namespace, explicitly stating-n NAMESPACE_NAMEfor the target Pod or Service is a good habit. It reduces ambiguity, prevents accidental connections to resources in the wrong namespace, and makes your commands more explicit and reproducible. - Choose Unique and Available Local Ports: Ensure the
LOCAL_PORTyou select is not already in use by another application on your machine. Using common ports like80,443, or8080might lead to conflicts if you have local web servers running. If you are unsure, let the system pick a free port by simply using:REMOTE_PORT, or use a less common range for your local development (e.g.,9000-9999,10000+). Tools likelsof -i :PORT(macOS/Linux) ornetstat -ano | findstr :PORT(Windows) can help identify occupied ports. - Monitor the Lifecycle of the Forwarded Pod: When you
port-forwardto a specific Pod, the connection is tied to that Pod's lifecycle. If the Pod is deleted, restarted, or rescheduled, yourport-forwardsession will terminate. For more robust connections that can tolerate Pod churn, considerport-forwarding to aservice/SERVICE_NAME. This way,kubectlattempts to re-establish the connection to a healthy Pod behind the Service. - Use Descriptive Resource Names: When targeting resources by name, ensure they are accurate. Typos are a common cause of "resource not found" errors. Leverage tab completion if your shell supports it (e.g., with
kubectl completion). - Utilize Backgrounding Strategically: For quick, one-off checks, running
port-forwardin the foreground is fine. For longer debugging or development sessions involving multiple forwarded ports, backgrounding commands (e.g., using&ornohup) can significantly improve your terminal workflow. Remember to keep track of these background processes and terminate them when no longer needed to free up local ports. - Understand Security Implications (Especially
--address 0.0.0.0): The default behavior ofport-forwardbinding to127.0.0.1(localhost) is inherently secure. Only processes on your machine can connect. If you use--address 0.0.0.0to make the port accessible from other machines on your local network, be acutely aware of the security risks. This opens a directgatewayto your internal clusterapis from any machine that can reach your IP, potentially bypassing other network controls. Only use this in highly trusted, isolated network environments. - Combine with Other
kubectlCommands:port-forwardis most powerful when used in conjunction with otherkubectlcommands. For example:kubectl get pods -l app=my-appto find the correct Pod name.kubectl logs POD_NAMEto see application output whileport-forwarding.kubectl exec -it POD_NAME -- /bin/bashto troubleshoot inside the container if the forwarded port isn't responding.
Common Troubleshooting Scenarios and Solutions
- "error: unable to listen on any of the requested ports: [ports 8080]"
- Cause: The
LOCAL_PORT(e.g., 8080) is already in use on your local machine. - Solution: Choose a different
LOCAL_PORT. Uselsof -i :8080ornetstat -ano | findstr :8080to find the conflicting process and kill it, or simply pick an unused port.
- Cause: The
- "error: error forwarding port 8080 to pod, uid : failed to execute portforward in backend: 'No such process'"
- Cause: The
REMOTE_PORT(e.g., 8080) specified is not actively being listened on by any process inside the target container/Pod. The application might not be running, or it's listening on a different port. - Solution:
- Verify the application's configuration: Check the
Dockerfileor application manifest for the correct exposed port. - Check Pod logs:
kubectl logs POD_NAMEto see if the application started successfully and is listening. - Exec into the Pod:
kubectl exec -it POD_NAME -- netstat -tulnorss -tulnto see what ports are open inside the container.
- Verify the application's configuration: Check the
- Cause: The
- "error: poddoes not exist" or "error: servicedoes not exist"
- Cause: The specified Pod or Service name is incorrect, or it resides in a different namespace.
- Solution:
- Double-check spelling.
- Verify the namespace with
kubectl get pods -n YOUR_NAMESPACEorkubectl get services -n YOUR_NAMESPACE. - Ensure you have access to that namespace.
- "error: You must be logged in to the server (Unauthorized)" or "Error from server (Forbidden)"
- Cause: Your current
kubeconfigcontext is not valid, or your Kubernetes user (via RBAC) does not have the necessary permissions to performport-forwardoperations. - Solution:
- Check your
kubeconfigcontext:kubectl config current-context. - Contact your cluster administrator to ensure your user account has
get,list,watchpermissions on Pods andportforwardpermissions on the Node resource.
- Check your
- Cause: Your current
- Connection is Established but No Data Flows / Application Times Out Locally
- Cause: This can be tricky. It might indicate a firewall on your local machine blocking outgoing connections to
localhost, or internal issues within the forwarded application. - Solution:
- Temporarily disable local firewalls to test.
- Check
kubectloutput for any errors after the initial "Forwarding..." message. - Verify network connectivity inside the Pod using
kubectl execandcurltolocalhost:REMOTE_PORTfrom within the Pod to confirm the application itself is responsive.
- Cause: This can be tricky. It might indicate a firewall on your local machine blocking outgoing connections to
By following these best practices and systematically troubleshooting common issues, you can harness the full power of kubectl port-forward as a reliable and efficient gateway for local access within your Kubernetes Open Platform, minimizing downtime and maximizing developer productivity.
Integrating kubectl port-forward into Your Workflow and the Broader Open Platform Vision
kubectl port-forward is an indispensable tool for the individual developer, providing immediate, secure, and ephemeral access to internal services. It’s the virtual wrench and multimeter in a developer's toolkit for direct interaction with components within a Kubernetes cluster. It embodies the agility and hands-on control that an Open Platform like Kubernetes strives to offer its users, empowering them to quickly test, debug, and iterate on their applications.
However, as applications mature and move from individual development environments to shared staging or production, the requirements for api access and management evolve significantly. While kubectl port-forward is perfect for establishing a personal gateway to an application's internal api for debugging, it is not designed for production-grade API exposure, security, or comprehensive management across an enterprise. It lacks features crucial for operationalizing APIs on a larger scale: robust authentication and authorization mechanisms for external consumers, rate limiting to prevent abuse, traffic routing across multiple versions or geographically distributed services, advanced monitoring, analytics, and a developer portal for discovery and consumption.
This is precisely where dedicated api gateway and management platforms become essential, bridging the gap between internal services and their external consumption. Imagine a scenario where a team is developing various microservices on Kubernetes, and these services expose internal apis. Developers use kubectl port-forward to access and debug these apis locally. But when these microservices are ready to be consumed by other internal teams, partner applications, or external clients, they need a more formal, secure, and manageable exposure mechanism.
This is where a product like ApiPark comes into play, offering a robust solution that complements the granular control provided by kubectl port-forward. While port-forward allows you to open a direct, temporary pipe to a single service's api for debugging, APIPark provides an enterprise-grade api gateway and management platform designed to unify, secure, and expose hundreds of AI models and REST services. It acts as the central traffic control and policy enforcement point for all your organization's APIs, whether they are running on Kubernetes, bare metal, or in a serverless environment.
APIPark transforms raw internal services, including those debugged and developed with kubectl port-forward, into discoverable, manageable, and secure APIs for a broader audience. It centralizes functionalities such as:
- Unified API Format and Integration: Standardizing how external consumers interact with diverse internal
apis, including complex AI models. This means developers don't have to worry about the underlying Kubernetes service details; they interact with a consistent API defined by APIPark. - Prompt Encapsulation into REST API: Allowing complex AI interactions (often debugged locally via
port-forwardto specific AI modelapis) to be exposed as simple REST endpoints, democratizing AI consumption across the organization. - End-to-End API Lifecycle Management: Managing APIs from design to deprecation, ensuring consistency and governance, which goes far beyond the ad-hoc nature of
port-forwardfor local testing. - Security and Access Control: Implementing robust authentication, authorization, and subscription approval workflows, making sure that access to your
apis, which might have been locally debugged usingport-forward, is now rigorously controlled and secure when exposed to the world or other internal systems. This is a criticalgatewayfor protecting sensitive data and business logic. - Performance and Scalability: Capable of handling massive traffic loads, ensuring that your
Open Platformcan scale with demand, a characteristic not provided by the individual, localport-forwardcommand. - Monitoring and Analytics: Providing deep insights into API usage, performance, and potential issues, which is essential for operational excellence and business decision-making, offering a holistic view of your
apilandscape thatport-forwardcannot.
In essence, kubectl port-forward is your personal, on-demand gateway for local development and debugging within Kubernetes. It's a tool for direct engagement with the internal apis of your microservices. ApiPark, on the other hand, is the enterprise-grade api gateway that transforms those individual, internal services into a cohesive, secure, and highly manageable Open Platform for your entire organization and its external partners. Both are crucial, but they serve different, complementary roles in the journey from code to production-ready, widely consumed APIs. They are two sides of the same coin: one for the developer's granular, immediate need, and the other for the organization's strategic, scalable API management vision on a truly Open Platform.
Security and Performance Considerations for kubectl port-forward
While kubectl port-forward is an incredibly useful utility, it's vital to use it with an understanding of its security implications and performance characteristics. Misusing it can inadvertently expose sensitive data or lead to unexpected performance bottlenecks.
Security Implications
The security model of kubectl port-forward is largely robust by default, but there are crucial considerations:
- RBAC Permissions are Paramount: To execute
kubectl port-forward, your Kubernetes user (identified by yourkubeconfigcontext) must have specific Role-Based Access Control (RBAC) permissions.- You need
get,list, andwatchpermissions on thepodsresource. - Crucially, you need the
portforwardverb on thepods/portforwardsubresource (orpods/proxyin older versions). This permission is often granted to developers through roles likeeditoradmin. - Risk: If a malicious actor gains access to your
kubeconfigand you have these permissions, they couldport-forwardto any Pod you can access. This means they could tunnel to databases, internal APIs, or administrative interfaces, potentially gaining access to sensitive data or control planes. - Mitigation: Follow the principle of least privilege. Grant only the necessary RBAC permissions. Regularly audit user permissions. Protect your
kubeconfigfile diligently.
- You need
--address 0.0.0.0is a Security Risk: As previously discussed, using--address 0.0.0.0binds the forwarded port to all network interfaces on your local machine, making it accessible from any other device on your local network.- Risk: If your local machine is on an untrusted network (e.g., public Wi-Fi) or if other devices on your trusted network are compromised, they could connect to your forwarded port and access the internal Kubernetes service. This is effectively creating a local, uncontrolled
gatewaythat bypasses cluster-level security. - Mitigation: Avoid
--address 0.0.0.0unless absolutely necessary on a highly controlled and isolated network segment. Prefer the default127.0.0.1binding. If external access is truly needed, consider using a secure VPN to your local machine or setting up a more robust, controlled Ingress/LoadBalancer within Kubernetes itself, backed by proper authentication and network policies.
- Risk: If your local machine is on an untrusted network (e.g., public Wi-Fi) or if other devices on your trusted network are compromised, they could connect to your forwarded port and access the internal Kubernetes service. This is effectively creating a local, uncontrolled
- No Inherent Application-Level Authentication:
kubectl port-forwardmerely creates a network tunnel. It does not provide any application-level authentication or authorization. If the target service'sapirequires no authentication (e.g., a simple HTTP server or a database without login), then anyone who can establish theport-forwardcan access it.- Risk: Direct access to an unauthenticated internal service.
- Mitigation: Ensure all services within your cluster (even internal ones) implement proper application-level authentication and authorization where sensitive data or operations are involved.
- Limited Scope of Network Policies: Kubernetes Network Policies operate at the Pod level, controlling traffic between Pods and to/from the Pod from outside the cluster. A
port-forwardconnection essentially comes from the Kubelet on the Node to the Pod. Most network policies are designed to regulate Pod-to-Pod or external-to-Pod traffic, not direct Kubelet-to-Pod (via the API server) connections thatport-forwardleverages.- Risk:
port-forwardmight bypass certain network policy restrictions designed to isolate services. - Mitigation: Rely on RBAC for controlling who can
port-forward. Consider host-level firewalls on the Kubernetes Nodes if extreme restrictions are required, though this can complicate cluster management.
- Risk:
Performance Characteristics
kubectl port-forward is generally efficient for its intended use cases, but it's important to understand its performance characteristics:
- TCP Proxying Overhead:
port-forwardworks by proxying a raw TCP stream. This introduces a small amount of overhead due to the multiple hops (your machine ->kubectl-> API server ->kubelet-> Pod). For development and debugging, this overhead is usually negligible.- Impact: You might observe slightly higher latency compared to directly connecting to a service on the same machine.
- Consideration: It is not designed for high-throughput, low-latency production traffic. Never use
port-forwardas a permanent solution for exposing services in production.
- Bandwidth Limitations: The actual bandwidth of a
port-forwardconnection is limited by several factors:- Your local network connection.
- The network bandwidth between your machine and the Kubernetes API server.
- The network bandwidth between the API server and the Kubernetes Node running the Pod.
- The Node's internal network performance.
- Impact: While sufficient for development, large data transfers or extremely high request rates might be slower than direct connections within the cluster or through optimized external load balancers.
- Single-Point of Failure (for the tunnel): The
kubectl port-forwardcommand itself is a single process running on your local machine. Ifkubectlcrashes, your machine loses network connectivity, or the target Pod/Node fails, theport-forwardtunnel will break.- Impact: Your local application will lose connectivity.
- Consideration: This reinforces its nature as a temporary development
gatewayrather than a robust, highly available production solution.
In conclusion, kubectl port-forward is a powerful and secure tool for its specific purpose: providing controlled, temporary local access to internal Kubernetes services for development and debugging. However, it requires careful consideration of RBAC, network binding, and the inherent lack of application-level security features. Its performance is adequate for development but makes it entirely unsuitable for production traffic, where dedicated api gateway solutions like ApiPark or Kubernetes' own Ingress/LoadBalancer mechanisms are indispensable for managing high-volume, secure, and scalable API exposure on an Open Platform.
Future Trends and the Enduring Relevance of Local Access in Kubernetes
The cloud-native landscape is in a constant state of evolution, with new tools and paradigms emerging regularly to address the complexities of distributed systems. While advanced solutions are developed, the fundamental need for developers to establish local connections to remote services remains an enduring challenge. This makes the underlying principles behind kubectl port-forward, and the command itself, perennially relevant.
The core problem kubectl port-forward solves—bridging the gap between a local development environment and a remote Kubernetes cluster—is so fundamental that various projects have emerged to offer more sophisticated or integrated solutions, often building upon port-forward or similar mechanisms. These tools aim to create an even more seamless "inner loop" development experience for Kubernetes.
Emerging Solutions and Their Relationship to port-forward
- Telepresence (by Ambassador Labs): Telepresence allows you to run a single service locally while it transparently communicates with other services in a remote Kubernetes cluster. It effectively intercepts traffic for a chosen service within the cluster and reroutes it to your local machine, or it proxies your local calls to services in the cluster. Telepresence often utilizes
port-forward-like mechanisms under the hood for its connectivity, abstracting away the manualkubectlcommands. It provides a more integrated development experience than rawport-forwardfor microservices development. - Skaffold (by Google): Skaffold streamlines the inner development loop by automating the build, push, and deploy steps for Kubernetes applications. It can also integrate with
port-forwardto automatically open tunnels for services once they are deployed, providing a hands-free local access experience. Skaffold is more about automating the entire iteration cycle, withport-forwardbeing one of its integrated capabilities. - DevSpace (by DevSpace Technologies): DevSpace aims to be a comprehensive development platform for Kubernetes. It offers features like hot reloading, automatic
port-forwarding, and synchronization of local files with remote containers. It provides a higher-level abstraction and opinionated workflow for developing directly on Kubernetes, encompassing and extending the functionality ofport-forward. - Tilt (by Windmill Engineering): Tilt focuses on developing multiple services simultaneously, providing a live-reloading dashboard that shows the state of all services and their logs. Like Skaffold and DevSpace, it can manage
port-forwardsessions as part of its continuous development cycle, ensuring that local services can always connect to remote dependencies.
Why kubectl port-forward Remains a Foundational Primitive
Despite the emergence of these powerful, higher-level tools, kubectl port-forward is unlikely to become obsolete. Here's why:
- Simplicity and Directness:
port-forwardis a single, focused command. It doesn't require complex configuration files, daemon processes, or a steep learning curve. For a quick check, a one-off debug session, or when you need absolute control over the connection,port-forwardis unmatched in its directness. - Zero Overhead: Unlike more integrated tools that might run local agents, intercept network traffic, or require specific configurations in your cluster,
port-forwardis lightweight. It runs only when you invoke it and leaves no persistent footprint. - Universal Availability:
kubectlis the standard command-line interface for Kubernetes. As long as you havekubectlinstalled and configured to connect to your cluster,port-forwardis available. You don't need to install additional tools or configure specialized components. - Debugging the Debuggers: Even when using higher-level tools, if you encounter networking issues, understanding and being able to manually use
kubectl port-forwardis often the first step in diagnosing problems with the more sophisticated tools themselves. It serves as a reliable baseline for connectivity. - Granular Control: Sometimes you need to forward a port from a very specific Pod, or use a particular local IP.
port-forwardoffers that granular control that higher-level abstractions might obscure.
The trend towards a more seamless developer experience on Kubernetes, transforming it into an even more productive Open Platform, will continue to drive innovation in tools that automate and enhance local access. These tools will increasingly abstract away the underlying complexities. However, kubectl port-forward will endure as the fundamental primitive, the essential "raw" command for local network bridging. It will continue to be taught to every aspiring Kubernetes developer as the bedrock skill for direct interaction, serving as a personal, on-demand gateway to the inner workings of their applications. Its straightforward nature, reliability, and ubiquity ensure its lasting relevance in the Kubernetes ecosystem, complementing, rather than being replaced by, more elaborate development environment solutions that also leverage core api management principles, as seen with solutions like ApiPark for managing external API consumption.
Conclusion: Mastering Your Local Kubernetes Gateway
The journey through the capabilities of kubectl port-forward reveals it to be far more than just another command-line utility. It is a vital gateway for any developer or operator navigating the complexities of Kubernetes, an Open Platform that thrives on robust interaction. From its fundamental role in bridging local development environments to remote cluster services, to its advanced applications in debugging intricate microservices architectures, port-forward empowers users with direct, on-demand access to the internal apis and components of their applications.
We've explored how port-forward elegantly circumvents the inherent network isolation of Kubernetes, providing a secure, temporary TCP tunnel that makes remote services feel local. We delved into its essential role in facilitating rapid local development, enabling precise remote debugging, and accelerating troubleshooting efforts by allowing direct inspection of internal service states. The comparison with other Kubernetes access methods underscored port-forward's unique niche: it's not a replacement for persistent, production-grade exposure mechanisms like Ingress or LoadBalancers, nor for comprehensive api gateway solutions such as ApiPark that manage vast fleets of APIs; rather, it is their indispensable counterpart for the individual's development and diagnostic needs.
Adhering to best practices—such as specifying namespaces, managing local ports, and understanding security implications—ensures that port-forward remains a reliable and secure tool. While the Kubernetes ecosystem continues to evolve with higher-level developer tools that automate many aspects of local access, kubectl port-forward maintains its enduring relevance as a fundamental, low-overhead, and universally available primitive. Its directness and simplicity will always make it the go-to command for quick checks and deep dives into cluster internals.
In mastering kubectl port-forward, you gain not just a command, but a profound capability to interact intimately with your containerized applications. You transform Kubernetes from a distant, abstract entity into a tangible, responsive development Open Platform, unlocking unparalleled agility and precision in your cloud-native journey. It is, without a doubt, an essential skill for anyone serious about building, deploying, and maintaining applications in the Kubernetes era.
Frequently Asked Questions (FAQs)
1. What is the primary purpose of kubectl port-forward? The primary purpose of kubectl port-forward is to create a secure, temporary, bidirectional TCP tunnel between a port on your local machine and a specific port on a Pod or Service within your Kubernetes cluster. This allows you to access internal cluster services and their apis from your local development environment as if they were running locally, facilitating debugging, local testing, and troubleshooting without exposing services publicly. It acts as a local gateway for development purposes.
2. Is kubectl port-forward secure enough for production traffic? No, kubectl port-forward is explicitly not designed for production traffic. It's a temporary, single-connection tunnel with overhead that makes it unsuitable for high-volume, low-latency, and highly available production workloads. For production exposure, you should use Kubernetes Service types like LoadBalancer or NodePort, or an Ingress controller, which are designed for robust, scalable, and secure external access. For comprehensive api management and robust external gateway functionality, platforms like ApiPark are recommended.
3. What's the difference between kubectl port-forward to a Pod versus a Service? When you port-forward to a Pod, the connection is tied to that specific Pod instance. If the Pod is terminated, restarted, or rescheduled, your port-forward session will break. When you port-forward to a Service, kubectl uses the Service's selector to find a healthy Pod and establishes the tunnel to it. If that initial Pod dies, kubectl will attempt to re-establish the connection to another healthy Pod managed by the same Service, providing a more stable connection that can tolerate Pod churn. For development, forwarding to a Service is generally preferred for this stability.
4. How can I run kubectl port-forward in the background? You can run kubectl port-forward in the background using several methods. The simplest in Linux/macOS is to append an ampersand (&) to the command (e.g., kubectl port-forward service/my-app 8080:80 &). For more robust backgrounding that survives terminal closure, nohup can be used (e.g., nohup kubectl port-forward service/my-app 8080:80 > /dev/null 2>&1 &). Remember to note the process ID (PID) to terminate it later if necessary.
5. I'm getting an "unable to listen on any of the requested ports" error. What should I do? This error typically means the LOCAL_PORT you specified in your kubectl port-forward command is already in use by another application on your local machine. To resolve this, you can: * Choose a different, unused LOCAL_PORT. * Let the system dynamically assign an available local port by omitting the LOCAL_PORT (e.g., kubectl port-forward service/my-service :80). * Identify and terminate the process currently using that port using utilities like lsof -i :LOCAL_PORT (Linux/macOS) or netstat -ano | findstr :LOCAL_PORT (Windows).
🚀You can securely and efficiently call the OpenAI API on APIPark in just two steps:
Step 1: Deploy the APIPark AI gateway in 5 minutes.
APIPark is developed based on Golang, offering strong product performance and low development and maintenance costs. You can deploy APIPark with a single command line.
curl -sSO https://download.apipark.com/install/quick-start.sh; bash quick-start.sh

In my experience, you can see the successful deployment interface within 5 to 10 minutes. Then, you can log in to APIPark using your account.

Step 2: Call the OpenAI API.