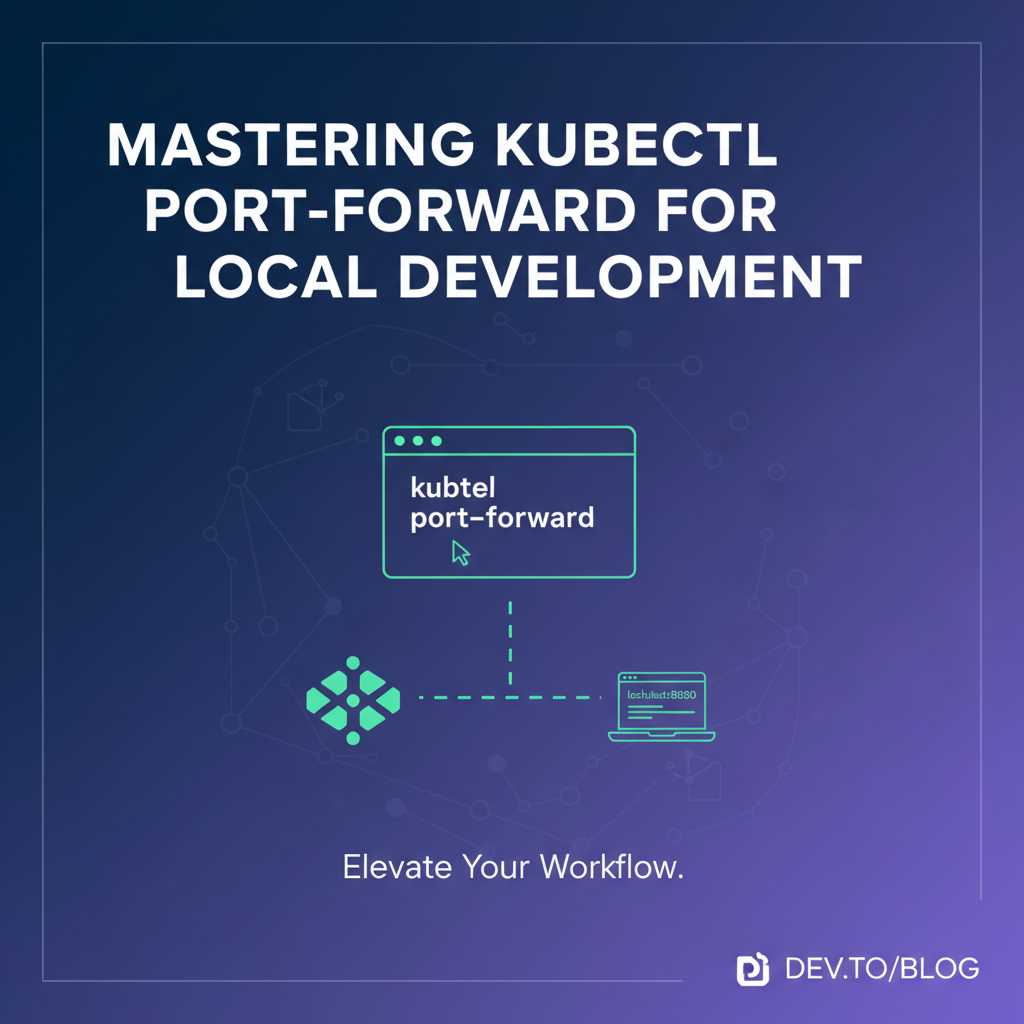
Mastering kubectl port-forward for Local Development


In the expansive and often complex landscape of cloud-native development, Kubernetes has emerged as the de facto orchestrator for containerized applications. While it offers unparalleled power in deploying, scaling, and managing workloads, the journey from local development to production-ready deployment often involves navigating intricate network configurations and service discovery mechanisms. One of the most unassuming yet profoundly impactful tools in a Kubernetes developer's arsenal is kubectl port-forward. This command acts as a crucial bridge, allowing developers to connect directly to services running inside a Kubernetes cluster from their local machine, effectively bringing remote services within arm's reach for testing, debugging, and iterative development.
The ability to seamlessly interact with a database, a microservice, or an API endpoint residing within a Kubernetes Pod, without the need for external exposure through LoadBalancers or Ingress controllers, streamlines the development process immeasurably. It bypasses the overhead and potential security implications of exposing internal services to the public internet, offering a secure, direct tunnel for local debugging sessions. This article embarks on an extensive exploration of kubectl port-forward, delving into its mechanics, practical applications, advanced techniques, and critical considerations. Our goal is to equip developers with a comprehensive understanding, transforming them into masters of this indispensable tool, ultimately fostering a more efficient and less frustrating Kubernetes development workflow. We will dissect its fundamental operations, explore its myriad use cases, and discuss how it fits into a broader cloud-native development strategy, especially in contexts where API gateway solutions manage production traffic.
The Foundation: Understanding kubectl port-forward
At its core, kubectl port-forward is a simple yet powerful utility designed to create a secure, direct connection between a local port on your machine and a specific port on a Pod within your Kubernetes cluster. This connection is a TCP tunnel, established through the Kubernetes API server, meaning it leverages existing authenticated and authorized channels. Unlike exposing services via NodePort or LoadBalancer, which are designed for external access to services, port-forward is inherently temporary and intended for development and debugging purposes. It provides a highly targeted way to interact with an individual Pod or a service that Kubernetes manages, without affecting the wider network topology of your cluster.
What is kubectl port-forward?
kubectl port-forward creates a bidirectional network tunnel. When you execute the command, kubectl connects to the Kubernetes API server. The API server then initiates a connection to the target Pod (or a Pod selected by a Service/Deployment), specifically to a particular port within that Pod. From your local machine's perspective, traffic sent to the specified local port is forwarded through this tunnel to the Pod's port, and responses are routed back the same way. This makes a remote service appear as if it's running on localhost.
Consider a scenario where you have a database Pod running within your cluster, listening on port 5432. To access this database from your local machine using a GUI client or a local application, you would typically need to expose it. port-forward allows you to do this:
kubectl port-forward pod/my-database-pod 5432:5432
After running this, you could connect to localhost:5432 on your machine, and your connection would be seamlessly redirected to the database inside the my-database-pod in your Kubernetes cluster.
Why is it essential for Kubernetes local development?
The necessity of kubectl port-forward stems from the distributed nature of Kubernetes and the challenges it introduces for traditional local development workflows. In a containerized, microservice-driven architecture orchestrated by Kubernetes, your application often consists of multiple independent services, each running in its own Pod. These Pods have internal cluster IP addresses that are not directly routable from your local network. Exposing every internal service to the outside world for development purposes is neither practical nor secure.
port-forward addresses several critical pain points:
- Direct Access to Internal Services: It provides a direct channel to services that are not meant for external exposure. This is invaluable for databases, caching layers, message queues, or internal APIs that should only be accessible within the cluster or by specific applications.
- Simplified Debugging: When debugging a microservice running locally that needs to interact with another service in the cluster,
port-forwardallows your local service to "see" the remote service as if it were local. This eliminates complex network configurations or mock services, enabling more realistic testing. - Security and Isolation: By creating a temporary, authenticated tunnel,
port-forwardavoids opening up permanent network routes to your cluster's internal services. It operates within the security context of yourkubectlconfiguration, respecting your cluster's RBAC policies. - Rapid Iteration: Developers can quickly make changes to a local service, test it against cluster services via
port-forward, get feedback, and iterate without the need for redeploying to the cluster for every small change. This significantly speeds up the development loop. - Bypassing External Load Balancers/Ingress: In development, you might want to test a specific instance of a service, or bypass the complexities of Ingress rules or API gateway configurations.
port-forwardoffers this direct line, isolating your testing from the broader traffic management layer.
The Common Pain Points It Solves
Without kubectl port-forward, developers often face a dilemma: * Constant Deployment for Testing: Every code change would necessitate rebuilding a Docker image, pushing it to a registry, and deploying it to the cluster to test against other services. This is slow and inefficient. * Complex Network Setups: Manually configuring VPNs, proxy servers, or modifying hosts files to route local traffic to internal cluster IPs is cumbersome and error-prone. * Security Risks: Exposing internal services via NodePort or LoadBalancer for development often means making them publicly accessible, which is a significant security risk, especially with sensitive services like databases. * Unrealistic Testing Environments: Using mock services for dependencies can lead to integration bugs that only manifest once deployed to the actual cluster. port-forward enables testing against real dependencies.
kubectl port-forward resolves these issues by providing a simple, secure, and ephemeral solution for connecting your local development environment directly to the heart of your Kubernetes cluster. It embodies the agile principles of rapid feedback and iterative development, making it an indispensable tool for any Kubernetes-focused developer.
Deep Dive: How kubectl port-forward Mechanically Operates
To truly master kubectl port-forward, it's crucial to understand the underlying network mechanics that enable its functionality. It's not magic, but a clever use of existing Kubernetes architecture to create a secure, direct network tunnel. This section dissects the journey of data from your local machine to a Pod within the cluster and back.
Basic Command Syntax and Usage
The most common way to use kubectl port-forward is by specifying a Pod name and the port mappings.
kubectl port-forward <pod-name> <local-port>:<remote-port> -n <namespace>
<pod-name>: The name of the specific Pod you want to connect to.<local-port>: The port on your local machine that you want to listen on.<remote-port>: The port inside the target Pod that the service is listening on.-n <namespace>: (Optional) The namespace where the Pod resides. If omitted,kubectluses the default namespace configured in yourkubeconfig.
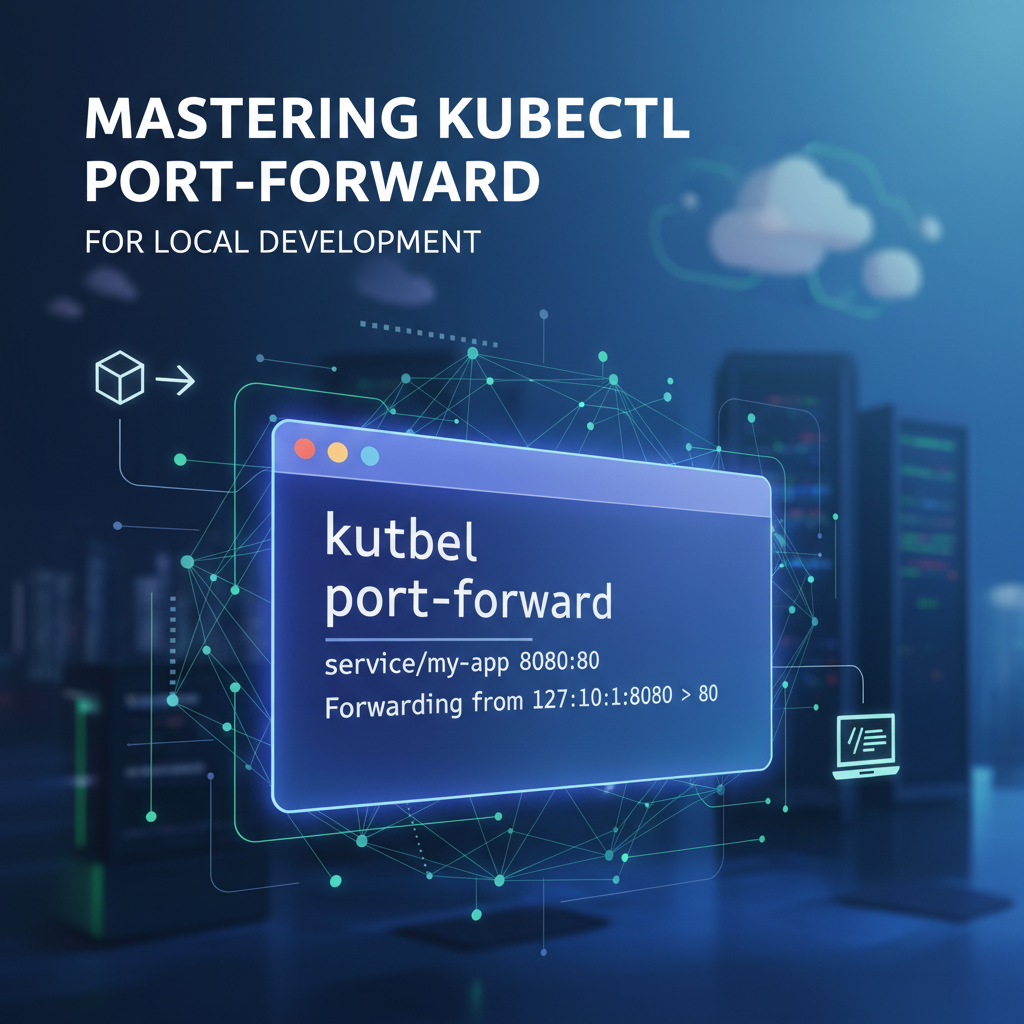
Example: To forward local port 8080 to port 80 of a Pod named my-web-app-789xyz in the development namespace:
kubectl port-forward my-web-app-789xyz 8080:80 -n development
After executing this, any request to http://localhost:8080 on your machine will be routed to http://my-web-app-789xyz:80 inside the development namespace.
Understanding the Underlying Network Mechanics
The port-forward operation involves several distinct steps and components:
- Client Request: When you execute
kubectl port-forward, yourkubectlclient initiates an HTTP/2 SPDY upgrade request to the Kubernetes API server. This request is an authenticated and authorized call, leveraging yourkubeconfigcredentials. - API Server as a Proxy: The Kubernetes API server, upon receiving the request, acts as an intermediary. It verifies your permissions to access the specified Pod and perform port forwarding. If authorized, it establishes an internal connection to the
kubeletagent running on the node where the target Pod resides. - Kubelet's Role: The
kubeletis responsible for managing Pods on its node. It receives theport-forwardrequest from the API server and, using the Pod's internal network namespace, creates a TCP socket connection to the specified<remote-port>within the target Pod. - Data Tunneling: At this point, a secure, bidirectional TCP tunnel is established:
Local Machine <-> kubectl client <-> Kubernetes API Server <-> Kubelet <-> Target Pod. Data flows through this tunnel. When you send data to<local-port>, it travels throughkubectl, the API server,kubelet, and finally reaches the<remote-port>of the Pod. Responses follow the reverse path.
Crucially, this entire process is encapsulated within the existing Kubernetes security model. kubectl authenticates with the API server, and the API server authorizes the request based on your RBAC permissions. The kubelet then handles the internal Pod communication. This means that if you don't have permission to access a Pod, port-forward will fail, maintaining the integrity of your cluster's security posture.
Identifying the Target: Pods, Services, Deployments
While port-forward technically targets a specific Pod, kubectl offers convenient abstractions to make it easier to use:
- Targeting a Pod directly: This is the most precise method. You provide the exact name of a Pod.
bash kubectl port-forward my-app-pod-123xyz 8080:80- Nuance: If the Pod restarts or gets replaced (e.g., during a deployment update), your
port-forwardsession will break because the Pod name will change. You'd need to re-establish the connection to the new Pod.
- Nuance: If the Pod restarts or gets replaced (e.g., during a deployment update), your
- Targeting a Service: When you specify a Service name,
kubectl port-forwardwill automatically select one of the Pods backing that Service (using the Service's selector) and establish the tunnel to it.bash kubectl port-forward service/my-app-service 8080:80- Benefit: This is more resilient. If the initially selected Pod dies,
kubectlmight attempt to connect to another healthy Pod backing the Service, though this behavior can sometimes be inconsistent with olderkubectlversions or specific scenarios. It's generally more robust than targeting a specific Pod by name which can change. - Limitation: It provides access to one Pod chosen by the Service's selector, not all Pods. If your Service spans multiple Pods and you need to debug a specific instance, direct Pod targeting is necessary.
- Benefit: This is more resilient. If the initially selected Pod dies,
- Targeting a Deployment/ReplicaSet: Similarly, you can specify a Deployment or ReplicaSet name.
kubectlwill then pick one of the Pods managed by that Deployment/ReplicaSet.bash kubectl port-forward deployment/my-app-deployment 8080:80- Benefit: Similar to Services, this offers a more stable target name than a volatile Pod name.
- Limitation: Again, it targets only one instance, randomly chosen, which might not be the specific instance you want to debug.
For deterministic debugging of a specific Pod, using pod/<pod-name> is best. For general interaction with any available instance of a service, service/<service-name> or deployment/<deployment-name> are more convenient.
Port Mapping: Local Port to Container Port
The syntax local-port:remote-port is critical.
local-port: This is the port number on your machine where you expect to send and receive traffic. You can choose any available port on your local machine. It doesn't have to match the remote port. For example,8080:80means your local8080connects to the Pod's80.remote-port: This is the port number inside the container where your application or service is actually listening. This must match the port configured within your containerized application.
Important Considerations for Port Mapping:
- Port Availability: The
local-portmust not be in use by another process on your machine. If it is,port-forwardwill fail with an "address already in use" error. - Privileged Ports: On Linux/macOS, ports below
1024are considered privileged and require root permissions to bind to. Avoid using them forlocal-portunless absolutely necessary and you runkubectlwithsudo. - Ephemeral Ports: If you omit the
local-port(e.g.,kubectl port-forward pod/my-app :80),kubectlwill dynamically choose an available ephemeral port on your local machine and print it to the console. This can be useful for quick, unscripted access.
Security Considerations and Implications
While kubectl port-forward is secure in the sense that it uses authenticated connections, it's not without its security implications that developers must be aware of:
- Access Control: The primary security mechanism is Kubernetes RBAC. If you have
execorport-forwardpermissions on a Pod, you can establish a tunnel. It's crucial that these permissions are granted judiciously and follow the principle of least privilege. - Local Machine Exposure: Once a
port-forwardis active, the remote service is exposed onlocalhostof your machine. Any other process or user on your local machine can potentially connect to thatlocalhostport. Whilelocalhostis generally considered safe, it means you're creating a temporary ingress point to a remote service. - Data in Transit: The connection from
kubectlto the API server is typically secured with TLS. The connection from the API server tokubeletis also secured. The connection fromkubeletto the Pod's process is usually not TLS-encrypted, as it's within the trusted boundary of the node. If the data is sensitive, ensure the service inside the Pod uses its own encryption (e.g., HTTPS for an API service, or TLS for a database connection) end-to-end. - Insider Threat: A malicious actor who gains
kubectlaccess can potentially useport-forwardto access sensitive internal services. This underscores the importance of strong authentication and authorization forkubectlusers.
In summary, kubectl port-forward creates a robust and secure tunnel for development purposes, but understanding its mechanics helps in using it responsibly and being aware of the transient exposure it creates on your local development machine. This direct line to services is one of the most effective ways to interact with a remote API or application as if it were running on your local machine, simplifying complex distributed system debugging.
Practical Applications and Common Scenarios
kubectl port-forward shines in a multitude of development scenarios, turning seemingly complex interactions with cluster-internal services into straightforward local connections. This section explores common use cases that highlight the versatility and power of this command.
Accessing a Database Running in a Pod
One of the most frequent applications of kubectl port-forward is gaining direct access to a database instance running within your Kubernetes cluster. Imagine you have a PostgreSQL database deployed as a StatefulSet, accessible only by other services within the same cluster. For local development or debugging, you might want to: 1. Run a migration script from your local machine. 2. Inspect database schema or data using a GUI client (e.g., DBeaver, pgAdmin). 3. Connect your locally running application directly to the cluster database.
Scenario: A PostgreSQL Pod named postgres-0 in the data namespace, listening on port 5432.
kubectl port-forward pod/postgres-0 5432:5432 -n data
Now, any PostgreSQL client on your local machine can connect to localhost:5432 using the credentials for your cluster database. This bypasses any service discovery or external exposure mechanisms, providing a direct, secure channel. This is incredibly useful for ad-hoc queries, data seeding, or debugging database-related issues without modifying service configurations or exposing sensitive ports publicly.
Debugging a Microservice Locally Connected to a Remote Service
Consider a microservice architecture where Service A (running locally) depends on Service B (running in the cluster). For example, Service A might be a new feature you're developing locally, and Service B is an existing user authentication API within the cluster. Instead of deploying Service A to the cluster for every test, port-forward allows your local Service A to communicate directly with Service B.
Scenario: Service B is a user API running in Pod user-api-xyz on port 8080. Your local Service A needs to call it.
kubectl port-forward pod/user-api-xyz 8081:8080 -n default
Your local Service A can now be configured to call http://localhost:8081 for its user authentication requests. This allows for rapid iteration on Service A while ensuring it interacts with a live, authentic version of Service B, avoiding discrepancies that might arise from mock services. This is a cornerstone of efficient local development in a microservice environment.
Interacting with a Web Application or API Running Inside Kubernetes
You've deployed a new version of your web application or a backend API service to Kubernetes. Before fully exposing it or running end-to-end tests, you want to perform some manual verification or integration testing directly from your browser or an API client like Postman.
Scenario: A web application Pod named frontend-app-abc is listening on port 3000.
kubectl port-forward pod/frontend-app-abc 8000:3000 -n default
Now, open your web browser and navigate to http://localhost:8000. You will see your application, just as if it were running locally. You can interact with its UI, test API endpoints it exposes, and verify functionality directly.
This is particularly useful when developing microservices that expose an API. kubectl port-forward allows you to directly interact with that API from your local machine, bypassing any external API gateway that might be present in a production environment. This direct access is crucial for rapid iteration and testing without the complexities of external dependencies and gateway configurations. It allows developers to validate the raw API behavior before it goes through any gateway transformations or policy enforcements.
Testing Internal Services Not Exposed via LoadBalancer or NodePort
Many services within a Kubernetes cluster are designed solely for internal communication and are never exposed externally. These might include message queues, internal reporting services, background workers, or configuration services. When you need to inspect their state, trigger a specific function, or verify their behavior, port-forward is your go-to tool.
Scenario: An internal queue management API in Pod queue-manager-pod on port 9090.
kubectl port-forward pod/queue-manager-pod 9091:9090 -n system
You can then use curl, Postman, or a custom script on your local machine to send requests to localhost:9091 to interact with this internal API. This method is safe because it doesn't require reconfiguring the Kubernetes Service object to expose it publicly.
Temporary Access for Administrative Tasks
Beyond development, kubectl port-forward is highly valuable for temporary administrative and maintenance tasks. * Accessing a monitoring dashboard: If you have Prometheus, Grafana, or a custom metrics dashboard running internally in the cluster, port-forward can give you temporary access without setting up Ingress or LoadBalancer rules. * SSH to a Pod (indirectly): While kubectl exec is for interactive shell access, port-forward can be used to forward an SSH port if an SSH server is running in a container, though this is less common and generally discouraged for security reasons compared to kubectl exec. * Database maintenance: Running database backups, restorations, or schema updates from your local machine against a cluster database via a port-forward tunnel is a secure and efficient approach.
These practical applications underscore kubectl port-forward's role as a versatile and indispensable tool for navigating the intricacies of Kubernetes networking during the development and maintenance lifecycle. It empowers developers and administrators to interact with cluster-internal resources with unprecedented ease and security.
Advanced Techniques and Best Practices
While the basic usage of kubectl port-forward is straightforward, mastering its advanced capabilities and adopting best practices can significantly enhance your development efficiency and troubleshooting prowess. This section dives into more sophisticated uses and considerations for optimal performance and stability.
Port Forwarding Multiple Ports from a Single Pod
Sometimes, a single Pod might host multiple services, each listening on a different port. For example, a development Pod might run a web server on port 80, an administration interface on port 8001, and a metrics endpoint on port 9000. Instead of running multiple port-forward commands, you can specify multiple port mappings in a single command:
kubectl port-forward pod/my-multi-service-pod 8080:80 8081:8001 9001:9000 -n default
This command establishes three separate tunnels: * localhost:8080 to my-multi-service-pod:80 * localhost:8081 to my-multi-service-pod:8001 * localhost:9001 to my-multi-service-pod:9000
This approach simplifies management by consolidating all necessary forwards into one command, making it easier to start and stop your debugging session.
Specifying Namespaces
As seen in previous examples, the -n or --namespace flag is crucial for targeting resources outside your currently configured default namespace. Always be explicit about the namespace to avoid errors or accidentally targeting the wrong resource.
kubectl port-forward service/my-backend 8080:80 -n production
This ensures you're connecting to my-backend in the production namespace, which is vital in multi-environment or multi-tenant clusters.
Running in the Background (using & or specific tools)
By default, kubectl port-forward runs in the foreground, consuming your terminal session. This is fine for quick checks, but for extended development sessions, you'll want it to run in the background.
- Using
&(Bash/Zsh): The simplest method is to append&to the command:bash kubectl port-forward pod/my-app 8080:80 &This detaches the process from your terminal, allowing you to continue using it. You can bring it back to the foreground withfgor terminate it withkill %<job_number>. - Using
-d(Detach): Some tools, includingkubectlin certain versions or with plugins, might offer a detach flag. However,kubectl port-forwarditself does not have a built-in-dor--detachflag as of standardkubectlversions. The&operator is the standard Unix way. - Using
nohup: For more robust background execution that persists even if your terminal session disconnects,nohupcan be used:bash nohup kubectl port-forward pod/my-app 8080:80 > /dev/null 2>&1 &This redirects all output to/dev/nulland runs the command in the background, making it less prone to being terminated by terminal closures.
Managing Multiple port-forward Sessions
In a complex microservice application, you might need to forward multiple services simultaneously. Managing these can become challenging.
- Dedicated Terminal Tabs/Windows: For a few forwards, simply opening a new terminal tab for each
port-forwardcommand is a common and easy approach. - Process Managers: Tools like
tmuxorscreencan manage multiple terminal sessions, making it easy to start, detach, and reattach toport-forwardsessions. For more advanced management,foremanordocker-compose(with services likekubectl port-forwardmapped) can orchestrate multiple background processes.
Scripting: For consistent setups, create a shell script that starts all necessary port-forward commands in the background. ```bash #!/bin/bashecho "Starting port-forwards..."kubectl port-forward service/my-api-service 8080:80 & echo "API Service forwarded to localhost:8080"kubectl port-forward service/my-db-service 5432:5432 & echo "Database Service forwarded to localhost:5432"
Wait for background jobs to finish (or for manual termination)
wait echo "All port-forwards terminated." `` Remember to add a cleanup mechanism (e.g.,kill %1 %2orkill $(jobs -p)`) when you're done.
Scripting port-forward for Automated Setups
Beyond simply running in the background, port-forward can be integrated into build scripts, Makefiles, or CI/CD pipelines for automated local development environment setup.
Example Makefile snippet:
.PHONY: dev-start dev-stop

# Find a Pod name for a deployment
DB_POD := $(shell kubectl get pods -l app=my-database -o jsonpath='{.items[0].metadata.name}')
API_POD := $(shell kubectl get pods -l app=my-api -o jsonpath='{.items[0].metadata.name}')

dev-start:
    @echo "Starting Kubernetes port forwards..."
    kubectl port-forward $(DB_POD) 5432:5432 -n default > /tmp/db_forward.log 2>&1 &
    echo $$! > /tmp/db_forward.pid
    echo "Database forwarded on localhost:5432 (PID: $$(cat /tmp/db_forward.pid))"
    kubectl port-forward $(API_POD) 8080:80 -n default > /tmp/api_forward.log 2>&1 &
    echo $$! > /tmp/api_forward.pid
    echo "API forwarded on localhost:8080 (PID: $$(cat /tmp/api_forward.pid))"
    @echo "Local development environment is ready."

dev-stop:
    @echo "Stopping Kubernetes port forwards..."
    -kill $$(cat /tmp/db_forward.pid) 2>/dev/null || true
    -kill $$(cat /tmp/api_forward.pid) 2>/dev/null || true
    -rm /tmp/db_forward.pid /tmp/api_forward.pid 2>/dev/null || true
    @echo "Port forwards stopped."
This Makefile uses kubectl get pods to dynamically find Pod names, stores PIDs for easy cleanup, and provides clean start and stop commands.
Dynamic Port Allocation
If you don't care about a specific local port and just need any available port, omit the local-port in the command:
kubectl port-forward pod/my-service :80
kubectl will then find an available ephemeral port (e.g., 34567) and print the full mapping to the console:
Forwarding from 127.0.0.1:34567 -> 80
Forwarding from [::1]:34567 -> 80
This is useful for quick checks when you don't want to worry about port conflicts, but less suitable for applications that need a fixed port.
Using kubectl port-forward with Deployment and Service Objects
When you target a Deployment or Service instead of a specific Pod, kubectl intelligently selects one of the healthy Pods that match the Deployment's or Service's selector.
- How it intelligently picks a Pod:
kubectlqueries the Kubernetes API for the specifiedDeploymentorService. If it's aDeployment, it finds the activeReplicaSetand then lists itsPods. If it's aService, it directly listsPodsmatching the Service's selector. From the list of healthy Pods, it picks one (often the first one returned by the API server, which is somewhat arbitrary but typically round-robin or based on internal sorting). - Implications for high-availability setups: In a highly available setup with multiple replicas, targeting a
DeploymentorServiceis convenient askubectlwill pick an available Pod. However, if you need to debug a specific instance (e.g., one that's exhibiting a particular bug), you must target that Pod directly by its full name. If the Pod picked bykubectldies, theport-forwardsession will terminate. Whilekubectlwon't automatically re-forward to a new Pod if the old one dies, usingServiceorDeploymentnames makes your scripts more robust to Pod name changes during normal operations (like scaling or rolling updates).
Timeout and Connection Issues: Troubleshooting
kubectl port-forward connections can sometimes be flaky. Common issues include:
- Pod restarts: If the Pod you're forwarding to restarts or is evicted, the
port-forwardsession will terminate. - Network instability: Transient network issues between your
kubectlclient, the API server, or the Kubernetes node can interrupt the tunnel. - Cluster scaling: If the node running your Pod is removed or scaled down, the session will break.
In such cases, kubectl will print an error message indicating a connection loss. The solution is typically to simply re-run the port-forward command. For critical long-running forwards, consider monitoring the process and restarting it if it dies (e.g., using systemd or a custom restart script).
Performance Considerations
kubectl port-forward is a debugging and development tool, not a high-performance production networking solution. * Throughput: While generally efficient for its purpose, it introduces some overhead due to the multiple hops (client -> API server -> kubelet -> Pod). For extremely high-throughput local testing, it might introduce slight latency compared to a direct network connection. * Latency: Each hop adds a small amount of latency. For services sensitive to millisecond-level latency, this might be noticeable, especially if the API server or kubelet is under heavy load. * API Server Load: The Kubernetes API server acts as an intermediary. While optimized for thousands of requests, continuous high-volume data transfer through port-forward for multiple users could potentially add to its load, though this is rare in typical development scenarios.
For most development and debugging tasks, the performance of kubectl port-forward is perfectly adequate and its benefits far outweigh these minor considerations. It provides a highly effective and secure bridge, allowing local applications to seamlessly interact with remote APIs and services as if they were co-located.
Alternatives and When to Use Them
While kubectl port-forward is a potent tool, it's essential to understand its place within the broader ecosystem of Kubernetes networking and development. Various alternatives exist, each with its own use cases, advantages, and limitations. Knowing when to choose port-forward versus another method is key to efficient Kubernetes development.
kubectl exec for Interactive Shells
kubectl exec allows you to run a command inside a container within a Pod. Its primary use case is obtaining an interactive shell (like bash or sh) to inspect the container's filesystem, run diagnostic commands, or manually interact with processes.
kubectl exec -it my-app-pod-123xyz -- /bin/bash
When to use kubectl exec vs. port-forward: * kubectl exec: Use when you need to interact directly with the container's environment – e.g., inspect logs, check file permissions, run a specific script, or debug a process from within. It doesn't create a network tunnel for your local machine to connect to the Pod's services. * kubectl port-forward: Use when you need to connect a local client/application (browser, IDE, database client, local microservice) to a service running inside the Pod, exposing that service on your localhost.
They are complementary tools, often used in conjunction for comprehensive debugging. You might port-forward to access a web API locally, and then exec into the Pod to check its logs or configuration if the API behaves unexpectedly.
kubectl proxy for API Server Access
kubectl proxy creates a local proxy server that forwards requests to the Kubernetes API server. It essentially exposes the API server's capabilities on a local port.
kubectl proxy --port=8001
Now, you can access the Kubernetes API and all resources (Pods, Services, Deployments, etc.) through http://localhost:8001/api/v1/.... This is primarily useful for: * Developing tools or scripts that interact with the Kubernetes API without needing to embed kubeconfig parsing. * Accessing cluster-wide resources (like monitoring dashboards that are backed by the Kubernetes API).
When to use kubectl proxy vs. port-forward: * kubectl proxy: Provides access to the Kubernetes API server itself, allowing you to manage or query Kubernetes resources. * kubectl port-forward: Provides access to a specific application or service running inside a Pod, allowing your local clients to interact with that application. Both provide local access to remote resources, but they target different layers of the Kubernetes stack.
Exposing Services via NodePort, LoadBalancer, or Ingress
These are Kubernetes service types designed for more persistent and public (or internal to a network) exposure of services.
NodePort: Exposes a service on a static port on each node's IP address. This means any traffic to<NodeIP>:<NodePort>will be routed to your service. It's generally used for development/testing in non-production environments or for services needing a fixed port within a cluster's private network.LoadBalancer: For cloud providers, this automatically provisions an external cloud load balancer, assigning an external IP that routes traffic to your service. This is the standard way to expose public-facing services.Ingress: A collection of rules that allow inbound connections to reach cluster services. Ingress provides HTTP and HTTPS routing based on hostnames and paths, typically backed by an Ingress Controller (like Nginx Ingress or Traefik). It's more sophisticated thanLoadBalancerand handles layer 7 routing, often integrating with an API gateway for advanced traffic management.
When to use these vs. port-forward: * NodePort, LoadBalancer, Ingress: Use when you need persistent, shared, and potentially public access to your service for end-users, other applications in the same network, or for full integration testing. They are designed for production-like exposure and traffic management, often involving a sophisticated API gateway for routing and security. * kubectl port-forward: Use for temporary, local, and direct developer access to a specific Pod. It's not for shared access, scaling, or production traffic. It's a personal debugging tunnel, not a public endpoint. port-forward can also be used to test your service before you configure an Ingress or LoadBalancer, ensuring the API works internally before exposing it.
Local Kubernetes Clusters (k3d, minikube, Docker Desktop)
Tools like minikube (a single-node Kubernetes cluster in a VM), k3d (K3s in Docker), or Docker Desktop's built-in Kubernetes allow you to run a full Kubernetes cluster on your local machine.
When to use these vs. port-forward: * Local Clusters: Use when you need a fully isolated and realistic Kubernetes environment on your local machine to test deployments, multi-service interactions, or specific Kubernetes features without touching a remote cluster. This eliminates the need for port-forward to access services within that local cluster, as they are typically exposed via NodePorts or the host network directly. * kubectl port-forward (to a remote cluster): Use when you need to develop against actual services in a shared, remote development, staging, or even production cluster. This is crucial when local resources are insufficient, or you need to test against real-world data and dependencies.
Telepresence, kots debug for seamless local-to-cluster integration
Tools like Telepresence (from Ambassador Labs) or kots debug (from Replicated) provide more advanced local development capabilities.
- Telepresence: This tool creates a bidirectional network tunnel, but instead of just forwarding ports, it can intercept network traffic from your local machine (e.g., all traffic to
service-a.namespace.svc.cluster.local) and route it to your local machine, or vice-versa. This means your local application can "see" all services in the cluster as if it were running inside the cluster, and vice-versa. It effectively puts your local machine into the cluster's network. kots debug: (Specific to KOTS, a Kubernetes Off-The-Shelf framework) provides debugging utilities that might includeport-forward-like functionality but also other diagnostic tools.
When to use these vs. port-forward: * Telepresence: Use for seamless, transparent integration where your local application needs to interact with many cluster services by their internal DNS names, or where a cluster service needs to interact with your local application as if it were another Pod. It's a more encompassing solution than port-forward. * kubectl port-forward: Use for simple, direct, and explicit access to one or a few specific services. It's lighter-weight and requires less setup for singular connections.
Service Meshes and Their Interaction with Local Development
Service meshes like Istio, Linkerd, or Consul Connect introduce sophisticated traffic management, observability, and security features to your microservices. They often include their own local development or debugging tools. For example, Istio's istioctl debug or istioctl dashboard commands might provide port-forward-like functionality to access internal dashboards or specific service instances within the mesh.
The relationship between kubectl port-forward and a service mesh is generally complementary. port-forward allows you to bypass the mesh's proxy for direct access to the application container, which can be useful for debugging the application itself without the mesh's sidecar proxy interfering or adding complexity. Alternatively, you can port-forward to the sidecar proxy's admin interface (if exposed) to debug the mesh's behavior. For instance, you could use port-forward to access a service's API and then kubectl exec into the istio-proxy sidecar to examine its configuration or logs, which is a common debugging pattern.
VPNs and Corporate Network Setups
In corporate environments, developers often connect to private Kubernetes clusters via a VPN. Once connected, the cluster's internal network might be directly routable from the developer's machine.
When to use VPNs vs. port-forward: * VPNs: Provide full network access to the cluster's internal network. If the cluster services are exposed via ClusterIP and the VPN makes those IPs routable, you might not even need port-forward for some cases. This is for broader network connectivity. * kubectl port-forward: Still useful even with a VPN for specific reasons: * Simplicity: No need to know internal IPs or configure local routing. port-forward uses symbolic names (Pod, Service, Deployment). * Targeting specific Pods: VPNs route to services (ClusterIP), not necessarily individual Pods. port-forward can target a particular Pod instance. * Security: port-forward creates a dedicated, authenticated tunnel, potentially offering a more granular and transient access method than a broad VPN connection.
In summary, kubectl port-forward is a surgical tool for point-to-point local-to-cluster connections. For broader network integration, permanent exposure, or complex debugging scenarios, other tools and Kubernetes features become more appropriate. The choice depends heavily on the specific development task and the desired level of integration and exposure.
APIPark is a high-performance AI gateway that allows you to securely access the most comprehensive LLM APIs globally on the APIPark platform, including OpenAI, Anthropic, Mistral, Llama2, Google Gemini, and more.Try APIPark now! 👇👇👇
Security Deep Dive: Mitigating Risks
While kubectl port-forward is an invaluable tool for development, its power to bridge local systems with internal cluster services necessitates a thorough understanding of its security implications. Used carelessly, it could inadvertently create vulnerabilities. This section elaborates on critical security considerations and best practices to mitigate associated risks.
Least Privilege Principle
The fundamental principle of least privilege dictates that a user or system should only be granted the minimum necessary permissions to perform its function. For kubectl port-forward, this means:
- RBAC Permissions:
port-forwardoperations are governed by Kubernetes Role-Based Access Control (RBAC). Specifically, users requireget,listonpods(orservices,deploymentsif targeting those abstractions), andcreateonpods/portforwardresources within the target namespace. - Granular Access: Avoid granting broad
*permissions. Instead, create specific ClusterRoles or Roles that only allowport-forwardfor particular Pods or Services, or within specific namespaces (e.g.,devnamespaces only). - Service Accounts: If automating
port-forwardthrough scripts or CI/CD, use dedicated Service Accounts with precisely defined RBAC roles, rather than using highly privileged user accounts.
By adhering to least privilege, you limit the blast radius if an attacker compromises a developer's kubeconfig or CI/CD system.
Network Segmentation Within Kubernetes
Kubernetes clusters can be logically segmented using NetworkPolicies. These policies define how Pods are allowed to communicate with each other and with external endpoints.
- Default Deny: Implement NetworkPolicies that enforce a "default deny" rule, meaning Pods cannot communicate unless explicitly allowed.
port-forwardand NetworkPolicies: Whileport-forwardtraffic travels through the API server andkubelet, the final leg of the journey (fromkubeletto the target Pod) respects NetworkPolicies. If a NetworkPolicy on the target Pod denies inbound connections on the forwarded port from sources outside its namespace (or from thekubelet's internal network), theport-forwardmight fail or the connection might be refused.- Egress Policies: Similarly, if your Pod needs to make outbound connections to other services from your local machine (via the forwarded port), and there's an egress NetworkPolicy, it must allow that traffic.
Understanding how NetworkPolicies interact with port-forward is crucial for troubleshooting connectivity and ensuring intended isolation.
Authentication and Authorization for kubectl
The security of kubectl port-forward heavily relies on the security of your kubeconfig file and the underlying authentication mechanisms.
- Secure
kubeconfig: Yourkubeconfigcontains credentials (tokens, certificates) that grant access to your clusters. Treat it like a password.- Protect it with appropriate file permissions (e.g.,
chmod 600 ~/.kube/config). - Avoid sharing it unnecessarily.
- Use short-lived credentials where possible (e.g., cloud provider
kubeconfigs that automatically refresh tokens).
- Protect it with appropriate file permissions (e.g.,
- Strong Authentication: Ensure your cluster uses strong authentication methods (e.g., OIDC, client certificates, cloud provider IAM integration) rather than basic authentication.
- Auditing: Implement API server auditing to track who is performing
port-forwardoperations, from where, and to which Pods. This provides a forensic trail in case of misuse.
The "Attack Surface" Created by Port-Forwarding
When a port-forward tunnel is active, it effectively exposes a remote service on your local machine's localhost interface. While localhost is generally considered secure because it's only accessible from the machine itself, it still creates a transient attack surface:
- Local Application Vulnerabilities: If a malicious application is running on your local machine, it could potentially scan
localhostports and connect to the forwarded service. For example, if you forward a database port, and a malware on your machine discovers it, it could attempt to connect. - Shared Development Machines: On shared development machines (less common but possible), other users logged into the same machine could access your forwarded ports.
- Accidental Exposure: Developers might sometimes inadvertently bind the
port-forwardto0.0.0.0(all network interfaces) instead of127.0.0.1(localhost). Whilekubectl port-forwarddefaults to127.0.0.1, if you use a reverse proxy or another tool to expose the forwarded port, ensure it's properly configured. Explicitly specify the local address if needed:kubectl port-forward --address 127.0.0.1 pod/my-app 8080:80.
Best Practices for Secure Usage
To use kubectl port-forward securely and effectively:
- Use it only when necessary: Don't keep
port-forwardsessions running indefinitely if not actively used. Terminate them promptly (Ctrl+Corkill). - Target specific Pods/Services: Be precise. Avoid wildcards or broad targets unless absolutely required and understood.
- Specify namespaces: Always use
-n <namespace>to prevent targeting the wrong resource in a different environment. - Least Privilege: Ensure your
kubeconfigcredentials have only the necessaryport-forwardpermissions. - Be mindful of sensitive data: If forwarding a service that handles sensitive data (e.g., a database with PII), be extra vigilant about the security of your local machine.
- Avoid privileged local ports: Unless you understand the implications, avoid forwarding to
local-portvalues below1024as they require root access. - Educate developers: Ensure all developers understand the security implications and best practices for using
port-forward. - Automate with care: When scripting
port-forward, ensure cleanup mechanisms are robust to prevent orphaned tunnels.
By embracing these security considerations and best practices, developers can leverage the immense power of kubectl port-forward for efficient local development and debugging without compromising the overall security posture of their Kubernetes environments. It's a testament to Kubernetes' flexibility that such a direct and powerful tool can be integrated into a robust security framework.
Integration with Development Workflows and IDEs
The true power of kubectl port-forward is unleashed when it's seamlessly integrated into a developer's daily workflow and preferred Integrated Development Environments (IDEs). This integration reduces friction, automates repetitive tasks, and allows developers to focus on writing code rather than managing infrastructure.
VS Code Integration
Visual Studio Code, with its rich extension ecosystem, offers excellent integration capabilities for Kubernetes and kubectl port-forward.
- Kubernetes Extension: The official Kubernetes extension for VS Code (from Microsoft) is a must-have. It provides a tree view of your clusters, namespaces, Pods, Services, and Deployments.
- Direct Port Forwarding: You can right-click on a Pod, Service, or Deployment in the Kubernetes explorer and select "Port Forward." The extension will prompt for local and remote ports and automatically initiate
kubectl port-forwardin the background. It also provides a clear indication of active forwards and options to stop them. - Context Switching: Easily switch between Kubernetes contexts and namespaces directly from the VS Code status bar.
- Logs and Exec: The extension also allows you to view Pod logs and execute commands (like
bash) within Pods, further streamlining debugging.
- Direct Port Forwarding: You can right-click on a Pod, Service, or Deployment in the Kubernetes explorer and select "Port Forward." The extension will prompt for local and remote ports and automatically initiate
- Tasks Integration: You can define VS Code tasks to automate
port-forwardcommands alongside your build or run tasks.json // .vscode/tasks.json { "version": "2.0.0", "tasks": [ { "label": "port-forward-api", "type": "shell", "command": "kubectl port-forward service/my-api-service 8080:80 -n dev &", "isBackground": true, "problemMatcher": [], "group": "build", "presentation": { "reveal": "always", "panel": "new", "showReuseMessage": false } }, { "label": "stop-port-forwards", "type": "shell", "command": "kill $(lsof -t -i:8080) 2>/dev/null || true", // A simple way to kill specific port process "problemMatcher": [], "group": "build", "presentation": { "reveal": "always", "panel": "new", "showReuseMessage": false } } ] }json // .vscode/launch.json (example for a Node.js app) { "version": "0.2.0", "configurations": [ { "name": "Launch Local API", "type": "node", "request": "launch", "program": "${workspaceFolder}/src/index.js", "preLaunchTask": "port-forward-api", "postDebugTask": "stop-port-forwards", "console": "integratedTerminal" } ] }This setup ensures that when you start debugging your local API, theport-forwardis automatically established, and cleanly torn down afterwards.- Create a
.vscode/tasks.jsonfile. - Define a task that runs
kubectl port-forwardin the background (using&). - Define a pre-launch task in
launch.jsonthat depends on yourport-forwardtask, ensuring the tunnel is active before your local application starts.
- Create a
IntelliJ/GoLand Integration
JetBrains IDEs (IntelliJ IDEA, GoLand, PyCharm, etc.) also provide robust Kubernetes integration, often through plugins.
- Kubernetes Plugin: Install the "Kubernetes" plugin from the JetBrains Marketplace. This plugin provides similar functionality to the VS Code extension:
- Resource Explorer: View and manage Kubernetes resources directly within the IDE.
- Port Forwarding: Right-click on a Pod or Service and select "Port Forward..." to establish a connection. The IDE manages the background process and displays active forwards.
- Logs, Exec, Describe: Access common
kubectlcommands directly from the IDE context menus.
- Run/Debug Configurations: JetBrains IDEs allow highly customizable Run/Debug configurations. You can:
- Before launch tasks: Add a "Run external tool" step to execute your
kubectl port-forwardcommand before your local application starts. You might need to script it to run in the background. - After launch tasks: Add a cleanup step to kill the
port-forwardprocess. - Environment variables: Set environment variables for your local application to point to
localhost:<forwarded-port>for remote services.
- Before launch tasks: Add a "Run external tool" step to execute your
Automating port-forward with Makefiles or Custom Scripts
Beyond IDEs, Makefiles and shell scripts remain powerful tools for orchestrating port-forward within a broader development environment setup. This is especially useful for teams where developers might use different IDEs or for non-interactive automation.
- Standardized Scripts: Create a
dev-up.shscript that:- Checks
kubectlcontext. - Finds Pod/Service names (potentially using
kubectl get ... -o jsonpath). - Starts multiple
port-forwardcommands in the background, storing their PIDs. - Prints helpful messages about which services are available on which
localhostports.
- Checks
- Cleanup Script: A corresponding
dev-down.shscript would read the stored PIDs andkilltheport-forwardprocesses.
Docker Compose Integration (Hybrid approach): You can even integrate kubectl port-forward into a docker-compose setup. While docker-compose typically manages local containers, you can define a "service" in docker-compose.yml that essentially runs kubectl port-forward, allowing docker-compose up to bring up both local containers and port-forward tunnels to remote cluster services. This makes port-forward part of your docker-compose managed dependencies.```yaml
docker-compose.yml
version: '3.8' services: my-local-app: build: . ports: - "3000:3000" environment: REMOTE_API_URL: "http://localhost:8080" # Points to the forwarded portremote-api-forward: image: alpine/git # A minimal image to run kubectl command: sh -c "kubectl port-forward service/my-api-service 8080:80 -n dev" network_mode: "host" # Allows container to access host's localhost # Add volume mounts for .kube/config if needed, or ensure kubectl is configured # Or even better, use a custom entrypoint/command to make sure kubectl is authenticated `` Thisdocker-composeexample is a bit hacky due tonetwork_mode: "host"andkubectlsetup, but illustrates the concept of encapsulatingport-forward` within a container orchestration tool.
Live Reloading and Hot Swapping Considerations
When developing a local application that connects to cluster services via port-forward, you can often leverage live reloading or hot swapping tools for your local code.
- Local Application Hot Reloading: If your local application development server supports hot reloading (e.g., Node.js with
nodemon, Spring Boot DevTools, Python withwatchdog), changes to your local code will automatically trigger a rebuild/restart of the local application. Since theport-forwardtunnel remains stable, your newly reloaded local application can immediately reconnect to the remote cluster services without interruption. - Impact on Cluster Services:
port-forwarddoes not directly enable hot swapping or live reloading of the services within the Kubernetes cluster. For that, you'd typically need specialized tools likeskaffold(withdevmode) orTilt, which monitor local code changes, rebuild container images, and perform rolling updates on the cluster.port-forwardoften complements these tools by allowing direct access to the cluster service after it has been redeployed byskaffoldorTilt.
In essence, kubectl port-forward acts as a stable anchor, providing a fixed point of contact within the dynamic Kubernetes environment. Integrating it intelligently into IDEs and development scripts transforms it from a manual command into an invisible, yet indispensable, part of a highly efficient cloud-native development workflow. This ensures that developers spend less time battling network configurations and more time building robust APIs and applications.
Troubleshooting Common kubectl port-forward Issues
Even with a solid understanding of kubectl port-forward, developers will inevitably encounter issues. Knowing how to diagnose and resolve these common problems quickly can save significant debugging time and frustration.
"Error: unable to listen on port X: listen tcp 127.0.0.1:X: bind: address already in use"
This is by far the most frequent error. It means the local-port you specified (X) is already being used by another process on your local machine.
Diagnosis: * Identify the culprit process: * Linux/macOS: lsof -i tcp:X (where X is the port number) will show the process listening on that port. * Windows: netstat -ano | findstr :X followed by tasklist | findstr <PID> (replace <PID> with the process ID from netstat). * Check existing port-forward sessions: You might have another kubectl port-forward running in a different terminal or in the background.
Resolution: 1. Choose a different local-port: The easiest solution is to simply pick an unused port. 2. Terminate the conflicting process: If you identify the process and it's something you can safely stop (e.g., an old port-forward session, a local development server), terminate it. * Linux/macOS: kill -9 <PID> * Windows: taskkill /PID <PID> /F 3. Use dynamic port allocation: If the specific local port doesn't matter, use kubectl port-forward <target> :<remote-port> to let kubectl choose an available port.
"Error: error forwarding port 3000 to pod [...] no such host" or Connection Refused
This usually indicates that kubectl couldn't establish a connection to the target Pod's specified remote-port.
Diagnosis: 1. Is the Pod running and healthy? bash kubectl get pod <pod-name> -n <namespace> kubectl describe pod <pod-name> -n <namespace> kubectl logs <pod-name> -n <namespace> Check the Pod's status, events, and logs. Is the container running? Is the application inside the container crashing or failing to start? 2. Is the application listening on the correct remote-port inside the Pod? * Double-check your application's configuration within the container. Is it truly listening on port 3000 (or whatever remote-port you specified)? * You can kubectl exec into the Pod and use netstat -tulnp (if netstat is available) or ss -tulnp to verify what ports are open inside the container. 3. NetworkPolicies: Could a Kubernetes NetworkPolicy be blocking the internal communication from the kubelet to the Pod's port? This is less common for port-forward but possible in very restrictive environments. 4. Targeting the wrong Pod/Service: Ensure the pod-name, service-name, or deployment-name you're using is correct and in the right namespace.
Resolution: * Fix the Pod/application issue (e.g., resolve startup errors, correct port configuration). * Correct the remote-port in your kubectl port-forward command. * Verify and adjust NetworkPolicies if they are overly restrictive.
Connection Refused/Timeout (after port-forward seems established)
The kubectl port-forward command successfully starts, but when you try to connect to localhost:local-port, you get a "connection refused" or "timeout" error.
Diagnosis: 1. Is the Pod still healthy? Services within Kubernetes are dynamic. The Pod might have restarted, been evicted, or become unhealthy after the port-forward tunnel was established. Check kubectl get pod <pod-name> -n <namespace> again. 2. Is the application inside the Pod still running/responsive? The Pod itself might be running, but the application inside it could have crashed or become unresponsive. Check Pod logs (kubectl logs). 3. Network issues within the cluster: Transient network problems between the Pod and other cluster components (e.g., CNI plugin issues on the node). 4. Local firewall: Is a firewall on your local machine blocking connections to localhost:local-port? (Less common, but possible). 5. Application bind address: Is the application inside the Pod configured to listen on 0.0.0.0 or :: (all interfaces) or a specific Pod IP? If it's binding only to localhost inside the container, the kubelet (which tries to connect to the Pod's IP) won't be able to reach it. Most containerized apps should bind to 0.0.0.0.
Resolution: * Restart the kubectl port-forward command. * Verify the application's health and logs inside the Pod. * Check the application's bind address configuration. * Temporarily disable local firewalls for testing (with caution).
Pod Restarts or Evictions Breaking port-forward
As mentioned, if the targeted Pod restarts, is rescheduled, or evicted, your port-forward session will terminate.
Diagnosis: * kubectl will exit with an error like "lost connection to Pod." * kubectl get events -n <namespace> or kubectl describe pod <pod-name> will show why the Pod restarted or was evicted.
Resolution: * Address the root cause of Pod instability: Fix application crashes, memory leaks, insufficient resource requests/limits, or node issues that lead to evictions. * Re-run port-forward: Once the Pod stabilizes, you'll need to re-run the port-forward command. * Target by Service/Deployment (for resilience): If you don't need a specific Pod instance, targeting a Service or Deployment name provides more resilience to individual Pod failures, as kubectl will pick another Pod. However, you'll still need to restart the port-forward if the initially selected Pod dies. * Use scripting with retry logic: Create a script that periodically checks if the port-forward process is running and restarts it if it's not.
Permissions Issues
You might encounter errors related to insufficient permissions.
Diagnosis: * "Error from server (Forbidden): pods "my-pod" is forbidden: User "..." cannot portforward pods in namespace "..."." * This explicitly tells you that your kubeconfig user or service account lacks the necessary RBAC permissions.
Resolution: * Contact your cluster administrator: Request the create permission for pods/portforward (and get/list for pods, services, deployments if needed) within the relevant namespaces. * Switch Kubernetes Context: Ensure your kubectl is configured to the correct cluster context and user. kubectl config current-context and kubectl config view can help.
Debugging Network Paths Within Kubernetes
For more complex network issues, kubectl port-forward might just be the symptom, not the cause. You might need to debug the internal Kubernetes network itself.
Tools and Techniques: * kubectl exec and network tools: exec into a Pod and use tools like ping, traceroute, curl, netcat to test connectivity to other services within the cluster by their ClusterIP or DNS names (<service-name>.<namespace>.svc.cluster.local). * kubectl logs and kubectl describe: These are your best friends for understanding Pod startup, application errors, and node events. * NetworkPolicy diagnostics: Use tools that visualize or test NetworkPolicies (e.g., kubectl-debug with netpol capabilities, or custom scripts). * Inspect CNI plugin: For advanced debugging, you might need to investigate the Container Network Interface (CNI) plugin logs on the Kubernetes nodes.
Mastering troubleshooting kubectl port-forward involves a combination of understanding its internal workings, familiarity with Kubernetes resource statuses, and general networking diagnostic skills. With practice, you'll quickly pinpoint and resolve issues, maintaining a smooth development flow.
The Role of Gateways and APIs in Modern Development
In modern distributed systems, particularly those built on microservices, APIs are the connective tissue, and API gateways are the traffic controllers. Understanding their role is crucial, and it provides an excellent context to understand where kubectl port-forward fits in, especially when considering the robust features offered by platforms like APIPark.
Reiterate the Importance of APIs in Microservices
At the heart of the microservices paradigm is the concept of independent services communicating with each other through well-defined APIs. Each microservice exposes its functionality via an API, allowing other services or client applications to interact with it without needing to know its internal implementation details. This contract-first approach promotes loose coupling, enhances scalability, and facilitates independent development and deployment. From simple REST endpoints to complex GraphQL interfaces or event-driven APIs, the API is the primary interface for any piece of functionality in a modern application. The design, documentation, and management of these APIs are paramount to the success of a microservice architecture.
Explain What an API Gateway Is and Its Typical Functions
An API gateway is a single entry point for all client requests to a backend microservices architecture. Instead of clients directly calling individual microservices, they send requests to the API gateway, which then routes them to the appropriate service. But an API gateway does much more than just routing; it typically handles a wide array of cross-cutting concerns:
- Request Routing: Directing incoming requests to the correct microservice based on URL paths, headers, or other criteria.
- Authentication and Authorization: Verifying client identity and permissions before forwarding requests to backend services, offloading this responsibility from individual services.
- Rate Limiting: Protecting backend services from being overwhelmed by too many requests from a single client.
- Request/Response Transformation: Modifying requests or responses on the fly, e.g., aggregating data from multiple services, transforming data formats (XML to JSON), or adding/removing headers.
- Logging and Monitoring: Centralizing logging and metrics collection for all incoming API traffic.
- Caching: Caching responses to reduce load on backend services and improve performance.
- Circuit Breaking: Implementing resilience patterns to prevent cascading failures in a distributed system.
- Load Balancing: Distributing requests across multiple instances of a service.
Essentially, an API gateway acts as a facade, abstracting the internal complexity of the microservices architecture from external clients and centralizing common functionalities. Popular open-source API gateways include Nginx, Kong, Apache APISIX, and commercial solutions like AWS API Gateway, Azure API Management, and Google Cloud Apigee.
How kubectl port-forward Bypasses or Complements an API Gateway During Local Development
While a production environment heavily relies on an API gateway for ingress traffic management and security, during local development, directly accessing the API of a service within Kubernetes via kubectl port-forward allows for unhindered, direct interaction. This simplifies the testing loop by removing the gateway as a variable.
- Bypassing for Direct Debugging: When you're debugging a specific microservice's API, you often want to isolate it from the API gateway.
port-forwardallows you to send requests directly to the Pod running your service, bypassing any gateway rules, authentication, transformations, or rate limits. This is invaluable for pinpointing bugs within the service itself, without the gateway introducing additional layers of complexity or potential issues. You can test the raw API behavior. - Complementing for End-to-End Testing (Limited Scope): In some scenarios, you might
port-forwarda front-end service (e.g., a React app running in the cluster) to your local machine, and then have that front-end service make calls to other backend services through the API gateway (if the gateway is also exposed). Or, your local application could interact with a directly forwarded backend API, while other backend services interact through the API gateway. This creates a hybrid environment. - Testing Gateway Configuration: While
port-forwardbypasses the gateway for direct service access, it can be used to access the API gateway's own administrative interfaces (if exposed via a Pod) for configuration or monitoring during setup or debugging of the gateway itself.
The key takeaway is that kubectl port-forward provides a developer-centric, direct line to a service's API for quick, isolated testing, contrasting with the API gateway's role as a robust, shared, and managed entry point for production traffic. They serve different but equally critical purposes in the API lifecycle.
Introducing APIPark: An Open Source AI Gateway & API Management Platform
For complex systems, especially those involving AI services or a multitude of APIs, managing all these endpoints becomes critical. While kubectl port-forward gives you direct access to a single service, a robust API gateway and management platform like APIPark can streamline the entire lifecycle of your APIs, from design to deployment.
APIPark is an all-in-one AI gateway and API developer portal that is open-sourced under the Apache 2.0 license. It offers unified management for authentication, cost tracking, and quick integration of various AI models. For instance, if your development involves integrating over 100 AI models or encapsulating custom prompts into new REST APIs, APIPark can standardize the request data format, ensuring that changes in AI models or prompts do not affect your applications or microservices.
In a scenario where you're developing a new AI-powered microservice locally and using kubectl port-forward to interact with a cluster-based component, APIPark would come into play when that microservice is ready for broader consumption. It acts as a sophisticated gateway for all your APIs, including AI-driven ones, simplifying invocation, security, performance monitoring, and end-to-end management. Developers can focus on building the core logic, knowing that APIPark provides the robust infrastructure for sharing, controlling access, and analyzing usage of their APIs in a production environment. Its capability to achieve over 20,000 TPS with an 8-core CPU rivals high-performance gateway solutions, making it suitable for managing large-scale traffic for both traditional and AI-specific APIs.
This distinction highlights that kubectl port-forward empowers individual developers to interact with the raw APIs of their services during the build phase, while a platform like APIPark takes over to manage, secure, and optimize these APIs as they transition to shared development, staging, and production environments, where the complexities of traffic, security, and integration demand a full-fledged API gateway solution.
Future Trends and Evolution
The landscape of cloud-native development is constantly evolving, driven by innovation in containerization, orchestration, and developer experience. While kubectl port-forward has proven its enduring value, it's worth considering how future trends might influence its usage and the emergence of alternative or complementary tools.
Cloud-Native Development Paradigms
The shift towards cloud-native architectures emphasizes immutable infrastructure, declarative APIs, and automated operations. This paradigm continues to push services further into the cloud, often requiring developers to interact with remote clusters more frequently.
- Increased Need for Remote Debugging: As applications become more distributed and environments more complex, the ability to debug directly against remote services becomes even more critical.
kubectl port-forwardwill likely remain a cornerstone for this. - Service Mesh Dominance: Service meshes will continue to grow in adoption. While they introduce overhead, their benefits in traffic management, observability, and security are substantial. Future
port-forwardtools might need to be more aware of service mesh proxies, either tunneling through them or bypassing them intelligently. - Serverless and FaaS: While
port-forwardis less relevant for ephemeral serverless functions (like AWS Lambda or Google Cloud Functions) that don't run as long-lived Pods, it remains crucial for interacting with the traditional long-running microservices that serverless functions often integrate with (e.g., a database, an API service).
Serverless Functions and Their Interaction with Traditional Services
Serverless computing abstracts away server management entirely. Functions-as-a-Service (FaaS) often run in response to events and have a very short lifecycle. * Limited Direct port-forward Use: You typically wouldn't port-forward to a serverless function instance directly because they are transient and managed by the cloud provider. * Interacting with Backends: However, serverless functions often interact with traditional backend services (databases, message queues, specialized APIs) that do run in Kubernetes or other container environments. In these scenarios, kubectl port-forward can be used to locally develop and test a serverless function's integration with these backend services by forwarding the backend service's port to the local machine where the serverless function emulator/runtime is running. This creates a powerful hybrid debugging environment.
The Evolving Landscape of Local Development Tools for Kubernetes
The Kubernetes community is actively developing tools to enhance the developer experience.
- Advanced Remote Development Environments: Tools like
Telepresence,DevSpace,Okteto,Garden.io, andLoft.shaim to provide more seamless integration between local development environments and remote clusters. They often offer capabilities beyond simpleport-forwarding, such as:- Transparent Proxying: Making local processes appear to run inside the cluster's network, allowing them to resolve cluster DNS names directly.
- Hot Reloading with Remote Sync: Automatically syncing local code changes to Pods in the cluster for rapid iteration.
- Shared Development Environments: Allowing multiple developers to work on the same cluster concurrently without interfering with each other.
- Shift from
kubectlto Higher-Level CLIs/GUIs: Whilekubectlwill remain the foundational tool, many developers might increasingly rely on higher-level CLI wrappers or graphical user interfaces provided by their IDEs or specialized tools for tasks likeport-forwarding, abstracting away the rawkubectlcommand. - Enhanced Debugging Capabilities: Future tools might offer more integrated debugging directly from IDEs into remote Pods, potentially leveraging or abstracting
port-forwardin the background.
Despite these advancements, kubectl port-forward is likely to remain a fundamental, low-level primitive due to its simplicity, reliability, and directness. It serves as a building block for many of these more sophisticated tools, often operating silently in the background. Its role as a direct, unmediated channel to a service's API will continue to be invaluable for diagnosing issues and quickly iterating on local code against remote dependencies. As Kubernetes continues to mature, kubectl port-forward will adapt and integrate, ensuring developers always have a reliable way to connect their local workspaces to the heart of their cloud-native applications.
Conclusion
kubectl port-forward stands as a testament to the elegant simplicity and profound utility that often characterize the most impactful tools in a developer's arsenal. In the complex, distributed world of Kubernetes, it provides a crucial, direct, and secure bridge between a developer's local machine and the myriad services residing within a cluster. Our journey through its mechanics, practical applications, advanced techniques, and security considerations has, we hope, illuminated its indispensable role in modern cloud-native development.
From seamlessly accessing a remote database, to debugging a local microservice against its cluster-resident dependencies, or simply verifying a new web API from a browser, port-forward streamlines the development cycle, empowering rapid iteration and realistic testing. It deftly bypasses the complexities of external service exposure and the overhead of full redeployments, offering an authenticated tunnel directly to the heart of your application's Pods. We've explored how its ability to bypass an API gateway for direct API inspection is critical during early development phases, providing an unfiltered view of service behavior.
Moreover, integrating kubectl port-forward into modern IDEs and automated workflows transforms it from a manual command into an invisible yet powerful enabler of productivity. While aware of its security implications, adhering to best practices ensures it remains a secure conduit for development and debugging.
As Kubernetes environments grow in sophistication, and the demand for efficient local-to-cluster interaction intensifies, kubectl port-forward will undoubtedly retain its prominence. It represents the developer's direct line to their deployed code, an essential tool for understanding, debugging, and evolving the intricate tapestry of microservices. Mastering this command isn't merely about memorizing syntax; it's about embracing a mindset of efficient, direct interaction with your distributed applications, ensuring that the power of Kubernetes always remains accessible and manageable for the individual developer.
5 Frequently Asked Questions (FAQs)
1. What is the primary purpose of kubectl port-forward? The primary purpose of kubectl port-forward is to create a secure, temporary, and direct connection (a TCP tunnel) between a port on your local machine and a port on a specific Pod within a Kubernetes cluster. This allows you to access services running inside your cluster (like databases, web APIs, or internal microservices) from your local machine as if they were running on localhost, without exposing them publicly via NodePort or LoadBalancer. It's invaluable for local development, debugging, and testing.
2. How does kubectl port-forward differ from kubectl proxy? kubectl port-forward connects your local machine to a specific application or service inside a Pod within the cluster. For example, you might use it to access a database or a custom API running in a container. In contrast, kubectl proxy creates a local proxy to the Kubernetes API server itself. This allows you to access and interact with Kubernetes resources (like Pods, Services, Deployments, or custom resources) through a local HTTP endpoint, useful for developing tools that manage the cluster.
3. Is kubectl port-forward secure for accessing production services? kubectl port-forward establishes an authenticated and authorized tunnel through the Kubernetes API server, leveraging your kubeconfig credentials and RBAC permissions. In this sense, the connection itself is secure. However, it exposes a remote service on your local machine's localhost interface. While localhost is generally considered safe, it creates a temporary ingress point that can be accessed by other processes or users on your local machine. It should be used judiciously, following the principle of least privilege, and terminated promptly when not in use, especially when dealing with sensitive production APIs or data. It is not designed for production traffic or shared access.
4. What happens if the Pod I'm port-forwarding to restarts or is deleted? If the specific Pod you are forwarding to restarts, is deleted, rescheduled to another node, or becomes unhealthy, your kubectl port-forward session will terminate. kubectl will typically exit with an error message indicating that the connection to the Pod was lost. In such cases, you will need to re-run the kubectl port-forward command, potentially targeting a new instance of the Pod (if the Pod name changed) or using the Service/Deployment name for automatic Pod selection.
5. Can I port-forward multiple services or multiple ports from one Pod simultaneously? Yes, you can. To forward multiple ports from a single Pod, you can specify multiple local-port:remote-port pairs in a single command, like kubectl port-forward pod/my-app 8080:80 9000:9001. If you need to forward different services from different Pods, you would typically run separate kubectl port-forward commands, ideally in different terminal tabs or in the background, or integrate them into a scripting solution to manage multiple simultaneous tunnels for your local development environment.
🚀You can securely and efficiently call the OpenAI API on APIPark in just two steps:
Step 1: Deploy the APIPark AI gateway in 5 minutes.
APIPark is developed based on Golang, offering strong product performance and low development and maintenance costs. You can deploy APIPark with a single command line.
curl -sSO https://download.apipark.com/install/quick-start.sh; bash quick-start.sh

In my experience, you can see the successful deployment interface within 5 to 10 minutes. Then, you can log in to APIPark using your account.

Step 2: Call the OpenAI API.