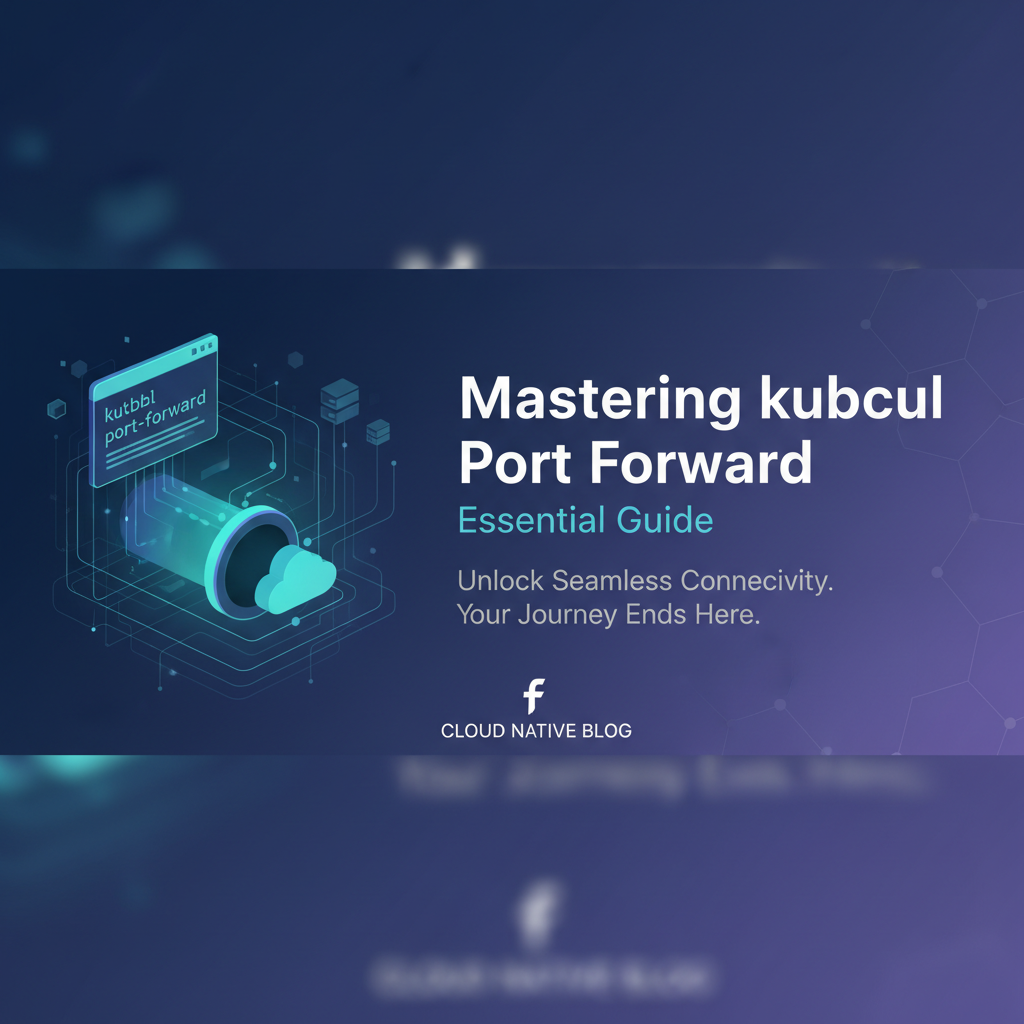
Mastering kubectl Port Forward: Essential Guide


In the sprawling, intricate landscape of Kubernetes, where applications live in ephemeral pods, shielded by layers of networking abstraction, developers often face a fundamental challenge: how to reach their services directly, without the complexities of public exposure or elaborate routing configurations. This is precisely where kubectl port-forward emerges as an unsung hero, a straightforward yet immensely powerful command that acts as a secure, temporary bridge between a developer's local machine and the heart of a Kubernetes cluster. It’s more than just a networking utility; it's an indispensable tool that dramatically streamlines local development, deep-seated debugging, and the intricate process of testing internal services that are intentionally not exposed to the outside world.
This comprehensive guide delves into the essence of kubectl port-forward, exploring its mechanics, diverse applications, advanced techniques, and crucial security considerations. We will peel back the layers of abstraction to understand how this command empowers developers to interact intimately with their containerized applications, transforming a seemingly distant cluster into a readily accessible local environment. From simple pod access to complex multi-port forwarding and strategic debugging, mastering kubectl port-forward is a cornerstone skill for anyone navigating the complexities of modern cloud-native development. Our journey will illuminate not just how to use it, but why it is such a pivotal component in a Kubernetes developer's toolkit, setting the stage for more efficient, agile, and robust application delivery.
I. Introduction: The Developer's Gateway to Kubernetes Internals
Kubernetes, by design, isolates applications within pods and manages their networking internally. While this isolation provides resilience and scalability, it also creates a barrier for developers who need direct, temporary access to their applications for development and debugging purposes. Enter kubectl port-forward, a command-line utility that punches a secure, temporary tunnel through the Kubernetes network fabric, connecting a local port on your workstation to a specific port on a pod, service, or even a deployment within your cluster. It's akin to having a direct hotline to your application, bypassing the public internet and complex ingress rules, making it an indispensable tool in any cloud-native developer's arsenal.
The power of kubectl port-forward lies in its simplicity and directness. Unlike other methods of exposing services, such as NodePort, LoadBalancer, or Ingress, which are designed for persistent, public-facing access, port-forward is explicitly for transient, private connections. It doesn't modify any cluster resources or external configurations; it merely creates a temporary, on-demand communication channel. This makes it ideal for scenarios where a developer needs to quickly test a newly deployed microservice, connect a local debugger to a remote application instance, or access an internal database or administrative interface without exposing it to the wider network. Without port-forward, these tasks would often involve convoluted setup, security risks, or simply be impossible, significantly hindering the development feedback loop and increasing the time it takes to diagnose and resolve issues within a distributed application environment.
This guide aims to be the definitive resource for understanding and mastering kubectl port-forward. We will begin by demystifying its core mechanism, explaining how it establishes a secure tunnel and interacts with the Kubernetes API server. Following this, we will dive into its basic usage patterns, demonstrating how to forward ports to individual pods, services, and deployments, accompanied by practical, step-by-step examples. The journey will then progress to advanced techniques, such as forwarding multiple ports, running processes in the background, and targeting specific containers within multi-container pods. A significant portion of this guide will be dedicated to exploring real-world scenarios where port-forward truly shines, from local development workflows to intricate debugging sessions and secure access to internal infrastructure components. We will also address common troubleshooting challenges, providing clear solutions to frequently encountered issues. Furthermore, we will delve into the critical security implications of using port-forward and discuss best practices to ensure its responsible application. Finally, we will consider where port-forward fits within the broader ecosystem of Kubernetes service exposure, examining its limitations and introducing dedicated solutions like AI gateways and API management platforms for production-grade service management, where concepts like api, gateway, and OpenAPI become paramount. By the end of this extensive exploration, you will possess a profound understanding of kubectl port-forward and be equipped to wield its power effectively, enhancing your productivity and control over your Kubernetes applications.
II. The Core Mechanism: How kubectl port-forward Works
To truly master kubectl port-forward, it's essential to grasp the underlying mechanism that enables this seemingly magical connection. It's not a direct network tunnel from your laptop to the pod; rather, it's an orchestrated process involving the Kubernetes API server and the kubelet agent running on the node hosting your target pod. This indirect approach is fundamental to Kubernetes' security model and its ability to manage networking effectively across a distributed cluster.
A. Establishing a Secure Tunnel
When you execute a kubectl port-forward command, the kubectl client on your local machine initiates a request to the Kubernetes API server. This request is not a direct network connection to the pod's IP address. Instead, it's an API call, typically over a secure WebSocket connection (or SPDY stream, which predates HTTP/2 for this purpose), to the API server. The API server then acts as an intermediary, forwarding this request to the kubelet agent running on the node where the target pod resides. The kubelet is the primary agent on a node, responsible for managing pods and their containers. Upon receiving the port-forward request from the API server, the kubelet establishes a local connection to the specified port within the target pod's network namespace.
From this point, the kubelet essentially proxies the traffic. Any data sent from your local machine to the forwarded local port travels up to the kubectl client, through the secure WebSocket/SPDY tunnel to the API server, then down to the kubelet on the node, and finally into the pod''s specified port. Conversely, traffic originating from the pod on that specified port travels back along the same path to your local machine. This creates a full-duplex communication channel, effectively making the remote port on the pod appear as if it's listening on a local port on your machine. This multi-hop process, while seemingly complex, ensures that kubectl port-forward respects Kubernetes' network isolation and security policies, leveraging existing, authenticated communication channels within the cluster.
B. Differences from Traditional Port Forwarding
It's crucial to distinguish kubectl port-forward from traditional network port forwarding or SSH tunneling. In a conventional SSH tunnel, a direct, encrypted connection is established between your local machine and a remote host. Traffic then flows directly over this SSH tunnel. With kubectl port-forward, the Kubernetes API server and kubelet are integral components of the data path. This architectural difference has several implications:
- Authentication and Authorization:
kubectl port-forwardinherently leverages yourkubectlconfiguration, meaning it uses your existing Kubernetes credentials (e.g.,kubeconfig) for authentication and RBAC (Role-Based Access Control) for authorization. If your user account doesn't have permissions toexecorforwardports to a specific pod or namespace, the command will fail. This provides a robust security layer that traditional SSH tunnels might lack without additional configuration. - Network Isolation:
kubectl port-forwarddoes not expose the pod or its host node directly to your local network. The traffic remains confined within the Kubernetes cluster's internal networking until it reaches thekubelet, and then locally to the pod. This maintains the integrity of the cluster's network segmentation. - Ephemeral Nature:
kubectl port-forwardconnections are typically ephemeral. They exist only for the duration of thekubectlcommand. If thekubectlprocess is terminated, the tunnel closes. This reinforces its role as a temporary debugging and development tool, distinct from permanent service exposure mechanisms.
C. Underlying Network Principles in Kubernetes
Understanding how kubectl port-forward interacts with Kubernetes' networking architecture provides deeper insight. Kubernetes networking is built on a flat network model where every pod gets its own unique IP address within the cluster, and pods can communicate with each other directly without NAT. This is often achieved through CNI (Container Network Interface) plugins like Calico, Flannel, or Cilium.
When a pod is created, it's assigned an IP address and gets its own network namespace. This namespace is isolated from the host's network namespace and other pods' namespaces, meaning the ports within the pod are not directly accessible from outside the pod's boundary, except through specific network policies or service abstractions. kubectl port-forward cleverly circumvents this isolation from the inside out (from the kubelet's perspective) rather than punching holes from the outside in. The kubelet can access the pod's network namespace, and thus its listening ports, because it's running on the same node and has the necessary privileges. By proxying the traffic through the API server, kubectl provides a secure and managed way for developers to leverage this internal access, ensuring that even services operating behind an internal gateway or service mesh can be reached for localized debugging or testing. This approach maintains the integrity of the cluster's network security while offering unparalleled developer convenience.
III. Basic Usage: Unlocking Pods, Services, and Deployments
The simplicity of kubectl port-forward belies its power. Its basic syntax is straightforward, yet versatile enough to target various Kubernetes resources. Understanding these fundamental commands is the first step towards leveraging its full potential.
A. Forwarding to a Pod: The Foundational Command
The most direct way to use kubectl port-forward is to target a specific pod. This is particularly useful when you know exactly which pod instance you want to interact with, perhaps for debugging a particular replica or inspecting logs from a problematic instance.
1. Syntax and Parameters Explained
The basic command structure for forwarding to a pod is:
kubectl port-forward POD_NAME LOCAL_PORT:REMOTE_PORT
Let's break down each component: * kubectl port-forward: This is the command itself, instructing kubectl to initiate a port forwarding session. * POD_NAME: This is the exact name of the pod you wish to connect to. Pod names in Kubernetes are unique within a namespace (e.g., my-app-deployment-78f77d7f7-abcde). You can find pod names using kubectl get pods. * LOCAL_PORT: This is the port on your local machine (where you're running the kubectl command) that you want to use. You can choose any available port on your local system. * REMOTE_PORT: This is the port inside the target pod that the application is listening on. This is the port you want to expose locally.
For example, if an application inside a pod named my-web-app-8f7f7d7f7-abcdef is listening on port 8080, and you want to access it locally on port 9000, the command would be:
kubectl port-forward my-web-app-8f7f7d7f7-abcdef 9000:8080
Once executed, kubectl will establish the tunnel. You'll see a message like Forwarding from 127.0.0.1:9000 -> 8080. Now, any traffic sent to http://localhost:9000 on your local machine will be securely forwarded to port 8080 within the specified pod.
2. Practical Example: Accessing a Simple Web Server in a Pod
Imagine you have a simple Nginx web server running in a pod called nginx-pod-12345 that serves content on port 80. You want to verify its configuration or access a specific static file directly without going through any external load balancers.
First, identify the pod name:
kubectl get pods
# Output might look like:
# NAME                             READY   STATUS    RESTARTS   AGE
# nginx-pod-12345                  1/1     Running   0          5m
# my-backend-app-abcde             1/1     Running   0          10m
Now, forward port 80 from the nginx-pod-12345 to port 8080 on your local machine:
kubectl port-forward nginx-pod-12345 8080:80
The command will block, and you'll see:
Forwarding from 127.0.0.1:8080 -> 80
Open your web browser or use curl to access http://localhost:8080. You should see the default Nginx welcome page or whatever content your Nginx pod is configured to serve. This direct access is invaluable for quick checks and debugging specific api endpoints that your web server might be exposing.
B. Forwarding to a Service: Leveraging Abstraction
While forwarding to a specific pod is powerful, it has a drawback: pod names are dynamic. If a pod crashes, restarts, or is scaled, its name changes. For more stable connections, especially in development environments, kubectl port-forward can target a Kubernetes Service.
1. Why Forward to a Service?
A Kubernetes Service acts as a stable network endpoint for a set of pods. It abstracts away the individual pod IP addresses and provides a consistent DNS name and IP address within the cluster. When you forward to a Service, kubectl automatically selects one of the healthy pods backing that Service and establishes the tunnel to it. If that pod goes down, kubectl attempts to re-establish the connection to another healthy pod, making it more resilient and user-friendly for continuous development or debugging. This is particularly useful when developing or testing services that expose a well-defined api surface, as the service name remains constant.
The syntax for forwarding to a Service is very similar:
kubectl port-forward service/SERVICE_NAME LOCAL_PORT:REMOTE_PORT
Here, service/SERVICE_NAME explicitly tells kubectl to look for a Service resource.
2. Example: Accessing a ClusterIP Service
Consider a ClusterIP Service named my-backend-service that exposes your application's api on port 3000. This Service might be backed by multiple replica pods.
First, identify the Service name (if you don't already know it):
kubectl get services
# Output might look like:
# NAME                  TYPE        CLUSTER-IP       EXTERNAL-IP   PORT(S)    AGE
# my-backend-service    ClusterIP   10.96.100.123    <none>        3000/TCP   15m
# kubernetes            ClusterIP   10.96.0.1        <none>        443/TCP    2d
Now, forward port 3000 from my-backend-service to port 8000 on your local machine:
kubectl port-forward service/my-backend-service 8000:3000
You'll see a message indicating the forwarding has started, for example:
Forwarding from 127.0.0.1:8000 -> 3000
Now, you can use http://localhost:8000 to interact with your my-backend-service. If the pod currently serving the connection restarts, kubectl will attempt to switch to another available pod without interrupting your local development experience, as long as the forwarding command is still running. This abstraction makes it easier to work with dynamic, scalable microservices architectures where individual pod lifecycles are transient.
C. Forwarding to a Deployment/ReplicaSet: Dynamic Target Selection
Beyond pods and services, kubectl port-forward can also target Deployments or ReplicaSets directly. This method is similar to forwarding to a Service in that kubectl will automatically pick a pod to forward to.
1. How Kubernetes Picks a Pod
When you target a Deployment or ReplicaSet, kubectl queries the Kubernetes API to find a healthy, running pod that is managed by that Deployment or ReplicaSet. It then establishes the port forward to one of these selected pods. This is particularly useful when you're working with a multi-replica application and don't care about which specific pod you connect to, as long as it's a functioning instance of your application. The benefit here, like with Services, is that you use a stable resource name (the Deployment name) rather than a volatile pod name.
The syntax is analogous to Services:
kubectl port-forward deployment/DEPLOYMENT_NAME LOCAL_PORT:REMOTE_PORT
Or for a ReplicaSet:
kubectl port-forward replicaset/REPLICASET_NAME LOCAL_PORT:REMOTE_PORT
2. Example: Debugging a Multi-Replica Application
Suppose you have a my-frontend-deployment that manages three replicas of your frontend application, all listening on port 80. You want to access one of them locally to test a UI change.
First, confirm your deployment name:
kubectl get deployments
# Output might look like:
# NAME                   READY   UP-TO-DATE   AVAILABLE   AGE
# my-frontend-deployment   3/3     3            3           20m
Now, forward a port to this deployment:
kubectl port-forward deployment/my-frontend-deployment 4200:80
kubectl will pick one of the three pods managed by my-frontend-deployment and establish the forward. You can then access your frontend application at http://localhost:4200. This is especially convenient for applications where you might also be interacting with a local development server for the frontend, and you just need to occasionally check the remote, deployed version without disrupting your local environment or relying on public exposure. This method ensures that even if one pod goes down, another available pod can be automatically targeted by the forwarding mechanism if the kubectl command is restarted or refreshed, providing a robust debugging experience for api services behind a deployment.
IV. Mastering the Syntax: Advanced Port Forwarding Techniques
Beyond the basic commands, kubectl port-forward offers several advanced syntax options and operational techniques that significantly enhance its utility, allowing for greater precision, efficiency, and flexibility in complex development and debugging scenarios. Mastering these nuances will empower you to tackle a wider range of challenges within your Kubernetes clusters.
A. Specifying Local and Remote Ports: Precision Control
While the LOCAL_PORT:REMOTE_PORT syntax is commonly used, kubectl port-forward also allows for a simpler form where you only specify the local port or even omit both. Understanding these variations provides more control.
1. LOCAL_PORT:REMOTE_PORT Syntax
As discussed, this is the most explicit form, allowing you to map any available local port to any desired remote port in the target pod/service. This is crucial when the remote service listens on a well-known port (e.g., 80, 443, 3306), but you prefer to use a different, potentially less privileged or already in-use, port on your local machine.
Example: Forward local 8080 to pod's 3000:
kubectl port-forward my-pod 8080:3000
If you only provide a single port, kubectl assumes it's the LOCAL_PORT, and it tries to find a matching REMOTE_PORT on the target pod, or defaults to the same port number if the target is a pod and no specific port is defined in its container manifest for the given number. However, it's safer and clearer to always specify both LOCAL_PORT:REMOTE_PORT to avoid ambiguity.
2. Scenarios for Non-Matching Ports
Using different local and remote ports is not just about avoiding conflicts; it's a strategic choice: * Avoiding Privileged Ports: Ports below 1024 often require root privileges to bind to. By forwarding REMOTE_PORT 80 to LOCAL_PORT 8080, you can access a standard web server without needing elevated permissions locally. * Running Multiple Forwards: If you need to forward port 80 from two different pods or services, you can map them to distinct local ports (e.g., 8080:80 for one, 8081:80 for another), allowing concurrent access without port clashes on your local machine. * Standardizing Local Access: Developers often use specific local ports for certain types of services (e.g., 3000 for frontends, 8000 for backends). Mapping remote ports to these local conventions simplifies development muscle memory.
B. Forwarding Multiple Ports Simultaneously: Efficiency at Scale
Instead of running multiple kubectl port-forward commands in separate terminal windows, you can forward several ports from a single pod or service with a single command. This is a significant efficiency booster for applications that expose multiple api endpoints or services on different ports.
1. LOCAL_PORT_1:REMOTE_PORT_1 LOCAL_PORT_2:REMOTE_PORT_2 Syntax
To forward multiple ports, simply list the LOCAL_PORT:REMOTE_PORT pairs, separated by spaces:
kubectl port-forward POD_NAME 8000:80 9000:443 3306:3306
This command will establish three distinct forwarding tunnels: * Local 8000 to remote 80 * Local 9000 to remote 443 * Local 3306 to remote 3306
2. Use Cases: Multi-Service Applications, Backend + Admin Interfaces
- Microservice Stacks: If a pod runs multiple containers or an application exposes different internal services (e.g., an
apiserver on8080, a metrics endpoint on9090, and a debugger on5005), you can access all of them concurrently.bash kubectl port-forward my-multi-service-pod 8080:8080 9090:9090 5005:5005 - Backend and Admin Interfaces: Many applications provide both a primary application interface and a separate administrative or monitoring interface, often on different ports. For example, a database might have its primary access on
3306and a web-basedgatewayfor administration on8080.bash kubectl port-forward mysql-pod 3306:3306 8080:8080This allows a developer to simultaneously connect their SQL client and a web browser to manage the database, streamlining debugging and maintenance tasks.
C. Running in the Background: Non-blocking Operations
By default, kubectl port-forward runs in the foreground, blocking your terminal session. While useful for short, interactive debugging, for longer sessions or when you need to use the terminal for other tasks, running it in the background is essential.
1. Using & and nohup
- Simple Backgrounding (
&): The simplest way to runkubectl port-forwardin the background is to append&to the command:bash kubectl port-forward my-pod 8080:80 &This will immediately return control to your terminal, and the forwarding process will run in the background. Note that if your terminal session closes, the background process might also terminate. - Persistent Backgrounding (
nohup): For more persistent background operations that survive terminal closures, usenohup:bash nohup kubectl port-forward my-pod 8080:80 &nohup(no hang up) ensures that the process continues to run even if your terminal session disconnects. Output will typically be redirected tonohup.outby default.
2. Managing Background Processes
When running port-forward in the background, you'll need ways to manage it: * Finding Process ID (PID): Use ps -ef | grep 'kubectl port-forward' to find the process ID. * Killing the Process: Use kill <PID> to terminate a background port-forward session. Remember to terminate these sessions when no longer needed to free up local ports and conserve resources. Forgetting to kill these processes is a common source of "port already in use" errors.
D. Targeting Specific Pods in a Deployment: Granular Control
While forwarding to a Deployment abstracts away individual pod selection, there are times you need to target a specific pod within a Deployment, perhaps because you're debugging a particular instance with a known issue, or you're running a debugger that requires a stable target.
1. Selecting by Pod Name
To target a specific pod, you must first get its exact name.
kubectl get pods -l app=my-app # Use label selectors for more specific filtering
# Output might show multiple pods:
# my-app-deployment-abcde-12345   1/1     Running   0          5h
# my-app-deployment-abcde-67890   1/1     Running   0          5h
Then, use the exact pod name for forwarding:
kubectl port-forward my-app-deployment-abcde-12345 8080:80
This ensures you're connecting to the precise instance you intend to debug or interact with.
2. Identifying the Correct Pod
- Labels: Use
kubectl get pods -l <key>=<value>to filter pods by their labels, which are often used to group pods belonging to the same application or deployment. - Namespace: Always specify the namespace using
-n NAMESPACEif your pod is not in the default namespace. - Logs: Check
kubectl logs <POD_NAME>to confirm the pod's identity or state. - Describe:
kubectl describe pod <POD_NAME>provides comprehensive information about a pod, including its IP, events, and container status, which can help in pinpointing the right target.
By leveraging these advanced techniques, kubectl port-forward transcends its basic utility, becoming a highly adaptable and powerful tool for nuanced interactions with your Kubernetes-deployed applications. This granular control is vital for maintaining productivity and precision in complex cloud-native environments, particularly when dealing with intricate api structures or sophisticated gateway configurations.
V. Real-World Scenarios: Where kubectl port-forward Shines
The true value of kubectl port-forward becomes evident in practical, day-to-day development and operations scenarios. It acts as a lifeline for developers, offering a direct, unhindered pathway to services that are otherwise encapsulated within the cluster's network boundaries. Let's explore some of the most common and impactful use cases where this command truly shines.
A. Local Development and Iteration: Bridging the Dev Environment
Modern microservice architectures often mean that while you might be developing one component locally, it needs to interact with other services already deployed in a Kubernetes cluster. kubectl port-forward is perfect for bridging this gap, allowing your local development environment to seamlessly communicate with remote dependencies.
1. Connecting Local IDEs to Remote Databases or Message Queues
Imagine you're developing a new feature for a backend service that relies on a PostgreSQL database running inside your Kubernetes development cluster. Instead of running a local PostgreSQL instance or exposing the cluster database publicly (a significant security risk), you can use port-forward to connect your local IDE or database client directly to the cluster's database pod.
# Forward local port 5432 to the PostgreSQL pod's port 5432
kubectl port-forward postgres-pod-xxxx 5432:5432
Now, your local application or database client can connect to localhost:5432 as if the database were running on your machine, dramatically simplifying setup and ensuring you're testing against the actual cluster database. This is equally applicable for message queues like Kafka or Redis, allowing local services to publish or subscribe to remote topics/queues.
2. Rapid Prototyping with Backend Services
For frontend developers working on a new UI feature, the backend api might be under active development or already deployed in a cluster. port-forward allows the local frontend application (e.g., a React app running on localhost:3000) to send requests directly to a backend api service within the cluster.
# Forward local port 8000 to the backend API service's port 8080
kubectl port-forward service/my-backend-api 8000:8080
Your local frontend can then be configured to make api calls to http://localhost:8000, providing a rapid feedback loop without deploying the frontend to the cluster for every change. This iterative approach significantly speeds up development, especially when working on api contracts defined by an OpenAPI specification, allowing for immediate validation of local client-side logic against the remote server.
B. Debugging Applications: The Investigator's Tool
When an application misbehaves in Kubernetes, kubectl port-forward becomes an indispensable tool for deep-dive debugging, allowing direct inspection and interaction with the running process.
1. Accessing Internal API Endpoints for Testing
Many microservices expose internal api endpoints for diagnostics, health checks, or specific administrative functions that are not meant for external consumption. If an api service is behind an internal gateway or only exposed via a ClusterIP Service, port-forward is often the easiest way to test these endpoints.
# Forward local port 8080 to the internal-api-service's port 80
kubectl port-forward service/internal-api-service 8080:80
You can then use curl or Postman on http://localhost:8080/metrics or http://localhost:8080/health to directly inspect the service's status, providing crucial insights into its operational state. This is particularly useful for verifying that an api adheres to its OpenAPI contract by sending test requests.
2. Inspecting Metrics or Health Checks Directly
Applications often expose metrics (e.g., Prometheus endpoints) or health check endpoints on specific ports. Using port-forward, you can pull these metrics directly into your local machine or connect a local metrics scraper.
# Forward local port 9090 to the application's metrics port 9090
kubectl port-forward my-app-pod 9090:9090
Now, your local Prometheus instance or simply your browser can access http://localhost:9090/metrics to see the real-time performance data of your running application instance, which is critical for performance tuning and troubleshooting.
3. Using Debuggers with Remote Processes
For compiled languages like Java, Go, or Python, remote debugging capabilities are often available, allowing a local IDE's debugger to attach to a running process. kubectl port-forward makes this possible even for applications within Kubernetes pods.
# Example for Java debugger (default port 5005)
kubectl port-forward my-java-app-pod 5005:5005
Once the forward is established, you can configure your IDE (e.g., IntelliJ, VS Code) to attach a remote debugger to localhost:5005. This allows you to set breakpoints, step through code, and inspect variables of the live application running in the cluster, which is an extremely powerful capability for resolving complex bugs that only manifest in the deployed environment.
C. Accessing Internal Services: Beyond External Exposure
Kubernetes clusters often host numerous internal services that are never meant to be publicly accessible. These might include monitoring tools, internal administrative panels, or custom gateway services. port-forward offers a secure, temporary way to access them.
1. Bypassing Ingress or Load Balancers for Testing
When testing a new api version or a specific feature of a service, you might want to bypass the complexity of ingress controllers, api gateways, or load balancers, especially if they involve caching, routing rules, or authentication layers that could interfere with your direct test.
# Accessing a specific version of an API service directly
kubectl port-forward service/my-api-v2-service 8080:80
This allows you to test the raw service behavior, ensuring that issues aren't being introduced by the external routing infrastructure.
2. Reaching Administrative Interfaces (e.g., Redis Commander, MongoDB Compass)
Many data stores or infrastructure components deploy with web-based administrative interfaces. If these are running as pods within your cluster (e.g., Redis Commander, Portainer, or custom observability dashboards), port-forward can make them locally accessible.
# Forwarding to a Redis Commander instance
kubectl port-forward redis-commander-pod-xxxx 8081:8081
Now, navigating to http://localhost:8081 in your browser provides access to the Redis Commander UI, allowing you to inspect Redis keys, execute commands, and monitor its state without exposing the entire api or gateway publicly.
3. Testing Internal Microservices Communication
In a complex microservices architecture, troubleshooting communication issues between services can be challenging. port-forward can help isolate problems by allowing you to manually send requests to a specific downstream service that an upstream service is struggling to connect to.
# Testing a downstream service that is normally only accessed by other internal services
kubectl port-forward service/downstream-service 8000:8080
You can then craft specific requests from your local machine to http://localhost:8000 to simulate the upstream service's calls, helping to pinpoint whether the issue lies with the downstream service itself or with the inter-service communication mechanism. This is invaluable when working with a distributed api ecosystem.
D. Working with Databases: Secure Local Access
Direct database access is often required for development, data migration, or ad-hoc querying. kubectl port-forward provides a secure channel for this, avoiding the need for complex VPNs or risky public exposures.
1. Connecting a Local SQL Client to a Kubernetes Database
Whether it's MySQL, PostgreSQL, MongoDB, or another database running as a pod in your cluster, port-forward allows your local database management tool (e.g., DBeaver, SQL Workbench, MongoDB Compass) to connect directly.
# MySQL: Forward local 3306 to MySQL pod's 3306
kubectl port-forward mysql-pod-xxxx 3306:3306

# MongoDB: Forward local 27017 to MongoDB pod's 27017
kubectl port-forward mongodb-pod-xxxx 27017:27017
Once the forward is active, you configure your local client to connect to localhost on the specified local port, using the credentials for your database in the cluster. This is significantly more secure than opening database ports to the internet.
2. Performing Data Migrations or Manual Inspections
For tasks like running schema migrations, importing/exporting data, or performing manual data inspections, having direct local access to the database is often crucial. port-forward facilitates these operations by making the remote database behave like a local one. Tools like pg_dump, mongodump, or custom scripts can then be run locally against the forwarded port.
These real-world applications underscore the versatility and importance of kubectl port-forward. It empowers developers with the ability to reach into their Kubernetes clusters with surgical precision, making debugging, development, and testing processes far more efficient and secure than traditional methods.
APIPark is a high-performance AI gateway that allows you to securely access the most comprehensive LLM APIs globally on the APIPark platform, including OpenAI, Anthropic, Mistral, Llama2, Google Gemini, and more.Try APIPark now! 👇👇👇
VI. Troubleshooting Common kubectl port-forward Issues
While kubectl port-forward is a robust and essential tool, developers can encounter a few common issues that prevent a successful connection. Understanding these problems and their solutions is key to effective troubleshooting.
A. "Error: unable to listen on any of the requested ports."
This is perhaps the most frequent error, indicating that kubectl cannot bind to the local port you specified.
1. Port Already In Use
- Cause: Another application or an existing
kubectl port-forwardprocess is already using theLOCAL_PORTyou've chosen. - Solution:
- Choose a different local port: The simplest solution is to pick another
LOCAL_PORTthat is free. For example, if8080is in use, try8081or9000. - Identify and terminate the conflicting process:
- On Linux/macOS: Use
lsof -i :<LOCAL_PORT>ornetstat -tulpn | grep :<LOCAL_PORT>to find the process ID (PID) listening on that port. Then, usekill <PID>to terminate it. - On Windows: Use
netstat -ano | findstr :<LOCAL_PORT>to find the PID, then usetaskkill /PID <PID> /Fto terminate it.
- On Linux/macOS: Use
- Check for lingering
kubectlprocesses: Sometimes,kubectl port-forwardprocesses running in the background (&) or from previous sessions might not have terminated cleanly. Useps -ef | grep 'kubectl port-forward'to find and kill any oldkubectlforwarding processes.
- Choose a different local port: The simplest solution is to pick another
2. Permissions Issues
- Cause: On Linux/macOS, binding to ports below
1024typically requires root privileges. If you try to forward to a local port like80or443withoutsudo, you'll get this error. - Solution:
- Use a higher local port: The recommended solution is to use a local port above
1024(e.g.,8080,3000,9000). - Use
sudo(less recommended): If you absolutely need to use a privileged local port, you can run thekubectl port-forwardcommand withsudo. However, this giveskubectlelevated privileges, which should be used with caution.
- Use a higher local port: The recommended solution is to use a local port above
B. "Error: Dialing with pod/mypod failed: failed to connect to pod/mypod."
This error indicates that kubectl could not establish the initial connection to the target pod through the API server and kubelet.
1. Pod Not Running or in a Bad State
- Cause: The target pod might be in a
Pending,CrashLoopBackOff,Error, orEvictedstate, or it might not exist anymore. - Solution:
- Check pod status: Run
kubectl get pods -n <NAMESPACE>to verify the pod's status. - Inspect pod events/logs: Use
kubectl describe pod <POD_NAME> -n <NAMESPACE>to check for events that might indicate why the pod isn't running. Usekubectl logs <POD_NAME> -n <NAMESPACE>to see if the application within the pod is failing to start. - Wait for pod readiness: If the pod is just starting up, give it some time to reach a
RunningandReadystate.
- Check pod status: Run
2. Incorrect Pod/Service Name or Namespace
- Cause: A typo in the pod or service name, or attempting to forward from a pod/service in a different namespace without specifying it.
- Solution:
- Verify names: Double-check the exact spelling of the pod, service, or deployment name using
kubectl get pods,kubectl get services, orkubectl get deployments. - Specify namespace: Always include the
-n <NAMESPACE>flag if the target resource is not in your currentkubectlcontext's default namespace. For example:kubectl port-forward -n my-app-ns my-pod 8080:80.
- Verify names: Double-check the exact spelling of the pod, service, or deployment name using
C. "Error from server (NotFound): pods "mypod" not found."
This error specifically means that the Kubernetes API server could not find a resource with the specified name and type in the given (or default) namespace.
1. Typo or Incorrect Resource
- Cause: You've made a spelling mistake in the resource name (pod, service, deployment) or specified the wrong type (e.g.,
pod/myserviceinstead ofservice/myservice). - Solution: Refer to the solution for "Incorrect Pod/Service Name or Namespace" above. Ensure you're using
pod/<pod_name>,service/<service_name>, ordeployment/<deployment_name>.
2. Wrong Namespace
- Cause: The resource exists, but in a different namespace than the one
kubectlis currently configured to use (or the default namespace if none is specified). - Solution: Add the
-n <NAMESPACE>flag to your command.
D. Connection drops or timeouts.
A port-forward session might initially establish but then unpredictably disconnect or cease forwarding traffic.
1. Pod Restarts
- Cause: The target pod might have crashed, restarted, or been evicted by Kubernetes, breaking the underlying connection.
- Solution: Monitor the pod's status (
kubectl get pods -w) while theport-forwardis active. If the pod is restarting frequently, address the application's stability issue. Forport-forwardto Services or Deployments,kubectlshould theoretically re-establish to another pod, but persistent pod instability will still cause issues.
2. Network Instability
- Cause: Intermittent network issues between your local machine and the Kubernetes cluster (or between the API server/kubelet and the pod).
- Solution: Check your internet connection. If you're on a VPN, ensure its stability. If running in a cloud environment, check the cloud provider's status.
3. Idling Connections
- Cause: Some network firewalls, load balancers, or even Kubernetes' own network policies might terminate idle connections after a certain period. If there's no traffic over the
port-forwardtunnel for too long, it might be closed. - Solution: If this is a persistent issue, consider trying to send keep-alive packets or restarting the
port-forwardmore frequently. For long-running local development sessions, runningnohup kubectl port-forward ... &might be marginally more robust, but it won't prevent external network closures.
E. Authentication and Authorization Challenges
If your kubectl context is not properly configured or your user lacks the necessary RBAC permissions, port-forward will fail.
- Cause: Missing or expired
kubeconfig, incorrect context selected, or insufficient RBAC permissions (e.g., lackinggetorportforwardpermissions on pods/services). - Solution:
- Check
kubeconfig: Ensure yourkubeconfigfile is correctly configured and points to the right cluster:kubectl config current-context,kubectl config view. - Verify permissions: If you suspect RBAC issues, consult your cluster administrator or check your roles/role bindings. For example, a user needs
getandportforwardverbs on the target resource (e.g.,podsorservices) in the relevant namespace.
- Check
By systematically addressing these common troubleshooting points, developers can quickly diagnose and resolve most kubectl port-forward issues, ensuring smooth and uninterrupted access to their Kubernetes-deployed applications.
VII. Security Implications and Best Practices
While kubectl port-forward is incredibly convenient, its ability to bypass standard ingress and network policies means it carries significant security implications. Used irresponsibly, it can inadvertently expose sensitive services or data. Therefore, understanding its security context and adhering to best practices is paramount.
A. port-forward as a Temporary Debug Tool
The fundamental principle governing the use of kubectl port-forward is that it is a temporary, development, and debugging tool. It is explicitly not designed for persistent service exposure, production access, or as a replacement for proper api gateways, ingress controllers, or load balancers. * Ephemeral Nature: The connection exists only as long as the kubectl command is running. This inherently limits its exposure window. * Local Scope: The forwarded port is typically bound to 127.0.0.1 (localhost) on your machine by default. This means only processes running on your local machine can access it. While you can explicitly bind to 0.0.0.0 (all interfaces) using --address 0.0.0.0, this is highly discouraged for security reasons as it exposes the forwarded port to your entire local network. Never use --address 0.0.0.0 unless you fully understand the risks and have robust firewall rules in place.
B. Limiting Access and Permissions (RBAC)
Kubernetes' Role-Based Access Control (RBAC) is the primary mechanism to control who can use kubectl port-forward.
- Granular Permissions: Users or service accounts need specific permissions to perform port forwarding. Specifically, they require:
getpermission on the target resource (e.g.,podsorservices).portforwardpermission (a subresource verb) on the target resource (e.g.,pods/portforward).
- Principle of Least Privilege: Always apply the principle of least privilege. Developers should only have
portforwardaccess to the namespaces and resources they genuinely need for their work. For instance, restrict access to production namespaces or sensitive infrastructure components. - Example RBAC Role: A simple role granting port-forward access might look like this:
yaml apiVersion: rbac.authorization.k8s.io/v1 kind: Role metadata: name: developer-port-forward namespace: dev-namespace rules: - apiGroups: [""] # "" indicates core API group resources: ["pods", "services"] verbs: ["get", "list", "watch"] # Need these to identify resources - apiGroups: [""] resources: ["pods/portforward", "services/portforward"] verbs: ["create"] # The 'create' verb is required for subresources like portforwardThis role would then be bound to a specific user or service account indev-namespace.
C. Avoiding Exposure of Sensitive Services
Even with localhost binding, port-forward allows a direct pipeline to internal services. This means:
- Internal
APIs: Be mindful when forwarding internalapis that might lack the same authentication or authorization layers as publicly exposed services. Whileport-forwarditself is authenticated, the internal service might not assume external scrutiny. - Databases: Direct access to databases via
port-forwardcan expose sensitive data. Always use strong credentials for database connections, even when connecting vialocalhost. - Configuration Files: If you're forwarding to a pod that hosts configuration files or secrets, be careful not to inadvertently download or expose them locally.
D. The Ephemeral Nature of port-forward Sessions
While a security feature, the ephemeral nature can also be a double-edged sword:
- Forgetting to Terminate: It's easy to start a
port-forwardin the background and forget about it. While bound tolocalhost, this still means a connection is open. Actively terminate sessions when they are no longer needed. - Session Hijacking: If your local machine is compromised while a
port-forwardsession is active (especially if bound to0.0.0.0or if your local firewall is weak), the attacker could potentially use your activeport-forwardtunnel to gain access to the cluster's internal network.
E. When to use port-forward vs. other exposure methods
Understanding the appropriate context for port-forward is a critical best practice.
| Method | Purpose | Security Implications | Best Use Case |
|---|---|---|---|
kubectl port-forward |
Temporary, local-only access | High security if bound to localhost; low if to 0.0.0.0. | Local dev, debugging, internal tool access |
| NodePort | Expose Service on all node IPs (fixed port) | Exposes on worker nodes; often requires firewall rules. | Simple dev/test clusters, internal services |
| LoadBalancer | Cloud provider managed external IP and LB | Depends on cloud provider's LB security; public by default. | Public-facing services, high traffic |
| Ingress | HTTP/HTTPS routing, hostname-based, path-based | Requires Ingress controller; public by default. | HTTP/HTTPS apis, web apps, gateway solutions |
| Service Mesh (e.g., Istio) | Advanced traffic management, security, observability | Complex setup; fine-grained control; robust security. | Microservice communication, advanced api governance |
- Production Never:
kubectl port-forwardshould never be used to provide persistent access to production services for end-users or other applications. Productionapis and services require robust, scalable, and secure exposure mechanisms like LoadBalancers, Ingress, or dedicatedapigateways. - Development and Debugging Only: Restrict
port-forwarduse to its intended purpose within secure development or staging environments.
By adhering to these security considerations and best practices, developers can harness the immense power of kubectl port-forward responsibly, maintaining both productivity and the integrity of their Kubernetes environments. It's a sharp tool, and like all sharp tools, it demands respect and careful handling.
VIII. Beyond port-forward: When to Consider Dedicated Solutions
While kubectl port-forward is an indispensable tool for local development and debugging, it's crucial to understand its limitations and when to transition to more robust, scalable, and secure solutions for exposing services, especially in production environments or when dealing with complex api ecosystems. Port-forward is a developer's direct conduit; for managed, enterprise-grade api exposure and AI model integration, different architectures and platforms are required.
A. Public Exposure: Ingress, LoadBalancer, NodePort
For services that need to be accessible from outside the Kubernetes cluster in a persistent and scalable manner, Kubernetes offers several native resource types:
- NodePort: Exposes a service on a static port on each node's IP address. While simple, it's generally not recommended for production due to node IP reliance and potential port conflicts.
- LoadBalancer: For cloud environments, this automatically provisions a cloud provider's load balancer, which then forwards external traffic to your service. This provides a stable external IP and handles traffic distribution.
- Ingress: An
APIobject that manages external access to services in a cluster, typically HTTP and HTTPS. Ingress provides HTTP routing, often based on hostnames or paths, and can integrate with SSL/TLS termination. It's often backed by an Ingress Controller (like Nginx, Traefik, or Istio) that implements the rules. Ingress is the common choice for exposing web applications andapis to the public internet, offering features like rate limiting, authentication, and URL rewriting.
These methods are designed for continuous, managed exposure, complete with load balancing, scaling, and integration with external DNS, making them suitable for production-grade applications where direct port-forward access is simply not feasible or secure.
B. Secure API Management for Production: The Need for an AI Gateway
As applications grow in complexity, especially those integrating Artificial Intelligence models, simply exposing a service via Ingress or LoadBalancer is often insufficient. Enterprises require more sophisticated control over their apis, encompassing security, traffic management, versioning, analytics, and developer experience. This is where dedicated API Management platforms and AI Gateway solutions become critical.
1. The Need for Robust AI Gateway Solutions
Modern applications increasingly leverage Large Language Models (LLMs) and other AI models. Integrating these models effectively into existing services, managing their apis, ensuring consistent access, and controlling costs can be a significant challenge. A dedicated AI Gateway addresses these specific needs: * Unified Access: Provides a single, unified entry point for diverse AI models, abstracting away their underlying apis and deployment specifics. * Security & Governance: Enforces authentication, authorization, rate limiting, and data privacy policies consistently across all AI apis. * Cost Management: Monitors and controls usage of expensive AI models, often allowing for intelligent routing to optimize for cost or performance. * Prompt Management: Standardizes prompt engineering, ensuring consistency and reusability across applications. * Observability: Provides detailed logging and analytics specific to AI model invocations.
2. Introduction to APIPark: An Open Source AI Gateway & API Management Platform
For organizations navigating the complexities of integrating AI and managing apis at scale, a platform like APIPark offers a compelling solution. APIPark is an all-in-one AI gateway and api developer portal, open-sourced under the Apache 2.0 license, designed to streamline the management, integration, and deployment of both AI and REST services.
Unlike kubectl port-forward, which provides a low-level, temporary tunnel, APIPark operates at a higher, strategic layer, offering robust capabilities for production environments:
- Quick Integration of 100+ AI Models: APIPark provides a unified management system for integrating a wide variety of AI models, handling authentication and cost tracking centrally. This vastly simplifies access to powerful LLMs like Claude or Deepseek.
- Unified
APIFormat for AI Invocation: It standardizes the request data format across different AI models. This crucial feature ensures that changes in underlying AI models or prompts do not ripple through and affect dependent applications or microservices, significantly simplifying AI usage and reducing maintenance costs. - Prompt Encapsulation into REST
API: Developers can easily combine AI models with custom prompts to create new, specializedapis (e.g., sentiment analysis, translation) that can be exposed as standard REST endpoints. - End-to-End
APILifecycle Management: APIPark assists with the entireapilifecycle, from design and publication to invocation and decommissioning. It helps manage traffic forwarding, load balancing, and versioning for publishedapis, a level of sophistication far beyond whatport-forwardcan offer. APIService Sharing within Teams: The platform centralizes the display of allapiservices, fostering collaboration and reuse across different departments and teams, acting as an internalapigatewayand marketplace.- Independent
APIand Access Permissions for Each Tenant: APIPark supports multi-tenancy, allowing for the creation of multiple teams with independent applications, data, user configurations, and security policies, while sharing the underlying infrastructure to optimize resource utilization. APIResource Access Requires Approval: Enhancing security, APIPark allows for subscription approval features, ensuring that callers must subscribe to anapiand receive administrator approval before invocation, preventing unauthorized access and potential data breaches.- Performance Rivaling Nginx: Built for high performance, APIPark can achieve over 20,000 TPS on modest hardware, supporting cluster deployment for large-scale traffic.
- Detailed
APICall Logging and Powerful Data Analysis: It provides comprehensive logging of everyapicall and analyzes historical data to display long-term trends and performance changes, offering proactive insights for system stability and security.
3. Discussing OpenAPI Specifications in the Context of APIPark for Well-Defined APIs
OpenAPI (formerly Swagger) is a widely adopted, language-agnostic specification for describing RESTful apis. It defines a standard, machine-readable interface file that allows both humans and computers to discover and understand the capabilities of a service without access to source code or documentation. In the context of robust API Management platforms like APIPark, OpenAPI plays a pivotal role:
- Documentation and Discovery: APIPark can consume
OpenAPIspecifications to automatically generate interactiveapidocumentation in its developer portal, making it easy for developers to discover, understand, and integrate availableapis. APIGateway Configuration:OpenAPIdefinitions can inform thegateway's configuration for routing, validation, and policy enforcement, ensuring thatapicalls conform to the defined contract.- Testing and Validation: Tools can leverage
OpenAPIspecifications to automatically generate test cases or validate incoming requests against theapi's schema, enhancing data integrity and reliability. - Code Generation:
OpenAPIenables the automatic generation of client SDKs in various programming languages, accelerating integration efforts forapiconsumers.
By integrating OpenAPI standards, APIPark not only provides the infrastructure for managing apis but also promotes best practices for api design and documentation, leading to a more consistent, discoverable, and usable api ecosystem. This is a stark contrast to kubectl port-forward, which merely provides a direct network pipe without any inherent api awareness or management capabilities.
C. Service Mesh for Advanced Traffic Management
For extremely complex microservice environments requiring advanced features like sophisticated traffic routing (e.g., A/B testing, canary deployments), circuit breaking, fine-grained access control, and deep observability, a Service Mesh (e.g., Istio, Linkerd) is often employed. A service mesh adds a proxy (a "sidecar" container) to each application pod, intercepting and managing all network traffic between services. While more complex to set up, it provides unparalleled control and visibility over inter-service communication, complementing api gateways for external traffic.
In conclusion, kubectl port-forward is a powerful, low-level tool for direct, temporary access. However, for production-grade api exposure, especially with the rise of AI models, solutions like Kubernetes Ingress, LoadBalancers, and critically, dedicated AI Gateway and API Management platforms such as APIPark, become essential. These platforms offer the scalability, security, and advanced management features that port-forward inherently lacks, transforming raw network access into a fully governed and optimized api ecosystem, often leveraging standards like OpenAPI for enhanced discoverability and integration.
IX. Deep Dive: The Inner Workings of kubectl port-forward
To fully appreciate the robustness and design of kubectl port-forward, it's beneficial to understand its internal architecture and how it orchestrates connectivity within the complex Kubernetes network. It's not just a simple network tunnel; it's a sophisticated interaction between several core Kubernetes components.
A. Kubernetes API Server as the Intermediary
As briefly mentioned earlier, the Kubernetes API server is the central control plane component, the primary interface for users, management components, and external agents to interact with the cluster. For kubectl port-forward, the API server plays a critical role as the initial point of contact and an essential intermediary.
- Client Request: When you execute
kubectl port-forward, yourkubectlclient doesn't directly connect to the target pod's IP address. Instead, it makes an authenticated and authorized HTTP request to the Kubernetes API server. This request typically targets a subresource of the pod, specifically/api/v1/namespaces/{namespace}/pods/{name}/portforward. - Authentication and Authorization: The API server first authenticates your
kubectlclient using your configuredkubeconfigcredentials (e.g., client certificates, bearer tokens). Following authentication, it performs an authorization check using RBAC. This ensures that you have the necessarygetandportforwardpermissions for the specified pod or service in its namespace. If these checks fail, theport-forwardcommand will immediately error out with an authorization denied message. - Protocol Upgrade: If authorized, the API server attempts to upgrade the HTTP connection to a WebSocket connection or a SPDY (pronounced "speedy") stream. SPDY was an older protocol designed for low-latency web communication, a precursor to HTTP/2, and was historically used by
kubectlfor features likeexecandport-forward. Modernkubectlversions often leverage HTTP/2 for these streaming connections. This upgraded connection serves as the secure, multiplexed channel for carrying the port-forwarded data.
B. SPDY/HTTP/2 Stream Protocol
The choice of SPDY or HTTP/2 for the underlying transport is crucial for the efficiency and reliability of kubectl port-forward.
- Multiplexing: Unlike traditional HTTP/1.1 where each request-response pair typically required a new TCP connection, SPDY and HTTP/2 support multiplexing. This means multiple independent, bidirectional streams can be carried over a single TCP connection. For
port-forward, this allows thekubectlclient and the API server to maintain a single persistent connection while simultaneously handling the data flow for the forwarded port. - Bidirectional Communication: These protocols inherently support full-duplex, bidirectional communication. This is essential for
port-forwardas data needs to flow from the local machine to the pod, and responses (or application data) need to flow back from the pod to the local machine over the same logical connection. - Efficiency: By reducing the overhead of establishing new TCP connections and enabling parallel data streams, SPDY/HTTP/2 contribute to a more efficient and responsive
port-forwardexperience, particularly when dealing with intermittent traffic or multiple forwarded ports.
C. Relationship with kubelet
Once the API server has established the upgraded stream connection with the kubectl client, it needs to bridge this to the actual pod. This is where the kubelet comes into play.
kubeletAgent: Each worker node in a Kubernetes cluster runs akubeletagent. Thekubeletis responsible for managing pods and their containers on that specific node. It communicates with the API server, receiving instructions and reporting pod status.kubelet's Role in Port Forwarding: When the API server receives aport-forwardrequest, it forwards this request down to thekubeleton the node where the target pod is scheduled. Thekubeletitself exposes an authenticated API endpoint that the API server uses for features likeexec,logs, andport-forward.- Local Connection to Pod: Upon receiving the
port-forwardinstruction from the API server, thekubeletestablishes a direct TCP connection to the specifiedREMOTE_PORTwithin the target pod's network namespace on its local node. This is possible because thekubeletruns with elevated privileges on the node and has access to the underlying container runtime (e.g., containerd, CRI-O) and the network namespaces of the pods it manages. - Data Proxying: The
kubeletthen acts as a local proxy. It reads data from its connection to the pod's port and sends it up the SPDY/HTTP/2 stream to the API server. Conversely, data arriving from the API server via the stream is written by thekubeletto the pod's port. This completes the end-to-end tunnel:kubectl client <-> API Server <-> kubelet <-> Pod.
D. Network Address Translation (NAT) and Routing
It's important to understand what kubectl port-forward doesn't do regarding network address translation (NAT) or complex routing.
- No Direct Network Modification:
kubectl port-forwarddoes not alter any iptables rules on the worker nodes, modify network policies, or create new Kubernetes Service objects. It's purely a temporary, data-proxying mechanism. - Pod IP Isolation: The pod's internal IP address remains isolated. The
port-forwardtunnel is established directly to the pod's network namespace, but the pod's IP itself is not exposed externally or on your local machine. The local port on your machine (LOCAL_PORT) acts as the endpoint for the forwarded traffic. - DNS Resolution: If you specify a Service name for
port-forwarding,kubectlfirst performs a lookup using the Kubernetes API to identify a healthy pod backing that service. It then proceeds to forward to that specific pod's IP address and port via itskubelet. It doesn't rely on or modify DNS resolution on your local machine for the cluster's internal DNS.
In essence, kubectl port-forward creates a carefully controlled, secure, and authenticated channel that leverages existing Kubernetes components to extend the pod's network reach to your local workstation. It's a testament to Kubernetes' extensible api design and the intelligent orchestration of its core components, providing developers with powerful direct access while maintaining the cluster's inherent security and isolation principles.
X. Practical Examples and Advanced Configurations
Building on the fundamental and advanced syntax, let's explore some more specific and illustrative practical examples, including a scenario involving multi-container pods and a table summarizing key commands.
A. Scenario: Debugging a Multi-Tier Application
Consider a common application architecture: a frontend web server, a backend api service, and a database, all running as separate Deployments in a Kubernetes cluster. You're debugging an issue where the frontend isn't displaying data correctly, and you suspect a problem with the backend api's interaction with the database.
- Accessing the Frontend (for initial diagnosis): First, you want to ensure the frontend itself is deployed and accessible.
bash kubectl port-forward deployment/my-frontend 3000:80(Accesshttp://localhost:3000to see the UI.) If the UI loads but shows an error, you move to the backend. - Accessing the Backend
API(for deeper inspection): Now, you need to test the backendapidirectly. Your backend service (my-backend-api) is aClusterIPtype, listening on port8080.bash kubectl port-forward service/my-backend-api 8081:8080(Accesshttp://localhost:8081/dataorhttp://localhost:8081/statusto testapiendpoints directly withcurlor Postman.) If theapiendpoints return errors, you might need to check its connection to the database. - Accessing the Database (for direct query): Your database (e.g.,
my-sql-db) is running as a pod and listening on port3306. You want to connect your local MySQL Workbench to it.bash kubectl port-forward deployment/my-sql-db 3306:3306(Connect MySQL Workbench tolocalhost:3306.) Now you can directly query the database to verify data integrity or schema, which might reveal why the backendapiis failing. - Concurrent Debugging (Multi-port forward): If you need to access both the backend
apiand the database simultaneously from your local machine (e.g., to run a local debugger that interacts with the backend while also inspecting the database), you can combine these:bash nohup kubectl port-forward service/my-backend-api 8081:8080 & nohup kubectl port-forward deployment/my-sql-db 3307:3306 &Here, the backendapiis onlocalhost:8081, and the database is onlocalhost:3307(using a different local port to avoid conflict with a potentially local MySQL instance). Both run in the background.
This scenario demonstrates how kubectl port-forward provides flexible, on-demand access to different tiers of a complex application stack, allowing for isolated testing and comprehensive debugging without the need for complex external routing or configuration changes within the cluster.
B. Forwarding to a Specific Container within a Multi-Container Pod
Sometimes, a single pod might host multiple containers (e.g., an application container and a sidecar container for logging or a proxy). If only one of these containers exposes a specific port, kubectl port-forward will typically connect to it by default if the port is unique. However, if multiple containers expose the same port, you might need to specify the target container.
Unfortunately, the kubectl port-forward command itself does not have a direct --container flag like kubectl exec does. It targets the pod's overall network namespace. The kubelet then attempts to connect to the specified REMOTE_PORT within that namespace. If multiple containers within the pod are listening on that same port, the behavior can be undefined or depend on the CNI plugin's specific implementation.
Best Practice: To reliably target a specific container's port in a multi-container pod: * Use distinct ports: Ensure each container within a pod that needs to be port-forwarded listens on a unique port. This is the most reliable method. * Separate into distinct pods: If containers genuinely need to share a port and be separately accessible, they are likely better suited as separate pods (perhaps managed by the same Deployment).
C. Scripting port-forward for Automated Tasks
kubectl port-forward can be integrated into scripts for automated setup of development environments or for specific testing routines.
#!/bin/bash

NAMESPACE="dev"
FRONTEND_PORT="3000:80"
BACKEND_API_PORT="8081:8080"
DATABASE_PORT="3306:3306"

echo "Starting port-forwards for application in namespace: $NAMESPACE"

# Get a stable pod name for the frontend deployment
FRONTEND_POD=$(kubectl get pod -n "$NAMESPACE" -l app=my-frontend -o jsonpath='{.items[0].metadata.name}')
if [ -z "$FRONTEND_POD" ]; then
  echo "Frontend pod not found. Exiting."
  exit 1
fi
echo "Forwarding frontend pod $FRONTEND_POD..."
kubectl port-forward -n "$NAMESPACE" "$FRONTEND_POD" "$FRONTEND_PORT" > /dev/null 2>&1 &
FRONTEND_PID=$!
echo "Frontend forward PID: $FRONTEND_PID (localhost:${FRONTEND_PORT%%:*})"

# Forward to the backend API service
echo "Forwarding backend API service/my-backend-api..."
kubectl port-forward -n "$NAMESPACE" service/my-backend-api "$BACKEND_API_PORT" > /dev/null 2>&1 &
BACKEND_PID=$!
echo "Backend API forward PID: $BACKEND_PID (localhost:${BACKEND_API_PORT%%:*})"

# Forward to the database deployment
echo "Forwarding database deployment/my-sql-db..."
kubectl port-forward -n "$NAMESPACE" deployment/my-sql-db "$DATABASE_PORT" > /dev/null 2>&1 &
DB_PID=$!
echo "Database forward PID: $DB_PID (localhost:${DATABASE_PORT%%:*})"

echo "All forwards started in background. Press [Enter] to terminate them..."
read -r

echo "Terminating port-forward processes..."
kill "$FRONTEND_PID" "$BACKEND_PID" "$DB_PID"
echo "Processes terminated."
This script automates the setup, runs the forwards in the background, captures their PIDs, and provides a simple way to terminate them. Such scripting enhances developer productivity by standardizing environment setup and reducing manual overhead.
Table: kubectl port-forward Command Reference and Use Cases
This table provides a concise summary of common kubectl port-forward commands and their applications, reinforcing the versatility of this essential tool.
| Target Type | Command Example | Description | Key Use Case |
|---|---|---|---|
| Pod (specific) | kubectl port-forward my-pod-abcd 8080:80 |
Forwards local port 8080 to port 80 of my-pod-abcd. |
Debugging a specific instance, direct api interaction. |
| Service | kubectl port-forward service/my-service 3000:80 |
Forwards local port 3000 to port 80 of my-service. Selects a healthy pod. |
Stable access for local dev, testing a service's api endpoint. |
| Deployment | kubectl port-forward deployment/my-deployment 5000:5000 |
Forwards local port 5000 to port 5000 of a randomly chosen pod in my-deployment. |
Quick access to any healthy replica of an application. |
| ReplicaSet | kubectl port-forward replicaset/my-rs-name 6000:6000 |
Similar to Deployment, targets a pod in the specified ReplicaSet. | Less common, usually covered by Deployment forwarding. |
| Multiple Ports | kubectl port-forward my-pod 8080:80 9090:metrics |
Forwards local 8080 to pod 80, and local 9090 to pod metrics port. |
Debugging multi-port services, accessing api and admin interfaces concurrently. |
| Backgrounded | nohup kubectl port-forward my-pod 8080:80 & |
Runs the forwarding process in the background, robust to terminal closure. | Long-running dev sessions, keeping a connection open while doing other tasks. |
| Specific Namespace | kubectl port-forward -n my-app-ns my-pod 8080:80 |
Explicitly specifies the namespace for the target resource. | Essential for multi-namespace environments. |
| Local-only Binding | kubectl port-forward --address 127.0.0.1 my-pod 8080:80 (default) |
Explicitly binds the local port to the loopback interface. | Enhanced security, preventing network-wide exposure. |
| Network-wide Binding | kubectl port-forward --address 0.0.0.0 my-pod 8080:80 (use with extreme caution) |
Binds the local port to all network interfaces on your machine. | Highly discouraged for security reasons. Only for very specific, controlled scenarios. |
These examples and the reference table demonstrate the versatility and power of kubectl port-forward. By understanding and applying these commands, developers gain unparalleled flexibility in interacting with their Kubernetes-deployed applications, significantly streamlining their workflow and enabling effective debugging in a complex cloud-native world.
XI. Conclusion: Empowering Developers with Direct Access
Throughout this comprehensive guide, we have journeyed deep into the capabilities and nuances of kubectl port-forward, revealing its position as an indispensable utility for any developer working within the Kubernetes ecosystem. From its foundational role in bridging local development environments with remote cluster services to its advanced applications in intricate debugging scenarios, port-forward stands out for its directness, simplicity, and effectiveness. It provides a secure, temporary conduit that cuts through layers of network abstraction, offering developers a surgical tool to interact intimately with their containerized applications without the complexities or risks associated with public exposure.
We've explored how port-forward operates by leveraging the Kubernetes API server and kubelet to establish a secure, ephemeral tunnel, distinguishing it from traditional network forwarding techniques. The guide detailed its basic usage for pods, services, and deployments, then delved into advanced syntax, including forwarding multiple ports, running processes in the background, and targeting specific resources. Real-world scenarios illuminated its practical power, demonstrating its utility in local development, debugging api endpoints, accessing internal administrative interfaces, and securely connecting to databases. Furthermore, we addressed common troubleshooting challenges, providing clear solutions to ensure smooth operation, and critically, highlighted the security implications and best practices to ensure responsible usage.
However, our exploration also underscored kubectl port-forward's inherent limitations. While paramount for temporary, local interactions, it is explicitly not designed for production-grade service exposure or comprehensive API management. For those critical enterprise needs, especially in an era increasingly dominated by Artificial Intelligence, solutions like Kubernetes Ingress, LoadBalancers, and specialized AI gateway and API Management platforms become paramount. Tools such as APIPark exemplify this evolution, offering robust, scalable, and secure platforms for integrating 100+ AI models, standardizing api formats (including leveraging OpenAPI specifications), and providing end-to-end API lifecycle management. These platforms address the complex requirements of api governance, security, and performance at scale, transforming how enterprises manage their digital assets.
In essence, kubectl port-forward empowers developers with direct, surgical access, accelerating the iterative development and debugging process. It is a testament to Kubernetes' design philosophy of providing powerful primitives for cluster interaction. As the cloud-native landscape continues to evolve, understanding and effectively wielding tools like port-forward will remain a foundational skill, while simultaneously recognizing when to transition to more sophisticated, dedicated solutions for deploying and managing apis in production. By mastering both, developers and organizations can navigate the complexities of modern software development with confidence, efficiency, and unparalleled control.
XII. FAQ
1. What is kubectl port-forward and why is it used?
kubectl port-forward is a Kubernetes command-line utility that creates a secure, temporary tunnel between a local port on your workstation and a specific port on a pod, service, or deployment within a Kubernetes cluster. It's primarily used for local development, debugging applications, and accessing internal services (like databases or administrative interfaces) that are not exposed to the public internet, without needing to modify cluster resources or external network configurations.
2. What's the difference between forwarding to a Pod, Service, or Deployment?
- Pod: Targets a specific pod instance by its exact (dynamic) name. Useful for debugging a particular replica.
- Service: Targets a Kubernetes Service by its stable name.
kubectlautomatically selects one of the healthy pods behind the service. This is more resilient as it can switch to another pod if the initial target restarts. - Deployment/ReplicaSet: Similar to Service,
kubectlselects a healthy pod managed by the specified Deployment or ReplicaSet. Useful when you need to access any instance of an application managed by a deployment.
3. Is kubectl port-forward secure for production use?
No, kubectl port-forward is not designed or recommended for production use or persistent service exposure. It is a temporary debugging and development tool. While the connection itself is authenticated and authorized via your kubeconfig and RBAC, it does not offer the scalability, robust security features (like advanced traffic management, rate limiting, and comprehensive access control), or reliability required for production apis or services. For production, use Ingress, LoadBalancer, or dedicated API Management platforms like APIPark.
4. How do I run kubectl port-forward in the background?
You can run kubectl port-forward in the background by appending & to the command (e.g., kubectl port-forward my-pod 8080:80 &). For more persistent background operations that survive terminal closure, use nohup (e.g., nohup kubectl port-forward my-pod 8080:80 &). Remember to periodically check for and terminate these background processes when they are no longer needed to free up local ports.
5. What are common troubleshooting steps if port-forward fails?
If kubectl port-forward fails, check the following: 1. Local Port Conflict: Ensure the LOCAL_PORT is not already in use on your machine. Use lsof -i :<PORT> (Linux/macOS) or netstat -ano | findstr :<PORT> (Windows) to identify and terminate conflicting processes. 2. Resource Name/Namespace: Verify the exact spelling of the pod, service, or deployment name and ensure you're in the correct namespace or using the -n <NAMESPACE> flag. 3. Pod Status: Check if the target pod is actually Running and Ready using kubectl get pods. 4. RBAC Permissions: Ensure your Kubernetes user has get and portforward permissions for the target resource in the relevant namespace. 5. Remote Port: Confirm the REMOTE_PORT specified in the command is the correct port your application is listening on inside the pod.
🚀You can securely and efficiently call the OpenAI API on APIPark in just two steps:
Step 1: Deploy the APIPark AI gateway in 5 minutes.
APIPark is developed based on Golang, offering strong product performance and low development and maintenance costs. You can deploy APIPark with a single command line.
curl -sSO https://download.apipark.com/install/quick-start.sh; bash quick-start.sh

In my experience, you can see the successful deployment interface within 5 to 10 minutes. Then, you can log in to APIPark using your account.

Step 2: Call the OpenAI API.