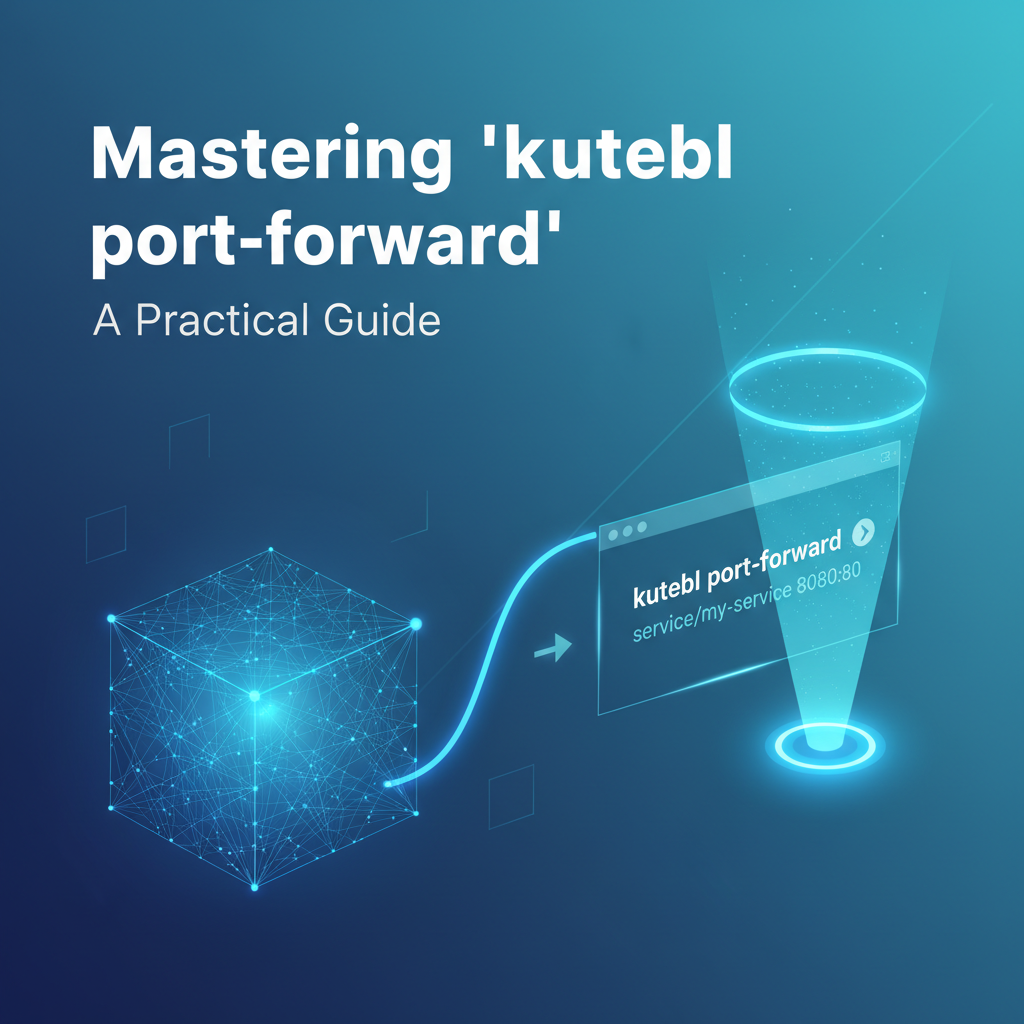
Mastering kubectl port-forward: A Practical Guide


In the intricate world of container orchestration, Kubernetes stands as a towering giant, providing unparalleled power to deploy, scale, and manage applications. However, this power often comes with layers of abstraction, particularly when it comes to network accessibility. While Kubernetes excels at ensuring services within its cluster can communicate seamlessly, accessing these internal services directly from your local development machine can sometimes feel like navigating a labyrinth. This is precisely where the humble yet incredibly potent kubectl port-forward command steps in, acting as a crucial bridge between your local environment and the heart of your Kubernetes cluster. It’s a foundational tool for any developer, operations engineer, or administrator working with Kubernetes, offering a temporary, secure, and direct tunnel to internal services without exposing them publicly.
This comprehensive guide delves deep into the mechanics, practical applications, and advanced techniques of kubectl port-forward. We will journey from its fundamental principles to intricate use cases, exploring how this command facilitates debugging, local development, and ad-hoc access to various Kubernetes resources. By the end of this exploration, you will not only understand how to wield kubectl port-forward with confidence but also appreciate its indispensable role in streamlining your Kubernetes workflow. Whether you are debugging a flaky microservice, connecting to a database for a quick query, or integrating a local application with a remote component, port-forward will become an indispensable ally in your daily development and operational arsenal.
Understanding the Fundamentals of kubectl port-forward
Before we dive into the practicalities of kubectl port-forward, it's essential to grasp the underlying networking model of Kubernetes and the specific problem that port-forward is designed to solve. Kubernetes employs a flat networking model where all Pods can communicate with each other directly without NAT, and nodes can communicate with all Pods. However, this internal network is typically isolated from the external world for security and management purposes. Services are often exposed internally via ClusterIP, making them reachable only from within the cluster. While this isolation is a cornerstone of Kubernetes security, it presents a challenge for developers who need direct, temporary access to these internal services from their local machines for testing, debugging, or rapid iteration.
kubectl port-forward establishes a secure, client-side tunnel from a port on your local machine to a port on a specific Pod, Deployment, or Service within your Kubernetes cluster. It essentially takes traffic sent to a specified local port and forwards it directly to a specified port on the target Kubernetes resource. This process bypasses any ingress controllers, load balancers, or external IP assignments, providing a direct, unadulterated connection. It’s particularly invaluable because it doesn't require any changes to your cluster's network configuration, making it a non-invasive and temporary solution perfectly suited for development and debugging tasks. The command leverages the Kubernetes API server as a proxy, which ensures that all connections are authenticated and authorized according to your kubectl configuration and RBAC policies, adding a layer of security to this convenient access method.
The command operates by opening a local socket on your machine and a corresponding socket within the target Pod or Service. When data is sent to the local port, kubectl wraps it, sends it through the authenticated and encrypted API server connection, and then delivers it to the target port within the Kubernetes resource. This bi-directional communication ensures that you can both send requests to and receive responses from the target service as if it were running natively on your localhost. This fundamental understanding is crucial for appreciating the simplicity and power of kubectl port-forward and for troubleshooting any issues that might arise during its usage.
Basic Usage: Getting Started with kubectl port-forward
The simplest form of kubectl port-forward involves forwarding a port from a specific Pod. This is often the starting point for many debugging scenarios. Let's break down the basic syntax and provide practical examples.
Forwarding a Single Port from a Pod
To forward a port from a Pod, you need to know the Pod's name and the port it's listening on. The general syntax is:
kubectl port-forward <pod-name> <local-port>:<remote-port>
Here's what each part signifies: * <pod-name>: The exact name of the Pod you want to connect to. You can find this by running kubectl get pods. * <local-port>: The port on your local machine that you want to open. You will access the service through this port. * <remote-port>: The port on the Pod that the service is actually listening on.
Example Scenario: Imagine you have a web application running inside a Pod named my-web-app-789c6d7f8-abcde, and this application is serving traffic on port 80. You want to access it from your local browser on port 8080.
kubectl port-forward pod/my-web-app-789c6d7f8-abcde 8080:80
Upon executing this command, you will see output similar to:
Forwarding from 127.0.0.1:8080 -> 80
Forwarding from [::1]:8080 -> 80
This indicates that kubectl has successfully established the port forward. Now, you can open your web browser and navigate to http://localhost:8080, and your requests will be securely routed to port 80 of the my-web-app Pod within your Kubernetes cluster. This direct access is incredibly valuable for testing new features, validating configurations, or diagnosing issues without the complexities of external load balancers or ingress rules. The connection remains active as long as the kubectl port-forward command is running in your terminal. If you close the terminal or press Ctrl+C, the forward will be terminated.
Forwarding from a Deployment or Service
While forwarding directly from a Pod is useful, Pods in Kubernetes are ephemeral. They can be restarted, rescheduled, or replaced, leading to a change in their names or even their IP addresses. If your Pod restarts, your port-forward connection will break, and you'll have to find the new Pod name and re-establish the connection. To address this, kubectl port-forward offers the ability to forward to a Deployment or a Service. This method provides greater resilience, as kubectl will automatically select a healthy Pod managed by the Deployment or targeted by the Service and re-establish the connection if the underlying Pod changes.
Forwarding to a Deployment:
When forwarding to a Deployment, kubectl will automatically pick one of the healthy Pods managed by that Deployment. This is a robust approach when you're working with services that might scale or undergo rolling updates.
kubectl port-forward deployment/my-deployment 8080:80
Example: If your web application is managed by a Deployment named my-web-deployment:
kubectl port-forward deployment/my-web-deployment 8080:80
This command works similarly to the Pod-specific forward but offers the advantage of automatically adapting to Pod changes within the Deployment. kubectl intelligently finds an available Pod associated with the my-web-deployment and establishes the tunnel. This makes your development workflow more resilient to the dynamic nature of Kubernetes Pods.
Forwarding to a Service:
Forwarding to a Service is often the most recommended approach for stability. A Kubernetes Service provides a stable network endpoint (ClusterIP) that abstracts away the individual Pods. When you forward to a Service, kubectl leverages the Service's internal load-balancing capabilities to select an endpoint Pod. This is beneficial because the Service acts as a consistent front for one or more Pods, even if they are scaled up, down, or replaced.
kubectl port-forward service/my-service 8080:80
Example: If your web application is exposed via a Service named my-web-service:
kubectl port-forward service/my-web-service 8080:80
This method is particularly powerful because it ensures that even if all Pods managed by the service are replaced, as long as the service itself remains operational and has healthy endpoints, your port-forward connection will remain stable. This resilience is critical for long-running debugging sessions or when you need a consistent connection during active development cycles.
Forwarding Multiple Ports
Sometimes, an application might expose multiple services on different ports (e.g., an HTTP API on port 80 and a metrics endpoint on port 9090). kubectl port-forward allows you to forward multiple ports in a single command.
The syntax for multiple ports is straightforward:
kubectl port-forward <resource-type>/<resource-name> <local-port-1>:<remote-port-1> <local-port-2>:<remote-port-2>
Example: To forward local port 8080 to Pod port 80 and local port 9090 to Pod port 9090 from a Deployment:
kubectl port-forward deployment/my-multiport-app 8080:80 9090:9090
This command will establish two independent tunnels, allowing you to access both services simultaneously from your local machine. This flexibility is crucial when dealing with microservices that expose different functionalities on distinct network ports, streamlining the debugging process for complex applications.
Listening on a Different Local Port (Implicitly)
While the explicit local-port:remote-port syntax is clear, kubectl port-forward offers a shorthand when you want the local port to be the same as the remote port, or when you simply provide a single local port.
If you omit the remote port, kubectl will assume you want to forward to the same port on the remote resource:
kubectl port-forward deployment/my-app 8080
In this case, kubectl will forward traffic from your local 8080 to port 8080 on the my-app Deployment's Pod. If the application in the Pod isn't listening on 8080, the connection will fail.
More commonly, if you only provide one port, kubectl will interpret it as the local port and attempt to forward it to the first exposed port of the target Pod. This can be convenient but also a source of confusion if the Pod exposes multiple ports and you're not sure which one kubectl will choose. It's generally best practice to explicitly define both <local-port>:<remote-port> for clarity and reliability, unless you are certain of the Pod's port configuration and your desired mapping.
For example, if a Pod exposes port 80 and you execute kubectl port-forward pod/my-pod 9000, kubectl will likely forward local port 9000 to the Pod's port 80, if 80 is its primary exposed port. However, it's always safer and clearer to write kubectl port-forward pod/my-pod 9000:80.
Understanding these basic usage patterns is the first step towards effectively leveraging kubectl port-forward. With these commands, you can establish direct, temporary access to your Kubernetes services, significantly improving your ability to develop, test, and debug applications within the cluster's isolated environment.
Advanced Techniques and Scenarios with kubectl port-forward
Beyond basic port forwarding, kubectl port-forward offers several advanced capabilities and considerations that can significantly enhance your workflow. These techniques address common challenges and provide solutions for more complex scenarios.
Specifying a Namespace
Kubernetes clusters are often segmented into namespaces to organize resources, enforce isolation, and manage access. By default, kubectl operates within the default namespace. However, if your target Pod, Deployment, or Service resides in a different namespace, you must explicitly specify it using the -n or --namespace flag.
kubectl -n my-namespace port-forward pod/my-pod 8080:80
Example: If your application is running in a namespace called development and its Pod is backend-api-pod:
kubectl -n development port-forward pod/backend-api-pod 9000:8080
This command ensures that kubectl correctly identifies the target resource within the specified namespace, preventing "resource not found" errors and allowing you to interact with services across different logical segregations of your cluster. Always double-check the namespace of your target resource to avoid connectivity issues.
Backgrounding the Process for Continuous Access
Running kubectl port-forward in the foreground means that your terminal window is occupied, and closing it terminates the connection. For longer debugging sessions or continuous local development, it's often desirable to run the port-forward process in the background.
Using & (for Linux/macOS):
On Unix-like systems, you can simply append an ampersand (&) to the command to run it in the background:
kubectl port-forward deployment/my-app 8080:80 &
This will immediately return control to your terminal, and the port forward will continue running. You'll typically see a job ID and process ID displayed. To bring it back to the foreground, you can use fg. To stop it, you can use kill <process-ID> or kill %<job-ID>.
Using nohup or screen/tmux:
For more robust backgrounding that persists even if you close your terminal session, nohup or terminal multiplexers like screen or tmux are excellent choices.
nohup: Stands for "no hang up". It allows a command to run indefinitely, even after the user logs out. Output is typically redirected tonohup.out.bash nohup kubectl port-forward deployment/my-app 8080:80 > /dev/null 2>&1 &The> /dev/null 2>&1part redirects standard output and standard error to/dev/null, preventingnohup.outfrom being created and keeping your directory clean.
screen / tmux: These tools create persistent terminal sessions. You can start a session, run kubectl port-forward, detach from the session, and the command will continue running. You can reattach to the session later from the same or a different terminal. This is often the preferred method for managing multiple long-running background tasks.```bash
Start a new tmux session
tmux new -s my-forward-session
Inside the tmux session, run your command
kubectl port-forward deployment/my-app 8080:80
Detach from the session (Ctrl+B, then D)
To reattach later: tmux attach -t my-forward-session
```
Programmatic termination of background processes typically involves identifying the process ID (PID) using ps aux | grep 'kubectl port-forward' and then using kill <PID>.
Forwarding to Specific Containers within a Multi-Container Pod
Kubernetes Pods can contain multiple containers (e.g., an application container and a sidecar logging agent). By default, kubectl port-forward attempts to forward to the first container defined in the Pod specification. If you need to target a specific container within a multi-container Pod, you can use the -c or --container flag.
kubectl port-forward pod/my-multi-container-pod 8080:80 -c my-sidecar-container
Example: Suppose you have a Pod named data-processor-pod with two containers: processor (on port 8000) and metrics-exporter (on port 9100). To access the metrics-exporter directly:
kubectl port-forward pod/data-processor-pod 9100:9100 -c metrics-exporter
This ensures that your local connection is directed precisely to the intended container within the Pod, which is essential for debugging specific components of a multi-container application.
Handling Common Errors and Troubleshooting
Despite its simplicity, you might encounter issues when using kubectl port-forward. Understanding common errors and their solutions is key to efficient troubleshooting.
Unable to listen on port <port>: listen tcp 127.0.0.1:<port>: bind: address already in use:- Cause: The
<local-port>you specified is already being used by another application on your machine. - Solution: Choose a different local port that is free. You can check occupied ports using
netstat -tulnp(Linux) orlsof -iTCP -sTCP:LISTEN(macOS).
- Cause: The
error: Pod "my-pod" not found/error: service "my-service" not found:- Cause: The Pod or Service name is incorrect, or it's in a different namespace than the one
kubectlis currently configured for (or the one you specified). - Solution: Double-check the resource name (e.g.,
kubectl get pods -n <namespace>). Ensure you are in the correct namespace or use the-nflag.
- Cause: The Pod or Service name is incorrect, or it's in a different namespace than the one
error: error forwarding port 80: UPNP_AddPortMapping(TCP, 80, 192.168.1.100, 80, 0, 'kube-proxy') failed(or similar networking errors):- Cause: This can indicate various network configuration problems, firewall issues on your local machine, or problems within the Kubernetes cluster's network fabric that prevent
kubectlfrom establishing the tunnel. Sometimes, it's a specific container not listening on the expected port. - Solution:
- Verify the
remote-portis indeed the port the application inside the Pod is listening on. Check the Pod's logs (kubectl logs <pod-name>) for any startup errors. - Check your local firewall settings to ensure
kubectlis allowed to open outbound connections. - Ensure the target Pod is running and healthy (
kubectl get pods). - If forwarding to a Service, ensure the Service has healthy endpoints (
kubectl describe service <service-name>). - Try specifying
127.0.0.1:<local-port>instead of just<local-port>to bind to a specific interface. - Sometimes, temporary network glitches or VPN issues can interfere. Try restarting your
kubectlcommand.
- Verify the
- Cause: This can indicate various network configuration problems, firewall issues on your local machine, or problems within the Kubernetes cluster's network fabric that prevent
Forwarding from 127.0.0.1:8080 -> 80but connection times out or is refused onlocalhost:8080:- Cause: The
port-forwardtunnel is established, but the application inside the Pod is either not running, has crashed, is listening on a different IP address (e.g.,127.0.0.1instead of0.0.0.0), or is not responding. - Solution:
- Check the Pod's logs (
kubectl logs <pod-name>) for application errors. - Verify the application inside the Pod is indeed listening on the
remote-portyou specified. You might need to exec into the Pod (kubectl exec -it <pod-name> -- /bin/bash) and usenetstat -tulnporss -tulnpto confirm listening ports. - Ensure the application is configured to listen on
0.0.0.0or the Pod's IP address, not just127.0.0.1within the Pod, which would restrict internal communication.
- Check the Pod's logs (
- Cause: The
Security Considerations
While kubectl port-forward is a powerful debugging tool, it's crucial to be aware of its security implications.
- Local Exposure: The
local-portyou open makes the remote service accessible from your local machine, including other processes and potentially other users on your machine. If you forward to0.0.0.0:<local-port>(using the--addressflag), the service becomes accessible from any machine on your local network. Avoid this in insecure networks. - Authentication and Authorization:
kubectl port-forwarduses yourkubeconfigcontext and RBAC permissions. Anyone who can usekubectl port-forwardon a specific Pod, Deployment, or Service can access the ports on that resource. Ensure that only authorized users have sufficient permissions. - Temporary Nature:
port-forwardis designed for temporary, ad-hoc access. It is not a production-grade solution for exposing services. For persistent, secure, and scalable external access, always use Kubernetes Ingress, LoadBalancer Services, or API Gateway solutions.
Real-World Use Cases and Practical Examples
kubectl port-forward shines brightest in practical scenarios, bridging the gap between isolated cluster services and a developer's local workflow. Let's explore some common and impactful use cases.
Debugging a Web Application
This is perhaps the most common use case. Imagine you're developing a microservice that runs as a Pod in Kubernetes. You've pushed a new feature, but it's not behaving as expected. Instead of deploying an Ingress or a LoadBalancer service just for debugging (which can be slow and expose your work-in-progress code), port-forward provides immediate access.
Scenario: A Node.js application my-api is running on port 3000 inside a Pod and you need to test a new endpoint.
kubectl port-forward deployment/my-api 8000:3000
Now, from your browser or curl on your local machine, you can hit http://localhost:8000/new-endpoint and interact directly with the application in the cluster. This allows for rapid iteration, debugging with local tools (like browser developer consoles or Postman), and immediate feedback on changes, without the overhead of redeploying and reconfiguring external access points. You can even set breakpoints in your local IDE if it supports remote debugging, and then use port-forward to connect your debugger to the application running in the Pod (assuming the Pod is configured for remote debugging).
Accessing a Database Inside the Cluster
Many applications rely on databases like PostgreSQL, MySQL, or MongoDB, which are often deployed as stateful sets or individual Pods within the Kubernetes cluster. For development or administrative tasks, you might need to connect to these databases directly from your local machine using a GUI client (e.g., DBeaver, DataGrip) or a local script.
Scenario: A PostgreSQL database is running in a Pod named postgres-0 (part of a StatefulSet) and listening on port 5432.
kubectl port-forward pod/postgres-0 5432:5432
Now, you can configure your local database client to connect to localhost:5432 with the appropriate credentials. This allows you to inspect schema, run queries, or seed test data without exposing your database to the public internet, maintaining a secure internal network for your sensitive data. This method is far safer and more convenient than creating a NodePort or LoadBalancer for a database during development.
Connecting to an Internal API for Development
In a microservices architecture, your local application might depend on other backend services running within Kubernetes. During local development, you need a way for your local frontend or another microservice to communicate with these remote dependencies.
Scenario: Your local frontend application needs to talk to a user-service running in Kubernetes on port 8080.
kubectl port-forward service/user-service 8080:8080
With this, your local frontend can be configured to make API calls to http://localhost:8080/users, and these requests will be forwarded to the actual user-service running in your cluster. This enables you to develop and test your local components against the real, up-to-date services in the cluster, ensuring compatibility and catching integration issues early. This pattern is particularly useful when you're only working on a single microservice locally, but it needs to interact with many other services that are already deployed in the cluster.
Local Development with Remote Kubernetes Resources
kubectl port-forward greatly simplifies scenarios where you need to run part of your application stack locally while leveraging remote resources in Kubernetes. This is often called "hybrid development."
Scenario: You're developing a new feature for a legacy system where only a new microservice is in Kubernetes, but the existing components are local. Or, you want to run a complex machine learning model in the cluster and send data to it from a local script.
# Example: Accessing a remote message queue (e.g., Kafka, RabbitMQ)
kubectl port-forward service/my-rabbitmq 5672:5672

# Example: Accessing a remote cache (e.g., Redis)
kubectl port-forward service/my-redis 6379:6379
By forwarding the necessary ports, your local development environment can seamlessly interact with remote infrastructure components, giving you the best of both worlds: local iteration speed and access to scalable, shared cluster resources.
Accessing Metrics/Monitoring Dashboards (e.g., Prometheus UI)
Many monitoring and observability tools, like Prometheus, Grafana, or Jaeger, are deployed within Kubernetes and expose web UIs or APIs. port-forward offers a quick way to access these dashboards without setting up complex ingress rules or exposing them publicly.
Scenario: You want to check the Prometheus UI, which is exposed by a service named prometheus-k8s on port 9090.
kubectl -n monitoring port-forward service/prometheus-k8s 9090:9090
Now, navigate to http://localhost:9090 in your browser to view your Prometheus dashboards. This is invaluable for ad-hoc checks of cluster health, debugging specific metrics, or validating alert rules. Similarly, you could forward Grafana's port (3000) or other monitoring tools.
Temporary Access for Administrative Tasks
Beyond development, administrators occasionally need temporary access to specific services for maintenance, configuration updates, or diagnostics.
Scenario: You need to access an internal admin panel or a management interface of a specific application that should never be exposed externally.
kubectl port-forward deployment/my-admin-tool 8080:80
This provides a secure, on-demand channel for administrators to perform sensitive tasks without opening up public access, thus adhering to the principle of least privilege.
In all these scenarios, kubectl port-forward provides a simple, secure, and temporary solution. It's the go-to command for developers and operators who need immediate, direct access to their Kubernetes services, drastically reducing friction in the development and debugging process. While it's perfect for these ad-hoc, temporary needs, for robust, production-grade API exposure and management, specialized platforms are crucial. For instance, when you have stable internal APIs, especially those backed by AI models, you might consider an AI gateway and API management platform like APIPark. APIPark helps manage, secure, and publish these APIs, providing features like quick integration of 100+ AI models, unified API formats, and end-to-end lifecycle management. This ensures that while kubectl port-forward addresses immediate developer needs, APIPark scales the management of your APIs for broader organizational consumption.
APIPark is a high-performance AI gateway that allows you to securely access the most comprehensive LLM APIs globally on the APIPark platform, including OpenAI, Anthropic, Mistral, Llama2, Google Gemini, and more.Try APIPark now! 👇👇👇
Alternatives to kubectl port-forward and When to Use Them
While kubectl port-forward is exceptionally useful for its specific purpose, it's not a silver bullet for all access requirements. Kubernetes offers several other mechanisms for service exposure, each with its own trade-offs regarding security, permanence, and complexity. Understanding these alternatives is crucial for choosing the right tool for the job.
1. kubectl proxy: For Accessing the Kubernetes API Itself
kubectl proxy serves a very different purpose than kubectl port-forward. Instead of forwarding to an application within a Pod or Service, kubectl proxy creates a local proxy to the Kubernetes API server itself.
kubectl proxy --port=8001
This command makes the Kubernetes API accessible at http://localhost:8001. You can then use this local endpoint to interact with the API, for instance, to list Pods: curl http://localhost:8001/api/v1/pods. It's primarily used for direct interaction with the Kubernetes API, often by custom scripts or tools that need to make authorized API calls. It respects your current kubeconfig context and RBAC permissions.
When to use kubectl proxy: * When you need to interact directly with the Kubernetes API server from your local machine. * For custom scripts or applications that programmatically manage Kubernetes resources. * For accessing internal Kubernetes API endpoints (like health checks or metrics for kube-proxy, kube-scheduler, etc.) that are exposed via the API server.
When NOT to use kubectl proxy: * When you want to access your own application deployed in a Pod or Service. kubectl proxy will not give you access to your application directly.
2. Ingress Controllers: For Exposing Services Externally with Load Balancing and SSL
Ingress is a Kubernetes API object that manages external access to services in a cluster, typically HTTP and HTTPS. An Ingress controller (like Nginx Ingress Controller, Traefik, or HAProxy Ingress) acts as a reverse proxy and load balancer, routing external traffic to the correct services based on rules defined in Ingress resources.
Key Features: * Layer 7 (HTTP/S) routing: Based on hostnames, paths, etc. * Load balancing: Distributes traffic across multiple Pods. * SSL/TLS termination: Manages certificates and encrypts traffic. * Name-based virtual hosting: Multiple domains on a single IP.
When to use Ingress: * For production-grade exposure of HTTP/HTTPS services. * When you need features like SSL termination, URL rewriting, path-based routing, or host-based routing. * When you need to expose multiple services under a single external IP address. * For persistent, well-defined public access to your web applications and APIs.
When NOT to use Ingress: * For temporary, ad-hoc debugging of a single service. * For non-HTTP/HTTPS traffic (e.g., raw TCP for a database). * If you don't want to expose your service publicly at all.
3. NodePort/LoadBalancer Services: For Persistent External Access
Kubernetes Services can be configured with different types to expose them to the outside world.
NodePortService: Exposes the Service on a static port on each Node's IP address. Any traffic sent to this port on any Node will be forwarded to the Service.- Pros: Simple to set up, works in any environment.
- Cons: Requires knowing Node IPs, uses ephemeral ports in a high range (30000-32767 by default), and you're responsible for external load balancing if needed. Not suitable for production without an external load balancer.
LoadBalancerService: Automatically provisions an external load balancer from the cloud provider (AWS ELB, GCP Load Balancer, Azure Load Balancer). This gives your Service a dedicated, publicly accessible IP address.- Pros: Automatic load balancing, dedicated external IP, easy to consume.
- Cons: Cloud provider dependent, can incur costs, might take time to provision.
When to use NodePort/LoadBalancer Services: * NodePort: For exposing services for testing in small, controlled environments, or when you have an external load balancer that can target NodePorts. Also useful for non-HTTP/HTTPS traffic that needs external exposure. * LoadBalancer: For exposing services publicly in cloud environments where you need reliable, scalable, and dedicated external access for any type of TCP/UDP traffic.
When NOT to use NodePort/LoadBalancer Services: * When you only need temporary, local access for debugging (as they expose the service globally). * For fine-grained HTTP routing and SSL management (Ingress is better). * If you want to avoid cloud provider costs or dependencies.
4. VPNs/Service Meshes: For More Complex and Secure Connectivity
For highly secure, multi-cluster, or complex inter-service communication requirements, more sophisticated solutions are available.
- VPN (Virtual Private Network): A VPN creates a secure, encrypted tunnel between your local machine (or another network) and your Kubernetes cluster's network. Once connected to the VPN, your local machine essentially becomes part of the cluster's private network, allowing direct access to ClusterIP services.
- Pros: Provides full network-level access, highly secure, integrates with existing enterprise network infrastructure.
- Cons: More complex to set up and manage, requires client software, can introduce network overhead.
- Service Meshes (e.g., Istio, Linkerd): A service mesh adds a programmable network layer to your microservices. While primarily focused on traffic management, observability, and security between services within the cluster, some service meshes offer capabilities for secure ingress and even egress traffic, or can integrate with external gateways. They provide advanced features like mTLS, circuit breaking, traffic splitting, and fine-grained access policies.
- Pros: Enterprise-grade security, advanced traffic control, deep observability.
- Cons: Significant operational overhead, steep learning curve, typically overkill for simple debugging needs.
When to use VPNs/Service Meshes: * VPN: For enterprise environments requiring secure, persistent network-level access from remote locations, or for connecting on-premises networks to cloud Kubernetes clusters. * Service Mesh: For large, complex microservice architectures in production that require advanced traffic management, security (mTLS), and observability capabilities.
Choosing the Right Tool: When port-forward is the Best Choice
kubectl port-forward excels in its simplicity and temporary nature. It is the best choice for:
- Ad-hoc Debugging: Quickly test a single Pod or Service without altering cluster configuration.
- Local Development Integration: Seamlessly connect a local application to a remote backend, database, or message queue running in Kubernetes.
- Temporary Administrative Access: Safely access internal dashboards or management interfaces without public exposure.
- Rapid Iteration: Get immediate feedback on code changes without waiting for CI/CD pipelines to deploy to an externally accessible endpoint.
- Resource Inspection: Peek into services that are not meant for external consumption, such as internal metrics endpoints.
Table: Comparison of Kubernetes Service Access Methods
| Feature / Method | kubectl port-forward |
kubectl proxy |
NodePort Service | LoadBalancer Service | Ingress Controller | VPN/Service Mesh |
|---|---|---|---|---|---|---|
| Purpose | Local Dev/Debugging | API Access | Basic External Access | Cloud External Access | HTTP/S Routing, SSL | Secure Network Access |
| Access Level | Localhost | Localhost | Node IP:Port | External IP | External IP (L7) | Network Layer |
| Exposure Scope | Local Machine Only | Local Machine Only | Cluster Nodes | Public Internet | Public Internet (L7) | Private Network |
| Persistence | Temporary (session) | Temporary (session) | Persistent | Persistent | Persistent | Persistent |
| Traffic Type | TCP/UDP | HTTP (API) | TCP/UDP | TCP/UDP | HTTP/S | TCP/UDP (Network) |
| Security | RBAC, SSH-like tunnel | RBAC, Localhost | Less Secure (open port) | Secure (cloud LB) | Secure (SSL, WAF) | Highly Secure (mTLS, VPN) |
| Complexity | Very Low | Very Low | Low | Medium | Medium-High | High |
| Ideal Use Case | Quick debugging, local dev integration | API scripting | Dev/test, behind custom LB | Production public services | Production web apps/APIs | Enterprise networking, microservices control |
Choosing the right method depends on the specific requirement at hand. kubectl port-forward remains unparalleled for its quick, secure, and temporary local access capabilities, making it a cornerstone tool for any Kubernetes practitioner.
Integrating kubectl port-forward with Development Workflows
The utility of kubectl port-forward extends beyond standalone command execution; it can be seamlessly integrated into various development workflows, enhancing productivity and streamlining the development cycle. Leveraging it in conjunction with IDEs, scripting, and other kubectl commands unlocks further efficiencies.
IDE Integrations (e.g., VS Code Kubernetes Extensions)
Modern Integrated Development Environments (IDEs) often provide rich extensions for Kubernetes, significantly simplifying interaction with clusters. These extensions frequently include built-in functionalities for port-forwarding, making it even more accessible.
Example: VS Code Kubernetes Extension Visual Studio Code, a popular IDE, offers a powerful Kubernetes extension. This extension allows you to: 1. View Kubernetes Resources: Browse Pods, Deployments, Services, etc., directly within the IDE's sidebar. 2. Right-Click Actions: Select a Pod or Service, right-click, and choose "Port Forward" from the context menu. The extension will often prompt you for the local and remote ports, or suggest common ones. 3. Integrated Experience: The port-forward process is managed by the extension, often displaying its status directly in the IDE's status bar or output window. This means you don't need to switch to a separate terminal window to initiate or monitor the forward.
This level of integration transforms port-forwarding from a command-line operation into an intuitive click-and-configure action, reducing cognitive load and keeping developers focused within their primary development environment. It's particularly beneficial for junior developers or those less familiar with command-line intricacies.
Scripting port-forward for Automated Tasks
For more complex development setups, or when you need to repeatedly establish multiple port-forward connections, scripting the command becomes invaluable. This ensures consistency, reduces manual errors, and automates repetitive setup.
Scenario: Automating local environment setup Imagine your local development machine needs to connect to several microservices, a database, and a message queue running in Kubernetes. Manually running multiple kubectl port-forward commands can be cumbersome. A simple shell script can automate this:
#!/bin/bash

# --- Configuration ---
NAMESPACE="dev"
API_SERVICE="my-api-service"
DB_SERVICE="my-postgres-db"
MQ_SERVICE="my-rabbitmq"

LOCAL_API_PORT=8080
REMOTE_API_PORT=80

LOCAL_DB_PORT=5432
REMOTE_DB_PORT=5432

LOCAL_MQ_PORT=5672
REMOTE_MQ_PORT=5672

# --- Function to start a port-forward in background ---
start_port_forward() {
  RESOURCE_TYPE=$1
  RESOURCE_NAME=$2
  LOCAL_PORT=$3
  REMOTE_PORT=$4
  IDENTIFIER="${RESOURCE_NAME}-${LOCAL_PORT}"

  echo "Starting port-forward for ${RESOURCE_TYPE}/${RESOURCE_NAME} from ${LOCAL_PORT} -> ${REMOTE_PORT} in namespace ${NAMESPACE}..."
  # Check if a process is already listening on the local port
  if lsof -i :${LOCAL_PORT} -t >/dev/null ; then
    echo "Warning: Local port ${LOCAL_PORT} is already in use. Skipping this forward."
  else
    kubectl -n "${NAMESPACE}" port-forward "${RESOURCE_TYPE}/${RESOURCE_NAME}" "${LOCAL_PORT}:${REMOTE_PORT}" > "/tmp/port-forward-${IDENTIFIER}.log" 2>&1 &
    PID=$!
    echo "Started PID ${PID}. Logging to /tmp/port-forward-${IDENTIFIER}.log"
    # Store PID to easily kill later
    echo "${PID}" > "/tmp/port-forward-${IDENTIFIER}.pid"
  fi
}

# --- Start all forwards ---
start_port_forward service "${API_SERVICE}" "${LOCAL_API_PORT}" "${REMOTE_API_PORT}"
start_port_forward service "${DB_SERVICE}" "${LOCAL_DB_PORT}" "${REMOTE_DB_PORT}"
start_port_forward service "${MQ_SERVICE}" "${LOCAL_MQ_PORT}" "${REMOTE_MQ_PORT}"

echo "All specified port-forwards initiated. Check /tmp/port-forward-*.log for details."
echo "To stop them, run 'kill $(cat /tmp/port-forward-*.pid)'"
echo "You may need to manually clean up if a forward failed to start."
This script (or a more sophisticated version) can be run once to set up your entire local development environment, providing immediate access to all necessary remote services. It incorporates error checking for occupied ports and provides instructions for termination.
Combining with Other kubectl Commands
kubectl port-forward can be powerfully combined with other kubectl commands to create dynamic and intelligent debugging flows.
Scenario: Forwarding to a specific Pod based on a label selector Sometimes, you don't know the exact Pod name, but you know its labels. You can use kubectl get pods with a selector and jq (a JSON processor) to extract the Pod name and then pass it to port-forward.
# Find the name of a Pod with app=my-app label in the dev namespace
POD_NAME=$(kubectl get pods -n dev -l app=my-app -o jsonpath='{.items[0].metadata.name}')

if [ -z "$POD_NAME" ]; then
  echo "No Pod found with label app=my-app in namespace dev."
else
  echo "Found Pod: $POD_NAME. Forwarding..."
  kubectl -n dev port-forward "$POD_NAME" 8080:80
fi
This script snippet automatically identifies a target Pod, making your port-forward commands more robust to Pod re-creations or name changes. Similarly, you can combine it with kubectl logs to monitor activity while forwarding, or kubectl exec to inspect the Pod's environment if troubleshooting connection issues.
Another example: dynamically forwarding to a Pod that is currently failing for closer inspection.
# Find a failing Pod (e.g., CrashLoopBackOff)
FAILED_POD=$(kubectl get pods -n my-app-namespace --field-selector=status.phase!=Running -o jsonpath='{.items[0].metadata.name}')

if [ -n "$FAILED_POD" ]; then
  echo "Found a failing Pod: $FAILED_POD. Attempting to port-forward..."
  kubectl -n my-app-namespace port-forward "$FAILED_POD" 8080:80
else
  echo "No failing Pod found in my-app-namespace."
fi
These integrations demonstrate how kubectl port-forward isn't just a standalone tool but a versatile component that can be woven into a sophisticated and efficient Kubernetes development and debugging workflow. By automating its usage and combining it with other powerful kubectl features, developers can significantly reduce friction and accelerate their work within the Kubernetes ecosystem.
Performance and Resource Considerations
While kubectl port-forward is incredibly convenient, it's important to understand its performance characteristics and resource implications, especially during long-running sessions or when dealing with high-throughput applications. It's a debugging tool, not a high-performance production solution, and its design reflects this.
Overhead of port-forward
The kubectl port-forward command establishes a tunnel through the Kubernetes API server. This means that all traffic from your local machine to the remote service (and vice versa) traverses: 1. Your local network interface. 2. The kubectl process running on your machine. 3. Your local network to the Kubernetes API server. 4. The Kubernetes API server. 5. The Kubernetes internal network to the target Pod/Service.
Each of these hops introduces a certain amount of latency and processing overhead. The API server acts as an intermediary, which adds a computational burden. While the overhead is typically negligible for most development and debugging tasks, it can become noticeable for applications that require extremely low latency or very high bandwidth. For example, streaming large amounts of data, real-time gaming applications, or high-frequency trading systems would likely experience degraded performance when routed through port-forward.
The encryption and authentication steps performed by kubectl and the API server also add to this overhead. While critical for security, they consume CPU cycles and contribute to slightly higher latency compared to a direct, unencrypted connection.
Long-Running Sessions
Running kubectl port-forward for extended periods can also have implications. * Resource Consumption on Local Machine: The kubectl process itself consumes some CPU and memory, particularly if it's handling a high volume of traffic. While generally modest, it's a persistent background process that ties up resources. * API Server Load: A large number of concurrent port-forward sessions from many developers can collectively put a strain on the Kubernetes API server. Each session maintains a persistent connection and requires the API server to actively proxy data. In very large organizations with numerous developers frequently using port-forward, this aggregate load could become a factor, though for typical clusters, the API server is designed to handle a significant number of connections. * Connection Stability: Network disruptions, temporary API server restarts, or target Pod restarts can interrupt a long-running port-forward session. While forwarding to a Service or Deployment offers some resilience (by picking a new Pod), a complete restart of kubectl or network interruptions will break the tunnel, requiring manual re-establishment.
Impact on Local Machine Resources
The impact of port-forward on your local machine is primarily related to CPU, memory, and network bandwidth. * CPU: kubectl consumes CPU cycles for processing the network traffic, encryption/decryption, and maintaining the tunnel. For low traffic, this is minimal. For high traffic, it can be more noticeable. * Memory: The kubectl process will occupy some RAM. Again, for typical usage, this is a small footprint, but it scales with the number of concurrent connections and data volume. * Network Bandwidth: All data transmitted to and from the remote service flows through your local machine's network interface. If you're downloading large files or streaming high-bandwidth content through port-forward, it will consume your local network bandwidth just like any other network activity.
Best Practices for Performance and Resource Management: * Use for its Intended Purpose: Reserve port-forward for temporary debugging and local development. Do not use it as a long-term solution for exposing production services. * Monitor Local Resources: If you experience slowdowns on your local machine, check top or Activity Monitor to see if kubectl is consuming excessive resources. * Terminate When Not Needed: Actively kill port-forward processes when you're done with them to free up local resources and reduce load on the API server. Scripting can help with this by providing clear stop commands. * Consider Alternatives for High-Throughput/Low-Latency Needs: For performance-critical scenarios, investigate direct VPN connections to the cluster network or other methods that provide more direct network paths, bypassing the API server for data plane traffic.
In summary, kubectl port-forward is an excellent tool for specific use cases but comes with inherent performance characteristics due to its design as an API server-proxied tunnel. Being mindful of these aspects ensures that you use the tool effectively without encountering unexpected performance bottlenecks or resource exhaustion.
Future Trends and Best Practices for kubectl port-forward
The Kubernetes ecosystem is constantly evolving, and while kubectl port-forward remains a fundamental tool, understanding broader trends and adopting best practices ensures its effective and secure utilization.
Evolution of Kubernetes Networking
Kubernetes networking is a complex and dynamic field. While port-forward relies on the core Pod/Service networking model and the API server, advancements in Kubernetes networking often focus on more robust, scalable, and secure inter-service communication and external exposure. * Service Mesh Adoption: The increasing prevalence of service meshes (Istio, Linkerd, Consul Connect) for production environments signifies a move towards more intelligent, policy-driven traffic management, security (mTLS), and observability within clusters. While a service mesh doesn't replace port-forward, it provides the robust infrastructure that makes port-forward less necessary for internal service-to-service communication during deployment, freeing port-forward to focus on the local-to-cluster connection. * Gateway API: The emergence of the Gateway API as a successor to Ingress is a significant trend. It offers a more expressive, role-oriented, and extensible way to manage external access to Kubernetes services. As Gateway API matures, it will provide more powerful and flexible mechanisms for exposing services, further solidifying port-forward's role as a developer utility rather than an exposure mechanism. * Improved Developer Experience Tools: Tools like Telepresence, Tilt, Skaffold, and various IDE extensions are continually improving the local development experience with Kubernetes. Many of these tools abstract or enhance port-forward's capabilities, allowing developers to seamlessly integrate local code with remote services without manually managing port-forward commands. They often provide intelligent routing and synchronization features that go beyond simple port tunneling.
These trends suggest that while port-forward will remain essential for its simplicity and directness, it will increasingly be seen as one piece of a larger, more sophisticated developer and operations toolkit.
Best Practices for Secure and Efficient port-forward Usage
To maximize the benefits of kubectl port-forward while mitigating potential downsides, adhere to these best practices:
- Principle of Least Privilege: Ensure that the user initiating
port-forwardhas only the necessary RBAC permissions to forward to the specific Pod or Service. Do not grant broadport-forwardpermissions if not required. The command requirespods/portforwardpermission on the target resource. - Explicit Port Mapping: Always use the
local-port:remote-portsyntax (e.g.,8080:80) rather than justlocal-port(e.g.,8080). This avoids ambiguity and ensures you're connecting to the intended remote port. - Specify Namespace: Always use the
-nor--namespaceflag to explicitly define the target namespace. This prevents accidental forwarding to resources in unintended namespaces. - Forward to Services/Deployments: Whenever possible, forward to a
service/<service-name>ordeployment/<deployment-name>rather than apod/<pod-name>. This makes yourport-forwardmore resilient to Pod restarts, re-scheduling, and scaling operations. - Use for Temporary Access Only: Reiterate that
port-forwardis a debugging and development tool, not a production-grade exposure mechanism. For stable, secure, and scalable external access, use Ingress, LoadBalancer Services, or API Gateways. - Avoid
--address 0.0.0.0on Untrusted Networks: Unless absolutely necessary and on a secured local network, avoid binding the local port to all interfaces (--address 0.0.0.0). The default127.0.0.1(localhost) binding is generally safer as it restricts access to your local machine. - Background Wisely: When running
port-forwardin the background, usenohuporscreen/tmuxfor robust persistence. Keep track of the PIDs of background processes for easy termination. Regularly clean up defunctport-forwardsessions. - Monitor Logs: If you encounter issues, always check the logs of the target Pod (
kubectl logs <pod-name>) for application errors, and the output of yourkubectl port-forwardcommand (especially if redirected to a file) for connection-specific problems. - Automate with Scripts/IDEs: Integrate
port-forwardinto your development environment through IDE extensions or shell scripts. This reduces manual effort, standardizes setup, and minimizes errors for repetitive tasks. - Understand Network Basics: A solid understanding of TCP/IP networking, port binding, and basic firewall concepts will greatly assist in troubleshooting
port-forwardissues.
Importance of Understanding Underlying Networking Principles
Ultimately, mastering kubectl port-forward and indeed, any Kubernetes networking concept, hinges on a fundamental understanding of how networks function. * Ports and Protocols: Knowing what ports your applications listen on (e.g., HTTP on 80/8080, PostgreSQL on 5432) and whether they use TCP or UDP is critical for correct port-forward configuration. * IP Addresses and Loopback: Differentiating between localhost (127.0.0.1), Pod IPs, Cluster IPs, and Node IPs helps in understanding where traffic is flowing and why certain connections might fail. * Firewalls and Security Groups: Awareness of local firewalls, network security groups in cloud environments, and Kubernetes Network Policies helps in diagnosing connectivity blocks. * DNS Resolution: While port-forward bypasses typical in-cluster DNS for direct Pod/Service IP routing, general DNS understanding is crucial for the broader Kubernetes network.
By combining practical port-forward skills with a solid grasp of networking fundamentals, developers and operators can confidently navigate the complexities of Kubernetes service access and ensure their applications are debugged, developed, and deployed effectively.
Conclusion
kubectl port-forward stands as an indispensable utility in the Kubernetes toolkit, offering a simple yet powerful mechanism to bridge the gap between your local development environment and the intricate network of your cluster. Throughout this guide, we've explored its fundamental principles, from basic Pod-level forwarding to more resilient Service and Deployment targets, and delved into advanced techniques like backgrounding processes, container-specific access, and robust error troubleshooting. We've seen how port-forward is the go-to solution for a myriad of real-world scenarios, including debugging web applications, accessing internal databases, connecting to remote APIs for local development, and reaching monitoring dashboards, all without the overhead or security implications of public exposure.
While kubectl port-forward excels in its domain of temporary, ad-hoc access, it's vital to place it within the broader context of Kubernetes service exposure. We've contrasted its capabilities with alternatives like kubectl proxy, Ingress controllers, NodePort/LoadBalancer Services, and advanced solutions such as VPNs and Service Meshes, highlighting when each tool is most appropriate. The recurring theme is that port-forward is a developer's best friend for immediate, granular access, perfectly complementing, rather than replacing, the more robust and permanent exposure mechanisms required for production. For instance, once an internal API or AI model is debugged and ready, a dedicated platform like APIPark becomes essential. APIPark, as an open-source AI gateway and API management platform, allows you to integrate, standardize, and manage these APIs (including over 100 AI models) efficiently across your organization, moving beyond the temporary tunnel of port-forward to a scalable, secure, and governable API lifecycle.
Finally, we emphasized the importance of integrating port-forward into modern development workflows through IDE extensions and scripting, and discussed performance considerations, security best practices, and future trends in Kubernetes networking. By adhering to these best practices and understanding the underlying networking principles, you can wield kubectl port-forward with maximum efficiency and confidence, significantly streamlining your Kubernetes development and debugging cycles. It empowers you to interact directly with your applications in the cluster, fostering faster iteration, quicker problem resolution, and a more fluid development experience. Embrace kubectl port-forward as the agile, secure conduit it is, and you'll find your journey through the Kubernetes landscape considerably smoother and more productive.
Frequently Asked Questions (FAQs)
Q1: What is the primary purpose of kubectl port-forward, and when should I use it instead of an Ingress or LoadBalancer?
A1: The primary purpose of kubectl port-forward is to provide temporary, secure, and direct access to a specific Kubernetes service or Pod from your local machine, primarily for development and debugging. You should use it when you need to interact with an internal cluster resource without exposing it publicly, without changing any cluster configuration, and only for the duration of your immediate task. Ingress or LoadBalancer Services, conversely, are designed for permanent, production-grade exposure of services to the outside world, offering features like load balancing, SSL/TLS termination, and advanced routing. They involve cluster configuration changes and are generally overkill for a quick debugging session or local development against an internal API.
Q2: Is kubectl port-forward secure? Are there any security risks I should be aware of?
A2: Yes, kubectl port-forward is generally considered secure for its intended use. It leverages your existing kubeconfig authentication and RBAC authorization to establish the tunnel, meaning only users with appropriate permissions can forward ports. The connection itself is typically secure, traversing the authenticated and encrypted Kubernetes API server. However, a key security risk is the local exposure of the forwarded port. By default, it binds to 127.0.0.1 (localhost), meaning only your local machine can access it. If you explicitly use the --address 0.0.0.0 flag, the service becomes accessible from any machine on your local network, which can be a significant security vulnerability if you are on an untrusted network. Always be cautious about which local port you open and the --address flag.
Q3: My kubectl port-forward command is running, but I can't access the service on localhost. What should I check?
A3: Several common issues can cause this: 1. Application Not Listening: The most frequent cause is that the application inside the target Pod is not actually listening on the remote-port you specified, or it has crashed. Check the Pod's logs (kubectl logs <pod-name>) for application errors, or kubectl exec -it <pod-name> -- netstat -tulnp (if netstat is available) to verify listening ports. 2. Incorrect Ports: Double-check that both your local-port and remote-port are correct. 3. Local Port In Use: Your local-port might already be used by another process on your machine. You would usually see an error like "address already in use" from kubectl, but sometimes it can be subtle. 4. Firewall: Your local machine's firewall might be blocking connections to the local-port. 5. Pod/Service Issues: Ensure the target Pod is running and healthy, or if forwarding to a Service, that the Service has healthy endpoint Pods.
Q4: Can I run multiple kubectl port-forward commands simultaneously? How do I manage them?
A4: Yes, you can run multiple kubectl port-forward commands simultaneously, as long as each command uses a unique local-port. This is commonly done when a developer needs to access several internal services (e.g., an API, a database, and a message queue) for local development. To manage them effectively, you can: * Run each command in a separate terminal tab or window. * Use nohup or terminal multiplexers like screen or tmux to run them in the background, allowing you to close your terminal session without stopping the forwards. * Create shell scripts that automate starting and stopping multiple port-forward processes, which is particularly useful for setting up a complex local development environment.
Q5: How does kubectl port-forward handle Pod restarts or scaling events when I'm forwarding to a Deployment or Service?
A5: When you forward to a Deployment or Service, kubectl port-forward exhibits a degree of resilience to Pod changes. Instead of targeting a specific Pod by name, it targets the higher-level resource. kubectl will then automatically select one of the healthy Pods managed by that Deployment or targeted by that Service. If the initially selected Pod restarts, crashes, or is replaced (e.g., during a rolling update or scaling event), kubectl port-forward will attempt to automatically re-establish the connection to a new, healthy Pod. This makes forwarding to a Deployment or Service much more stable and reliable for long-running development or debugging sessions compared to forwarding directly to an ephemeral Pod name.
🚀You can securely and efficiently call the OpenAI API on APIPark in just two steps:
Step 1: Deploy the APIPark AI gateway in 5 minutes.
APIPark is developed based on Golang, offering strong product performance and low development and maintenance costs. You can deploy APIPark with a single command line.
curl -sSO https://download.apipark.com/install/quick-start.sh; bash quick-start.sh

In my experience, you can see the successful deployment interface within 5 to 10 minutes. Then, you can log in to APIPark using your account.

Step 2: Call the OpenAI API.