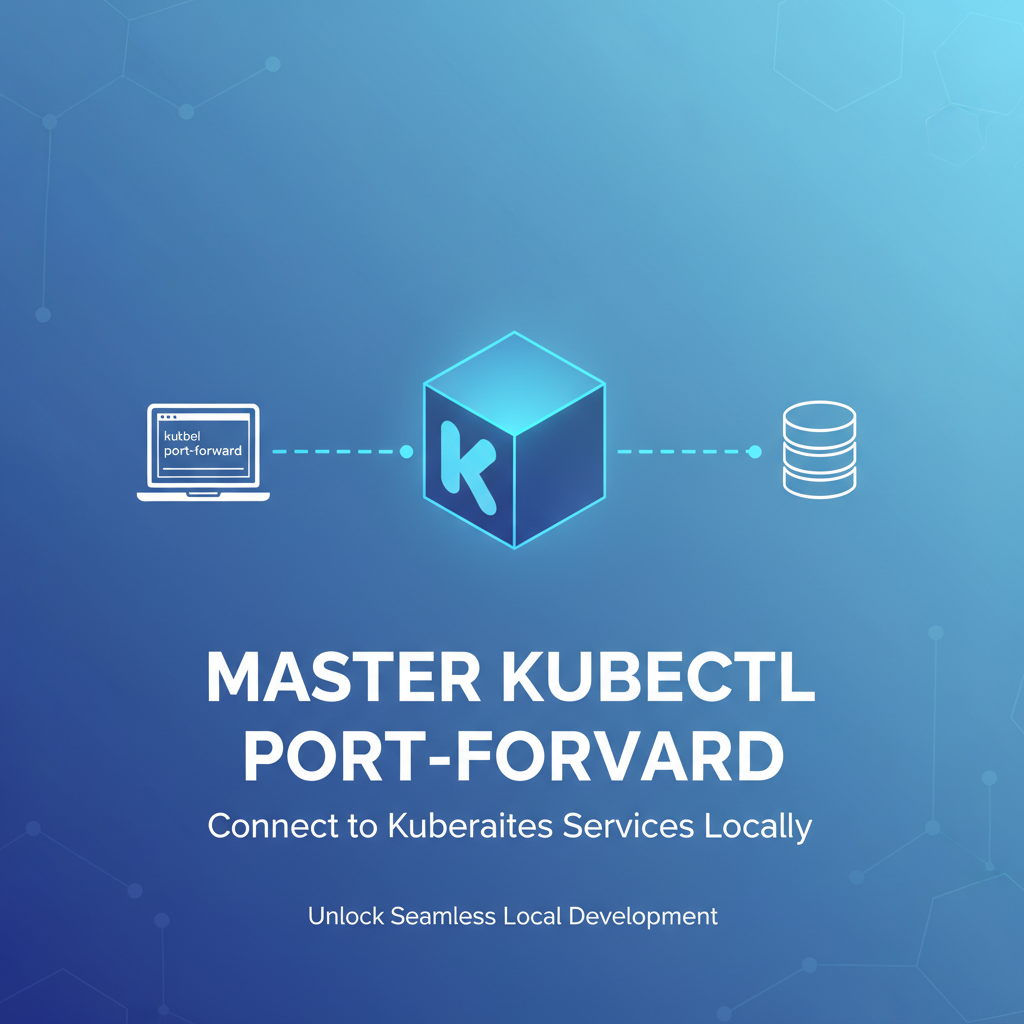
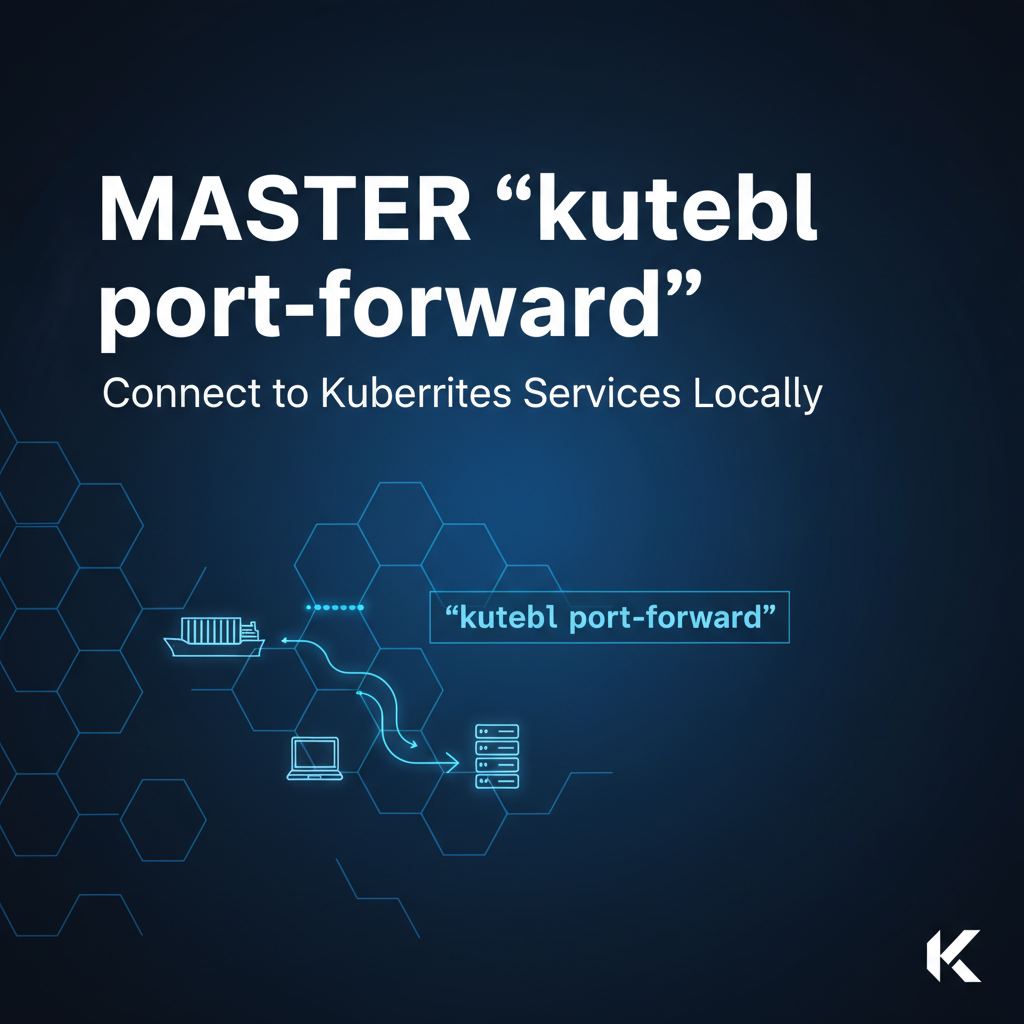
Master kubectl port-forward: Connect to Kubernetes Services Locally


In the vast and increasingly complex landscape of cloud-native development, Kubernetes stands as the undisputed orchestrator, managing containers with unparalleled efficiency. For developers working within this ecosystem, the ability to seamlessly interact with applications running inside a cluster is not merely a convenience—it's an absolute necessity. Whether you’re debugging a nascent microservice, testing a database connection, or simply peeking at an application's administrative interface, the challenge remains: how do you bridge the divide between your local machine and a service residing deep within the Kubernetes network? Enter kubectl port-forward, a utility that often goes unsung but is, in reality, a cornerstone of developer productivity in a Kubernetes environment.
This comprehensive guide aims to demystify kubectl port-forward, transforming you from a casual user into a master of this essential command. We will journey through its core mechanics, explore its myriad applications, delve into best practices, and even touch upon its integration with broader API management strategies. By the end of this deep dive, you'll possess the knowledge and confidence to leverage port-forward to its fullest potential, ensuring a smoother, more efficient development workflow when interacting with your Kubernetes-hosted applications and APIs. Prepare to unlock the full power of local access to remote services, a capability that will undoubtedly streamline your daily development tasks and accelerate your journey in the cloud-native world.
Chapter 1: The Core Concept of kubectl port-forward – Bridging the Gap
Developing applications that run within a Kubernetes cluster presents a unique set of challenges, particularly when it comes to local debugging and interaction. Imagine you have a complex microservice architecture deployed in Kubernetes. Your local development environment needs to communicate with a specific backend service, perhaps a database, a cache, or another API endpoint, which is not exposed externally. How do you establish a secure, direct, and temporary connection to such an internal resource without modifying its deployment, exposing it to the public internet, or navigating intricate network configurations? This is precisely the problem kubectl port-forward is designed to solve, acting as an indispensable bridge between your local machine and the Kubernetes internal network.
At its heart, kubectl port-forward establishes a secure, bi-directional tunnel from a local port on your machine to a specific port on a Pod or Service within your Kubernetes cluster. This tunnel operates at the TCP layer, effectively making a remote resource appear as if it's running directly on your localhost. When you send traffic to the specified local port, kubectl port-forward intercepts that traffic, securely tunnels it into the Kubernetes cluster, and forwards it to the designated port of the target Pod or Service. Conversely, any response from the Pod or Service is tunneled back to your local machine, creating a seamless communication channel.
This mechanism is crucial because Kubernetes' internal networking model isolates Pods from the external world by default. Pods communicate using internal cluster IP addresses, which are not routable from outside the cluster. While Kubernetes offers various ways to expose services externally—such as NodePort, LoadBalancer, and Ingress—these methods are primarily designed for broader, more permanent access, often for production or public-facing applications. They involve modifying cluster resources, configuring network rules, and sometimes incurring additional cloud provider costs.
For developers, these external exposure methods are often overkill and introduce unnecessary complexity for temporary, localized access. You don't want to expose a development database or a staging API gateway to the entire internet just to test a new feature on your laptop. kubectl port-forward provides an elegant solution by offering on-demand, user-initiated local access that requires no changes to your cluster's deployment manifests or service definitions. It's a "personal tunnel" that respects the cluster's security boundaries, as access is explicitly granted through your kubeconfig permissions and is only active for the duration of the port-forward command. This temporary and localized nature makes it an ideal tool for debugging, development, and administrative tasks, allowing developers to interact with their containerized applications as if they were running natively on their workstation, without the overhead or security implications of a full external exposure.
Chapter 2: Prerequisites and Essential Setup for Seamless Forwarding
Before you can effectively wield the power of kubectl port-forward, a few foundational elements must be in place. These prerequisites ensure that your local development environment is correctly configured to communicate with your Kubernetes cluster and that you have the necessary permissions to establish port forwarding tunnels. Overlooking these steps can lead to frustrating errors and impede your ability to connect to your services. Let's meticulously walk through each essential requirement.
Firstly, and most fundamentally, you need kubectl installed on your local machine. kubectl is the command-line tool for running commands against Kubernetes clusters. It allows you to deploy applications, inspect and manage cluster resources, and view logs. Installation varies by operating system, but typically involves downloading the binary and placing it in your system's PATH, or using a package manager like Homebrew on macOS or apt on Debian/Ubuntu. Verifying its installation is as simple as running kubectl version. This command should output both the client and server versions, indicating a successful setup and connection to a cluster.
Secondly, and equally vital, is a properly configured kubeconfig file. This file, typically located at ~/.kube/config, contains the necessary credentials and connection information to access your Kubernetes cluster. It specifies the cluster's endpoint, user authentication details (like client certificates, tokens, or cloud provider-specific credentials), and context information (which cluster, user, and namespace kubectl should use by default). Most kubectl operations, including port-forward, rely on this kubeconfig to authenticate and authorize your requests to the Kubernetes API server. If your kubeconfig is incorrectly set up, or if you lack the necessary permissions within the cluster, port-forward commands will fail, often with "connection refused" or "permission denied" errors. Ensuring your kubeconfig points to the correct context and that the associated user has get, list, and create permissions on Pods and Services (at a minimum for the target namespace) is paramount.
Thirdly, a basic understanding of Kubernetes objects is indispensable. While port-forward itself is a simple command, knowing what you're forwarding to is key. You should be familiar with: * Pods: The smallest deployable units in Kubernetes, representing a single instance of a running process in your cluster. port-forward can directly target a Pod. * Services: An abstract way to expose an application running on a set of Pods as a network service. Services provide a stable IP address and DNS name for a group of Pods, enabling stable communication even as Pods are created, terminated, or replaced. port-forward can also target a Service, which is often preferred for robustness. * Deployments: A higher-level abstraction that manages the deployment and scaling of a set of Pods. While you don't forward to a Deployment directly, Deployments create and manage the Pods that you will ultimately forward to.
Finally, consider your local network environment. Firewalls, both on your operating system and within your local network, can interfere with port-forward operations. If you encounter issues, temporarily disabling your local firewall or explicitly allowing connections on the chosen local port can help diagnose the problem. Additionally, be aware of potential port conflicts. If the local port you specify for forwarding is already in use by another application on your machine, kubectl port-forward will report an error. Always choose a local port that is free and ideally within the non-privileged range (above 1024) to avoid permission issues. A quick check with netstat or lsof can reveal occupied ports on your system, ensuring a smooth start to your port-forward session. With these prerequisites thoroughly addressed, you'll be well-prepared to establish reliable and efficient connections to your Kubernetes services.
Chapter 3: Basic Usage – Forwarding to a Pod for Direct Access
The most direct and fundamental way to use kubectl port-forward is to establish a connection to a specific Pod. This approach is particularly useful when you need to interact with a single instance of an application, perhaps for debugging a problem unique to that Pod or accessing a particular utility container. Understanding how to forward to a Pod lays the groundwork for more advanced scenarios and ensures you can always reach your individual containerized processes when needed.
The syntax for forwarding to a Pod is straightforward:
kubectl port-forward POD_NAME LOCAL_PORT:REMOTE_PORT -n NAMESPACE
Let's break down each component of this command:
POD_NAME: This is the exact name of the Pod you wish to connect to. You can obtain Pod names usingkubectl get pods -n NAMESPACE. It's crucial to specify the correct Pod, especially in deployments with multiple replicas.LOCAL_PORT: This is the port on your local machine that you will use to access the forwarded service. When you point your browser,curlcommand, or application tolocalhost:LOCAL_PORT,kubectlwill tunnel that traffic to the remote Pod. You can choose any available port on your machine, typically above 1024 to avoid requiring root privileges.REMOTE_PORT: This is the port on which the application inside the target Pod is listening. For example, if your web server inside the Pod listens on port 80, thenREMOTE_PORTwould be80.-n NAMESPACE: (Optional but highly recommended) Specifies the Kubernetes namespace where the Pod resides. If omitted,kubectlwill default to the currently configured namespace in yourkubeconfig. Explicitly stating the namespace avoids ambiguity and potential errors.
Let's walk through a practical example. Imagine you have a simple Nginx web server deployed in your Kubernetes cluster, and its Pod is named nginx-deployment-78f56477d9-abcde. This Nginx server is configured to listen for incoming HTTP requests on port 80 within its container. You want to access this Nginx server from your local machine, say, on port 8080.
First, identify the Pod name:
kubectl get pods -n default
This might output something like:
NAME                                READY   STATUS    RESTARTS   AGE
nginx-deployment-78f56477d9-abcde   1/1     Running   0          5m
Now, establish the port forward:
kubectl port-forward nginx-deployment-78f56477d9-abcde 8080:80 -n default
Once you execute this command, you'll see output similar to:
Forwarding from 127.0.0.1:8080 -> 80
Forwarding from [::1]:8080 -> 80
This indicates that the tunnel has been successfully established. Now, open your web browser or your terminal and navigate to http://localhost:8080. You should see the default Nginx welcome page, proving that your local machine is now directly communicating with the Nginx server running inside the Kubernetes Pod.
It's important to note that the kubectl port-forward command is a blocking operation. It will run in your terminal until you press Ctrl+C. If you need to keep the tunnel open while continuing to use your terminal, you can run the command in the background. On Linux/macOS, simply add an & at the end of the command:
kubectl port-forward nginx-deployment-78f56477d9-abcde 8080:80 -n default &
Alternatively, for more robust backgrounding, especially for long-running sessions, nohup or screen/tmux are excellent choices. Using nohup prevents the process from being terminated even if your shell exits:
nohup kubectl port-forward nginx-deployment-78f56477d9-abcde 8080:80 -n default > /dev/null 2>&1 &
This command runs port-forward in the background, redirects its output to /dev/null, and ensures it keeps running. To find and stop a backgrounded port-forward process, you'd typically use ps aux | grep 'kubectl port-forward' to find its PID, then kill PID.
You can also establish multiple port forwards simultaneously, either to the same Pod (on different remote ports) or to different Pods, as long as each port-forward command uses a unique LOCAL_PORT. For instance, if your Pod has an API service on port 8080 and an admin interface on port 9000, you could run two separate port-forward commands:
kubectl port-forward my-app-pod 8000:8080 &
kubectl port-forward my-app-pod 9001:9000 &
This flexibility makes kubectl port-forward an incredibly versatile tool for granular access to your Kubernetes applications.
Chapter 4: Advanced Usage – Forwarding to a Service for Robustness
While forwarding to a specific Pod offers direct access, it has a significant drawback: Pods are ephemeral. They can be restarted, rescheduled, or replaced by Kubernetes at any time, especially if they are part of a Deployment or ReplicaSet. When a Pod is replaced, its name changes, breaking any active port-forward session tied to that specific Pod name. This is where forwarding to a Kubernetes Service becomes not just convenient, but essential for robust and stable local development.
A Kubernetes Service provides a stable network endpoint for a set of Pods. Instead of directly addressing an individual Pod, you interact with the Service, which then intelligently routes your requests to one of its backend Pods according to its internal load-balancing strategy. This abstraction means that even if the underlying Pods change, the Service's IP address and DNS name remain constant, ensuring uninterrupted connectivity. When you port-forward to a Service, kubectl automatically selects one of the healthy Pods backing that Service and establishes the tunnel to it. If that Pod becomes unavailable, kubectl often attempts to re-establish the tunnel to another healthy Pod, although this behavior can vary slightly depending on the kubectl version and specific network conditions. The primary benefit is that your port-forward command is more resilient to Pod lifecycle events.
The syntax for forwarding to a Service is very similar to forwarding to a Pod, with a minor but crucial difference:
kubectl port-forward service/SERVICE_NAME LOCAL_PORT:REMOTE_PORT -n NAMESPACE
Here's the breakdown:
service/SERVICE_NAME: You explicitly prefix the Service's name withservice/to indicate that you are targeting a Service object rather than a Pod. This tellskubectlto use the Service's selector to identify a backend Pod.LOCAL_PORT: The local port on your machine.REMOTE_PORT: This is the target port defined in the Service's specification. It's important to distinguish this from the Pod's container port. When a Service is defined, it maps aportto atargetPort. TheREMOTE_PORThere refers to theportexposed by the Service, which the Service then forwards to thetargetPortof a selected Pod.
Let's illustrate with an example. Suppose you have a web application deployed as a Deployment called my-web-app, which creates Pods labeled app: my-web-app. You've also defined a Service, my-web-service, that targets these Pods on port 80. The Service itself listens on port 80 (or another chosen port) and forwards traffic to the Pods' port 80.
First, identify your Service:
kubectl get services -n default
You might see:
NAME            TYPE        CLUSTER-IP       EXTERNAL-IP   PORT(S)        AGE
my-web-service  ClusterIP   10.96.100.123    <none>        80/TCP         10m
Now, establish the port forward to the Service. Let's say you want to access it locally on port 8000:
kubectl port-forward service/my-web-service 8000:80 -n default
In this command, 8000 is your LOCAL_PORT, and 80 is the port exposed by my-web-service. kubectl will then find a healthy Pod backed by my-web-service, connect to it, and tunnel traffic from localhost:8000 to that Pod's targetPort (which is likely also 80, as defined in the Service).
You will again see output confirming the forwarding:
Forwarding from 127.0.0.1:8000 -> 80
Forwarding from [::1]:8000 -> 80
Now, navigating to http://localhost:8000 will connect you to your my-web-app. The significant advantage here is that if the original Pod selected by port-forward is terminated and a new one starts up, your port-forward session might (depending on kubectl version and specific conditions) gracefully reconnect to a new Pod, or at least you can easily restart the command knowing the Service name remains constant. This dramatically enhances stability during active development where Pods are frequently restarted due to code changes or resource constraints.
One more subtle point: if your Service exposes multiple ports (e.g., port: 80 with name: http-web and port: 443 with name: https-web), you can specify the target port by its name instead of its number for clarity:
kubectl port-forward service/my-web-service 8000:http-web -n default
This ensures you're targeting the correct logical port within the Service definition, making your commands more readable and less prone to errors, especially in complex Service configurations. Using port-forward with Services is a hallmark of efficient and resilient Kubernetes development, providing a stable window into your cluster's applications.
Chapter 5: Common Scenarios and Use Cases – Where port-forward Shines
kubectl port-forward is more than just a command; it's a versatile utility that underpins a multitude of critical development, debugging, and administrative workflows within the Kubernetes ecosystem. Its ability to create temporary, secure, local access to remote services makes it invaluable in situations where direct external exposure is either impractical, insecure, or simply unnecessary. Let's explore some of the most common and impactful scenarios where port-forward truly shines.
1. Local Development and Debugging of Microservices: Perhaps the most prominent use case for port-forward is facilitating local development of applications that interact with services running inside the cluster. Imagine you're developing a new frontend service locally on your machine, but it needs to communicate with a backend API service, a database (like PostgreSQL or MongoDB), or a caching layer (like Redis) that resides within Kubernetes. Instead of deploying your frontend to the cluster for every small change, or trying to configure complex ingress rules, you can simply port-forward the backend services to your localhost.
For example, if your backend API service is my-backend-api-service on port 8080 and your Redis cache is redis-master on port 6379, you can set up:
kubectl port-forward service/my-backend-api-service 8080:8080 -n dev &
kubectl port-forward service/redis-master 6379:6379 -n dev &
Now, your locally running frontend can make requests to http://localhost:8080 for the backend API and localhost:6379 for Redis, just as if they were running locally. This dramatically accelerates the development cycle, allowing for rapid iteration and debugging with local tools and IDEs, while still interacting with the "real" cluster components. This approach significantly reduces the overhead of re-deploying and testing changes, making it a cornerstone for efficient microservice development.
2. Accessing Internal Administrative Interfaces: Many applications, especially infrastructure components, expose administrative or monitoring interfaces that are only meant to be accessed by developers or operators. These might include Prometheus metrics endpoints, Grafana dashboards, database management UIs (e.g., for Elasticsearch or Kafka), or even custom application admin panels. These interfaces are typically not exposed publicly for security reasons. port-forward provides a secure, on-demand way to access them.
For instance, if your Prometheus server is running in a Pod named prometheus-server-xxxxx and exposing its UI on port 9090, a simple kubectl port-forward prometheus-server-xxxxx 9090:9090 -n monitoring allows you to open http://localhost:9090 in your browser and interact with the Prometheus UI, inspecting metrics and alerts without any public exposure of the monitoring system. This capability extends to any internal tool or gateway with a web interface.
3. Troubleshooting and Inspecting Applications: When an application isn't behaving as expected within the cluster, port-forward can be an invaluable troubleshooting tool. * Direct API Interaction: You can port-forward an API service and use curl or Postman on your local machine to directly send requests to it. This helps in isolating whether an issue lies with the application logic, the network configuration, or an upstream service. * Database Inspection: Temporarily forwarding a database Pod allows you to connect with your local database client (e.g., psql, MySQL Workbench, MongoDB Compass) to inspect data, execute queries, and verify schema without needing to log into the Pod or expose the database publicly. * Service Mesh Interaction: In a service mesh environment (like Istio or Linkerd), you might want to observe how a particular service is behaving in isolation. port-forward allows you to bypass the mesh's routing for a direct connection, helping to diagnose if the mesh configuration itself is causing an issue. * Health Check Verification: Sometimes, an application reports healthy but isn't truly serving traffic. By port-forwarding it, you can bypass kube-proxy and ingress controllers to directly test if the application container itself is responsive on its expected port.
4. Temporary Access to External Services via Kubernetes: While less common, port-forward can also be used in conjunction with a Pod that has external network access to tunnel traffic through it. For example, if your local machine is behind a restrictive firewall but a Pod in your cluster has outbound internet access, you could potentially port-forward a proxy running in that Pod to your local machine, effectively using the Pod as a temporary SOCKS proxy. This is an advanced scenario and typically requires careful security considerations and appropriate Pod configurations.
In essence, kubectl port-forward acts as a developer's Swiss Army knife, providing a flexible and secure mechanism to interact with any network service inside a Kubernetes cluster. It simplifies the development loop, enhances debugging capabilities, and allows for safe inspection of internal components, making it an indispensable tool for anyone working with containerized applications.
Chapter 6: Best Practices and Essential Tips for port-forward Mastery
Mastering kubectl port-forward goes beyond merely knowing the command syntax; it involves adopting best practices that ensure stability, security, and efficiency in your daily workflow. By adhering to these guidelines, you can prevent common pitfalls, streamline your debugging efforts, and integrate port-forward seamlessly into your development process.
1. Explicitly Specify Target and Local Ports: Always be clear about which local port you're using and which remote port you're targeting. While kubectl can sometimes infer the remote port if the Service only exposes one, being explicit (LOCAL_PORT:REMOTE_PORT) improves readability and prevents unexpected behavior. For example, kubectl port-forward service/my-app 8000:80 is clearer than kubectl port-forward service/my-app 8000. If your Service ports are named, use the name for clarity (e.g., 8000:http).
2. Prioritize Services Over Pods for Stability: As discussed, forwarding to a Service (service/SERVICE_NAME) is generally more robust than forwarding directly to a Pod (POD_NAME). Services provide a stable abstraction, automatically routing to available Pods, which makes your port-forward sessions more resilient to Pod restarts, scaling events, and node failures. Only forward to a specific Pod when you need to target a unique instance for deep debugging or when no Service is defined for it.
3. Manage Background Sessions Gracefully: For long-running port-forward sessions, you'll inevitably run them in the background. While & works for quick commands, for professional use, consider: * nohup: nohup kubectl port-forward ... > /dev/null 2>&1 & ensures the process continues even if your terminal session closes. Remember to keep track of these PIDs to kill them when no longer needed. * screen or tmux: These terminal multiplexers are excellent for managing multiple persistent terminal sessions. You can start port-forward in a tmux window, detach from it, and reattach later, making it easy to see the output and stop the process gracefully. This is particularly useful for complex debugging sessions where you might have several port-forward commands active.
4. Be Mindful of Local Port Conflicts: Before establishing a port-forward, quickly check if your chosen local port is already in use. Tools like netstat -tulnp | grep LOCAL_PORT (Linux) or lsof -i :LOCAL_PORT (macOS/Linux) can identify conflicts. Choosing unique, non-privileged ports (above 1024) is a good general practice to avoid permission issues and typical system service conflicts.
5. Secure Your Local Environment: While port-forward creates a secure tunnel into Kubernetes, the local end of that tunnel is exposed on your machine's loopback interface (localhost). This means any application on your local machine can access the forwarded service. * Firewalls: Ensure your local firewall is configured appropriately. While typically localhost connections are allowed, if you specify the --address 0.0.0.0 flag (which allows access from other machines on your local network), you're significantly broadening the exposure. Only use 0.0.0.0 if absolutely necessary and understand the security implications. * Sensitive Data: Avoid forwarding highly sensitive services (like a production database) to your local machine, especially on networks where other machines might have access. Treat the forwarded connection with the same security diligence as if the service were running locally.
6. Use --namespace Explicitly: Always include the -n or --namespace flag to specify the target namespace. This prevents kubectl from guessing the namespace based on your current context, reducing errors and improving clarity, especially when working across multiple projects or environments.
7. Integrate with Development Tools and Scripts: Consider integrating port-forward into your development scripts or IDE configurations. * Shell Scripts: Create simple shell scripts (e.g., dev-connect.sh) that start all necessary port-forward commands for your project. This automates the setup for your team. * IDE Extensions: Many IDEs (like VS Code) have Kubernetes extensions that can simplify port-forward management, allowing you to click to establish or terminate tunnels. * Local Development Tools: Tools like skaffold or telepresence build upon port-forward and other kubectl commands to provide even more sophisticated local development experiences, including live reloading and seamless traffic interception.
8. Understand --address for Network Accessibility: By default, port-forward listens only on 127.0.0.1 (localhost). If you need other machines on your local network to access the forwarded service (e.g., if you're collaborating with a colleague on the same network or testing from a mobile device), you can use the --address flag:
kubectl port-forward service/my-app 8000:80 --address 0.0.0.0 -n dev
Using 0.0.0.0 makes the forwarded port accessible from all network interfaces on your machine. Be extremely cautious with this, as it increases the attack surface. Alternatively, you can specify a particular local IP address if your machine has multiple.
By incorporating these best practices into your workflow, you’ll transform kubectl port-forward from a simple command into a powerful and reliable component of your Kubernetes development toolkit, enabling more efficient and secure interactions with your cluster's services.
APIPark is a high-performance AI gateway that allows you to securely access the most comprehensive LLM APIs globally on the APIPark platform, including OpenAI, Anthropic, Mistral, Llama2, Google Gemini, and more.Try APIPark now! 👇👇👇
Chapter 7: Troubleshooting Common Issues with kubectl port-forward
While kubectl port-forward is a remarkably robust tool, encountering issues is a natural part of any development process. Understanding the common errors and their solutions can save you significant time and frustration. This chapter will walk you through typical problems you might face and provide practical steps to diagnose and resolve them, ensuring your tunnels remain open and your development flow uninterrupted.
1. Error: Error from server (NotFound): pods "POD_NAME" not found or services "SERVICE_NAME" not found
- Cause: The specified Pod or Service name is incorrect, or it doesn't exist in the current or specified namespace.
- Solution:
- Check Names: Double-check the spelling of the Pod or Service name. Kubernetes resource names are case-sensitive.
- Verify Namespace: Ensure you are targeting the correct namespace using the
-n NAMESPACEflag. If unsure, runkubectl config view --minify | grep namespace:to see your current context's default namespace, orkubectl get (pods|services) --all-namespacesto list resources across all namespaces. - Resource Existence: Use
kubectl get pods -n NAMESPACEorkubectl get services -n NAMESPACEto confirm that the resource actually exists and to get its exact name.
2. Error: Unable to listen on port NNNN: Listeners failed to create with the following errors: [unable to create listener: Error: listen tcp 127.0.0.1:NNNN: bind: address already in use]
- Cause: The
LOCAL_PORTyou specified is already being used by another process on your local machine. - Solution:
- Choose a Different Port: The simplest solution is to pick a different
LOCAL_PORTthat is free. - Identify & Terminate Process: To find out which process is using the port and potentially terminate it:
- Linux/macOS:
lsof -i :NNNN(replace NNNN with the port number). This will show the process ID (PID) and command. Then usekill PIDto stop it. - Windows:
netstat -ano | findstr :NNNNto find the PID, thentaskkill /PID NNNN /F.
- Linux/macOS:
- Check Backgrounded
port-forwards: Sometimes, a previouskubectl port-forwardcommand might still be running in the background. Useps aux | grep 'kubectl port-forward'to identify andkillany lingering processes.
- Choose a Different Port: The simplest solution is to pick a different
3. Error: E0608 10:30:00.123456 12345 portforward.go:XXX] error copying from local connection to remote stream: read tcp 127.0.0.1:NNNN->127.0.0.1:MMMM: read: connection reset by peer or Error from server: error dialing backend: dial tcp 10.X.X.X:MMMM: connect: connection refused
- Cause: This usually indicates that while the tunnel from your local machine to the Pod/Service was established, the application inside the Pod is not listening on the
REMOTE_PORT, or it crashed, or a network policy is blocking the internal connection. - Solution:
- Verify Application Port: Ensure the
REMOTE_PORTyou specified in the command (e.g.,8080:80means remote port 80) is indeed the port the application inside the container is listening on. Check the Pod's container definition or application logs. - Check Pod Status: Use
kubectl get pods -n NAMESPACEandkubectl describe pod POD_NAME -n NAMESPACEto confirm the Pod isRunningand healthy. Look for recent restarts or error messages in the events. - Inspect Logs: Fetch the Pod's logs using
kubectl logs POD_NAME -n NAMESPACE. The application might be failing to start or crashing, preventing it from listening on its port. - Internal Network Policies: In some clusters, network policies might prevent the
port-forwardtunnel from reaching the target Pod even if the application is listening. Verify if any network policies are in effect that could block traffic within the cluster. - Firewall inside Pod (rare): Though uncommon, a firewall configured within the container itself could block incoming connections.
- Verify Application Port: Ensure the
4. Error: Error from server (Forbidden): User "USER_NAME" cannot create portforwards in the namespace "NAMESPACE"
- Cause: Your
kubeconfiguser lacks the necessary RBAC permissions to performport-forwardoperations in the specified namespace. - Solution:
- Check RBAC Permissions: Contact your cluster administrator. You need
get,list, andcreatepermissions on Pods and Services (orportforwardspecifically) in the target namespace. They might need to grant you a more permissive Role or a custom RoleBinding. - Verify Context: Ensure your
kubeconfigis pointing to the correct context and user. Usekubectl config current-contextandkubectl config view.
- Check RBAC Permissions: Contact your cluster administrator. You need
5. Error: E0608 10:30:00.123456 12345 portforward.go:XXX] error creating listener: Error: listen tcp 127.0.0.1:NNNN: bind: permission denied
- Cause: You are trying to use a privileged port (any port number less than 1024) without sufficient permissions (e.g., not running as root/administrator).
- Solution:
- Use a Non-Privileged Port: The simplest solution is to use a local port number greater than or equal to 1024 (e.g., 8080, 3000, 5000).
- Run as Administrator (Not Recommended): On Linux/macOS, you could prefix
sudoto thekubectlcommand. However, runningkubectlas root is generally not recommended due to security implications. Prefer using a non-privileged port.
By systematically going through these troubleshooting steps, you can quickly pinpoint the root cause of most kubectl port-forward failures and restore your connection, ensuring minimal disruption to your Kubernetes development workflow.
Chapter 8: Alternatives to kubectl port-forward and When to Use Them
While kubectl port-forward is an indispensable tool for local development and debugging, it's not the only way to expose or access services within Kubernetes. Understanding its alternatives and their respective use cases is crucial for making informed architectural and operational decisions. Each method serves a different purpose, balancing ease of access, security, and scalability.
Let's explore the primary alternatives and when you might choose them over kubectl port-forward.
1. Kubernetes Services: NodePort
- What it is: A
NodePortService exposes a Service on a static port on each Node's IP. Kubernetes automatically allocates a port from a configurable range (default: 30000-32767) on all cluster Nodes. Any traffic sent to that port on any Node's IP will be forwarded to the Service. - When to Use It:
- Simple External Access (Development/Staging): For quick, somewhat persistent external access to a service in a development or staging environment where a dedicated LoadBalancer or Ingress might be overkill.
- On-Premise or Bare Metal Clusters: Often used in environments where cloud-provider-managed LoadBalancers are not available, and you want to manage external access yourself (e.g., via an external load balancer pointed to Node IPs).
- Why
port-forwardis Better for Local Dev:NodePortrequires exposing a high port on all Nodes, potentially through public IPs. This is less secure and less precise for individual developer access. It's a cluster-wide exposure, not a personal tunnel.
2. Kubernetes Services: LoadBalancer
- What it is: A
LoadBalancerService type provisions an external load balancer from your cloud provider (e.g., AWS ELB, Google Cloud Load Balancer, Azure Load Balancer). This load balancer gets a unique, externally accessible IP address and distributes incoming traffic to the Pods backing your Service. - When to Use It:
- Public-Facing TCP/UDP Services: Ideal for production applications or services that need direct, public TCP/UDP access and high availability, such as game servers, VPN endpoints, or raw TCP
apis not based on HTTP. - Cloud Environments: This type relies heavily on cloud provider integrations.
- Public-Facing TCP/UDP Services: Ideal for production applications or services that need direct, public TCP/UDP access and high availability, such as game servers, VPN endpoints, or raw TCP
- Why
port-forwardis Better for Local Dev:LoadBalancerservices incur cloud provider costs, take time to provision, and are meant for persistent, public exposure. For local, temporary access,port-forwardis instantaneous, free, and secure.
3. Kubernetes Ingress
- What it is: Ingress exposes HTTP and HTTPS routes from outside the cluster to services within the cluster. It's not a Service type but rather an
apiobject that manages external access to HTTP/S services, typically providing URL-based routing, SSL termination, and name-based virtual hosting. An Ingress controller (e.g., Nginx Ingress Controller, Traefik) is required to fulfill the Ingress rules. - When to Use It:
- HTTP/S Web Applications and
APIs (Production): The standard and most flexible way to expose HTTP/S applications and API gateway endpoints to the internet. - Consolidated External Access: Allows multiple services to share a single external IP address or domain, simplifying external routing and management.
- HTTP/S Web Applications and
- Why
port-forwardis Better for Local Dev: Configuring Ingress is more complex than aport-forwardand requires managing DNS records, SSL certificates, and Ingress rules. While anapi gatewaymight use Ingress as its underlying exposure mechanism,port-forwardoffers direct, internal access without this overhead. For individual developer testing, directport-forwardis vastly simpler and quicker.
4. VPNs and Bastion Hosts
- What it is:
- VPN (Virtual Private Network): Establishes a secure, encrypted connection to a private network (e.g., your corporate network or VPC where the cluster resides). Once connected, your local machine effectively becomes part of that private network, allowing direct access to internal cluster IPs.
- Bastion Host (Jump Box): A dedicated server, usually hardened and located in a demilitarized zone (DMZ) or management subnet, that acts as a secure intermediary. You SSH into the bastion host, and from there, you can access internal resources within your private network.
- When to Use It:
- General Cluster Access: For comprehensive access to the entire cluster's internal network, not just a single service. Useful for administrators, for
kubectl execinto any Pod, or for connecting other local tools that need broad network access. - Enhanced Security: Provides a strong security perimeter around the cluster, requiring authentication to the VPN or bastion.
- General Cluster Access: For comprehensive access to the entire cluster's internal network, not just a single service. Useful for administrators, for
- Why
port-forwardis Better for Local Dev: While VPNs provide broader access, setting them up can be complex, and they might route all your network traffic through the corporate network.port-forwardis more lightweight and granular, focusing specifically on the service you need to interact with, without affecting your general network routing. For a singleapicall,port-forwardis faster.
5. Service Mesh (e.g., Istio, Linkerd) with In-Cluster Development Tools
- What it is: Service meshes provide advanced traffic management, observability, and security features for microservices. They often include capabilities for "in-cluster development," where local code can seamlessly integrate and interact with services running inside the mesh as if it were part of the cluster. Tools like Telepresence build on these concepts.
- When to Use It:
- Advanced Microservices Development: For sophisticated development workflows in complex microservice architectures where you need to test local changes against live services, intercept traffic, or perform canary deployments from your local machine.
- High Observability Needs: When deep insights into traffic flow and service interactions are critical.
- Why
port-forwardis Still Relevant: Even with service meshes,port-forwardremains useful for direct, un-meshed access to a specific Pod or for accessing internal control plane components of the mesh itself. Service mesh tools often build uponport-forwardrather than replacing it entirely, extending its capabilities.
In summary, kubectl port-forward is the agile, secure, and developer-centric choice for temporary, direct local access to individual Kubernetes services. Its alternatives are generally designed for broader, more permanent, or production-grade exposure, each with its own trade-offs in terms of complexity, cost, and security. Understanding this landscape allows you to choose the right tool for the right job, optimizing both development velocity and operational integrity.
| Feature / Method | kubectl port-forward |
NodePort Service |
LoadBalancer Service |
Ingress (with Controller) |
VPN / Bastion Host |
|---|---|---|---|---|---|
| Access Scope | Local machine only (default) | Cluster-wide (Node IP:NodePort) | External (Cloud LB IP:Port) | External (HTTP/S routes) | Full network access (VPN), SSH to host |
| Purpose | Local Dev/Debug, Admin Access | Simple Dev/Staging External Access | Production Public TCP/UDP | Production Public HTTP/S API/Web | General Cluster/Network Access |
| Setup Complexity | Very Low (single command) | Low (Service definition) | Medium (Service definition, cloud overhead) | High (Ingress obj, Controller, DNS, Certs) | High (Network config, client software) |
| Cost | Free | Free (Kubernetes resource) | Varies (Cloud LB cost) | Varies (Cloud LB/Ingress Controller cost) | Varies (Server cost, network data) |
| Security | High (local loopback, authenticated tunnel) | Moderate (exposed on Node IPs) | Varies (depends on cloud provider security) | Varies (depends on Ingress config, WAF) | High (secure tunnel/host) |
| Use Case Examples | Debugging local api, accessing DB locally |
Exposing a demo app in staging | Public game server, raw TCP api endpoint |
Public web app, RESTful api gateway |
Admin tasks, broad internal api testing |
| Resilience to Pod Changes | Low (Pod-specific), High (Service-specific) | High (transparent to client) | High (transparent to client) | High (transparent to client) | N/A |
| Typical Protocol | TCP (any) | TCP (any) | TCP/UDP (any) | HTTP/S | TCP (any) |
Chapter 9: Integrating port-forward into Your Development Workflow
kubectl port-forward is not just a standalone command; it's a powerful primitive that can be deeply integrated into your daily development workflow, transforming it from a manual chore into an automated and seamless experience. By incorporating port-forward into scripts, IDEs, and other development tools, you can dramatically reduce friction, accelerate iteration cycles, and enhance developer productivity when working with Kubernetes-backed applications.
1. Scripting for Automated Setup: One of the most effective ways to integrate port-forward is through simple shell scripts. For projects with multiple microservices, manually typing out several port-forward commands can be tedious and error-prone. A small script can launch all necessary tunnels in one go.
Consider a start-dev.sh script for a project with a backend API and a database:
#!/bin/bash

NAMESPACE="my-dev-namespace"

echo "Starting port-forward for my-backend-api-service (local:8080 -> remote:8080)"
kubectl port-forward service/my-backend-api-service 8080:8080 -n "$NAMESPACE" > /tmp/my-backend-api.log 2>&1 &
BACKEND_PID=$!
echo "Backend API forwarded. PID: $BACKEND_PID"

echo "Starting port-forward for my-db-service (local:5432 -> remote:5432)"
kubectl port-forward service/my-db-service 5432:5432 -n "$NAMESPACE" > /tmp/my-db.log 2>&1 &
DB_PID=$!
echo "Database forwarded. PID: $DB_PID"

echo "All services forwarded. Access backend at http://localhost:8080, DB at localhost:5432"
echo "To stop, run: kill $BACKEND_PID $DB_PID"

# Optional: Add a trap to clean up on script exit
trap "echo 'Stopping port-forwards...' && kill $BACKEND_PID $DB_PID 2>/dev/null" EXIT

# Keep script running to allow the trap to work, or just exit if no further actions are needed
wait $BACKEND_PID $DB_PID # Or some other long-running task
This script does the following: * Defines the namespace. * Starts port-forward commands for both services in the background, redirecting output to logs. * Stores the process IDs (PIDs) for easy termination. * Provides instructions to stop the processes. * Includes an EXIT trap to automatically kill the backgrounded port-forward processes when the script itself is terminated (e.g., with Ctrl+C), ensuring a clean shutdown.
2. Integrating with Makefiles or Build Tools: For projects that use Makefiles or other task runners (like npm scripts for Node.js projects), port-forward commands can be integrated as targets or scripts.
Example Makefile snippet:
.PHONY: dev-connect clean-dev-connect

NAMESPACE := my-dev-namespace
BACKEND_PF_LOG := /tmp/backend-pf.log
DB_PF_LOG := /tmp/db-pf.log

dev-connect: ## Start kubectl port-forwards for local development
    @echo "Starting backend API port-forward..."
    @kubectl port-forward service/my-backend-api-service 8080:8080 -n $(NAMESPACE) > $(BACKEND_PF_LOG) 2>&1 & echo $$! > .backend-pf.pid
    @echo "Starting DB port-forward..."
    @kubectl port-forward service/my-db-service 5432:5432 -n $(NAMESPACE) > $(DB_PF_LOG) 2>&1 & echo $$! > .db-pf.pid
    @echo "Port-forwards started. PIDs saved to .backend-pf.pid and .db-pf.pid"
    @echo "Access backend at http://localhost:8080, DB at localhost:5432"
    @echo "Run 'make clean-dev-connect' to stop."

clean-dev-connect: ## Stop all active port-forwards
    @if [ -f .backend-pf.pid ]; then \
        kill $$(cat .backend-pf.pid) 2>/dev/null || true; \
        rm .backend-pf.pid; \
        echo "Backend port-forward stopped."; \
    fi
    @if [ -f .db-pf.pid ]; then \
        kill $$(cat .db-pf.pid) 2>/dev/null || true; \
        rm .db-pf.pid; \
        echo "DB port-forward stopped."; \
    fi
    @rm -f $(BACKEND_PF_LOG) $(DB_PF_LOG)
    @echo "All associated port-forwards terminated and log files cleaned."
This approach standardizes the port-forward process across your team, allowing everyone to use make dev-connect to set up their local environment.
3. IDE Integration (e.g., VS Code): Many modern IDEs offer extensions for Kubernetes. For example, the official "Kubernetes" extension for VS Code allows you to browse cluster resources, view logs, and often initiate port-forward sessions directly from the IDE's UI. You can right-click on a Pod or Service and select "Port Forward," and the extension will manage the command for you, even providing visual cues for active forwards. This GUI-driven approach reduces the cognitive load of remembering commands and PIDs.
4. Advanced Local Development Tools: A new generation of tools has emerged to further enhance local development with Kubernetes, often building upon port-forward under the hood: * Skaffold: Automates the develop-deploy-debug cycle for Kubernetes applications. It can detect code changes, rebuild images, redeploy to the cluster, and port-forward services for local access, providing a continuous feedback loop. * Telepresence: Allows your local machine to act as a Pod within the cluster network. It sets up a two-way proxy that intercepts traffic for a specified service, redirecting it to your local machine. This means your locally running application can directly consume in-cluster services (e.g., a database or an API gateway) and be consumed by other in-cluster services as if it were running inside the cluster. This is an advanced form of port-forward that modifies network routing. * DevSpace: Similar to Skaffold, DevSpace provides a powerful command-line tool for building, deploying, and debugging cloud-native applications directly from your local machine, often utilizing port-forward for local access.
These tools abstract away much of the complexity of port-forward and other kubectl commands, providing a more integrated and developer-friendly experience. They are particularly valuable in larger teams and complex microservice environments where the goal is to make Kubernetes transparent to the developer.
By embracing these integration strategies, kubectl port-forward transcends its role as a simple command, becoming a strategic component of a highly efficient and enjoyable Kubernetes development workflow. It ensures that developers can focus on writing code rather than wrestling with network configurations, ultimately leading to faster development cycles and higher-quality applications.
Chapter 10: Security Considerations and Advanced Techniques
While kubectl port-forward is a developer's best friend, like any powerful tool, it comes with inherent security implications and opportunities for advanced usage. Understanding these aspects is crucial for responsible and efficient operation in a Kubernetes environment.
Security Considerations
kubectl port-forward creates a direct, secure tunnel, but its security profile is tied to how kubectl itself is secured and how it's used locally.
1. Authentication and Authorization (RBAC): The primary security boundary for port-forward is Kubernetes' Role-Based Access Control (RBAC). A user attempting to execute kubectl port-forward must have create permission on the pods/portforward resource (or pods and services in general) within the target namespace. If a user has broad permissions (e.g., cluster-admin in a development environment), they could potentially port-forward any service in the cluster. * Best Practice: Implement strict RBAC policies. Developers should only have port-forward permissions to the namespaces and services relevant to their work. Avoid granting blanket cluster-admin roles in anything beyond personal sandbox clusters. This prevents unauthorized access to sensitive services like production databases or internal control planes.
2. Local Exposure and --address Flag: By default, port-forward binds the local port to 127.0.0.1 (localhost), meaning only applications running on your machine can access it. This is generally secure. However, using the --address 0.0.0.0 flag exposes the forwarded port on all network interfaces of your local machine, making it accessible to other machines on your local network. * Best Practice: Only use --address 0.0.0.0 when absolutely necessary (e.g., demonstrating something to a colleague on the same LAN, or testing from a mobile device). Be acutely aware of your local network environment when doing so. Are you on a secure home network, or a less trusted public Wi-Fi? Avoid forwarding highly sensitive services this way.
3. Data in Transit: The tunnel established by port-forward is not encrypted at the application layer by kubectl itself. While the underlying connection to the Kubernetes API server is typically TLS-encrypted, the data flowing through the tunnel between your local machine and the Pod's application port is raw TCP. If the application itself uses TLS (e.g., https traffic), then your data remains encrypted end-to-end. If the application does not use TLS, the data within the port-forward tunnel is not additionally encrypted by kubectl beyond the initial control plane communication. * Best Practice: Always assume that port-forward provides a secure channel into the cluster, but the application's own security (e.g., using HTTPS for web APIs, or internal encryption for databases) is still paramount for data privacy.
4. Logging and Auditing: kubectl port-forward commands are typically logged in Kubernetes API server audit logs. This provides a trail of who initiated a port-forward and to which resource. * Best Practice: Ensure your Kubernetes cluster has robust audit logging enabled and configured. Regularly review these logs, especially in production or sensitive environments, to detect any anomalous or unauthorized port-forward activity.
Advanced Techniques
Beyond basic forwarding, kubectl port-forward offers some lesser-known but powerful capabilities.
1. Targeting Resources by Label Selector: While you typically forward to a specific Pod name or Service name, you can also use a label selector to target a Pod. kubectl will then pick one healthy Pod matching the selector.
kubectl port-forward --selector app=my-app,env=dev 8080:80 -n my-namespace
This can be useful if you don't want to rely on Service abstraction or if you need to access a Pod that isn't backed by a Service but still want some flexibility beyond a hardcoded Pod name. However, for most cases, forwarding to a Service is more robust.
2. Dynamic Port Forwarding (SOCKS Proxy): kubectl port-forward can also be used to create a SOCKS5 proxy, allowing you to route all TCP connections through the Kubernetes cluster. This can be incredibly powerful for accessing multiple internal services without individual port-forward commands.
kubectl port-forward deployment/my-pod-deployment 8888 -n my-namespace --pod-running-timeout=1m
In this command, 8888 is the local port for the SOCKS proxy. Notice there's no REMOTE_PORT. kubectl will pick one Pod from the my-pod-deployment and establish a SOCKS5 proxy server on your localhost:8888. You then configure your browser, application, or system to use localhost:8888 as a SOCKS5 proxy. Any traffic you send through this proxy will be tunneled into the cluster and then egress from the selected Pod. * Use Cases: Accessing multiple internal web UIs, connecting to various internal databases, or routing all traffic for a specific application through the cluster's network. * Caution: This gives your local applications broad network access from within the cluster. Be mindful of the security implications and ensure the Pod selected has the necessary network egress permissions.
3. Reverse Port Forwarding (Limited/Indirect): Standard port-forward brings a remote port to your local machine. "Reverse port forwarding" would typically mean exposing a service on your local machine to a Pod inside the cluster. kubectl port-forward doesn't directly support this in the same way SSH does. However, you can achieve a similar effect indirectly: * From within the Pod: You could kubectl exec into a Pod and run an SSH client from there, initiating a reverse SSH tunnel back to your local machine. This requires SSH client binaries in the Pod and an SSH server on your local machine. * Using a second port-forward and network manipulation: A more complex setup might involve port-forwarding a local service to an intermediate Pod, and then from that intermediate Pod, using another port-forward or network rules to expose it to other Pods. This is generally overly complicated for most scenarios. * Dedicated Tools: Tools like Telepresence are designed precisely for this kind of "local service into cluster" integration, offering a much more streamlined and robust experience than trying to hack it with kubectl port-forward.
By understanding both the security implications and advanced capabilities of kubectl port-forward, you can leverage this command not just effectively, but also responsibly, contributing to a more secure and efficient Kubernetes development environment.
Chapter 11: The Role of an API Gateway in a Broader Context (and APIPark)
Up to this point, we've focused extensively on kubectl port-forward as an indispensable tool for individual developers to access Kubernetes services locally. It provides a direct, secure, and temporary window into your cluster's internal network, streamlining local development and debugging. However, for applications beyond the developer's laptop—for production deployments, for exposing services to external consumers, for managing a fleet of microservices, or for integrating with AI models—a different class of tool becomes essential: the API gateway.
While kubectl port-forward empowers local development by providing direct access to services, scaling that access, securing your APIs for external consumption, and managing their lifecycle requires a robust API gateway solution. An API gateway acts as a single entry point for all client requests, routing them to the appropriate backend services. It provides a layer of abstraction and control over your backend APIs, offering crucial features that port-forward is neither designed nor intended to deliver.
Consider the fundamental differences: * kubectl port-forward is a developer-centric, ad-hoc, internal access mechanism. * An API gateway is an enterprise-centric, persistent, external traffic management and security layer.
The capabilities of an API gateway extend far beyond simple port forwarding: * Traffic Management: Load balancing, routing, request/response transformation, rate limiting, circuit breaking, caching. * Security: Authentication (OAuth, JWT), authorization, IP whitelisting, threat protection, SSL/TLS termination, API key management. * Observability: Request logging, monitoring, analytics, tracing. * API Lifecycle Management: Design, publication, versioning, deprecation, and consumption of APIs through developer portals. * Integration: Seamlessly integrating diverse services, including legacy systems, microservices, and specialized AI models.
For instance, platforms like APIPark offer comprehensive capabilities for managing your API ecosystem, especially in the evolving landscape of AI-driven applications. APIPark is an all-in-one AI gateway and API developer portal, open-sourced under the Apache 2.0 license, designed to help developers and enterprises manage, integrate, and deploy AI and REST services with ease.
Let's delve into how APIPark addresses these broader needs:
1. Quick Integration of 100+ AI Models: In a world increasingly powered by AI, integrating various AI models (like large language models, image recognition, or sentiment analysis) can be complex due to diverse APIs and authentication schemes. APIPark simplifies this by offering a unified management system for authenticating and tracking costs across a wide array of AI models. This means developers can integrate powerful AI capabilities into their applications without wrestling with each model's unique specifics, allowing kubectl port-forward to then connect a local application to this standardized AI gateway.
2. Unified API Format for AI Invocation: One of the most significant challenges in AI integration is the lack of a standardized API format. Changes in AI models or prompts can force applications to be rewritten. APIPark tackles this by standardizing the request data format across all AI models. This ensures that your application or microservices can invoke AI functions consistently, insulating them from underlying AI model changes and significantly reducing maintenance costs. You can then port-forward to this unified API gateway locally for testing your application's AI interactions.
3. Prompt Encapsulation into REST API: APIPark enables users to quickly combine AI models with custom prompts to create new, specialized APIs. For example, you can encapsulate a specific sentiment analysis prompt or a translation prompt into a simple REST API endpoint. This allows even non-AI specialists to leverage powerful AI capabilities through familiar REST interfaces, making AI functionality consumable for any application.
4. End-to-End API Lifecycle Management: Beyond just AI, APIPark provides full lifecycle management for all your APIs. From initial design and publication to invocation, versioning, traffic forwarding, load balancing, and eventual decommission, it helps regulate the entire API management process. This comprehensive approach ensures that all your APIs, whether AI-powered or traditional REST, are governed efficiently and securely.
5. API Service Sharing within Teams: In large organizations, discovering and reusing existing APIs can be a bottleneck. APIPark offers a centralized display of all API services, making it easy for different departments and teams to find and use the required APIs. This fosters collaboration and prevents redundant development, while developers can still use port-forward for local, direct testing of these shared services.
6. Independent API and Access Permissions for Each Tenant: For multi-tenant environments or large enterprises, APIPark allows the creation of multiple teams (tenants), each with independent applications, data, user configurations, and security policies. This provides strong isolation while sharing underlying infrastructure, improving resource utilization and reducing operational costs for the gateway infrastructure itself.
7. API Resource Access Requires Approval: Security is paramount for APIs. APIPark includes features to activate subscription approval for APIs. Callers must subscribe to an API and await administrator approval before they can invoke it, preventing unauthorized API calls and potential data breaches. This is a crucial security layer that port-forward doesn't provide, as port-forward only secures the tunnel, not the access control to the API itself.
8. Performance Rivaling Nginx: APIPark is designed for high performance and scalability. With modest hardware (e.g., an 8-core CPU and 8GB of memory), it can achieve over 20,000 Transactions Per Second (TPS) and supports cluster deployment to handle large-scale traffic, making it suitable for even the most demanding production environments.
9. Detailed API Call Logging and Powerful Data Analysis: Observability is key for any production gateway. APIPark provides comprehensive logging, recording every detail of each API call. This allows businesses to quickly trace and troubleshoot issues, ensuring system stability and data security. Furthermore, it analyzes historical call data to display long-term trends and performance changes, enabling proactive maintenance and business intelligence.
APIPark can be quickly deployed in just 5 minutes with a single command, making it accessible for startups and enterprises alike. While the open-source product meets basic needs, a commercial version offers advanced features and professional technical support. Developed by Eolink, a leader in API lifecycle governance, APIPark represents a significant step forward in managing complex API and AI ecosystems.
In conclusion, while kubectl port-forward remains an invaluable tool for developers to interact with services during local development, it operates at a fundamentally different layer than an API gateway. An API gateway like APIPark is essential for scaling, securing, managing, and observing APIs in production, especially when integrating a diverse set of traditional REST services and rapidly evolving AI models. Together, kubectl port-forward and a robust API gateway form a comprehensive strategy for efficient, secure, and scalable cloud-native application development and deployment.
Conclusion: Unleashing Your Kubernetes Potential with kubectl port-forward
We have embarked on a comprehensive journey, exploring the depths of kubectl port-forward, a command that, despite its apparent simplicity, holds immense power in the realm of Kubernetes development. From understanding its core mechanics as a secure TCP tunnel to mastering its usage for Pods and Services, we've seen how port-forward effectively bridges the gap between your local workstation and the intricate network of a Kubernetes cluster.
We've highlighted its indispensable role in accelerating local development cycles, simplifying the debugging of complex microservice architectures, and enabling secure, on-demand access to internal administrative interfaces. The best practices outlined, from prioritizing Services over Pods to intelligently managing background processes and securing local exposures, are not just theoretical guidelines but practical necessities for maintaining an efficient and secure workflow. Furthermore, by understanding common troubleshooting scenarios, you are now equipped to quickly diagnose and resolve connectivity issues, minimizing downtime and maximizing productivity.
We also contextualized kubectl port-forward within the broader Kubernetes ecosystem, comparing it with alternatives like NodePort, LoadBalancer, and Ingress. This exploration revealed that while these alternatives serve crucial roles in external service exposure and production environments, port-forward remains uniquely positioned as the agile, developer-centric solution for internal, temporary access. Its integration into development workflows through scripting, Makefiles, and advanced tools like Skaffold and Telepresence further solidifies its status as a foundational element of modern cloud-native development.
Finally, we broadened our perspective to acknowledge the strategic importance of an API gateway. While kubectl port-forward empowers individual developers, an API gateway like APIPark steps in to manage, secure, and scale APIs for broader consumption, both for traditional REST services and the burgeoning landscape of AI models. It’s a powerful reminder that while port-forward provides the tactical solution for local interaction, an API gateway offers the strategic platform for enterprise-wide API governance and innovation.
In essence, kubectl port-forward is more than just a command; it's a testament to Kubernetes' flexibility and a critical enabler of developer velocity. By mastering this tool, you're not just learning a syntax; you're gaining a fundamental skill that will empower you to interact with your Kubernetes applications with unprecedented ease and confidence. Embrace its power, integrate it wisely, and unlock a more efficient and enjoyable path to developing and managing your cloud-native applications. Your Kubernetes potential awaits.
Frequently Asked Questions (FAQ)
1. What is kubectl port-forward and why do I need it?
kubectl port-forward establishes a secure, temporary, bi-directional TCP tunnel from a port on your local machine to a port on a Pod or Service within your Kubernetes cluster. You need it primarily for local development and debugging because it allows you to access internal cluster services (like databases, backend APIs, or admin interfaces) directly from your workstation as if they were running locally, without exposing them to the public internet or reconfiguring your cluster's network. It's ideal for quickly testing, developing, and troubleshooting applications.
2. What's the difference between port-forwarding to a Pod versus a Service?
Forwarding to a Pod (kubectl port-forward POD_NAME LOCAL_PORT:REMOTE_PORT) creates a tunnel to a specific instance of your application. This is useful for debugging individual Pods, but if that Pod is restarted or replaced, your port-forward will break. Forwarding to a Service (kubectl port-forward service/SERVICE_NAME LOCAL_PORT:REMOTE_PORT) creates a tunnel to a stable network endpoint provided by Kubernetes. kubectl will then pick one of the healthy Pods backing that Service. This is generally more robust because the tunnel can often reconnect to another Pod if the original one goes down, making your development sessions more stable.
3. Is kubectl port-forward secure? What are the security implications?
kubectl port-forward itself creates a secure tunnel between your kubectl client and the Kubernetes API server, using your existing kubeconfig authentication and RBAC permissions. By default, the local end of the tunnel is only accessible from localhost (127.0.0.1) on your machine, making it relatively secure from external access. However, if you use --address 0.0.0.0, the forwarded port becomes accessible from any machine on your local network, increasing the exposure. The data transmitted through the tunnel at the application layer is not encrypted by kubectl itself (unless the application itself uses TLS, like HTTPS). Always ensure you have appropriate RBAC permissions, use localhost by default, and be cautious when forwarding sensitive services.
4. How can I run kubectl port-forward in the background?
To run kubectl port-forward in the background on Linux/macOS, you can append & to the command (e.g., kubectl port-forward ... &). For more robust backgrounding, especially for long-running sessions, use nohup: nohup kubectl port-forward service/my-service 8080:80 > /dev/null 2>&1 &. This detaches the process from your terminal. To manage multiple backgrounded port-forwards more easily, consider using terminal multiplexers like screen or tmux, which allow you to start processes in separate sessions, detach, and reattach later.
5. When should I use an API Gateway like APIPark instead of kubectl port-forward?
You should use an API gateway like APIPark when you need to expose your services to external consumers, manage API lifecycles, enforce security policies, handle traffic management (like rate limiting, routing, and load balancing), and provide observability (logging, analytics) for your APIs. kubectl port-forward is for individual developer's local, temporary, and internal access. An API gateway provides a scalable, secure, and managed entry point for a wide audience, especially crucial for production environments, multi-tenant architectures, or when integrating complex AI models with standardized APIs. They solve fundamentally different problems: port-forward for local development, API gateway for public or cross-service consumption and management.
🚀You can securely and efficiently call the OpenAI API on APIPark in just two steps:
Step 1: Deploy the APIPark AI gateway in 5 minutes.
APIPark is developed based on Golang, offering strong product performance and low development and maintenance costs. You can deploy APIPark with a single command line.
curl -sSO https://download.apipark.com/install/quick-start.sh; bash quick-start.sh

In my experience, you can see the successful deployment interface within 5 to 10 minutes. Then, you can log in to APIPark using your account.

Step 2: Call the OpenAI API.