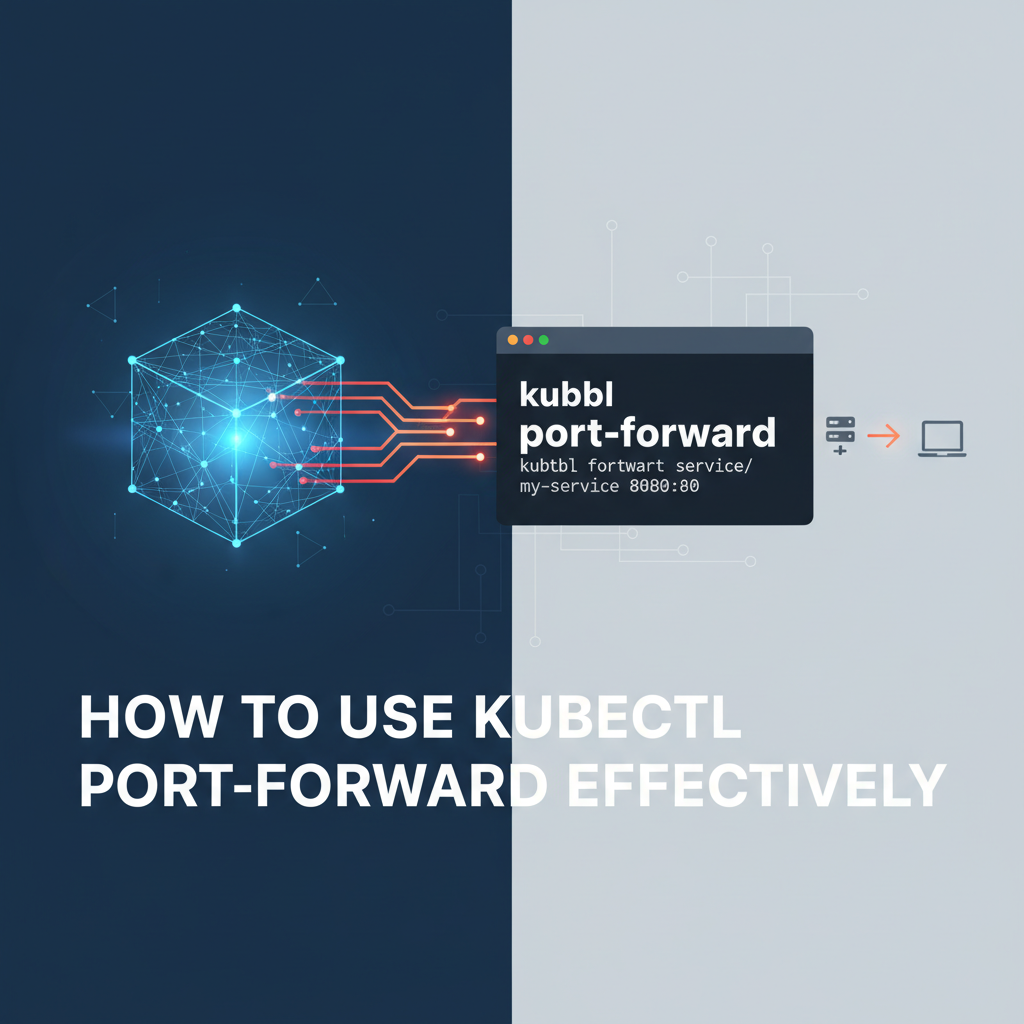
How to Use kubectl port-forward Effectively


The Kubernetes ecosystem, a sprawling cloud-native landscape, offers an unparalleled environment for deploying, scaling, and managing containerized applications. Yet, the very abstraction that makes Kubernetes so powerful can also introduce layers of complexity, particularly when developers need to interact directly with services running inside the cluster from their local workstations. This is where kubectl port-forward emerges as an indispensable utility, a true Swiss Army knife for local development, debugging, and direct access to internal Kubernetes resources.
Understanding and mastering kubectl port-forward is not merely about knowing a command; it's about unlocking a crucial capability that bridges the gap between your local development environment and the remote Kubernetes cluster. It allows you to establish a secure, temporary connection, effectively making a service or pod inside the cluster accessible on a specified port on your local machine, as if it were running natively. This extensive guide will delve deep into the intricacies of kubectl port-forward, exploring its fundamental mechanics, advanced usage patterns, practical applications, security considerations, and how it fits into a broader cloud-native development workflow. We will dissect its capabilities, compare it with alternative methods, and provide actionable insights to ensure you can leverage it with maximum efficiency and confidence.
The Foundation: What is kubectl port-forward and Why Does It Matter?
At its core, kubectl port-forward creates a direct tunnel between a local port on your machine and a port on a specific resource within your Kubernetes cluster. This resource can be a Pod, Deployment, ReplicaSet, or Service. The command essentially acts as a proxy, forwarding traffic from your local machine to the specified target inside the cluster, and vice-versa. This is particularly useful because, by default, services and pods within a Kubernetes cluster are isolated, often living behind internal network boundaries and not directly exposed to the internet. While external exposure methods like Ingress, NodePort, or LoadBalancer exist, they are primarily for production-grade accessibility and might be overly complex or unnecessary for transient development and debugging tasks.
Consider a scenario where you're developing a frontend application that needs to interact with a backend api service running in Kubernetes. Without port-forward, you'd either need to deploy your frontend to the cluster (a slow feedback loop) or expose your backend service externally (a security risk for development). kubectl port-forward elegantly solves this by allowing your local frontend to talk to the backend as if it were a local service, without any public exposure. This direct and secure connection facilitates rapid iteration and precise debugging, significantly accelerating the development cycle.
The power of kubectl port-forward lies in its simplicity and directness. It bypasses the complexities of network policies, firewalls, and ingress controllers, providing a straightforward pathway for local interaction. This makes it a cornerstone utility for any developer working with Kubernetes, ensuring that the remote nature of the cluster doesn't impede the agility required for modern software development.
Unpacking the Mechanics: How Does It Work Under the Hood?
To truly appreciate kubectl port-forward, it's beneficial to understand the underlying mechanism. When you execute the command, kubectl first contacts the Kubernetes API server. The API server then instructs the Kubelet (the agent running on each node in the cluster) of the target Pod to establish a connection. This connection isn't a simple TCP pipe; rather, it leverages SPDY, a deprecated but still used HTTP/2-like protocol for multiplexing streams over a single TCP connection, or more commonly, a WebSocket connection.
Here's a simplified breakdown of the process:
- Client Request: Your
kubectlcommand initiates a request to the Kubernetes API server, specifying the target resource (Pod, Service, etc.) and the local and remote ports. - API Server Proxy: The API server acts as a secure proxy. It verifies your authentication and authorization to access the specified resource.
- Kubelet Interaction: If authorized, the API server sends a request to the Kubelet running on the node hosting the target Pod. This request includes instructions to open a port-forwarding stream.
- Pod-Level Forwarding: The Kubelet then establishes a connection to the specified port within the target Pod. This connection is typically done via the Pod's network namespace.
- Tunnel Establishment: A secure, bidirectionally streaming connection (often a WebSocket or SPDY stream) is established from your local
kubectlclient, through the API server, to the Kubelet, and finally to the specified port inside the Pod. - Traffic Flow: Any traffic sent to the local port on your machine is then forwarded through this tunnel to the Pod's port, and responses are sent back the same way.
This tunneling mechanism ensures that traffic flows securely within the Kubernetes internal network, without exposing the target service directly to the public internet. It essentially creates a temporary, on-demand gateway for your local machine to interact with internal services. This secure, client-side initiated tunnel is a fundamental design choice that provides both flexibility and control, avoiding the need for complex network configurations on the cluster side for temporary access. It’s a testament to Kubernetes’ design as an Open Platform for application development, providing tools that empower developers to work seamlessly regardless of their application's deployment environment.
The Basic Syntax: Your First Steps with kubectl port-forward
Getting started with kubectl port-forward is straightforward. The most common use case involves forwarding a port from a specific Pod.
The general syntax is:
kubectl port-forward <resource_type>/<resource_name> <local_port>:<remote_port> -n <namespace>
Let's break down the components:
<resource_type>: This specifies the type of Kubernetes resource you want to forward from. Most commonly, this will bepod,deployment, orservice. You can often omitpod/if you're specifying a pod directly by name.<resource_name>: The name of the specific resource (e.g.,my-backend-pod-xyz12,my-backend-deployment,my-backend-service).<local_port>: The port on your local machine that you want to use to access the remote service.<remote_port>: The port on the target Pod or Service that you want to forward traffic to.-n <namespace>: (Optional, but highly recommended) Specifies the Kubernetes namespace where the resource resides. If omitted,kubectluses the current context's default namespace.
Example 1: Forwarding a Pod's Port
Suppose you have a Pod named my-web-app-pod-12345 running a web application on port 8080. To access it locally on port 8000:
kubectl port-forward pod/my-web-app-pod-12345 8000:8080
Now, you can open your web browser and navigate to http://localhost:8000, and your request will be routed to the my-web-app-pod-12345 Pod's port 8080. The kubectl command will continue to run in your terminal, displaying logs of forwarded connections. To stop the forwarding, simply press Ctrl+C.
Example 2: Forwarding a Deployment's Port
Often, you don't care about a specific Pod, but rather any Pod managed by a Deployment. kubectl port-forward can target Deployments directly. It will pick one of the healthy Pods managed by that Deployment.
kubectl port-forward deployment/my-api-deployment 9000:8080
This command will forward local port 9000 to port 8080 of one of the Pods created by the my-api-deployment. This is generally more robust for development, as it doesn't tie you to a specific Pod instance that might be recreated.
Example 3: Forwarding a Service's Port
Forwarding from a Service is incredibly useful because it leverages Kubernetes' internal service discovery. When you forward from a Service, kubectl looks up the Pods that the Service routes traffic to and then establishes the tunnel to one of those Pods. This provides an additional layer of abstraction and resilience.
kubectl port-forward service/my-database-service 5432:5432
Here, local port 5432 will be forwarded to port 5432 of a Pod backing my-database-service. This is perfect for connecting local database clients (like DBeaver, psql, MySQL Workbench) to a database running inside your cluster without exposing it externally. This approach ensures that even if the underlying Pod restarts or changes, kubectl port-forward will attempt to re-establish the connection to a new healthy Pod, making it a reliable way to access api endpoints.
Advanced Usage Patterns and Flags
Beyond the basic syntax, kubectl port-forward offers several flags and advanced patterns that enhance its utility.
1. Specifying the Local Address (--address)
By default, kubectl port-forward binds to localhost (127.0.0.1). This means only applications running on your machine can access the forwarded port. If you need to make the forwarded port accessible from other machines on your local network, you can specify the address.
kubectl port-forward deployment/my-app 8000:8080 --address 0.0.0.0
This will bind the local port 8000 to all available network interfaces on your machine, allowing other devices on your network to access my-app via your machine's IP address and port 8000. Be cautious when using 0.0.0.0 as it can introduce security risks by exposing internal services to your local network.
2. Forwarding Multiple Ports
You can forward multiple ports simultaneously within a single kubectl port-forward command by separating the port mappings with spaces.
kubectl port-forward pod/my-multi-service-pod 8000:8080 9000:9090
This command will forward local port 8000 to remote port 8080, and local port 9000 to remote port 9090, all through the same tunnel to my-multi-service-pod. This is efficient for services that expose multiple internal api endpoints or different protocols.
3. Detaching the Process (& or nohup)
kubectl port-forward runs as a foreground process. If you close your terminal, the tunnel will be terminated. To run it in the background, you can use standard shell job control features.
Using &:
kubectl port-forward deployment/my-app 8000:8080 &
This will run the command in the background, giving you back your terminal prompt. You can later bring it back to the foreground with fg or kill it with kill %<job_number>.
Using nohup (more robust for session detachment):
nohup kubectl port-forward deployment/my-app 8000:8080 > /dev/null 2>&1 &
This command runs port-forward in the background, detaches it from the terminal session, and redirects all output to /dev/null, preventing it from polluting your nohup.out file. To stop this process, you'll need to find its PID (e.g., using ps aux | grep 'kubectl port-forward') and kill it.
4. Specifying the Kubeconfig (--kubeconfig) and Context (--context)
If you manage multiple Kubernetes clusters or contexts, you'll often need to specify which one kubectl should interact with.
kubectl port-forward --kubeconfig ~/.kube/my-other-config --context prod-cluster deployment/my-app 8000:8080
These flags ensure that your port-forward command targets the correct cluster and api server, especially crucial in multi-cluster environments or when dealing with different client gateway configurations.
5. Ignoring Certificate Errors (--accept-handshake-failure)
In some advanced debugging scenarios, particularly with custom api server setups or self-signed certificates, kubectl might encounter TLS handshake failures. While generally not recommended for security reasons, the --accept-handshake-failure flag can be used to bypass these errors for debugging purposes. Use this with extreme caution.
kubectl port-forward pod/my-debug-pod 8000:8080 --accept-handshake-failure
Table 1: Common kubectl port-forward Flags and Their Uses
| Flag | Description | Example Usage |
|---|---|---|
-n, --namespace |
Specify the Kubernetes namespace for the target resource. | kubectl port-forward pod/my-app 8000:8080 -n dev |
--address |
The address to bind to on the local machine (default: 127.0.0.1). Use 0.0.0.0 to bind to all interfaces. |
kubectl port-forward deployment/my-app 8000:8080 --address 0.0.0.0 |
--kubeconfig |
Path to the kubeconfig file to use for authentication and cluster details. | kubectl port-forward --kubeconfig ~/.kube/config-dev service/my-db 5432:5432 |
--context |
The name of the kubeconfig context to use. | kubectl port-forward --context staging-cluster deployment/my-app 8000:8080 |
--pod-running-timeout |
The length of time to wait for a pod to be running before giving up (default: 1m0s). |
kubectl port-forward pod/my-app 8000:8080 --pod-running-timeout=2m |
--disable-compression |
If true, do not request API calls to be compressed. | kubectl port-forward pod/my-app 8000:8080 --disable-compression |
--dry-run |
Not directly applicable to port-forward for execution, but kubectl has this for resource creation/updates. (Mention for completeness) |
N/A (not for port-forward execution) |
--accept-handshake-failure |
If true, accepts TLS handshake failures and proceeds with the connection. Use with extreme caution. | kubectl port-forward pod/my-app 8000:8080 --accept-handshake-failure |
Practical Use Cases: Where kubectl port-forward Shines
The versatility of kubectl port-forward makes it invaluable across a multitude of development and operational scenarios. Here are some of the most common and impactful use cases:
1. Local Development and Testing
This is arguably the most common and impactful use of port-forward.
- Frontend Development: Develop a local frontend application that needs to communicate with a backend
apiservice running in the cluster. Instead of mock data or deploying the frontend,port-forwardallows direct, real-time interaction. - Microservice Development: If you're working on one microservice in a larger system, you can
port-forwardother dependent services (e.g., a message queue, a user service) to your local machine, allowing your locally running microservice to interact with them as if they were local. This avoids the overhead of deploying your entire local stack to the cluster for every change. - IDE Integration: Many IDEs and development tools can be configured to use
localhostports.port-forwardallows these tools to seamlessly connect to services running within Kubernetes, facilitating features like live reloading, debugger attachment, andapiclient interactions.
2. Debugging and Troubleshooting
port-forward is a lifesaver for diagnosing issues within your cluster.
- Accessing Internal Logs/Metrics Endpoints: Many applications expose internal
apiendpoints for health checks, metrics (e.g., Prometheus/metrics), or detailed status information. These endpoints are usually not exposed externally.port-forwardallows you to directly access them from your browser orcurlto inspect the application's state. - Debugging Database Issues: Connect your local database client (e.g., DBeaver, DataGrip, pgAdmin) directly to a database Pod running in Kubernetes. This allows you to inspect tables, run queries, and debug data-related issues without needing an externally exposed database connection.
- Troubleshooting Webhooks: If you have a Kubernetes webhook service that's misbehaving, you can
port-forwardit and send test requests from your local machine, observing its behavior directly. - Connecting to a Debugger: For languages that support remote debugging (like Java, Python, Node.js), you can configure your application in the Pod to listen for a debugger connection on a specific port, and then
port-forwardthat port to your local IDE's debugger. This allows you to step through code execution of a running application inside the cluster.
3. Bypassing Ingress and Firewalls
Sometimes, for quick testing or debugging, you need to access a service directly without configuring complex Ingress rules or opening firewall ports.
- Ad-hoc Service Access: Quickly test a new
apiendpoint or UI component of a service before it's fully integrated into yourgatewayor Ingress configuration. - Testing Services Behind Proxies: If your cluster has a restrictive network policy or an
api gatewaythat might be interfering,port-forwardallows you to bypass these layers and interact directly with the underlying service. This helps isolate issues: if it works viaport-forwardbut not via thegateway, the problem likely lies in thegatewayconfiguration.
4. Admin and Operator Tasks
Even operations teams find value in port-forward.
- Accessing Management Interfaces: Some applications, like message queues (RabbitMQ, Kafka), databases (MongoDB, Redis), or monitoring tools, provide web-based administration interfaces that are typically only accessible within the cluster.
port-forwardenables secure, temporary access to these UIs from an operator's workstation. - Interacting with Cluster Add-ons: Similar to application services, many cluster add-ons or control plane components expose internal
apis or UIs that can be accessed for debugging or configuration viaport-forward.
As developers fine-tune their services locally using kubectl port-forward, ensuring the api endpoints are behaving as expected, they often look for robust solutions to manage these apis in production. This is where platforms like ApiPark, an open-source AI gateway and API management solution, become invaluable. It helps streamline the management, integration, and deployment of both AI and REST services, acting as a crucial gateway for all your service apis within an Open Platform ecosystem. ApiPark allows teams to centralize api governance, security, and traffic management, providing an Open Platform for collaboration and innovation, far beyond what port-forward is designed for, but complementary to the local development workflow port-forward enables.
APIPark is a high-performance AI gateway that allows you to securely access the most comprehensive LLM APIs globally on the APIPark platform, including OpenAI, Anthropic, Mistral, Llama2, Google Gemini, and more.Try APIPark now! 👇👇👇
Security Considerations and Best Practices
While kubectl port-forward is incredibly useful, it's crucial to understand its security implications. Because it creates a direct tunnel, it can potentially expose internal cluster services to your local machine, and if --address 0.0.0.0 is used, to your local network.
Security Implications:
- Unauthorized Access: If your local machine is compromised or if you're on an untrusted network and use
--address 0.0.0.0, you risk exposing internal cluster services to external threats. - Privilege Escalation: A malicious actor gaining access to your
kubectlclient could potentiallyport-forwardto sensitive services, even if those services aren't publicly exposed. - Data Exposure: Accessing services directly might bypass network policies or authentication mechanisms intended for external access, potentially exposing sensitive data.
Best Practices for Secure Usage:
- Least Privilege: Ensure the Kubernetes user or service account associated with your
kubectlcontext has only the necessary permissions toport-forwardto the intended resources. Avoid using highly privileged accounts for routine development. - Limit Exposure:
- Always use
127.0.0.1(the default) for--addressunless absolutely necessary. Avoid0.0.0.0on untrusted networks or if you don't fully understand the implications. - Terminate tunnels promptly: Don't leave
port-forwardprocesses running in the background indefinitely, especially for sensitive services.Ctrl+Cis your friend.
- Always use
- Secure Your Local Machine: Your local machine becomes an extension of your cluster's network when
port-forwardis active. Keep your local machine secure with firewalls, up-to-date software, and strong authentication. - Understand the Target: Be aware of what service you are forwarding to. What data does it handle? What
apiendpoints does it expose? - Use
kubectlin Secure Environments: Only runkubectlcommands from trusted machines and networks. - Namespace Isolation: Leverage Kubernetes namespaces to segment your workloads and control access. This limits the blast radius if an individual Pod or Service is inadvertently exposed.
- Audit Logs: Remember that
kubectloperations, includingport-forwardrequests to the API server, are typically logged. In production environments, monitor these logs for suspicious activity.
By adhering to these best practices, you can mitigate the risks associated with kubectl port-forward and continue to leverage its powerful capabilities safely. It's a tool designed for developers to interact with an Open Platform, and like any powerful tool, it requires responsible handling.
Alternatives to kubectl port-forward and When to Use Them
While kubectl port-forward is excellent for many scenarios, it's not always the best solution. Kubernetes offers several other mechanisms for accessing services, each with its own advantages and disadvantages. Understanding these alternatives helps you choose the right tool for the job.
1. kubectl proxy
- What it does: Creates a proxy to the Kubernetes API server on your local machine. You can then access any service, Pod, or resource through this proxy using URLs like
http://localhost:8001/api/v1/namespaces/default/pods/my-pod/proxy/<path>. - When to use it: When you need to access multiple resources dynamically, especially Kubernetes API endpoints or internal application
apis that are designed to be proxied. It's great for building tools that interact broadly with the cluster. - When not to use it: It adds an extra layer of URL complexity (
/proxy/path). It's not suitable for directly pointing a web browser or client application that expects a simplehost:portURL to a specific application'sapiendpoint. It's also less performant for high-throughput scenarios as all traffic goes through the API server.
2. Kubernetes Services (NodePort, LoadBalancer, ClusterIP)
- ClusterIP: The default service type, making the service only reachable from within the cluster. This is what
port-forwardoften targets. - NodePort: Exposes the service on a static port on each Node's IP. You can then access the service using
<NodeIP>:<NodePort>.- When to use it: For simple, internal testing or exposing services on a fixed port within a private network. Less ideal for production due to potential port conflicts and reliance on Node IPs.
- LoadBalancer: Creates an external load balancer (if supported by your cloud provider) that directs traffic to your service.
- When to use it: The standard way to expose public-facing
apis or web applications in the cloud. It provides a stable external IP and handles load distribution.
- When to use it: The standard way to expose public-facing
- When not to use NodePort/LoadBalancer for
port-forwardscenarios: For transient, local development or debugging, these methods are overkill. They involve public exposure, network configuration, and often cost money (for LoadBalancers).
3. Ingress
- What it does: An API object that manages external access to services in a cluster, typically HTTP. Ingress can provide load balancing, SSL termination, and name-based virtual hosting. An Ingress controller (e.g., Nginx Ingress, Traefik) is required to fulfill the Ingress.
- When to use it: The preferred method for exposing HTTP/HTTPS
apis and web applications in production. It offers advanced routing, domain management, and security features that no other method provides. It integrates seamlessly withapi gatewaysolutions. - When not to use it: For quick local development or debugging where you just need direct, temporary
host:portaccess. Setting up Ingress can be complex and time-consuming for a transient need.
4. kubectl exec
- What it does: Allows you to execute a command directly inside a running container within a Pod. You can also get a shell into a container (
kubectl exec -it <pod> -- /bin/bash). - When to use it: For direct interaction with the container's file system, running commands (e.g.,
ps aux,ls -l), or debugging directly within the container's environment. - When not to use it: To access a service's network port from your local machine.
execis about executing commands, not forwarding network traffic.
5. VPN/Direct Network Access
- What it does: Establishes a VPN connection to your cluster's network, effectively making your local machine a part of the cluster's private network.
- When to use it: For complex multi-service interactions, when you need deep network integration, or if your organization mandates VPN for all cluster access.
- When not to use it: It's more complex to set up and manage than
port-forwardfor simple, direct service access. Overkill for many development tasks.
Conclusion on Alternatives:
kubectl port-forward occupies a sweet spot for local, direct, and temporary access to services. It's less powerful than Ingress/LoadBalancer for external production exposure, and less broad than kubectl proxy for API server interaction, but for focused host:port debugging and development, it's unparalleled in its simplicity and effectiveness. It complements, rather than replaces, other Kubernetes networking primitives, offering a vital tool in the developer's arsenal for working with an Open Platform like Kubernetes.
Troubleshooting Common kubectl port-forward Issues
Even seasoned Kubernetes users encounter occasional hiccups with kubectl port-forward. Here's a rundown of common issues and how to diagnose and resolve them.
1. "Unable to listen on port X: Listeners failed to create" or "Address already in use"
- Symptom: The command fails immediately with an error indicating the local port is already in use.
- Diagnosis: Another process on your local machine is already using the specified local port.
- Solution:
- Choose a different local port (e.g.,
8001:8080instead of8000:8080). - Find and terminate the process using the port:
- Linux/macOS:
sudo lsof -i :<port_number>thenkill <PID> - Windows:
netstat -ano | findstr :<port_number>thentaskkill /PID <PID> /F
- Linux/macOS:
- Choose a different local port (e.g.,
2. "Error from server (NotFound): pods "..." not found" or "service "..." not found"
- Symptom:
kubectlcannot find the specified resource. - Diagnosis:
- Typo: You've misspelled the resource name.
- Wrong Namespace: The resource exists but is in a different namespace than the one
kubectlis currently configured for or the one you specified with-n. - Resource Doesn't Exist: The Pod, Deployment, or Service you're trying to target simply doesn't exist.
- Solution:
- Double-check the resource name for typos.
- Verify the namespace:
- Check current context:
kubectl config view --minify | grep namespace: - List resources in all namespaces:
kubectl get <resource_type> --all-namespaces - Specify the correct namespace with
-n <namespace>.
- Check current context:
- Confirm the resource exists:
kubectl get <resource_type> <resource_name> -n <namespace>.
3. "Error forwarding port X to port Y: ... connection refused" or "dial tcp:: connect: connection refused"
- Symptom: The
port-forwardcommand starts but when you try to connect tolocalhost:local_port, the connection is refused. - Diagnosis:
- Incorrect Remote Port: The application inside the Pod is not listening on the specified
remote_port. - Application Not Running/Healthy: The application within the Pod is not running or has crashed, so there's nothing to respond on that port.
- Firewall/Network Policy: A network policy within the cluster is preventing the Kubelet from connecting to the Pod's port. (Less common for
port-forwarditself, but possible.) - Container Not Listening on 0.0.0.0: The application inside the container might be configured to listen only on
localhost(127.0.0.1) within the container, making it inaccessible from the Kubelet (which connects via the Pod's IP).
- Incorrect Remote Port: The application inside the Pod is not listening on the specified
- Solution:
- Verify Remote Port: Check your application's configuration, Dockerfile, or Kubernetes manifest to confirm the actual port it's listening on. You can use
kubectl exec <pod_name> -- netstat -tulnp(ifnetstatis available in the container) to see what ports are open inside the Pod. - Check Pod Status:
kubectl get pod <pod_name> -n <namespace>andkubectl describe pod <pod_name> -n <namespace>to see if the Pod is running and healthy. View logs withkubectl logs <pod_name> -n <namespace>. - Check Network Policies: Consult your cluster's network policies if you suspect they are blocking internal traffic.
- Container Listener: Ensure your application within the container is configured to listen on
0.0.0.0or its default network interface, not just127.0.0.1.
- Verify Remote Port: Check your application's configuration, Dockerfile, or Kubernetes manifest to confirm the actual port it's listening on. You can use
4. kubectl port-forward Hangs or Times Out
- Symptom: The
kubectl port-forwardcommand starts but nothing happens when you try to connect, or it eventually times out. - Diagnosis:
- Network Latency/Connectivity Issues: Poor network connection between your local machine and the Kubernetes API server, or between the API server and the Kubelet.
- API Server Overload: The Kubernetes API server might be under heavy load, delaying proxying requests.
- Kubelet Issues: The Kubelet on the target node might be unhealthy or unresponsive.
- Firewall on Local Machine: Your local firewall might be blocking outbound connections to the Kubernetes API server, or inbound connections on the local forwarded port.
- Solution:
- Check Network: Verify your internet connection and ability to reach the Kubernetes API server endpoint (
kubectl cluster-info). - Check API Server Status: If you have access, check the health of the API server.
- Check Kubelet Logs: If possible, check Kubelet logs on the node hosting the Pod for errors.
- Local Firewall: Temporarily disable your local firewall to see if it resolves the issue (re-enable afterward!).
- Retry: Sometimes, transient network issues resolve themselves with a retry.
- Check Network: Verify your internet connection and ability to reach the Kubernetes API server endpoint (
5. kubectl port-forward Works, But Application Returns Errors
- Symptom: You can connect to
localhost:local_port, but the application (e.g., a web service) returns 4xx or 5xx errors. - Diagnosis: The issue is likely with the application logic itself, not the
port-forwardtunnel. The tunnel is successfully delivering your request to the application. - Solution: Debug your application as you would normally:
- Check application logs (e.g.,
kubectl logs <pod_name> -n <namespace>). - Use a debugger (potentially connected via another
port-forwardfor the debugger port). - Verify
apirequests and responses.
- Check application logs (e.g.,
Effective troubleshooting involves a systematic approach, checking each layer of the connection from your client to the application within the Pod. By understanding these common pitfalls, you can quickly pinpoint and resolve issues, ensuring kubectl port-forward remains a reliable tool in your development workflow on this Open Platform.
Integrating kubectl port-forward into Your Development Workflow
For maximum efficiency, kubectl port-forward should be integrated seamlessly into your daily development workflow. This means thinking beyond just typing commands and exploring how it interacts with other tools.
1. Scripting and Automation
Instead of manually typing port-forward commands every time, especially for complex setups with multiple services, consider scripting them.
- Makefile/Task Runners: Integrate
port-forwardcommands into yourMakefileor other task runners (likenpm scriptsorjust).makefile .PHONY: dev-forward dev-forward: kubectl port-forward service/my-backend-service 8000:8080 -n dev & \ kubectl port-forward service/my-db-service 5432:5432 -n dev & \ echo "Port-forwards started. Press Ctrl+C to stop." # Use wait or sleep here if you need to keep the Makefile alive
Shell Scripts: Create simple shell scripts (e.g., start-dev.sh) that bring up all necessary port-forward tunnels for your project.```bash
!/bin/bash
echo "Starting port-forwards..."
Forward backend API
kubectl port-forward service/my-backend-service 8000:8080 -n dev & BACKEND_PID=$! echo "Backend API forwarded on :8000 (PID: $BACKEND_PID)"
Forward database
kubectl port-forward service/my-db-service 5432:5432 -n dev & DB_PID=$! echo "Database forwarded on :5432 (PID: $DB_PID)"
Forward a Kafka UI (example)
kubectl port-forward deployment/kafka-ui 9000:8080 -n monitoring & KAFKA_UI_PID=$! echo "Kafka UI forwarded on :9000 (PID: $KAFKA_UI_PID)"echo "All port-forwards started in background." echo "To stop: kill $BACKEND_PID $DB_PID $KAFKA_UI_PID"
Keep script alive, or use wait to wait for background jobs to finish if desired
For keeping alive and gracefully stopping all at once
trap "kill $BACKEND_PID $DB_PID $KAFKA_UI_PID; echo 'Port-forwards stopped.'" EXIT wait ```
2. IDE Integration
Many modern IDEs have extensions for Kubernetes that can facilitate port-forward operations.
- VS Code: Extensions like "Kubernetes" from Microsoft allow you to browse clusters, view Pods, and right-click to initiate a port-forward directly from the UI. This reduces cognitive load and manual command typing.
- IntelliJ/GoLand/PyCharm: Similar plugins exist that provide graphical interfaces for Kubernetes resource management, including
port-forward.
3. Combining with Other Tools
- Docker Compose for Local Dependencies: For very complex local development environments where some services run locally via Docker Compose and others in Kubernetes,
port-forwardcan bridge the gap. Your local Docker Compose services can communicate with services in Kubernetes via the forwarded ports. - Local Proxy Tools (e.g.,
ngrok): Whileport-forwardbrings remote services locally, you might occasionally need to expose a local service externally for testing webhooks or integrations. Tools likengrokcan create a public URL for yourlocalhost:portwhich, if thatlocalhost:portis itself aport-forwardtarget, creates a powerful chain:Public Internet -> ngrok -> Localhost -> kubectl port-forward -> Kubernetes Service. This is an advanced pattern but can be incredibly useful for specific debugging scenarios with anapi gateway.
4. Naming Conventions and Labels
Ensure your Kubernetes resources (Pods, Deployments, Services) have clear, descriptive names and appropriate labels. This makes it easier to target them reliably with kubectl port-forward commands. For example, consistently using app: my-backend as a label allows you to select resources easily.
By adopting these integration strategies, kubectl port-forward transforms from a standalone command into an integral, almost invisible part of your daily Kubernetes development routine. It significantly contributes to the efficiency and agility promised by an Open Platform approach to software delivery.
The Future of Local Kubernetes Development and port-forward's Enduring Role
The Kubernetes ecosystem is constantly evolving, with new tools emerging to streamline local development. Projects like Telepresence, Skaffold, and Tilt aim to provide more sophisticated and integrated local development experiences that go beyond simple port forwarding.
- Telepresence: Allows you to run a single service locally while it appears to be running within the cluster, communicating directly with other cluster services as if it were a Pod. This effectively reverse-engineers the
port-forwardconcept for local code execution. - Skaffold: Automates the build, push, and deploy cycle for Kubernetes applications, providing local development capabilities including file synchronization and hot reloading.
- Tilt: Focuses on multi-service local development, managing dependencies and providing live updates for all services.
These tools offer compelling alternatives, especially for complex microservice architectures where port-forwarding dozens of services becomes cumbersome. However, even with these advanced solutions, kubectl port-forward retains its foundational importance.
Why port-forward Will Persist:
- Simplicity and Accessibility: It's a built-in
kubectlcommand, requiring no extra installations or complex configurations. For quick, ad-hoc access, nothing beats its simplicity. - Debugging Specifics: For pinpoint debugging of a single service or Pod,
port-forwardoffers a direct, transparent tunnel that advanced tools might abstract away, making it harder to diagnose exact network paths. - Ubiquity: It's available on any machine with
kubectland access to a cluster, making it a universal troubleshooting tool across different environments and teams. - Learning Tool: Understanding
port-forwardhelps developers grasp fundamental Kubernetes networking concepts, even if they later move to more automated tools. It teaches how to directly interact with anapi gatewayor anyapiendpoint that lives within the cluster. - Foundation for Higher-Level Tools: Many of the more advanced local development tools might internally leverage or build upon the same underlying
port-forwarding mechanisms, providing a more refined user experience over the core functionality.
In essence, kubectl port-forward is the elemental building block, the raw api call for local connectivity. While higher-level Open Platform tools provide more streamlined workflows, the direct, powerful, and universally available nature of port-forward ensures its enduring relevance as an essential utility for any Kubernetes developer or operator. Mastering it is not just about using a command, but about gaining a deeper understanding and control over your applications within the cloud-native landscape. It embodies the spirit of an Open Platform by providing flexible access and control, allowing developers to extend the reach of their local environments into the powerful Kubernetes cluster.
Conclusion
kubectl port-forward is more than just a command; it's a vital bridge connecting your local development environment to the powerful, distributed world of Kubernetes. From enabling rapid local development and precise debugging to facilitating secure ad-hoc access to internal services, its utility is undeniable. This comprehensive guide has walked through its fundamental operation, advanced capabilities, myriad practical applications, crucial security considerations, and effective troubleshooting techniques. We've also explored how it fits into a broader development workflow and its enduring place amidst evolving cloud-native tooling.
By understanding the mechanics of how kubectl port-forward creates a temporary, secure gateway to your containerized applications, you gain an invaluable capability. It empowers you to interact directly with internal api services, databases, and user interfaces, bypassing the complexities of external exposure and significantly accelerating your development and debugging cycles. Whether you are a seasoned Kubernetes engineer or just starting your journey on this Open Platform, mastering kubectl port-forward is an essential skill that enhances your productivity, deepens your understanding of cluster networking, and allows you to confidently navigate the intricate landscape of modern cloud-native applications. Embrace its power, wield it responsibly, and let it be a cornerstone of your efficient Kubernetes workflow.
Frequently Asked Questions (FAQ)
1. What is the primary purpose of kubectl port-forward?
The primary purpose of kubectl port-forward is to establish a secure, temporary tunnel from a local port on your workstation to a port on a specific resource (like a Pod, Deployment, or Service) inside a Kubernetes cluster. This allows developers to access internal cluster services and api endpoints from their local machine as if they were running locally, which is crucial for development, debugging, and administrative tasks without exposing the service publicly.
2. Can I use kubectl port-forward to access multiple services simultaneously?
Yes, you can forward multiple ports in a single kubectl port-forward command, like kubectl port-forward pod/my-app 8000:8080 9000:9090. Alternatively, you can run multiple kubectl port-forward commands concurrently in different terminal windows or as background processes to access different services or different ports on the same service.
3. Is kubectl port-forward secure for production environments?
No, kubectl port-forward is generally not recommended for exposing services in production environments. It's designed for temporary, ad-hoc access by developers and operators. For production, services should be exposed using Kubernetes Service types like LoadBalancer or NodePort, or via an Ingress controller, which provide robust features such as load balancing, SSL termination, and integration with an api gateway like ApiPark for comprehensive management, security, and scalability.
4. What's the difference between kubectl port-forward and kubectl proxy?
kubectl port-forward creates a direct TCP tunnel from a local port to a specific port of a single Kubernetes resource (Pod, Service, etc.), making that resource's api or application accessible via localhost:local_port. kubectl proxy, on the other hand, creates a local proxy to the Kubernetes API server itself, allowing you to access any resource or API endpoint within the cluster by constructing special URLs that include the API server's proxy path (e.g., http://localhost:8001/api/v1/namespaces/default/pods/my-pod/proxy/). Port-forward is better for specific application access, while proxy is better for broad API server interaction or building tools.
5. My kubectl port-forward command is running, but I can't connect to localhost:local_port. What should I check?
First, ensure that no other process on your local machine is already using the local_port (Address already in use error). Second, verify that the application inside the target Pod is actually listening on the remote_port you specified, and that it's healthy and running. Check the Pod's logs (kubectl logs <pod_name>) and status (kubectl get pod <pod_name>). Also, confirm that the application in the container is configured to listen on 0.0.0.0 or its default network interface, not just 127.0.0.1 within the container, which would prevent connections from the Kubelet.
🚀You can securely and efficiently call the OpenAI API on APIPark in just two steps:
Step 1: Deploy the APIPark AI gateway in 5 minutes.
APIPark is developed based on Golang, offering strong product performance and low development and maintenance costs. You can deploy APIPark with a single command line.
curl -sSO https://download.apipark.com/install/quick-start.sh; bash quick-start.sh

In my experience, you can see the successful deployment interface within 5 to 10 minutes. Then, you can log in to APIPark using your account.

Step 2: Call the OpenAI API.