How to Test a MuleSoft Proxy: A Step-by-Step Guide


In the intricate landscape of modern enterprise architecture, Application Programming Interfaces (APIs) serve as the fundamental connective tissue, enabling disparate systems to communicate, share data, and orchestrate complex business processes. As organizations increasingly adopt API-led connectivity, the role of an API gateway becomes paramount. MuleSoft, with its Anypoint Platform, offers robust capabilities for designing, building, and managing APIs, and a critical component within this ecosystem is the MuleSoft Proxy. These proxies act as an essential front-end to your backend APIs, enforcing security policies, managing traffic, and ensuring the overall governance of your digital assets. However, the mere deployment of a proxy is insufficient; its effectiveness hinges entirely on rigorous, comprehensive testing.
This extensive guide delves deep into the methodologies, best practices, and practical steps required to thoroughly test a MuleSoft Proxy. We will explore the various types of policies it enforces, the tools necessary for effective validation, and a systematic approach to ensure your API gateway operates with optimal security, performance, and reliability. From basic connectivity checks to advanced performance and security assessments, we will equip you with the knowledge to validate every facet of your MuleSoft proxy implementation, guaranteeing that your APIs are not just functional, but also resilient and trustworthy components of your enterprise integration strategy. Understanding and mastering proxy testing is not merely a technical exercise; it's a strategic imperative for any organization leveraging MuleSoft to build a robust, secure, and scalable API ecosystem.
Understanding MuleSoft Proxies and Their Importance
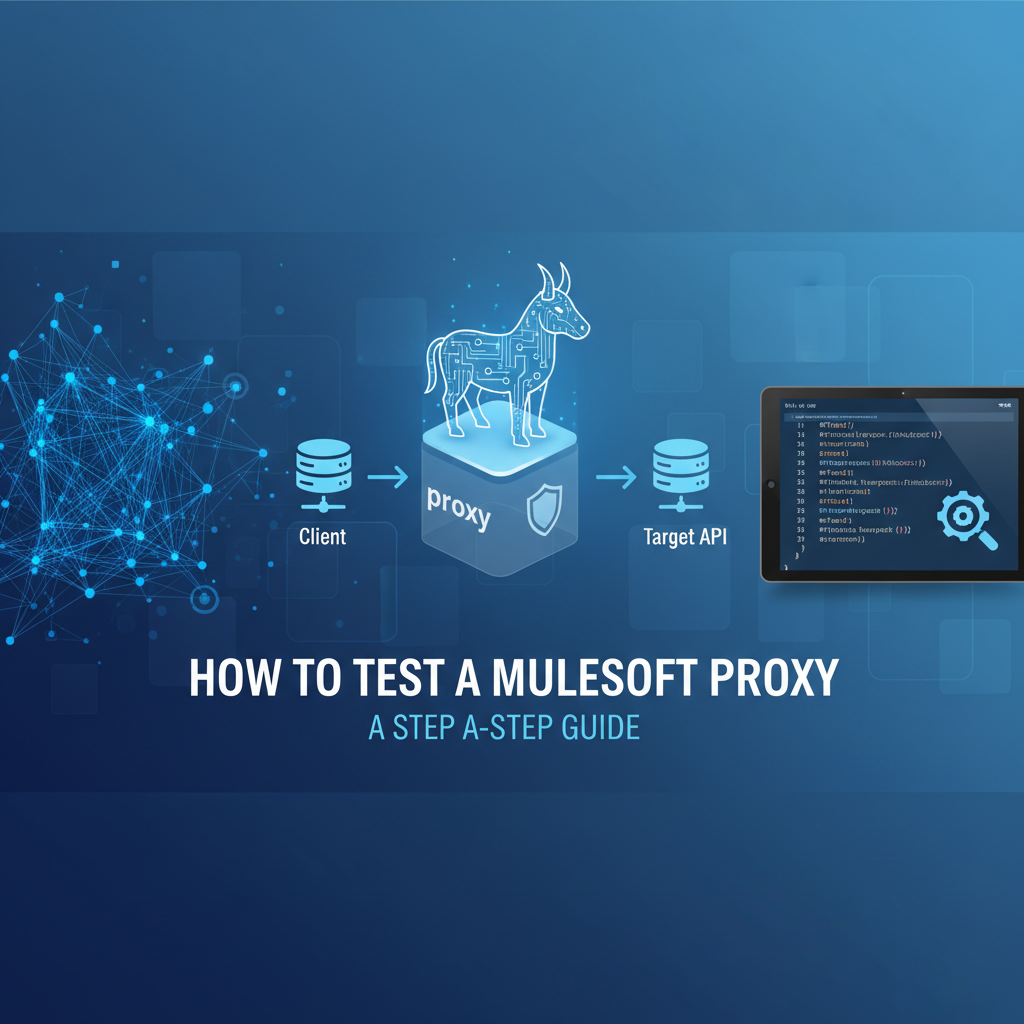
At the heart of MuleSoft's API management capabilities lies the concept of a proxy API. A MuleSoft proxy is not just a simple passthrough; it's an intelligent layer sitting between your consumers and your backend implementation. Managed through Anypoint API Manager, these proxies allow organizations to apply a wide array of policies to their APIs without altering the underlying implementation. This decoupling provides immense flexibility, enabling changes to security, throttling, caching, and other operational concerns at the gateway level, independent of the actual service logic.
The primary function of a MuleSoft proxy, acting as an api gateway, is to provide a centralized point of control and enforcement for all incoming API requests. When an API consumer sends a request to your API, it first hits the proxy, which then evaluates it against a set of predefined policies before forwarding it to the actual backend api implementation. This intermediary role is crucial for several reasons:
Firstly, Enhanced Security. A proxy serves as the first line of defense for your backend services. It can enforce various security policies such as client ID enforcement, OAuth 2.0 validation, JSON threat protection, and IP whitelisting/blacklisting. This prevents unauthorized access, protects against common attack vectors like oversized payloads or deeply nested JSON structures, and ensures that only legitimate, authenticated requests reach your valuable backend systems. Without a robust proxy, each backend service would need to implement these security measures independently, leading to potential inconsistencies and security gaps.
Secondly, Centralized Governance and Control. By abstracting the backend implementation, the proxy allows API administrators to apply consistent governance rules across multiple APIs. This includes managing API versions, applying rate limits to prevent abuse, setting up service level agreements (SLAs), and providing detailed analytics on API usage. This centralized approach simplifies management, reduces operational overhead, and ensures compliance with organizational standards. It's a key enabler for a coherent api strategy.
Thirdly, Improved Performance and Scalability. Proxies can incorporate caching policies, reducing the load on backend systems by serving frequently requested data directly from the cache. They can also handle traffic shaping, load balancing, and even request/response transformations, optimizing the data flow and enhancing the overall responsiveness of the api ecosystem. For example, a proxy can combine multiple backend calls into a single response, or filter out unnecessary data, making the api more efficient for consumers.
Fourthly, Flexibility and Agility. The ability to apply policies without code changes means that security updates, performance optimizations, or changes in access control can be rolled out quickly and independently of the backend api development lifecycle. This agility is invaluable in fast-paced development environments, allowing teams to react swiftly to new requirements or threats. For instance, if a new security vulnerability is discovered, a policy can be rapidly deployed to mitigate it at the gateway level, without requiring redeployment of numerous backend services.
Fifthly, Analytics and Monitoring. MuleSoft proxies, through Anypoint Platform's monitoring capabilities, provide valuable insights into API usage patterns, performance metrics, and error rates. This data is critical for understanding how APIs are being consumed, identifying potential bottlenecks, and making informed decisions for future enhancements or optimizations. Comprehensive logging at the gateway level ensures that every interaction is recorded, which is invaluable for auditing and troubleshooting.
In essence, a MuleSoft proxy transforms a collection of backend services into a managed, secure, and performant api ecosystem. Its importance cannot be overstated in a world where APIs are the lifeblood of digital transformation, and thorough testing of this critical gateway component is paramount to ensure the integrity and reliability of the entire system.
Types of Policies Commonly Applied to MuleSoft Proxies
MuleSoft's API Manager offers a rich set of predefined policies that can be applied to proxies, each serving a specific purpose in managing and securing APIs. Understanding these policies is crucial, as the core of proxy testing revolves around verifying their correct enforcement. Policies can be applied at different levels: on the API as a whole, or on specific API resources and methods. Here's a detailed look at the most common types:
1. Security Policies
These policies are designed to protect your APIs from unauthorized access, malicious attacks, and data breaches. They are foundational for any api gateway implementation.
- Client ID Enforcement Policy: This is arguably one of the most fundamental security policies. It requires API consumers to provide a valid
client_idandclient_secretin their requests (typically in headers or query parameters) to gain access to the API.- Testing Focus: Verify that requests without credentials, with invalid credentials, or with expired credentials are rejected (e.g., HTTP 401 Unauthorized or 403 Forbidden). Ensure valid credentials grant access. Test edge cases like malformed client IDs.
- OAuth 2.0 Access Token Enforcement Policy: This policy validates OAuth 2.0 access tokens, ensuring that only requests with valid, unexpired tokens and appropriate scopes are permitted. It integrates with an OAuth provider (like Anypoint Access Management, PingFederate, Okta, etc.).
- Testing Focus: Test with no token, invalid token formats, expired tokens, tokens with insufficient scopes, and valid tokens. Verify correct rejection and acceptance scenarios. Ensure the policy correctly introspects or validates the token against the configured OAuth provider.
- JWT Validation Policy: Similar to OAuth, this policy validates JSON Web Tokens (JWTs) based on their signature, claims (e.g., expiry, issuer, audience), and other rules.
- Testing Focus: Validate with no JWT, invalid signatures, expired JWTs, JWTs with missing or incorrect claims, and valid JWTs. Verify different signature algorithms (HS256, RS256).
- IP Whitelisting/Blacklisting Policy: This policy allows or denies access to the API based on the source IP address of the client. Whitelisting restricts access to a predefined list of trusted IPs, while blacklisting blocks known malicious IPs.
- Testing Focus: Send requests from an allowed IP (whitelist) or a non-blocked IP (blacklist). Send requests from a blocked IP (blacklist) or a non-allowed IP (whitelist). Verify HTTP 403 Forbidden for blocked access.
- JSON Threat Protection Policy: Designed to prevent JSON-based denial-of-service (DoS) attacks or resource exhaustion by restricting the size and complexity of incoming JSON payloads. This includes limits on max depth, max keys, max string length, etc.
- Testing Focus: Send legitimate, well-formed JSON payloads. Then, send excessively large JSON bodies, deeply nested JSON structures, or JSON objects with an exorbitant number of keys. Verify HTTP 400 Bad Request responses for violations.
- XML Threat Protection Policy: Similar to JSON threat protection, but for XML payloads, preventing vulnerabilities like XML bomb attacks.
- Testing Focus: Test with oversized XML documents, deeply nested XML, and large attribute values.
2. Quality of Service (QoS) Policies
These policies manage the performance and reliability of your APIs, ensuring fair usage and optimal resource utilization. They are vital for any production api gateway.
- Rate Limiting Policy: This policy restricts the number of requests an API consumer can make within a defined time window. It prevents abuse, ensures fair usage among consumers, and protects backend systems from being overwhelmed.
- Testing Focus: Send requests below the limit, exactly at the limit, and exceeding the limit. Verify that exceeding requests receive an HTTP 429 Too Many Requests response. Test the reset mechanism (e.g., wait for the time window to pass and confirm access is restored).
- Throttling Policy: Similar to rate limiting, but typically with a focus on burst control and often tied to more dynamic factors or service level agreements. It can sometimes prioritize traffic.
- Testing Focus: Similar to rate limiting, but pay attention to any subtle differences in behavior if both are present or if throttling has different burst capacity rules.
- Caching Policy: This policy stores responses from backend services and serves subsequent identical requests directly from the cache, reducing latency and load on the backend.
- Testing Focus: Send an initial request and confirm it hits the backend. Send subsequent identical requests and verify they are served from the cache (e.g., check for specific cache-related headers, observe faster response times). Test cache expiration and invalidation scenarios.
- Message Logging Policy: This policy logs details of API requests and responses, which is invaluable for auditing, debugging, and analytics.
- Testing Focus: Make API calls and then verify that the expected log entries appear in Anypoint Monitoring or your configured logging destination (e.g., Splunk, ELK stack). Check that sensitive data is appropriately masked if configured.
3. Transformation Policies
These policies modify the structure or content of requests and responses passing through the proxy.
- Header Injection/Removal Policy: Adds or removes specific HTTP headers from incoming requests or outgoing responses. Useful for injecting tracing IDs, security tokens, or cleaning up internal headers.
- Testing Focus: Send a request and verify the presence or absence of the specified header in the backend service's received request, or in the client's received response.
- Query Parameter Injection/Removal Policy: Similar to header policies, but for query parameters.
- Testing Focus: Verify addition or removal of query parameters.
- Set Payload Policy: Replaces the entire request or response payload with a static value or a value derived using DataWeave expressions.
- Testing Focus: Send a request and verify the backend receives the transformed payload. Or, verify the client receives the transformed response.
4. Custom Policies
When a specific requirement cannot be met by the out-of-the-box policies, MuleSoft allows developers to create custom policies using DataWeave, Java, or Mule flows. * Testing Focus: Custom policies require thorough unit and integration testing, often mimicking the testing of a standard Mule application. Verify all logical paths and error handling within the custom policy.
Each of these policy types plays a vital role in defining the behavior and characteristics of your API. The comprehensive testing of a MuleSoft proxy, therefore, involves systematically validating each policy to ensure it functions exactly as intended, protecting your api resources and delivering consistent experiences to consumers.
Prerequisites for Testing a MuleSoft Proxy
Before embarking on the actual testing of a MuleSoft proxy, several foundational elements and configurations must be in place. Rushing into testing without these prerequisites can lead to wasted effort, inaccurate results, and frustration. A well-prepared testing environment and a clear understanding of the API's contract are critical for success.
1. Access to Anypoint Platform
You'll need appropriate access to the various components of the MuleSoft Anypoint Platform:
- Anypoint API Manager: This is where your API specifications are registered, and where you define and apply policies to your proxy. You'll need permissions to view the API, its policies, and potentially to modify them if changes are required during the testing phase.
- Anypoint Runtime Manager: This is where your proxy application (and potentially the backend API implementation) is deployed. You'll need access to monitor the deployed applications, check logs, and understand their operational status. This is crucial for troubleshooting connectivity and policy enforcement issues.
- Anypoint Exchange: While not directly for testing, access to Exchange is useful for retrieving API specifications (RAML, OpenAPI/Swagger) which provide the contract for your API, guiding your test case design.
- Access Management: To create client applications and obtain
client_idandclient_secretpairs for testing policies like Client ID Enforcement.
2. Deployed Backend API
The MuleSoft proxy acts as a frontend to an actual API implementation. Therefore, a functional backend api must be deployed and accessible.
- Functional API: The backend API should be stable and reliably respond to requests. If the backend API itself is unstable, it will be challenging to isolate whether issues are originating from the proxy or the backend.
- Known Endpoint: The URL of the backend API must be correctly configured in the proxy's
Target URLsetting within API Manager. - Basic Connectivity Test: Before testing the proxy, perform a direct test against the backend API to ensure it's operational and responds as expected without any proxy in front. This helps establish a baseline and isolate potential issues.
3. Configured and Deployed Proxy
The MuleSoft proxy application itself must be correctly configured and deployed to a Mule runtime.
- Proxy Application: A Mule application that acts as the proxy, often generated automatically by API Manager when you configure an API instance.
- Deployment Target: The proxy application must be deployed to a Mule runtime—this could be CloudHub, Runtime Fabric (RTF), a customer-hosted Mule runtime, or even a local Anypoint Studio instance for development testing.
- Policy Application: All the policies you intend to test must be correctly applied to the API instance in API Manager and subsequently synchronized with the deployed proxy application. Verify that the policies show as "Applied" in API Manager.
- Proxy Endpoint: The publicly accessible URL of the deployed proxy must be known. This is the URL that API consumers (and your test tools) will use.
4. Testing Tools
A robust set of tools is essential for effective API testing. The choice of tools depends on the type of testing (functional, performance, security) and team preferences.
- Manual/Ad-hoc Testing Tools:
- Postman: An extremely popular and versatile
apidevelopment and testing tool. It allows you to create and send various HTTP requests, inspect responses, manage environments, and organize test suites into collections. - cURL: A command-line tool for making HTTP requests. It's excellent for quick, scriptable tests and is often used in automated pipelines.
- Insomnia / SoapUI: Other popular GUI-based tools for
apitesting, offering similar capabilities to Postman. SoapUI is particularly strong for SOAP-based services but also supports REST.
- Postman: An extremely popular and versatile
- Automated / Performance Testing Tools:
- JMeter: An open-source tool for load testing and performance measurement. It can simulate a high volume of concurrent users accessing your API.
- LoadRunner / k6 / Gatling: Commercial or open-source alternatives for performance and load testing, offering powerful scripting and reporting capabilities.
- Newman: A command-line collection runner for Postman. It allows you to run Postman collections in CI/CD pipelines, making automated functional testing feasible.
- Karate DSL / RestAssured: Frameworks for writing automated API tests in a more programmatic way, often integrated into larger automation suites.
- Security Testing Tools:
- OWASP ZAP / Burp Suite: Tools for penetration testing and identifying security vulnerabilities.
5. Understanding of API Contracts (RAML/OAS)
A clear definition of your API's expected behavior is paramount.
- API Specification: Access to the API's RAML or OpenAPI Specification (OAS/Swagger) document. This contract details the API's endpoints, methods, request/response structures, parameters, and authentication requirements.
- Expected Behavior: A thorough understanding of how the API should behave under various conditions, including expected HTTP status codes, response payloads, and error messages. This forms the basis for defining your test assertions.
6. Test Data
Preparing a comprehensive set of test data is non-negotiable.
- Valid Data: Data that conforms to the API's schema and constraints, used for positive test cases.
- Invalid Data: Data that violates schema, type, or constraint rules, used for negative test cases to ensure error handling.
- Edge Cases: Data at boundaries (e.g., minimum/maximum values, empty strings, nulls) to test robustness.
- Security-specific Data: Credentials (valid, invalid, expired), tokens (valid, invalid), IP addresses (allowed, blocked), and malicious payloads for threat protection testing.
- Volume Data: For performance testing, data that simulates real-world usage volumes.
By meticulously preparing these prerequisites, you lay a solid foundation for an efficient and effective MuleSoft proxy testing process, minimizing unexpected hurdles and maximizing the accuracy and value of your test results.
APIPark is a high-performance AI gateway that allows you to securely access the most comprehensive LLM APIs globally on the APIPark platform, including OpenAI, Anthropic, Mistral, Llama2, Google Gemini, and more.Try APIPark now! 👇👇👇
Step-by-Step Guide to Testing a MuleSoft Proxy
Testing a MuleSoft proxy is a multi-faceted process that spans various dimensions: functionality, policy enforcement, performance, and security. A systematic, phased approach ensures comprehensive coverage and helps isolate issues effectively.
Phase 1: Basic Connectivity and Routing
The initial step is to ensure that the proxy is correctly deployed, accessible, and can successfully forward requests to the backend API. This establishes a baseline of functionality before introducing the complexities of policies.
- Obtain the Proxy Endpoint URL: From Anypoint API Manager or Runtime Manager, identify the public URL where your proxy is exposed. This is the URL your clients will use.
- Perform a Simple GET Request (if applicable):
- Using a tool like Postman or cURL, make a basic
GETrequest to a public endpoint of your proxy that ideally requires no complex authentication or specific headers. - Example (cURL):
curl -v http://your-mulesoft-proxy-url/api/status - Expected Outcome:
- An HTTP 200 OK status code.
- A response payload that matches what the backend API would return directly for the same request.
- Observe the response time. It should be reasonable.
- Troubleshooting:
- If you get a 404 Not Found, check the proxy URL, the API path in API Manager, and confirm the proxy application is deployed and started in Runtime Manager.
- If you get a 500 Internal Server Error, check the proxy's logs in Runtime Manager for detailed error messages. It could indicate an issue with the proxy's internal flow or its ability to connect to the backend.
- Using a tool like Postman or cURL, make a basic
- Perform a Simple POST/PUT/DELETE Request (if applicable):
- If your API has endpoints that modify data, test a basic
POST(orPUT/DELETE) operation through the proxy, ensuring the request body is correctly forwarded. - Example (Postman/cURL): Send a
POSTrequest with a small JSON payload. - Expected Outcome:
- The backend API receives the request with the correct method, headers, and payload.
- The proxy returns the expected response from the backend (e.g., 201 Created, 200 OK with updated resource).
- Verify the action actually occurred in the backend system (e.g., check a database).
- If your API has endpoints that modify data, test a basic
- Monitor Proxy Logs in Runtime Manager:
- While performing these basic tests, keep an eye on the logs of your proxy application in Anypoint Runtime Manager.
- What to Look For:
- Entries confirming the proxy received the request.
- Messages indicating successful routing to the backend API.
- Any error messages if the request fails, which can provide clues about network connectivity issues between the proxy and the backend, or misconfigurations.
- If using logging policies, verify log entries appear as expected.
This phase confirms the fundamental plumbing is working: the proxy is alive, reachable, and correctly routes traffic to your backend api. Without this, subsequent policy testing will be fruitless.
Phase 2: Testing Policy Enforcement - Detailed Scenarios
This is the most critical and time-consuming phase, where each applied policy is systematically validated. The goal is to ensure that policies correctly process valid requests and effectively block or modify invalid ones. For each policy, you'll need to define positive (should succeed) and negative (should fail) test cases.
Let's use a structured approach for common policies:
2.1. Client ID Enforcement Policy
- Policy Description: Requires a valid
client_idandclient_secretfor API access. - Test Cases:
- Positive Test (Valid Credentials):
- Action: Obtain a valid
client_idandclient_secretfrom Anypoint Access Management (or a configured external provider). Include these in the request headers (e.g.,X-ANYPNT-CLIENT-ID,X-ANYPNT-CLIENT-SECRET). - Expected Result: HTTP 200 OK, successful access to the backend API, and the expected response.
- Action: Obtain a valid
- Negative Test (No Credentials):
- Action: Send a request without
client_idorclient_secretheaders. - Expected Result: HTTP 401 Unauthorized or 403 Forbidden, with an error message indicating missing credentials.
- Action: Send a request without
- Negative Test (Invalid Client ID):
- Action: Send a request with an incorrect or non-existent
client_id(e.g.,ABCDEFG) but a validclient_secret. - Expected Result: HTTP 401 Unauthorized or 403 Forbidden, indicating invalid client.
- Action: Send a request with an incorrect or non-existent
- Negative Test (Invalid Client Secret):
- Action: Send a request with a valid
client_idbut an incorrectclient_secret. - Expected Result: HTTP 401 Unauthorized or 403 Forbidden, indicating invalid credentials.
- Action: Send a request with a valid
- Negative Test (Expired Client Application):
- Action: If your Access Management supports application expiration, use an expired
client_id/secretpair. - Expected Result: HTTP 401 Unauthorized or 403 Forbidden.
- Action: If your Access Management supports application expiration, use an expired
- Positive Test (Valid Credentials):
2.2. Rate Limiting / Throttling Policy
- Policy Description: Limits the number of requests per client within a specific time window (e.g., 10 requests per 60 seconds).
- Test Cases:
- Positive Test (Below Limit):
- Action: Send
N-1requests (where N is the limit) within the defined time window. - Expected Result: All requests succeed with HTTP 200 OK.
- Action: Send
- Positive Test (At Limit):
- Action: Send
Nrequests within the time window. - Expected Result: All requests succeed with HTTP 200 OK.
- Action: Send
- Negative Test (Exceeding Limit):
- Action: Send
N+1(or more) requests within the time window. - Expected Result: The first
Nrequests succeed, but theN+1th request (and subsequent ones within the window) should receive an HTTP 429 Too Many Requests response.
- Action: Send
- Positive Test (Reset Period):
- Action: After exceeding the limit and receiving 429s, wait for the full duration of the time window to pass. Then, send another request.
- Expected Result: The request should now succeed with HTTP 200 OK, indicating the rate limit has reset.
- Tools: Automated tools like JMeter or Postman with a collection runner and iteration count are ideal here to rapidly send multiple requests.
- Positive Test (Below Limit):
2.3. Caching Policy
- Policy Description: Caches responses from the backend for a specified duration, serving subsequent identical requests from the cache.
- Test Cases:
- Positive Test (First Request - Cache Miss):
- Action: Send a
GETrequest to an endpoint covered by the caching policy. - Expected Result: HTTP 200 OK. The request should hit the backend API (verify via backend logs or a unique ID in the response if possible). Note the response time.
- Action: Send a
- Positive Test (Subsequent Request - Cache Hit):
- Action: Immediately send the exact same
GETrequest again. - Expected Result: HTTP 200 OK. The response should be significantly faster (served from cache). The request should not hit the backend (verify via backend logs). Check if any cache-specific headers (e.g.,
X-Cache-Status: HIT) are present in the response.
- Action: Immediately send the exact same
- Positive Test (Cache Expiration):
- Action: After validating cache hit, wait for the cache TTL (Time To Live) to expire. Then send the same request again.
- Expected Result: The request should now hit the backend API again, and the response time should reflect a cache miss.
- Negative Test (Different Request):
- Action: Send a
GETrequest that is slightly different (e.g., different query parameters, different path) from the cached one. - Expected Result: This should be a cache miss and hit the backend, as it's a new request for the cache.
- Action: Send a
- Positive Test (Cache Invalidation - if configured):
- Action: If your policy allows for cache invalidation (e.g., via a
POSTto a specific endpoint), perform the invalidation action and then send the cachedGETrequest. - Expected Result: The
GETrequest should now be a cache miss and hit the backend.
- Action: If your policy allows for cache invalidation (e.g., via a
- Positive Test (First Request - Cache Miss):
2.4. IP Whitelisting/Blacklisting Policy
- Policy Description: Restricts access based on the client's IP address.
- Test Cases:
- Positive Test (Allowed IP - Whitelist):
- Action: Send a request from an IP address configured in the whitelist.
- Expected Result: HTTP 200 OK, successful access.
- Negative Test (Blocked IP - Whitelist):
- Action: Send a request from an IP address not in the whitelist.
- Expected Result: HTTP 403 Forbidden.
- Positive Test (Non-Blocked IP - Blacklist):
- Action: Send a request from an IP address not in the blacklist.
- Expected Result: HTTP 200 OK, successful access.
- Negative Test (Blocked IP - Blacklist):
- Action: Send a request from an IP address configured in the blacklist.
- Expected Result: HTTP 403 Forbidden.
- Note: To simulate different client IPs, you might need to use a VPN, proxy server, or tools that can spoof source IPs (use with caution and only in controlled environments).
- Positive Test (Allowed IP - Whitelist):
2.5. JSON Threat Protection Policy
- Policy Description: Guards against overly complex or large JSON payloads to prevent DoS attacks. Parameters often include
Max Number of Keys,Max Depth,Max String Length,Max Payload Size. - Test Cases:
- Positive Test (Valid JSON):
- Action: Send a
POSTrequest with a well-formed JSON payload that adheres to all configured limits. - Expected Result: HTTP 200 OK (or 201 Created), successful processing by the backend.
- Action: Send a
- Negative Test (Oversized Payload):
- Action: Send a
POSTrequest with a JSON payload exceeding theMax Payload Sizelimit. - Expected Result: HTTP 400 Bad Request, with an error message indicating payload size violation.
- Action: Send a
- Negative Test (Deeply Nested JSON):
- Action: Send a
POSTrequest with a JSON payload that has more nested levels thanMax Depth. - Expected Result: HTTP 400 Bad Request, with an error message indicating depth violation.
- Action: Send a
- Negative Test (Too Many Keys/Elements):
- Action: Send a
POSTrequest with a JSON object containing more keys thanMax Number of Keys, or a JSON array with too many elements. - Expected Result: HTTP 400 Bad Request, with an error message indicating key/element count violation.
- Action: Send a
- Negative Test (Long String Value):
- Action: Send a
POSTrequest with a JSON string value exceedingMax String Length. - Expected Result: HTTP 400 Bad Request, with an error message indicating string length violation.
- Action: Send a
- Positive Test (Valid JSON):
2.6. Header/Query Parameter Transformation Policies
- Policy Description: Adds, removes, or modifies headers or query parameters.
- Test Cases:
- Positive Test (Header Injection):
- Action: Send a request to the proxy.
- Expected Result: Verify (e.g., via backend logs or by modifying the backend to echo headers) that the injected header is present in the request received by the backend, with the correct value.
- Positive Test (Header Removal):
- Action: Send a request to the proxy with a specific header that should be removed.
- Expected Result: Verify that the removed header is not present in the request reaching the backend.
- Positive Test (Query Parameter Injection/Removal):
- Action: Similar tests for query parameters.
- Expected Result: Verify presence/absence and correct values of query parameters at the backend.
- Positive Test (Header Injection):
Phase 3: Performance and Load Testing
While functional testing ensures correctness, performance testing verifies that your api gateway can handle expected (and peak) traffic loads without degradation. This is especially crucial for high-throughput APIs.
- Why it's Important: A proxy, being an intermediary, adds a small amount of latency. Under load, it also consumes resources (CPU, memory). Performance testing helps identify bottlenecks, confirm scalability, and ensure QoS policies behave correctly under stress.
- Tools: JMeter, LoadRunner, k6, or Gatling are standard tools for this.
- Metrics to Monitor:
- Throughput (TPS - Transactions Per Second): The number of requests processed per second.
- Latency/Response Time: The time taken for a request to receive a response. Measure average, median, 90th percentile, and 99th percentile.
- Error Rate: Percentage of failed requests (e.g., 5xx, 429). Should be minimal for valid requests.
- Resource Utilization: Monitor CPU, memory, and network I/O of the Mule runtime hosting the proxy.
- Testing Scenarios:
- Baseline Test: Test with a small number of concurrent users to establish a performance baseline for a single request through the proxy.
- Load Test: Gradually increase the number of concurrent users/requests up to the expected peak load. Observe if performance metrics (throughput, latency) remain within acceptable SLAs.
- Stress Test: Push the system beyond its expected limits to determine its breaking point and how it recovers. This helps understand the proxy's resilience.
- Soak Test (Endurance Test): Run a moderate load for an extended period (several hours or even days) to detect memory leaks or resource exhaustion issues that might only appear over time.
- Focus on Policies: Pay close attention to how policies like rate limiting and throttling behave under load. Ensure they correctly reject requests when limits are exceeded, and that the proxy doesn't crash or become unresponsive.
Phase 4: Security and Vulnerability Testing
Beyond policy enforcement, it's vital to conduct broader security testing to uncover potential vulnerabilities that might not be directly addressed by specific policies. This is where the concept of an api gateway truly comes into its own as a security enforcer.
- Penetration Testing (Pen-testing): Engages security experts to simulate real-world attacks against your API through the proxy.
- Fuzz Testing: Involves sending a large volume of malformed, unexpected, or random data to the API to uncover crashes, buffer overflows, or unexpected behavior.
- OWASP Top 10 Considerations: Ensure your proxy and the underlying API are protected against the most common web application security risks (e.g., SQL Injection, Cross-Site Scripting, Broken Authentication, Sensitive Data Exposure). While many are backend concerns, the proxy should ideally prevent some from even reaching the backend.
- Tools: OWASP ZAP (Zed Attack Proxy), Burp Suite, Nmap, Nessus.
- Focus Areas:
- Authentication & Authorization Bypass: Try to access protected resources without proper authentication or with insufficient authorization.
- Data Tampering: Attempt to modify request headers, query parameters, or payload to gain unauthorized access or alter data.
- Injection Attacks: While primarily a backend concern, ensure the proxy doesn't inadvertently allow or facilitate SQL/NoSQL/Command injection through faulty transformations or logging.
- Error Handling: Ensure error messages returned by the proxy do not leak sensitive information about the backend infrastructure or internal workings.
- Header Manipulation: Test for vulnerabilities related to
Hostheader manipulation, header injection, or incorrect handling of security-related headers.
Phase 5: Automated Testing and CI/CD Integration
Manual testing is essential initially, but for regression testing and continuous validation, automation is key. Integrating proxy tests into your CI/CD pipeline ensures that any changes to the proxy configuration, policies, or the underlying API don't introduce regressions.
- Benefits of Automation:
- Speed: Tests run much faster.
- Repeatability: Ensures consistent results across runs.
- Early Detection: Catches issues earlier in the development cycle.
- Regression Prevention: Guarantees existing functionality remains intact after changes.
- Frameworks & Tools:
- Newman: If you've developed your test cases in Postman, Newman allows you to run entire Postman collections from the command line, making them easily integrate into CI/CD scripts.
- Karate DSL: A powerful, easy-to-read BDD (Behavior-Driven Development) framework specifically designed for API testing.
- RestAssured: A Java library for testing RESTful APIs, popular for those working in Java ecosystems.
- Cypress / Playwright: While primarily UI testing tools, they can also make direct API calls and be used for end-to-end scenarios where the UI interacts with the API.
- CI/CD Integration:
- Configure your CI/CD pipeline (e.g., Jenkins, GitLab CI, GitHub Actions, Azure DevOps) to automatically trigger proxy tests after code commits, proxy deployment, or on a scheduled basis.
- The pipeline should:
- Deploy/update the MuleSoft proxy.
- Run the automated test suite (e.g., Newman scripts, Karate tests).
- Generate test reports.
- Fail the build if any tests fail, providing immediate feedback.
Table: Common Policies and Expected Test Outcomes
To provide a quick reference, here's a table summarizing some of the most common policies and their expected test outcomes:
| Policy Type | Test Case Scenario | Expected Successful Outcome | Expected Failure Outcome | HTTP Status Code (Failure) |
|---|---|---|---|---|
| Client ID Enforcement | Valid Client ID/Secret | API access granted | Invalid/Missing Client ID/Secret | 401 / 403 |
| Rate Limiting | Requests below limit | API access granted | Requests exceeding limit | 429 |
| Caching | First request (cache miss) | Hits backend, normal speed | Subsequent requests (cache hit) | (N/A) (faster response) |
| IP Whitelisting | Request from whitelisted IP | API access granted | Request from non-whitelisted IP | 403 |
| JSON Threat Protection | Valid JSON payload | API access granted | Oversized/Deeply Nested JSON payload | 400 |
| OAuth 2.0 Enforcement | Valid Access Token (correct scope) | API access granted | Invalid/Expired Token, wrong scope | 401 / 403 |
| Header Injection | Request to proxy | Backend receives injected header | (N/A) | (N/A) |
| Message Logging | Any API call | Log entry created | (N/A) | (N/A) |
By systematically executing tests across these phases, you can gain high confidence in the reliability, security, and performance of your MuleSoft proxy, ensuring it functions as a robust api gateway for your entire integration landscape.
Troubleshooting Common MuleSoft Proxy Issues
Even with meticulous planning and execution, issues can arise during the testing or operational phases of a MuleSoft proxy. Effective troubleshooting requires a systematic approach, leveraging the monitoring and logging capabilities within the Anypoint Platform. Understanding common error codes and their potential causes is the first step towards swift resolution.
1. 404 Not Found (or "No listener found for URI")
This is one of the most frequent errors, indicating that the proxy cannot map the incoming request to a defined resource.
- Potential Causes:
- Incorrect Proxy URL: The client is calling an incorrect or misspelled proxy endpoint. Double-check the URL.
- API Path Mismatch: The path defined in API Manager for the API instance does not match the incoming request path. For example, if the API path is
/api/v1/*and the client calls/v1/data, it won't match. Ensure the base path and resource paths are consistent. - Proxy Not Deployed/Started: The Mule application acting as the proxy might not be deployed or is in a stopped state in Runtime Manager.
- Target URL Mismatch (less common for 404): While less likely to cause a 404 from the proxy itself, an incorrect target URL might cause a 404 from the backend that the proxy then propagates.
- Troubleshooting Steps:
- Verify the proxy application status in Runtime Manager (should be "Started").
- Check the API instance configuration in API Manager, particularly the "API path" and "Base path" settings.
- Compare the requested URL exactly with the expected proxy endpoint.
2. 401 Unauthorized / 403 Forbidden
These errors signal that the request was denied due to authentication or authorization failures, typically because of policy enforcement.
- Potential Causes:
- Policy Misconfiguration: The most common cause. A security policy (e.g., Client ID Enforcement, OAuth, JWT) is enabled but the request does not meet its criteria.
- Missing Credentials: The client omitted required
client_id/secret, access token, or JWT. - Invalid Credentials: The provided
client_id/secret, token, or JWT is incorrect, expired, or malformed. - Incorrect Scope/Permissions: For OAuth/JWT, the token might be valid but lacks the necessary scopes to access the requested resource.
- IP Restriction: The client's IP address is blocked by an IP Whitelisting/Blacklisting policy.
- Troubleshooting Steps:
- Review the specific security policies applied to the API in API Manager.
- Examine the incoming request headers and parameters to ensure all required credentials and tokens are present and correctly formatted.
- If using OAuth/JWT, verify the token's validity, expiry, and scopes using a JWT debugger tool (e.g., jwt.io) or by inspecting your OAuth provider logs.
- Check the proxy's logs in Runtime Manager; policy enforcement failures often generate specific log entries (e.g., "Policy client-id-enforcement-1.0.0 failed").
3. 429 Too Many Requests
This error explicitly indicates that a rate limiting or throttling policy is actively preventing further requests from the client.
- Potential Causes:
- Exceeded Rate Limit: The client has sent more requests than allowed within the configured time window.
- Low Rate Limit Threshold: The configured rate limit might be too low for the expected traffic volume, inadvertently blocking legitimate users.
- Troubleshooting Steps:
- Confirm if the client intended to exceed the rate limit (positive test scenario).
- If it's an unexpected failure for a legitimate client, verify the rate limit configuration in API Manager. Is the
Maximum requestsandTime periodappropriate? - Communicate with the API consumer about the rate limit policies and their usage patterns.
4. 500 Internal Server Error
A generic error indicating that something went wrong on the server side (either the proxy itself or the backend API). This is often the most challenging to diagnose.
- Potential Causes:
- Backend API Failure: The backend API itself experienced an internal error and returned a 500, which the proxy then propagated. This is very common.
- Proxy Runtime Error: An error occurred within the proxy's Mule application itself (e.g., a DataWeave transformation error in a custom policy, an unhandled exception in the proxy's flow, or a connectivity issue from the proxy to the backend).
- Target URL Connectivity: The proxy could not connect to the backend API (e.g., incorrect URL, network firewall blocking access, backend API down).
- Policy Processing Error: A policy failed during its execution, perhaps due to invalid configuration or unexpected data.
- Troubleshooting Steps:
- Check Backend First: Perform a direct test against the backend API (bypassing the proxy) to see if it's operational and returning 500s directly. If so, the issue lies in the backend.
- Examine Proxy Logs: This is crucial. Go to Runtime Manager and inspect the logs of the proxy application. Look for stack traces, error messages, and context that indicates where the error occurred (e.g., which policy, which flow).
- Verify Target URL: Confirm the
Target URLconfigured in API Manager points to the correct and accessible backend endpoint. - Anypoint Monitoring: Use Anypoint Monitoring dashboards and alert notifications to gain insights into the health of the proxy application and its dependencies. Look for sudden spikes in error rates or resource utilization.
5. Timeout Errors (e.g., 504 Gateway Timeout, 502 Bad Gateway)
These errors indicate that the proxy did not receive a timely response from the backend API.
- Potential Causes:
- Backend Slowness: The backend API is taking too long to process the request, exceeding the proxy's configured timeout.
- Network Latency: High network latency between the proxy and the backend, or between the client and the proxy.
- Backend Overload: The backend API is overwhelmed and cannot respond promptly.
- Troubleshooting Steps:
- Measure Backend Latency: Test the backend API directly to determine its typical response time.
- Adjust Timeouts: If the backend is inherently slow but acceptable, consider increasing the timeout configuration for the proxy. However, be cautious not to set excessively long timeouts that can impact user experience.
- Optimize Backend Performance: If the backend is too slow, focus on optimizing its performance.
- Monitor Network: Check for network congestion or issues between the proxy's deployment environment and the backend's deployment.
General Troubleshooting Best Practices:
- Start Simple: Isolate the problem. Remove policies one by one, or test the backend directly to narrow down the source of the issue.
- Reproduce Consistently: Ensure you can reliably reproduce the issue.
- Use -v (verbose) with cURL: This shows request/response headers, which can be invaluable for debugging.
- Check Anypoint Visualizer: For complex API networks, Visualizer can help understand the flow of requests and identify where calls are failing.
- Consult MuleSoft Documentation/Community: Many common issues have well-documented solutions or discussions in the MuleSoft community forums.
By systematically applying these troubleshooting strategies, you can efficiently diagnose and resolve issues encountered during MuleSoft proxy testing and operations, ensuring the continued stability and reliability of your api gateway.
Best Practices for Testing MuleSoft Proxies
Effective testing of MuleSoft proxies goes beyond merely running a few test cases; it involves adopting a set of best practices that ensure thorough coverage, maintainability, and efficiency throughout the API lifecycle. Adhering to these principles transforms testing from a necessary chore into a valuable asset for delivering high-quality, secure, and performant APIs.
- Start Simple, Then Add Complexity: Begin by testing the most basic functionality: connectivity and routing without any policies. Once you confirm the proxy can successfully forward requests to the backend, gradually introduce and test individual policies. Only after each policy is validated in isolation should you test combinations of policies, as interactions between them can sometimes lead to unexpected behaviors. This layered approach helps pinpoint the exact source of any issues.
- Test Policies in Isolation and in Combination: While individual policy testing is crucial, it's equally important to consider how policies interact. For instance, a rate-limiting policy might interact with a caching policy. What happens if a cached response is served, but the request still counts towards the rate limit? Test these scenarios to ensure the combined behavior aligns with expectations. Some policies might need to be ordered carefully in API Manager for the desired outcome.
- Employ a Mix of Positive and Negative Test Cases: Positive test cases (valid inputs, expected successful outcomes) confirm that the proxy works as intended. However, negative test cases (invalid inputs, edge cases, boundary conditions) are equally vital. They ensure that the proxy robustly handles errors, rejects malicious or malformed requests, and returns appropriate error messages (e.g., 400 Bad Request, 401 Unauthorized, 403 Forbidden, 429 Too Many Requests). This is fundamental to a secure
api gateway. - Automate Repetitive Tests: Manual testing is time-consuming and prone to human error, especially for regression testing. Invest in automating your proxy test suites using tools like Postman (with Newman for CI/CD), Karate DSL, or RestAssured. Automated tests can be run quickly and consistently, providing immediate feedback on policy changes or underlying API updates. This is particularly important for any
apithat frequently evolves. - Integrate Testing into Your CI/CD Pipeline: Make proxy testing an integral part of your Continuous Integration/Continuous Delivery (CI/CD) pipeline. Every time the proxy configuration or related
apicode is updated, the automated tests should run automatically. This "shift-left" approach catches issues early, reducing the cost and effort of fixing them later in the development cycle. A failing test in the CI/CD pipeline should ideally block deployment. - Include Performance and Load Testing: Beyond functional correctness, ensure your proxy can handle the expected traffic volume and respond within acceptable latency thresholds. Conduct load tests to identify bottlenecks, validate the effectiveness of caching and throttling policies under stress, and confirm the scalability of your
api gateway. Monitor resource utilization (CPU, memory) of the Mule runtime hosting the proxy during these tests. - Conduct Security and Vulnerability Testing: While policies provide a strong baseline, dedicated security testing (penetration testing, fuzz testing) should be performed to uncover any hidden vulnerabilities. Ensure robust error handling that doesn't leak sensitive information, and continuously evaluate your
apiagainst common security risks like the OWASP Top 10. The proxy is your first line of defense; ensure it's unbreachable. - Document Test Plans and Results Thoroughly: Maintain clear documentation of your test plans, including test scenarios, expected outcomes, and the rationale behind complex tests. Document test results, especially for performance and security tests, to track improvements, regressions, and compliance. This documentation is invaluable for future audits, team collaboration, and onboarding new team members.
- Collaborate with API Developers and Security Teams: Proxy testing is not an isolated activity. Foster close collaboration between API developers (who understand the backend logic), API managers (who configure the policies), and security teams (who advise on best security practices). This ensures a holistic understanding of the API's behavior and potential vulnerabilities, leading to more comprehensive testing.
- Leverage Anypoint Platform Monitoring and Logging: During testing, heavily rely on Anypoint Monitoring, Anypoint Runtime Manager logs, and Anypoint Visualizer. These tools provide real-time insights into the proxy's behavior, policy execution, error messages, and overall system health. Detailed logging helps immensely in troubleshooting and understanding why certain tests passed or failed.
- Consider Specialized API Management Platforms for Broader Needs: While MuleSoft provides powerful capabilities for proxy management, managing a vast array of APIs, especially those involving diverse technologies, microservices, or AI models, can introduce new complexities. Platforms like APIPark, an open-source AI
gatewayand API management platform, offer comprehensive solutions for end-to-end API lifecycle management. APIPark provides robust features for quick integration of 100+ AI models, unified API formats, and detailed call logging, which greatly aids in testing and operational monitoring of APIs, whether they are traditional REST services or cutting-edge AI endpoints. Such platforms complement an existingapi gatewaystrategy by providing specialized tools for diverse API needs, helping manage an ever-growingapiecosystem securely and efficiently.
By embedding these best practices into your development and operations workflow, you can ensure that your MuleSoft proxies not only meet their functional requirements but also stand as resilient, secure, and performant components within your enterprise architecture, enabling reliable api consumption and robust gateway operations.
Conclusion
The meticulous testing of a MuleSoft proxy is far more than a technical formality; it is an indispensable pillar in the construction and maintenance of a robust, secure, and high-performing API ecosystem. As organizations continue to leverage APIs as the fundamental building blocks of digital transformation, the api gateway, epitomized by the MuleSoft proxy, becomes the critical control point for managing access, ensuring security, and guaranteeing quality of service.
Throughout this comprehensive guide, we have traversed the essential landscape of proxy testing, starting with a deep dive into the intrinsic importance of MuleSoft proxies as a central api gateway component. We meticulously detailed the various policies – from fundamental security measures like Client ID Enforcement and OAuth validation, to performance enhancers such as Rate Limiting and Caching, and critical transformation capabilities – each requiring specific and rigorous validation.
Our step-by-step approach systematically outlined the prerequisites for effective testing, emphasizing the importance of a prepared environment, access to necessary tools, and a clear understanding of API contracts. We then provided a phased methodology, guiding you from basic connectivity checks to intricate policy enforcement scenarios, and extending into the crucial realms of performance, load, and security testing. The emphasis on both positive and negative test cases underscores the need for thoroughness, ensuring that the proxy not only permits legitimate requests but also effectively thwarts invalid or malicious attempts.
Finally, we culminated with a set of best practices that advocate for automation, CI/CD integration, continuous monitoring, and collaborative efforts across development, operations, and security teams. These practices are designed to integrate testing seamlessly into the API lifecycle, catching issues early, reducing technical debt, and fostering a culture of quality and resilience. The mention of complementary platforms like APIPark highlights the evolving landscape of API management, where specialized tools can further enhance an organization's api gateway strategy, especially for integrating advanced services like AI models.
In essence, a thoroughly tested MuleSoft proxy stands as a testament to an organization's commitment to API excellence. It ensures that your valuable backend services are protected, traffic is managed efficiently, and API consumers experience reliable and consistent interactions. By embracing the principles and methodologies outlined in this guide, you are not just testing a piece of software; you are fortifying the digital backbone of your enterprise, empowering innovation with confidence, and building an api ecosystem that is resilient, secure, and primed for future growth.
5 FAQs about MuleSoft Proxy Testing
1. What is the primary purpose of testing a MuleSoft proxy? The primary purpose of testing a MuleSoft proxy is to ensure that all applied policies (security, QoS, transformation) are functioning correctly and as intended. This means verifying that the proxy accurately routes traffic to the backend API, enforces security rules (like client ID validation or rate limiting) to protect the API from unauthorized access or abuse, manages performance through caching or throttling, and handles both valid and invalid requests gracefully, returning appropriate responses or error codes. It's about ensuring the proxy acts as a robust and reliable api gateway.
2. What are the most crucial types of policies to test on a MuleSoft proxy? The most crucial policies to test are typically security policies, such as Client ID Enforcement, OAuth 2.0 Access Token Enforcement, JWT Validation, and IP Whitelisting/Blacklisting, as these directly protect your APIs from unauthorized access. Equally important are Quality of Service (QoS) policies like Rate Limiting and Caching, which govern API performance and resource utilization. Additionally, any custom policies or transformation policies should be thoroughly tested as they directly impact the request and response flow.
3. What tools are recommended for testing a MuleSoft proxy? For manual and functional testing, Postman and cURL are highly recommended due to their versatility and ease of use in crafting HTTP requests and inspecting responses. For automated testing and CI/CD integration, Newman (Postman's CLI runner), Karate DSL, or RestAssured are excellent choices. For performance and load testing, tools like JMeter, LoadRunner, or k6 are essential. For security and vulnerability testing, OWASP ZAP or Burp Suite can be utilized.
4. How can I ensure my MuleSoft proxy is secure against common vulnerabilities? Beyond verifying the explicit security policies (like Client ID, OAuth, JWT, JSON Threat Protection), ensuring proxy security involves broader measures. This includes conducting dedicated penetration testing and fuzz testing to uncover hidden vulnerabilities. It's vital to test with malformed inputs, oversized payloads, and unauthorized access attempts. Additionally, always follow the OWASP Top 10 guidelines, ensure error messages don't leak sensitive information, and continuously monitor the proxy's logs for any suspicious activity. The proxy, acting as an api gateway, is your first line of defense, so its hardening is paramount.
5. Why is it important to integrate proxy testing into the CI/CD pipeline? Integrating proxy testing into the CI/CD pipeline is crucial for several reasons: It enables early detection of issues, catching regressions or misconfigurations immediately after changes are introduced, significantly reducing the cost and effort of fixing them. It ensures consistent quality by running the same suite of tests repeatedly. It automates repetitive tasks, freeing up developers and testers for more complex work. Ultimately, it fosters confidence in every deployment, guaranteeing that your api functionality and gateway policies remain robust and reliable as your systems evolve.
🚀You can securely and efficiently call the OpenAI API on APIPark in just two steps:
Step 1: Deploy the APIPark AI gateway in 5 minutes.
APIPark is developed based on Golang, offering strong product performance and low development and maintenance costs. You can deploy APIPark with a single command line.
curl -sSO https://download.apipark.com/install/quick-start.sh; bash quick-start.sh

In my experience, you can see the successful deployment interface within 5 to 10 minutes. Then, you can log in to APIPark using your account.

Step 2: Call the OpenAI API.