How to Setup Grafana Agent AWS Request Signing
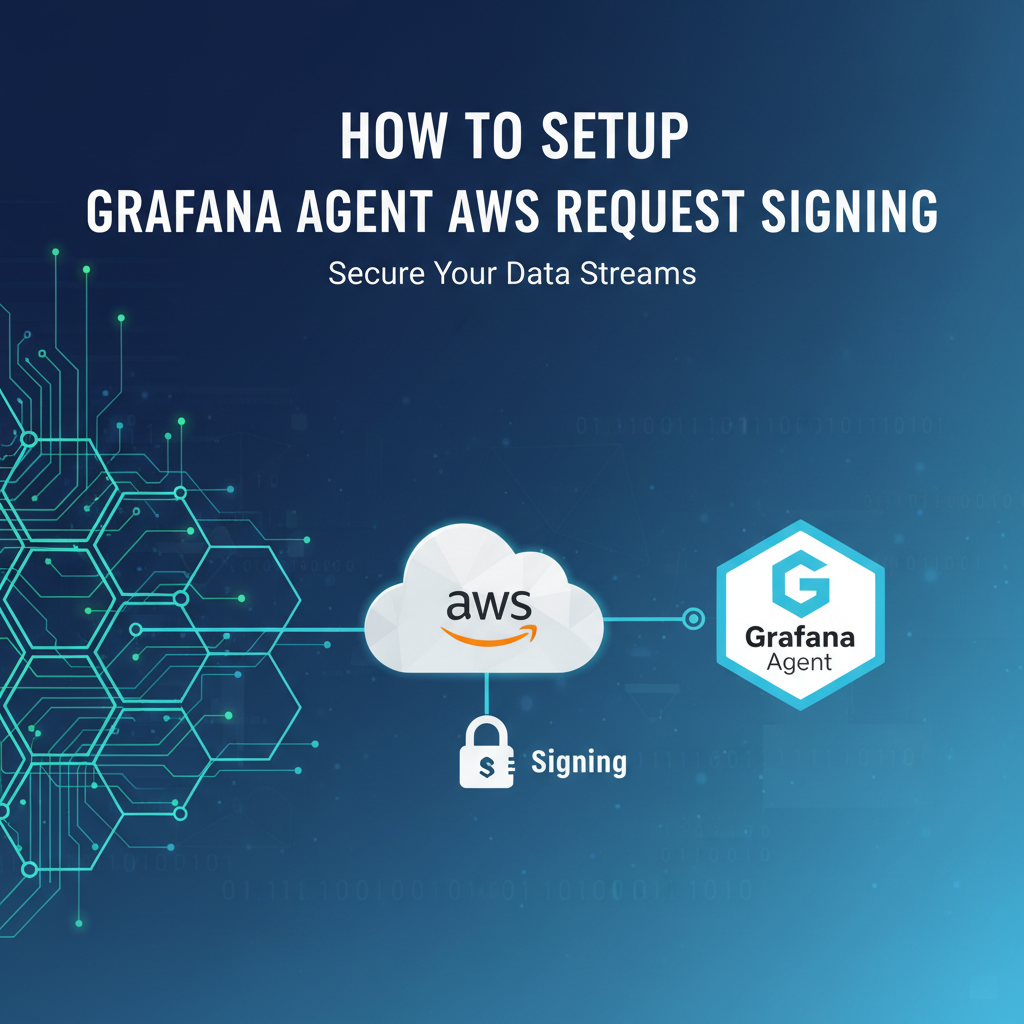


In the sprawling and dynamic landscape of cloud computing, particularly within Amazon Web Services (AWS), the ability to securely and efficiently monitor your infrastructure and applications is not merely a convenience but a fundamental requirement for operational excellence. Grafana Agent, a lightweight telemetric collector, has emerged as a powerful tool in this ecosystem, designed to collect metrics, logs, and traces from various sources and forward them to Grafana Cloud or other compatible endpoints. However, the secure interaction with AWS services often necessitates a sophisticated authentication mechanism: AWS Signature Version 4 (SigV4). This intricate signing process ensures that requests made to AWS APIs are authenticated and authorized, protecting sensitive data and maintaining the integrity of your cloud environment.
This comprehensive guide will meticulously walk you through the process of configuring Grafana Agent to utilize AWS Request Signing (SigV4). We will delve into the underlying principles, explore practical implementation steps for different Agent modes (metrics, logs, and traces), discuss crucial security best practices, and offer troubleshooting tips to empower you to confidently integrate Grafana Agent with your AWS infrastructure. Whether you are collecting performance metrics from an EC2 instance, shipping application logs to a secure S3 bucket, or tracing transactions through an API Gateway endpoint, understanding and correctly implementing SigV4 is paramount for maintaining a robust and secure observability stack.
Understanding the Core Components: A Foundation for Secure Monitoring
Before we dive into the technical configurations, a solid understanding of the key players involved is essential. This section will introduce Grafana Agent, demystify AWS Signature Version 4, and briefly touch upon AWS Identity and Access Management (IAM), which underpins all secure interactions within AWS.
Grafana Agent: Your Lightweight Observability Companion
Grafana Agent is a highly efficient, purpose-built agent designed by Grafana Labs to simplify the collection and forwarding of observability data. Unlike a full-fledged Prometheus server or Loki client, the Agent is optimized for resource efficiency and ease of deployment, making it ideal for distributed environments, edge deployments, and ephemeral workloads. It consolidates the functionalities of Prometheus's node_exporter, Promtail, and the OpenTelemetry Collector into a single binary, reducing operational overhead.
The Agent operates in several primary modes, each tailored for a specific type of telemetry data:
- Metrics Mode (Prometheus): This mode enables the Agent to scrape Prometheus-compatible metrics endpoints, process them, and forward them to a remote write endpoint, typically Prometheus or Grafana Cloud Metrics. It supports various discovery mechanisms, including AWS service discovery, making it invaluable for monitoring dynamic cloud environments.
- Logs Mode (Loki/Promtail): Functioning similarly to Promtail, this mode allows the Agent to tail log files, enrich them with labels, and send them to a Loki instance or Grafana Cloud Logs. This is crucial for centralized log aggregation and analysis.
- Traces Mode (OpenTelemetry Collector): In this mode, the Agent acts as an OpenTelemetry Collector, receiving traces from applications instrumented with OpenTelemetry SDKs, processing them, and exporting them to trace backends like Grafana Cloud Traces or AWS X-Ray.
The Grafana Agent configuration is written in River, a declarative language inspired by HashiCorp's HCL, offering a more flexible and expressive way to define data pipelines. This guide will focus on how to augment these pipelines with SigV4 authentication.
AWS Signature Version 4 (SigV4): The Gatekeeper of AWS APIs
AWS Signature Version 4 (SigV4) is the cryptographic protocol that AWS uses to authenticate and authorize requests made to its services. When you interact with AWS services, whether through the AWS CLI, SDKs, or direct HTTP requests, SigV4 is almost always at play behind the scenes. Its primary purpose is to ensure that only authorized entities can make requests to your AWS resources and that these requests have not been tampered with in transit.
The SigV4 signing process involves several key components and steps:
- Access Key ID and Secret Access Key: These are the primary credentials used to identify and authenticate the requesting entity. They are typically associated with an IAM user or an IAM role. For enhanced security, temporary credentials obtained through AWS STS (Security Token Service) are highly recommended.
- Request Parameters: Every HTTP request to an AWS service includes various parameters, such as the HTTP method (GET, POST), the host, the URI path, query parameters, and request headers.
- Region and Service Name: AWS is a global service, segmented into various regions (e.g.,
us-east-1,eu-west-2). Each AWS service also has a specific identifier (e.g.,s3for S3,execute-apifor API Gateway,cloudwatchfor CloudWatch). These are critical inputs for the signing process. - Timestamp: A precise timestamp is included in the request to protect against replay attacks. The server checks if the request is recent enough.
- Canonical Request: All relevant parts of the HTTP request are combined into a standardized, canonical format. This includes the HTTP method, canonical URI, canonical query string, canonical headers (with specific sorting and formatting rules), and the hashed payload.
- String to Sign: This string includes the algorithm (AWS4-HMAC-SHA256), the request date, the credential scope (date, region, service,
aws4_request), and the hash of the canonical request. - Signing Key: A series of HMAC-SHA256 hashes are performed using the secret access key, the request date, the AWS region, and the service name to derive a unique signing key for that specific request.
- Signature: The signing key is then used with the string to sign to produce the final cryptographic signature.
- Authorization Header: The generated signature, along with the credential scope, signed headers, and the access key ID, is then included in the
Authorizationheader of the HTTP request.
When an AWS service receives a request with a SigV4 Authorization header, it performs the exact same signing process using the provided credentials. If the generated signature matches the one in the header, and the credentials are valid and authorized, the request is processed. This intricate dance ensures mutual authentication and data integrity. For Grafana Agent, this means it needs a way to automatically generate and include this Authorization header for its outgoing requests to AWS-protected endpoints.
AWS Identity and Access Management (IAM): The Bedrock of Permissions
AWS IAM is the service that enables you to securely control access to AWS resources. With IAM, you can manage users, groups, and roles and define their permissions using policies. For Grafana Agent, IAM plays a critical role in defining what the Agent is allowed to do and which AWS services it can interact with.
Key IAM concepts relevant to Grafana Agent and SigV4:
- IAM Users: Long-lived credentials (access key ID and secret access key) for a human user or an application. While functional, using static IAM user credentials directly on instances is generally discouraged due to security risks.
- IAM Roles: An IAM identity that you can create in your account that has specific permissions. IAM roles do not have standard long-term credentials (password or access keys) associated with them. Instead, when you assume a role, you are provided with temporary security credentials. This is the preferred and most secure method for applications running on EC2 instances or other AWS compute services to access AWS resources.
- IAM Policies: JSON documents that define permissions. They specify what actions are allowed or denied on which resources, under what conditions. For Grafana Agent, you would attach policies to its IAM role (or user) that grant permissions to read metrics from CloudWatch, list EC2 instances, or write logs to S3, for example.
By combining the power of Grafana Agent with the robust security provided by SigV4 and IAM, you can build a resilient, secure, and highly observable cloud environment.
Pre-requisites and Initial Setup: Laying the Groundwork
Before we configure Grafana Agent for AWS request signing, let's ensure you have the necessary components in place. This section covers the essential accounts, infrastructure, and initial Agent deployment steps.
1. AWS Account and IAM Setup
You will need an active AWS account. Within this account, it is highly recommended to set up an IAM role that Grafana Agent can assume. This role should have the minimal necessary permissions (least privilege principle) to perform its duties.
Creating an IAM Role for Grafana Agent:
- Navigate to the IAM service in the AWS Management Console.
- In the navigation pane, choose "Roles" and then "Create role".
- For "Select type of trusted entity", choose "AWS service", then "EC2" (assuming your Agent will run on an EC2 instance). If running on EKS, Fargate, or another service, choose the appropriate trusted entity.
- Click "Next".
- On the "Add permissions" page, search for and select the necessary policies. For example:
CloudWatchReadOnlyAccess(if collecting CloudWatch metrics)AmazonS3ReadOnlyAccess(if discovering S3 buckets or reading S3 configurations)AmazonS3FullAccess(if writing logs/traces to S3, be careful with full access)AmazonAPIGatewayReadOnly(if discovering API Gateway endpoints, less common for agent to directly discover, but useful for context)- Custom policies: For more granular control, create a custom IAM policy with specific actions like
s3:GetObject,s3:PutObject,cloudwatch:GetMetricData,ec2:DescribeInstances, etc., for the exact resources your Agent needs to interact with. - Example custom policy for reading CloudWatch metrics and listing EC2 instances:
json { "Version": "2012-10-17", "Statement": [ { "Effect": "Allow", "Action": [ "cloudwatch:GetMetricData", "cloudwatch:ListMetrics", "cloudwatch:GetMetricStatistics" ], "Resource": "*" }, { "Effect": "Allow", "Action": [ "ec2:DescribeInstances", "ec2:DescribeRegions" ], "Resource": "*" } ] }
- Click "Next".
- Provide a meaningful "Role name" (e.g.,
GrafanaAgentRole) and an optional description. - Review the role details and click "Create role".
Once the role is created, you will attach it to your EC2 instance (or EKS pod, etc.) where Grafana Agent will run. This allows the Agent to automatically assume the role and obtain temporary credentials without storing static access keys on the instance.
2. Grafana Cloud or Self-Hosted Grafana Instance
You'll need an endpoint where Grafana Agent can send its collected telemetry data. This can be:
- Grafana Cloud: The easiest option, providing managed Prometheus, Loki, and Tempo instances. You'll need an API key and the instance IDs.
- Self-Hosted Grafana with Prometheus/Loki/Tempo: If you manage your own observability stack, ensure these services are running and accessible from your Grafana Agent instance.
For the purpose of this guide, we'll assume you have a remote write endpoint configured and know its URL and necessary authentication (e.g., basic auth for Grafana Cloud).
3. Linux Server for Grafana Agent
Grafana Agent typically runs on a Linux-based server, often an EC2 instance within your AWS environment. For demonstration purposes, a basic EC2 instance (e.g., t3.medium) running Amazon Linux 2 or Ubuntu will suffice. Ensure the instance has network connectivity to your target AWS services (e.g., CloudWatch, S3, API Gateway endpoints) and your Grafana Cloud or self-hosted Grafana endpoint.
Important Network Configuration: * Security Groups: Ensure the EC2 instance's security group allows outbound HTTPS (port 443) traffic to *.amazonaws.com (for AWS service endpoints) and to your Grafana Cloud/self-hosted Grafana endpoint. If you are scraping internal API Gateway endpoints, ensure the security group allows outbound traffic to those specific endpoints. * VPC Endpoints: For enhanced security and to keep traffic within the AWS network, consider configuring VPC endpoints for services like S3, CloudWatch, and STS. This avoids traversing the public internet.
4. Installation of Grafana Agent
Install Grafana Agent on your chosen Linux server. You can download the latest binary from the Grafana Agent releases page or use a package manager if available.
Example Installation Steps (for Linux):
# Download the latest binary for your architecture (e.g., amd64)
# Check the releases page for the most recent version
wget https://github.com/grafana/agent/releases/download/v0.38.0/grafana-agent-linux-amd64.zip

# Unzip the archive
unzip grafana-agent-linux-amd64.zip

# Move the binary to a common PATH location
sudo mv grafana-agent-linux-amd64 /usr/local/bin/grafana-agent

# Make it executable
sudo chmod +x /usr/local/bin/grafana-agent

# Create a directory for configurations
sudo mkdir /etc/grafana-agent

# Create a systemd service file for easy management (optional but recommended)
sudo nano /etc/systemd/system/grafana-agent.service
grafana-agent.service content:
[Unit]
Description=Grafana Agent
After=network-online.target

[Service]
ExecStart=/usr/local/bin/grafana-agent -config.file=/etc/grafana-agent/config.river
Restart=always
RestartSec=5s
StandardOutput=journal
StandardError=journal
SyslogIdentifier=grafana-agent
User=grafana-agent # Create this user if it doesn't exist
Group=grafana-agent # Create this group if it doesn't exist

[Install]
WantedBy=multi-user.target
# Create the user and group if they don't exist
sudo useradd -r -s /bin/false grafana-agent
sudo chown -R grafana-agent:grafana-agent /etc/grafana-agent

# Reload systemd and start the agent
sudo systemctl daemon-reload
sudo systemctl enable grafana-agent
sudo systemctl start grafana-agent
sudo systemctl status grafana-agent
5. Basic Grafana Agent Configuration File Structure
The heart of Grafana Agent is its configuration file, typically named config.river (or agent.yaml for older versions, though River is preferred now). This file defines what data to collect, how to process it, and where to send it.
A minimal config.river might look like this, defining a basic prometheus.remote_write endpoint:
// Define where to send Prometheus metrics
prometheus.remote_write "default" {
  endpoint {
    url = "YOUR_GRAFANA_CLOUD_PROMETHEUS_REMOTE_WRITE_URL"
    basic_auth {
      username = "YOUR_GRAFANA_CLOUD_PROMETHEUS_USERNAME"
      password = env("GRAFANA_CLOUD_API_KEY") // Best practice: use environment variables for secrets
    }
  }
}

// Define where to send Loki logs
loki.write "default" {
  endpoint {
    url = "YOUR_GRAFANA_CLOUD_LOKI_REMOTE_WRITE_URL"
    basic_auth {
      username = "YOUR_GRAFANA_CLOUD_LOKI_USERNAME"
      password = env("GRAFANA_CLOUD_API_KEY")
    }
  }
}

// Define where to send OpenTelemetry traces
otelcol.exporter.otlp "default" {
  client {
    endpoint = "YOUR_GRAFANA_CLOUD_OTLP_ENDPOINT"
    auth = otelcol.auth.basic {
      username = "YOUR_GRAFANA_CLOUD_OTLP_USERNAME"
      password = env("GRAFANA_CLOUD_API_KEY")
    }
  }
}

// Add modules for metrics, logs, or traces here as needed.
// For example, to scrape node_exporter metrics:
// prometheus.scrape "node_exporter" {
//   targets    = [{"__address__" = "localhost:9100", "job" = "node"}]
//   forward_to = [prometheus.remote_write.default.receiver]
// }
With these prerequisites in place, we are ready to dive into the specific configurations for enabling AWS Request Signing within Grafana Agent for various data types.
Deep Dive: Configuring AWS Request Signing in Grafana Agent (Metrics Mode)
When Grafana Agent operates in metrics mode, it primarily uses prometheus.scrape components to collect metrics. These metrics might originate from various AWS services or custom applications whose endpoints are secured by SigV4. A common scenario involves scraping metrics from an internal application exposed through an API Gateway, or collecting metrics from AWS services like CloudWatch, or even custom endpoints hosted on S3 that require SigV4 for access.
Grafana Agent leverages the aws_sigv4 block within its http_client_config (for prometheus.scrape targets) or directly within certain AWS service discovery components. This block instructs the Agent to sign outgoing HTTP requests using the SigV4 protocol.
Scenario: Scraping a SigV4-Protected HTTP Endpoint
Let's consider a scenario where you have a custom application running on an EC2 instance, and it exposes a /metrics endpoint that requires AWS SigV4 authentication. This application might be behind an internal API Gateway endpoint, or it could be a specialized service directly exposing metrics that have been configured to use SigV4 for enhanced security. The Agent needs to scrape this endpoint to collect its metrics.
Here’s how you would configure prometheus.scrape to use aws_sigv4:
// Define where to send Prometheus metrics (from previous setup)
prometheus.remote_write "default" {
  endpoint {
    url = "YOUR_GRAFANA_CLOUD_PROMETHEUS_REMOTE_WRITE_URL"
    basic_auth {
      username = "YOUR_GRAFANA_CLOUD_PROMETHEUS_USERNAME"
      password = env("GRAFANA_CLOUD_API_KEY")
    }
  }
}

// Define a scrape target that requires AWS SigV4 signing
prometheus.scrape "custom_app_metrics" {
  targets = [
    {
      "__address__" = "your-sigv4-protected-endpoint.execute-api.us-east-1.amazonaws.com", // Example API Gateway endpoint
      "__scheme__"  = "https",
      "__metrics_path__" = "/prod/metrics", // Adjust path as needed
      "job"         = "custom-app-metrics"
    }
  ]
  scrape_interval = "15s"
  forward_to = [prometheus.remote_write.default.receiver]

  // Configure AWS SigV4 signing for the HTTP client
  http_client_config {
    aws_sigv4 {
      region        = "us-east-1"                 // The AWS region of the target endpoint
      service_name  = "execute-api"               // The AWS service name (e.g., 'execute-api' for API Gateway)
      // Credentials:
      // Option 1: Rely on IAM role attached to the EC2 instance (recommended)
      // access_key_id = "" // Leave empty to use IAM role
      // secret_access_key = "" // Leave empty to use IAM role
      // token = "" // Leave empty for IAM role, or provide STS token if using temporary credentials

      // Option 2: Provide static credentials (less secure, use only if IAM roles are not an option)
      // access_key_id     = "AKIAIOSFODNN7EXAMPLE"
      // secret_access_key = "wJalrXUtnFEMI/K7MDENG/bPxRfiCYEXAMPLEKEY"
      // token             = "A temporary security token if using STS-issued credentials"
    }
  }
}
Explanation of aws_sigv4 parameters:
region: This is a mandatory parameter that specifies the AWS region where the target service resides (e.g.,us-east-1,eu-west-2). It's crucial for the signing process.service_name: This parameter defines the AWS service that the request is targeting. Common values include:execute-apifor AWS API Gateway endpoints.s3for Amazon S3.cloudwatchfor Amazon CloudWatch.dynamodbfor Amazon DynamoDB.ecsfor Amazon ECS.- You must ensure this matches the actual service the endpoint belongs to.
access_key_id,secret_access_key,token: These fields are for providing AWS credentials.- Recommended approach: Leave
access_key_idandsecret_access_keyempty if your Grafana Agent is running on an EC2 instance with an attached IAM role. The Agent will automatically detect and use the instance's temporary credentials, which is the most secure method. - Alternative (less secure): If you must use static credentials (e.g., for testing or in environments where IAM roles aren't feasible), you can hardcode them here. However, this is strongly discouraged for production environments. If you do, consider using Grafana Agent's
secretblock or environment variables to avoid exposing them directly in the configuration file. tokenis used when you have temporary credentials from AWS STS (e.g., assuming a role from outside AWS or using anaws-cliconfigured profile that uses STS).
- Recommended approach: Leave
Using discovery.aws.ec2 with SigV4 (Advanced)
While prometheus.scrape with http_client_config handles direct endpoint scraping, Grafana Agent also offers powerful AWS service discovery mechanisms. For example, discovery.aws.ec2 can find EC2 instances based on tags or other criteria. If you then want to scrape an endpoint on these discovered EC2 instances and that endpoint itself requires SigV4, you might combine discovery with relabeling to apply SigV4.
A more direct application of SigV4 within service discovery is for fetching metadata. For example, if discovery.aws.cloudwatch needs to interact with CloudWatch APIs, it will inherently use SigV4 for those API calls. In such cases, the Agent relies on the IAM role attached to its host EC2 instance. You generally don't configure aws_sigv4 directly within discovery.aws.cloudwatch or discovery.aws.ec2 itself for their interactions with AWS; they inherit the Agent's ambient AWS authentication context (IAM role). The aws_sigv4 block inside http_client_config is specifically for when the scrape target itself requires SigV4.
Example for CloudWatch Metrics (where Agent makes SigV4 requests to CloudWatch API):
When using prometheus.scrape with discovery.aws.cloudwatch, the Agent interacts with the CloudWatch API to list metrics. This interaction automatically uses the IAM role attached to the EC2 instance running the Agent. You simply need to ensure the IAM role has cloudwatch:GetMetricData and cloudwatch:ListMetrics permissions.
// Define a module for CloudWatch metrics discovery
prometheus.scrape "cloudwatch_metrics" {
  targets = discovery.aws.cloudwatch {
    region = "us-east-1"
    // Other filters like `metrics_filter` or `tag_filters` can go here
  }.targets

  scrape_interval = "1m"
  forward_to      = [prometheus.remote_write.default.receiver]
}
In this case, the aws_sigv4 block is implicitly handled by the Agent's underlying AWS SDK client, which picks up credentials from the environment (IAM role). You don't explicitly declare aws_sigv4 here. This distinction is important: http_client_config.aws_sigv4 is for target endpoints that require SigV4, while AWS service discovery implicitly handles SigV4 for its own calls to AWS APIs using the Agent's environment credentials.
Deep Dive: Configuring AWS Request Signing in Grafana Agent (Logs Mode - Promtail)
Grafana Agent's logs mode, based on Promtail, is designed to collect logs from various sources (files, journald) and forward them to a Loki instance. While Loki itself typically uses basic authentication or token-based authentication, there are scenarios where the destination for logs might be an AWS service that requires SigV4 authentication. For instance, if you have a custom log aggregation service running within AWS that exposes an API endpoint requiring SigV4, or if you're sending logs to an S3 bucket that has strict access policies requiring SigV4 on PUT operations.
The loki.write component supports an aws_sigv4 block within its endpoint configuration, enabling it to sign HTTP requests to the Loki-compatible API.
Scenario: Sending Logs to a SigV4-Protected Endpoint
Imagine you have an internal log processing API that resides within your AWS environment, perhaps behind an API Gateway, and this API expects incoming log streams to be authenticated with SigV4. Your Grafana Agent, collecting application logs from files, needs to send these logs to this custom endpoint.
Here's how you would configure loki.write for this scenario:
// Define the log collection source (e.g., tailing log files)
loki.source.file "app_logs" {
  targets = loki.source.file_match {
    path_targets = [
      "/var/log/my_app/*.log",
      "/var/log/nginx/*.log"
    ]
  }.targets

  forward_to = [loki.write.custom_loki_api.receiver] // Forward to our SigV4-enabled write endpoint
}

// Define the Loki write endpoint with AWS SigV4
loki.write "custom_loki_api" {
  endpoint {
    url = "https://your-sigv4-protected-loki-api.execute-api.us-east-1.amazonaws.com/prod/loki/api/v1/push" // Example API Gateway endpoint for Loki push
    // No basic_auth or authorization header here, SigV4 will handle authentication

    aws_sigv4 {
      region        = "us-east-1"                 // The AWS region of the target endpoint
      service_name  = "execute-api"               // The AWS service name (e.g., 'execute-api' for API Gateway)
      // Credentials: Rely on IAM role attached to the EC2 instance (recommended)
      // access_key_id = ""
      // secret_access_key = ""
    }
  }
}
Explanation:
loki.source.file "app_logs": This block defines where Grafana Agent (in Promtail mode) should look for log files. It will discover files matching thepath_targetsand read new log entries.forward_to = [loki.write.custom_loki_api.receiver]: This line directs the collected logs to theloki.writecomponent we're configuring for SigV4.loki.write "custom_loki_api": This is the core component for sending logs.endpoint.url: This is the full URL of your SigV4-protected log ingestion endpoint. This could be an API Gateway endpoint, a custom Lambda function URL, or another service that expects Loki-formatted push requests.aws_sigv4block: Similar to the metrics mode, this block enables SigV4 signing.region: The AWS region of your custom log API.service_name: The AWS service that hosts your log API. If it's an API Gateway endpoint,execute-apiis the correct service name.- Credential handling (
access_key_id,secret_access_key): Again, leaving these empty will leverage the IAM role attached to the EC2 instance, which is the most secure and recommended approach. The role needs permissions to invoke the target API Gateway or write to the target S3 bucket.
This configuration ensures that every log push request from Grafana Agent to your custom API endpoint is cryptographically signed, meeting the security requirements of your AWS infrastructure.
APIPark is a high-performance AI gateway that allows you to securely access the most comprehensive LLM APIs globally on the APIPark platform, including OpenAI, Anthropic, Mistral, Llama2, Google Gemini, and more.Try APIPark now! 👇👇👇
Deep Dive: Configuring AWS Request Signing in Grafana Agent (Traces Mode - OTel Collector)
Grafana Agent's traces mode is built upon components of the OpenTelemetry Collector, allowing it to receive, process, and export traces. When sending traces to AWS-managed services like AWS X-Ray, or to custom OpenTelemetry Protocol (OTLP) endpoints that might be secured with SigV4 (e.g., an internal OTLP API behind an API Gateway), AWS request signing becomes vital.
The otelcol.exporter.otlp component, which sends traces to an OTLP endpoint, supports an aws_sigv4 configuration within its client block.
Scenario: Exporting Traces to a SigV4-Protected OTLP Endpoint
Consider an architecture where your applications send OpenTelemetry traces to a Grafana Agent instance. The Agent then needs to forward these traces to a centralized OTLP endpoint, which could be a custom trace processing service or an API managed by an API Gateway within AWS, requiring SigV4 authentication.
Here’s an example of how to configure otelcol.exporter.otlp to use aws_sigv4:
// Define an OTLP receiver to accept incoming traces
otelcol.receiver.otlp "default" {
  http {
    endpoint = "0.0.0.0:4318" // Listen for OTLP HTTP traces on all interfaces, port 4318
  }
  grpc {
    endpoint = "0.0.0.0:4317" // Listen for OTLP gRPC traces on all interfaces, port 4317
  }
  forward_to = [otelcol.exporter.sigv4_otlp.input] // Forward to our SigV4-enabled exporter
}

// Define the OTLP exporter with AWS SigV4 signing
otelcol.exporter.otlp "sigv4_otlp" {
  client {
    endpoint = "https://your-sigv4-protected-otlp-api.execute-api.us-east-1.amazonaws.com/prod/v1/traces" // Example API Gateway endpoint for OTLP traces

    // No basic_auth or authorization header directly, SigV4 handles it
    auth = otelcol.auth.aws_sigv4 {
      region        = "us-east-1"                 // The AWS region of the target endpoint
      service_name  = "execute-api"               // The AWS service name (e.g., 'execute-api' for API Gateway)
      // Credentials: Rely on IAM role attached to the EC2 instance (recommended)
      // access_key_id = ""
      // secret_access_key = ""
    }
  }
}
Explanation:
otelcol.receiver.otlp "default": This block configures the Agent to act as an OpenTelemetry Collector receiver, listening for incoming OTLP traces over HTTP and gRPC. Applications would be configured to send their traces to the Agent's IP address and these ports.forward_to = [otelcol.exporter.sigv4_otlp.input]: This sends the received traces to theotelcol.exporter.otlpcomponent.otelcol.exporter.otlp "sigv4_otlp": This is the component responsible for exporting traces.client.endpoint: This is the URL of your SigV4-protected OTLP endpoint. It could be an API Gateway endpoint fronting a Lambda, Fargate service, or another custom trace ingestion API that expects OTLP data and is secured with SigV4.auth = otelcol.auth.aws_sigv4: This is the crucial part that enables SigV4 authentication for the OTLP exporter.region: The AWS region where your OTLP API is hosted.service_name: The AWS service hosting the OTLP API. For an API Gateway endpoint,execute-apiis appropriate.- Credential handling: As with metrics and logs, leaving
access_key_idandsecret_access_keyempty allows the Agent to automatically use the IAM role attached to its EC2 instance, which is the most secure method. The role needs permissions to invoke the target API Gateway endpoint.
By configuring aws_sigv4 in the otelcol.exporter.otlp component, you ensure that your trace data is securely transmitted to its destination within your AWS environment, maintaining the chain of custody and integrity of your observability data.
Best Practices for Security and Scalability
Implementing AWS Request Signing is a critical step towards securing your observability pipeline. However, for a truly robust and scalable solution, adherence to broader security and operational best practices is paramount.
1. IAM Roles for EC2 Instances: The Gold Standard for Credentials
As repeatedly emphasized, using IAM roles attached to your EC2 instances (or other compute services like ECS tasks, EKS pods via IRSA) is the most secure and recommended way to manage AWS credentials for Grafana Agent.
Why IAM Roles?
- No Hardcoded Credentials: You avoid storing static
access_key_idandsecret_access_keydirectly on the instance or in configuration files, which are high-risk security vulnerabilities. - Automatic Credential Rotation: IAM roles provide temporary credentials that are automatically rotated by AWS STS, minimizing the window for compromise.
- Least Privilege: Roles enforce the principle of least privilege, allowing you to grant only the necessary permissions for Grafana Agent's operations.
- Simplified Management: No need to manually distribute or manage credentials. The EC2 instance metadata service provides credentials transparently to applications.
Steps to Create and Attach an IAM Role (Recap and Detail):
- Create the Role: As detailed in the "Pre-requisites" section, create an IAM role with "EC2" as the trusted entity.
- Define Permissions: Attach a custom IAM policy (or AWS managed policies where appropriate) to this role.
- For scraping API Gateway endpoints:
execute-api:Invokeon the specific API Gateway resources. - For S3 operations (e.g., writing logs):
s3:GetObject,s3:PutObjecton specific S3 buckets/prefixes. - For CloudWatch (if using
discovery.aws.cloudwatch):cloudwatch:GetMetricData,cloudwatch:ListMetrics. - For EC2 instance discovery:
ec2:DescribeInstances,ec2:DescribeRegions.
- For scraping API Gateway endpoints:
- Attach to EC2 Instance:
- During Launch: When launching a new EC2 instance, select the created IAM role under "Advanced details" -> "IAM instance profile".
- To an Existing Instance:
- Go to the EC2 console.
- Select the instance.
- Choose "Actions" -> "Security" -> "Modify IAM role".
- Select the desired IAM role and click "Update IAM role".
After attaching the role, Grafana Agent will automatically assume it when making AWS API calls that require SigV4, provided its aws_sigv4 blocks have empty access_key_id and secret_access_key.
2. Secrets Management: Beyond IAM Roles
While IAM roles are ideal for instances, if Grafana Agent runs in an environment where IAM roles are not directly applicable (e.g., local testing, non-AWS hosts), or if you need to access resources in another AWS account, you'll need robust secrets management.
- AWS Secrets Manager/KMS: Store
access_key_idandsecret_access_keyin AWS Secrets Manager and use KMS for encryption. You can then retrieve these secrets programmatically (e.g., using a small wrapper script or by extending Grafana Agent's capabilities if it supports direct Secrets Manager integration). - Environment Variables: For less sensitive non-production scenarios, you can pass credentials via environment variables to the Grafana Agent process. Grafana Agent's River configuration supports
env()function calls to read environment variables (e.g.,access_key_id = env("AWS_ACCESS_KEY_ID")).bash export AWS_ACCESS_KEY_ID="AKIA..." export AWS_SECRET_ACCESS_KEY="wJalr..." sudo systemctl start grafana-agent # Agent will inherit theseHowever, this should still be considered less secure than IAM roles as environment variables can be inspected.
3. Least Privilege Principle: A Foundation of AWS Security
Always grant Grafana Agent only the minimum permissions necessary to perform its functions. Avoid using * for resources or actions unless absolutely required and understood. Granular permissions reduce the blast radius if the Agent's credentials are ever compromised.
Example of Least Privilege Policy:
Instead of s3:FullAccess for writing logs, use:
{
    "Version": "2012-10-17",
    "Statement": [
        {
            "Effect": "Allow",
            "Action": [
                "s3:PutObject",
                "s3:AbortMultipartUpload",
                "s3:ListMultipartUploadParts"
            ],
            "Resource": "arn:aws:s3:::your-log-bucket-name/logs/*"
        }
    ]
}
This policy only allows writing and managing parts of multi-part uploads to a specific prefix within a specific S3 bucket.
4. Monitoring Grafana Agent: Ensuring Data Flow and Health
A well-configured Grafana Agent is useless if it's not running or if its data flow is interrupted.
- Internal Metrics: Grafana Agent exposes its own internal metrics on a
/metricsendpoint (typicallylocalhost:8080/metrics). Scrape these metrics with another Agent (or the same Agent if configured) and send them to your observability stack. Monitor for errors, dropped samples, CPU/memory usage, and scrape failures. - Log Analysis: Regularly review Grafana Agent's logs (via
journalctl -u grafana-agent.servicefor systemd setups). Look for errors related to network connectivity, authentication failures, or configuration parsing issues. - Dashboarding: Create Grafana dashboards to visualize the Agent's health and data flow, including:
- Number of scraped targets.
- Number of samples/logs/traces sent.
- Remote write queue size.
- Scrape duration and error rate.
5. Network Considerations: Connectivity and Isolation
Secure and efficient networking is crucial for Grafana Agent to communicate with AWS services and its remote write endpoints.
- Security Groups/NACLs: Configure security groups and network ACLs (NACLs) on your EC2 instance to restrict inbound and outbound traffic to only what's necessary.
- Outbound HTTPS (port 443) to AWS service endpoints (e.g.,
*.amazonaws.com). - Outbound HTTPS/HTTP to your Grafana Cloud or self-hosted Grafana endpoints.
- Inbound traffic on ports used by
otelcol.receiveror for internal/metricsscraping, but only from trusted sources.
- Outbound HTTPS (port 443) to AWS service endpoints (e.g.,
- VPC Endpoints (PrivateLink): For critical production environments, use AWS VPC endpoints (PrivateLink) for services like S3, CloudWatch, and STS. This routes traffic privately within the AWS network, improving security, compliance, and often performance, by avoiding the public internet. If using VPC endpoints, ensure your security groups allow traffic to these endpoints.
- Proxy Configuration: If your Agent is behind a corporate proxy, configure the
http_client_configwith proxy settings. Theaws_sigv4block will still handle the signing, but the HTTP request will be routed through the proxy.
6. Handling Multiple AWS Accounts/Regions: Scalable Design
For complex organizations with multiple AWS accounts or a global presence across regions, consider these strategies:
- Cross-Account Roles: Configure IAM roles with trust policies that allow Grafana Agent in one account to assume a role in another account (cross-account access). This is a secure way to collect data from disparate accounts. You would then use
token(from STSAssumeRole) inaws_sigv4or rely on the agent's implicit credential chain. - Dedicated Agent per Account/Region: Deploy Grafana Agent instances strategically within each AWS account or region to collect local data and forward it to a centralized observability stack. This minimizes cross-region traffic costs and latency.
- Centralized Configuration Management: Use tools like AWS Systems Manager, Ansible, or Terraform to manage and distribute Grafana Agent configurations consistently across your fleet of agents.
By diligently applying these best practices, you can establish a highly secure, efficient, and scalable observability solution powered by Grafana Agent and AWS Request Signing.
Troubleshooting Common Issues
Even with careful planning, issues can arise during the setup of Grafana Agent with AWS Request Signing. Here are some common problems and their potential solutions.
1. "SignatureDoesNotMatch" Error
This is perhaps the most common error when dealing with SigV4 and indicates that the signature generated by the client (Grafana Agent) does not match the signature generated by the AWS service.
Causes and Solutions:
- Incorrect Credentials:
- Check
access_key_idandsecret_access_key: If you are using static credentials, double-check them for typos. - Expired
token: If using temporary credentials (token), ensure they haven't expired. This is common when manually obtaining STS tokens. IAM roles on EC2 handle this automatically. - Incorrect IAM Role Permissions: Even if the role is attached, it might lack the specific permission for the action being attempted on the target resource. For example,
s3:GetObjectmight be missing for an S3 target, orexecute-api:Invokefor an API Gateway endpoint. Review the IAM policy.
- Check
- Incorrect
regionorservice_name: These parameters are crucial for the signing process.region: Ensure it exactly matches the region where the target AWS service or API Gateway endpoint is deployed (e.g.,us-east-1, notus-east).service_name: Verify that theservice_namein youraws_sigv4block (e.g.,execute-api,s3,cloudwatch) precisely matches the AWS service your request is targeting. An incorrect service name will lead to a signature mismatch.
- Clock Skew: AWS requires your system clock to be synchronized closely with its servers. A significant time difference (typically more than 5 minutes) can cause
SignatureDoesNotMatcherrors.- Solution: Ensure NTP (Network Time Protocol) is running on your Grafana Agent host. For EC2 instances, Amazon Time Sync Service (via NTP) should be enabled by default. Check
timedatectlon Linux to verify time synchronization.
- Solution: Ensure NTP (Network Time Protocol) is running on your Grafana Agent host. For EC2 instances, Amazon Time Sync Service (via NTP) should be enabled by default. Check
- URL/Path Mismatch: The canonical request string used in SigV4 includes the URI path and query parameters. If your configured URL or path for the scrape target in Grafana Agent doesn't exactly match what the AWS service expects, the signature will be different.
- Solution: Double-check the
__address__and__metrics_path__inprometheus.scrapeor theendpoint.urlinloki.write/otelcol.exporter.otlpto ensure they are correct and canonical.
- Solution: Double-check the
- Payload Hashing: While Grafana Agent handles this internally, understanding that the payload (body of POST/PUT requests) is hashed as part of the signing process is important. If the payload is malformed or altered, the signature will be invalid.
2. "The security token included in the request is invalid" Error
This error often points to issues with temporary security credentials.
Causes and Solutions:
- Expired STS Token: If you are manually providing an STS
token(session token), it might have expired. Request a new one. - Incorrect STS Token: The token itself might be malformed or incorrect.
- IAM Role Not Assumed: If running on EC2, and you're getting this error, it could mean:
- The IAM role was not correctly attached to the EC2 instance. Verify via EC2 console.
- The Agent isn't picking up credentials from the instance metadata service. This is rare but can happen if the environment is heavily customized or if there are networking issues preventing access to
169.254.169.254.
3. Network Connectivity Issues
Grafana Agent needs to reach both the AWS service endpoint and your remote write endpoint.
Causes and Solutions:
- Security Group/NACL Restrictions:
- Outbound to AWS: Ensure your EC2 instance's security group allows outbound HTTPS (port 443) traffic to the relevant AWS service endpoints (e.g.,
*.amazonaws.com). - Outbound to Grafana Cloud/Self-hosted Grafana: Ensure outbound HTTPS/HTTP is allowed to your observability backend.
- Inbound to Agent (if applicable): If you're scraping internal Agent metrics or pushing traces/logs to an Agent receiver, ensure inbound rules are correctly configured.
- Outbound to AWS: Ensure your EC2 instance's security group allows outbound HTTPS (port 443) traffic to the relevant AWS service endpoints (e.g.,
- DNS Resolution: Ensure your instance can resolve AWS service domain names (e.g.,
execute-api.us-east-1.amazonaws.com). Check/etc/resolv.conf. - Proxy Issues: If using a proxy, ensure the
http_client_confighas the correctproxy_urland that the proxy itself is correctly configured and accessible. - VPC Endpoint Configuration: If you're using VPC endpoints, ensure the endpoint policy allows access from your instance, and that your instance's routing table directs traffic to the VPC endpoint.
4. Incorrect IAM Permissions
Even if SigV4 signing works, the request might be denied due to insufficient permissions.
Causes and Solutions:
- "Access Denied" or "Unauthorized" Errors: These errors typically appear in the Agent's logs or in the AWS CloudTrail logs.
- Review IAM Policy: Carefully examine the IAM policy attached to your Grafana Agent's role. Ensure it explicitly grants the required
Action(e.g.,s3:PutObject,execute-api:Invoke) on the correctResource(e.g.,arn:aws:s3:::your-bucket/*,arn:aws:execute-api:region:account-id:api-id/stage/resource). Use CloudTrail logs to identify the exact denied action. - Resource-Based Policies: If the target resource (e.g., S3 bucket, SQS queue, API Gateway resource) has its own resource-based policy, ensure that policy explicitly allows access from your Grafana Agent's IAM role.
5. Agent Not Starting or Processing Data
Sometimes, the issue isn't with SigV4 directly but with the Agent's overall health.
Causes and Solutions:
- Configuration File Errors:
- Syntax Errors: River configuration is strict. Use
grafana-agent -config.file=/etc/grafana-agent/config.river -check-configto validate syntax. - Invalid Blocks/Parameters: Ensure you're using correct block names and parameters as per Grafana Agent documentation.
- Syntax Errors: River configuration is strict. Use
- File Permissions:
- Ensure the
grafana-agentuser has read access to theconfig.riverfile and write access to log directories if usingloki.source.file. - If using
loki.source.file, ensure the Agent user can read the specified log files.
- Ensure the
- Resource Exhaustion: If the Agent runs out of CPU, memory, or disk space, it might stop processing or crash. Monitor its resource usage.
- Log Level: Increase Grafana Agent's logging verbosity for more detailed debug output. Add
-log.level=debugto yourExecStartcommand in the systemd service file.
By systematically going through these troubleshooting steps and leveraging the detailed logs provided by Grafana Agent and AWS CloudTrail, you can effectively diagnose and resolve most issues related to AWS Request Signing.
Advanced Scenarios and Integration
Beyond basic metrics, logs, and traces collection, Grafana Agent's flexibility and support for SigV4 open doors to more sophisticated integration patterns within the AWS ecosystem. These advanced scenarios highlight the Agent's utility in complex, secure cloud environments.
Integrating with AWS PrivateLink for Secure Private Connectivity
For highly secure or regulated environments, sending observability data over the public internet, even with SigV4, might not be acceptable. AWS PrivateLink allows you to establish private connectivity between your VPCs and AWS services (or services hosted by other AWS accounts) without exposing your traffic to the public internet.
When Grafana Agent is deployed within a VPC that has PrivateLink endpoints configured for services like S3, CloudWatch, or custom services fronted by Network Load Balancers (NLBs), the Agent will naturally route its SigV4-signed requests through these private endpoints. The aws_sigv4 configuration remains the same; the networking layer handles the private routing. This combination provides both cryptographic security (SigV4) and network isolation (PrivateLink).
Example: If your Grafana Agent needs to send logs to an S3 bucket and you have an S3 VPC endpoint configured, the Agent's loki.write with aws_sigv4 will use the S3 endpoint automatically, provided DNS resolution within the VPC correctly maps S3 service endpoints to the private IP addresses of the VPC endpoint.
Monitoring Custom Applications via AWS API Gateway
Grafana Agent can be a powerful tool for monitoring custom applications hosted on various AWS compute platforms (EC2, ECS, EKS, Lambda). If these applications expose custom metrics, logs, or trace endpoints, and these endpoints are secured and exposed via AWS API Gateway, Grafana Agent's SigV4 capability becomes indispensable.
- Custom Metrics API: An application might expose a custom
/metricsendpoint that aggregates internal application-specific metrics. This endpoint could be secured with an API Gateway custom authorizer that enforces SigV4 authentication. Grafana Agent'sprometheus.scrapewithhttp_client_config.aws_sigv4would be configured to hit this API Gateway endpoint, ensuring only authenticated and authorized requests are processed. - Custom Log Ingestion API: Instead of directly writing to S3, applications might send logs to a custom API Gateway endpoint that then processes and stores logs. Grafana Agent can collect application logs locally and forward them to this API Gateway endpoint using
loki.writewithaws_sigv4, treating the API Gateway as its Loki-compatible endpoint. - Centralized Observability API: For organizations building sophisticated internal observability platforms, a centralized API might be established using API Gateway to receive telemetry data from various sources. This API would be secured with SigV4, and Grafana Agents distributed across the infrastructure would use their
aws_sigv4configurations to send data securely to this central ingestion point.
This approach offers immense flexibility, allowing you to decouple your telemetry collection from the backend storage mechanisms and build highly customized, secure data pipelines.
For organizations leveraging advanced API management solutions like APIPark, which provides an open-source AI gateway and API management platform for managing, integrating, and deploying AI and REST services, securely exporting data from Grafana Agent to custom API endpoints becomes critical. If these custom APIs, managed by APIPark, are hosted within AWS and require SigV4 authentication, the techniques discussed in this guide become directly applicable, ensuring seamless and secure data flow into your API ecosystem. APIPark's robust API governance features, including end-to-end API lifecycle management and independent API access permissions for each tenant, complement Grafana Agent's secure data collection capabilities by providing a secure and managed environment for your custom observability APIs. Whether you're encapsulating prompts into REST APIs for AI models or exposing internal service metrics, APIPark can act as the secure gateway, and Grafana Agent with SigV4 can be the trusted data source.
Table: AWS Service Names for SigV4 Configuration
Understanding the correct service_name for your aws_sigv4 configuration is crucial. Here's a table of common AWS services and their corresponding service names:
| AWS Service | Common service_name Value |
Typical Use Case with Grafana Agent + SigV4 |
|---|---|---|
| API Gateway | execute-api |
Scraping custom metrics/logs/traces endpoints exposed via API Gateway |
| Amazon S3 | s3 |
Writing logs/traces directly to an S3 bucket with SigV4-protected access |
| Amazon CloudWatch | monitoring (for data plane) / cloudwatch (for control plane) |
Querying CloudWatch metrics for discovery.aws.cloudwatch (Agent handles implicitly) |
| AWS STS | sts |
Obtaining temporary credentials (Agent handles implicitly with IAM roles) |
| Amazon EC2 | ec2 |
Discovering EC2 instances for Prometheus targets (Agent handles implicitly) |
| Amazon DynamoDB | dynamodb |
Interacting with DynamoDB (less common for Agent's direct telemetry export) |
| Amazon Kinesis Firehose | firehose |
Sending logs/metrics/traces to Kinesis Firehose for delivery to other destinations |
| AWS Lambda | lambda |
Invoking Lambda functions that act as custom telemetry endpoints |
Note: For services like CloudWatch and EC2, when Grafana Agent uses discovery.aws.cloudwatch or discovery.aws.ec2 components, the Agent's underlying AWS SDK automatically handles SigV4 for its API calls to these services, relying on the instance's IAM role. The explicit aws_sigv4 block in http_client_config or endpoint is primarily for scraping/writing to an external HTTP endpoint that happens to be secured by SigV4, often through API Gateway or S3.
Conclusion
Securing your observability pipeline within AWS is not an option, but a necessity. Grafana Agent, with its robust support for AWS Request Signing (SigV4), provides a powerful and secure way to collect metrics, logs, and traces from your AWS environment and forward them to your preferred observability backend. By understanding the intricacies of SigV4, diligently configuring IAM roles, and meticulously setting up your Grafana Agent's River configuration, you can ensure that every piece of telemetry data is authenticated and authorized from its source to its destination.
We've traversed the foundational concepts of Grafana Agent and SigV4, walked through detailed examples for metrics, logs, and traces, and highlighted crucial security best practices like leveraging IAM roles and adhering to the principle of least privilege. Furthermore, we've explored advanced scenarios, including integrating with AWS PrivateLink and utilizing API Gateway for custom observability APIs, demonstrating the Agent's versatility in complex architectures. The importance of monitoring the Agent itself and systematic troubleshooting cannot be overstated, forming the backbone of a reliable observability solution.
As cloud environments continue to evolve in complexity and scale, the ability to securely and efficiently gather telemetry data will remain a cornerstone of effective operations. By mastering the setup of Grafana Agent with AWS Request Signing, you empower your organization with the confidence that your monitoring infrastructure is not only comprehensive but also resilient against unauthorized access and data tampering. Embrace these principles, and build an observability stack that stands the test of time and security scrutiny.
5 Frequently Asked Questions (FAQs)
1. What is the primary benefit of using AWS Request Signing (SigV4) with Grafana Agent? The primary benefit is enhanced security. SigV4 ensures that all requests made by Grafana Agent to AWS services or SigV4-protected custom endpoints (like those potentially exposed via API Gateway) are authenticated and authorized. This prevents unauthorized access, protects sensitive data in transit, and verifies the integrity of the request, safeguarding your AWS resources and observability data.
2. Is it always necessary to explicitly configure aws_sigv4 in the Grafana Agent configuration? No, not always. You explicitly configure aws_sigv4 within http_client_config for prometheus.scrape or within endpoint.aws_sigv4 for loki.write/otelcol.exporter.otlp when the target endpoint itself requires SigV4. However, when Grafana Agent uses built-in AWS service discovery components (e.g., discovery.aws.ec2, discovery.aws.cloudwatch) to make API calls to AWS for metadata, the Agent's underlying AWS SDK automatically handles SigV4 authentication using the credentials available in its environment (most securely, an attached IAM role).
3. What is the most secure way to provide AWS credentials to Grafana Agent for SigV4? The most secure and recommended method is to attach an IAM role to the EC2 instance (or other AWS compute service) where Grafana Agent is running. By leaving the access_key_id, secret_access_key, and token fields empty in the aws_sigv4 configuration block, Grafana Agent will automatically assume this role and use its temporary credentials, avoiding the need to store static credentials on the instance or in configuration files.
4. Can Grafana Agent collect metrics from an AWS API Gateway endpoint that requires SigV4? Yes, absolutely. You would configure a prometheus.scrape job in Grafana Agent. Within the http_client_config block of this scrape job, you would enable aws_sigv4 and specify the region of your API Gateway and service_name = "execute-api". The Agent would then sign its requests to the API Gateway endpoint, allowing it to securely scrape metrics.
5. What should I do if I encounter a "SignatureDoesNotMatch" error when using SigV4? A "SignatureDoesNotMatch" error indicates that the signature generated by Grafana Agent doesn't match the one AWS expects. Common troubleshooting steps include: * Verify the correctness of your AWS credentials (Access Key, Secret Key, or STS Token if used). * Ensure the region and service_name configured in aws_sigv4 exactly match the target AWS service. * Check for significant clock skew on the Grafana Agent host, as AWS requires time synchronization. * Review the IAM permissions for the role/user being used, ensuring it has the specific Action required on the target Resource.
🚀You can securely and efficiently call the OpenAI API on APIPark in just two steps:
Step 1: Deploy the APIPark AI gateway in 5 minutes.
APIPark is developed based on Golang, offering strong product performance and low development and maintenance costs. You can deploy APIPark with a single command line.
curl -sSO https://download.apipark.com/install/quick-start.sh; bash quick-start.sh

In my experience, you can see the successful deployment interface within 5 to 10 minutes. Then, you can log in to APIPark using your account.

Step 2: Call the OpenAI API.