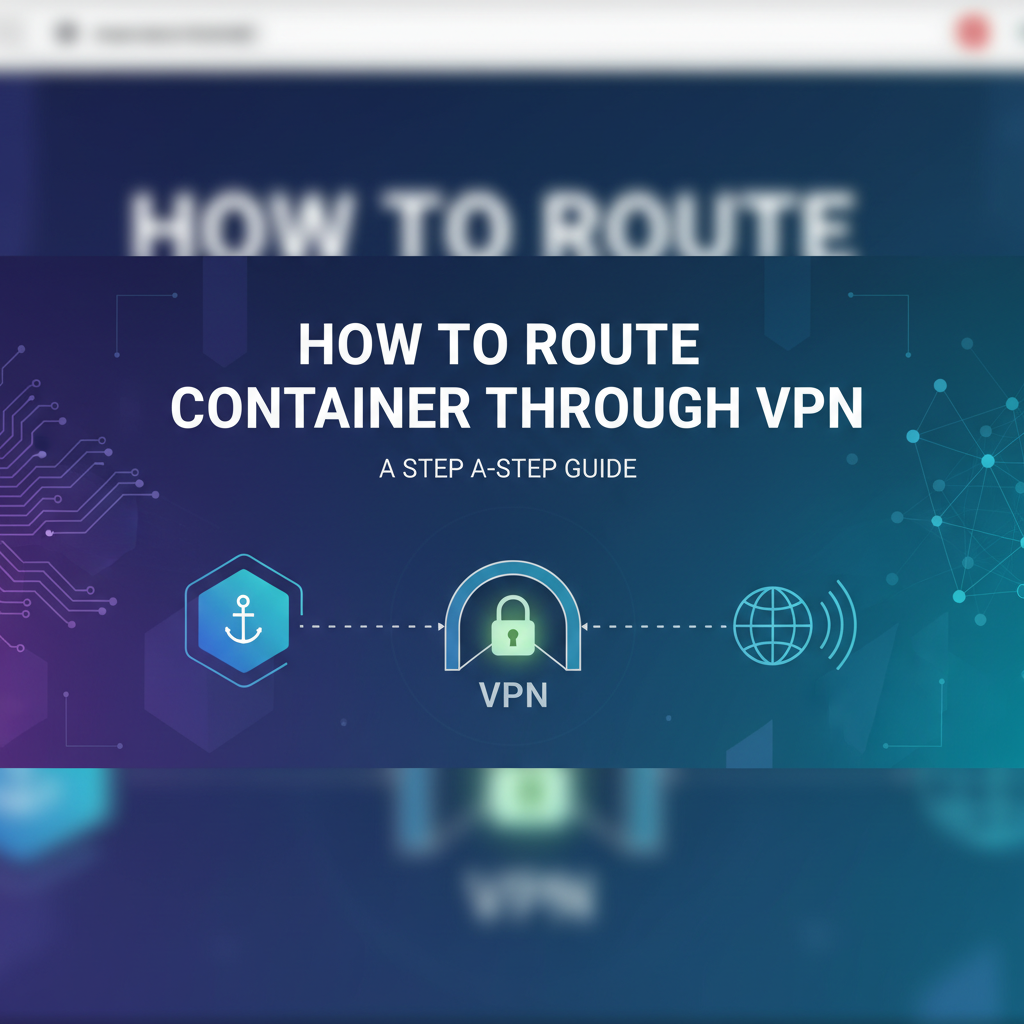
How to Route Container Through VPN: A Step-by-Step Guide


In the rapidly evolving landscape of modern application deployment, containers have emerged as a cornerstone technology, offering unparalleled agility, portability, and resource efficiency. Docker and Kubernetes have become household names, empowering developers to package applications and their dependencies into lightweight, isolated units. However, as organizations increasingly adopt containerized workflows for critical applications, the need for robust security, controlled access, and reliable network connectivity becomes paramount. Oftentimes, these containerized applications need to interact with sensitive internal resources, traverse geo-restricted boundaries, or operate within a secure, isolated network segment – scenarios where traditional container networking falls short. This is precisely where the strategic integration of Virtual Private Networks (VPNs) with containerized environments becomes indispensable.
Routing container traffic through a VPN is not merely a technical exercise; it's a critical strategy for enhancing security, ensuring compliance, and extending the reach of your applications across diverse network landscapes. Whether you're a developer testing an application against a remote database, an SRE managing microservices in a hybrid cloud setup, or an enterprise architect designing a secure multi-tenant environment, understanding how to effectively tunnel container traffic through a VPN is a vital skill. This guide delves deep into the methodologies, configurations, and best practices required to achieve this, offering a comprehensive, step-by-step approach to navigate the complexities. We will explore various techniques, from installing VPN clients directly within containers to leveraging the host's VPN connection, and even establishing dedicated VPN gateway containers, providing you with a versatile toolkit for different operational demands. By the end of this extensive guide, you will possess a profound understanding of how to securely and efficiently route your container traffic, unlocking new dimensions of network control and operational flexibility.
Understanding the Fundamentals: Containers, VPNs, and Network Gateways
Before we embark on the practical journey of routing container traffic through a VPN, it's essential to establish a solid understanding of the foundational components involved. A clear grasp of container networking, VPN principles, and the pivotal role of a network gateway will illuminate the underlying mechanisms and ensure a more informed implementation.
Containers and Networking Basics
Containers, exemplified by Docker, provide a lightweight, isolated environment for applications. This isolation extends to their networking stack, which is often configured to operate independently from the host system, yet is designed to facilitate communication where necessary. By default, Docker containers typically connect to a virtual bridge network (often docker0 on Linux hosts), which is managed by the Docker daemon. Each container on this bridge receives its own IP address within a private subnet, enabling seamless communication between containers on the same host and outbound access to the internet via Network Address Translation (NAT) performed by the host.
However, this default setup, while convenient for many use cases, presents limitations when more specialized routing or enhanced security is required. The docker0 bridge acts as a simple internal gateway for containers on that host, directing their traffic outwards. Other network modes, such as host mode (where the container shares the host's network namespace directly, losing some isolation but gaining direct access), none mode (no network connectivity), or overlay networks (for multi-host container communication, often used in Swarm or Kubernetes), offer different trade-offs. Understanding these modes is crucial because they dictate how readily a container's traffic can be intercepted, redirected, or influenced by external network configurations, including those of a VPN. For instance, in host mode, the container's network traffic is indistinguishable from the host's, simplifying VPN integration but sacrificing network isolation. Conversely, in bridge mode, the container's isolated network stack requires more deliberate configuration to funnel its traffic through a VPN. The intricacies of how IP packets flow from the container's virtual network interface, through the docker0 bridge, and out to the host's physical network adapter, are central to successfully rerouting them through a VPN tunnel.
VPNs Explained: The Secure Tunnel
A Virtual Private Network (VPN) creates a secure, encrypted connection—a "tunnel"—over a public network, typically the internet. This tunnel ensures that data transmitted between a client and a VPN server remains confidential and protected from eavesdropping or tampering. The primary purposes of a VPN include enhancing security, bypassing geo-restrictions, and connecting securely to remote networks. When a device connects to a VPN server, all its internet traffic is routed through this encrypted tunnel. The VPN server then acts as a gateway to the internet or to the private network it represents, masking the client's true IP address and encrypting the data in transit.
There are several types of VPNs, each with specific applications: * Client-to-Site VPNs: These connect individual users (clients) to a private network (e.g., a corporate network) over the internet. This is what most people think of when they use a commercial VPN service on their laptop. * Site-to-Site VPNs: These connect entire networks (e.g., two different office branches or a data center to a cloud VPC) securely, making them appear as a single, contiguous network. * SSL/TLS VPNs, IPSec VPNs, OpenVPN, and WireGuard: These are different protocols and implementations, each offering distinct advantages in terms of speed, security, and ease of deployment. OpenVPN, for instance, is highly configurable and robust, while WireGuard is known for its modern cryptography and lightweight, high-performance design. The choice of VPN protocol can significantly impact the complexity and performance of routing container traffic, influencing the required software within the container or on the host. Regardless of the specific protocol, the core concept remains: establishing a trusted gateway that encrypts and routes traffic between disparate network segments.
The Concept of a Network Gateway
In networking, a gateway is a node that serves as an access point to another network. It is a critical piece of hardware or software that allows data to flow from one network to another. When your computer sends data to a destination outside its local network, it first sends that data to its default gateway. This gateway then takes responsibility for routing the data packet to its next hop, eventually reaching its final destination. In simple terms, it's the exit point for traffic leaving a local network and the entry point for traffic coming into it.
In the context of this guide, the concept of a gateway is multi-faceted: 1. Host as a Gateway: Your Docker host machine itself acts as a gateway for the containers running on it, translating their private IP addresses to its public IP when communicating with the internet. 2. VPN Server as a Gateway: The VPN server you connect to becomes a remote gateway, redirecting your encrypted traffic and presenting its own IP address to the outside world. 3. Dedicated VPN Container as a Gateway: As we'll explore, you can design a specific container to run the VPN client and act as a gateway for other application containers, centralizing VPN management and traffic routing within your containerized environment. This container effectively takes on the role of an internal network gateway, providing the VPN tunnel for its peers.
Understanding the gateway concept is fundamental because our objective is to precisely direct which gateway (the host's default, the VPN server, or an internal VPN container) a container's traffic should use for specific destinations. This requires meticulous manipulation of network routing tables and potentially iptables rules, ensuring that the traffic flows securely and correctly through the desired VPN tunnel.
Use Cases for Routing Containers Through VPN
The decision to route container traffic through a VPN is driven by a range of practical necessities and strategic advantages. Understanding these use cases helps in justifying the implementation effort and in selecting the most appropriate method.
- Accessing Sensitive Internal Company Resources: Many organizations house critical databases, internal APIs, or legacy systems within private networks that are not directly accessible from the public internet. Containers deployed in cloud environments or external hosts might need to interact with these resources. By routing container traffic through a VPN connected to the corporate network, these containers can securely access internal services as if they were directly on the private network, bypassing firewall restrictions and ensuring data confidentiality during transit. This is crucial for hybrid cloud architectures where on-premises services must securely communicate with cloud-native applications.
- Securely Connecting to Cloud Services with Private Endpoints: While cloud providers offer various security mechanisms, establishing direct, private connectivity to services like managed databases or message queues often involves VPN or Direct Connect solutions. When containers need to access these services via private endpoints, using a VPN ensures that traffic never traverses the public internet, reducing latency, enhancing security, and minimizing data transfer costs in some scenarios. It forms a secure tunnel for containerized microservices to interact with cloud infrastructure components.
- Bypassing Geo-Restrictions for Testing or Data Collection: For applications that require data from geographically restricted sources, or for testing region-specific features, a VPN is indispensable. Developers can route their containerized testing environments through a VPN server located in the target region, allowing the application to appear as if it's originating from that location. This is particularly useful for web scraping, content localization testing, or accessing region-locked APIs for data analytics purposes, ensuring compliance with data residency requirements where applicable.
- Ensuring Compliance and Auditing: In regulated industries, maintaining strict control over data flow and network access is a mandate. Routing container traffic through a VPN provides an additional layer of encryption and often centralized logging capabilities at the VPN gateway level, which can aid in demonstrating compliance with data privacy regulations (e.g., GDPR, HIPAA). It allows for detailed auditing of network access attempts and data transfers, providing a clear trail of how sensitive information is accessed and processed by containerized workloads.
- Hybrid Cloud and Multi-Cloud Deployments: Modern enterprises frequently leverage a mix of on-premises infrastructure and multiple public cloud providers. Establishing secure communication pathways between these disparate environments is a core challenge. VPNs provide a cost-effective and flexible solution for creating secure tunnels between these locations. When containers are distributed across such a hybrid landscape, routing their traffic through strategically placed VPNs can unify the network, enabling seamless communication and data synchronization between containerized services regardless of their physical deployment location.
- Securing Microservices Communication: Even within a single data center or cloud region, microservices communication can benefit from VPN-like encryption, especially when dealing with sensitive data. While service meshes offer robust solutions for inter-service encryption, a VPN can provide an additional, network-level security blanket for specific clusters or groups of containers, particularly for egress traffic destined for external, untrusted networks. It encapsulates and protects the traffic as it leaves the controlled environment, acting as a secure egress gateway.
- Enhancing Anonymity and Privacy: For tasks that require a higher degree of anonymity, such as certain types of research, competitive analysis, or secure communication, routing container traffic through a VPN can mask the origin IP address and encrypt the entire data stream. This is especially relevant when containers are used for automated tasks that need to operate with an enhanced level of privacy from the underlying host or network.
Each of these use cases underscores the versatility and importance of carefully planned VPN integration with containerized workloads, making it a critical skill for anyone involved in modern infrastructure and application deployment.
Prerequisites and Planning
Successfully routing container traffic through a VPN requires careful preparation. Skipping the planning phase can lead to frustrating debugging sessions and potential security vulnerabilities. Here's what you need to have in place and consider before diving into the configuration.
Essential Knowledge and Tools
- Basic Linux Command-Line Knowledge: Most Docker hosts run on Linux, and even Windows or macOS Docker Desktop environments utilize a Linux VM for container operations. Familiarity with basic commands like
ip,route,iptables,systemctl,cat,grep, and file editing (e.g.,vi,nano) is crucial for diagnosing network issues, configuring the host, and examining container environments. The ability to navigate the file system and understand output from network utilities will significantly streamline the process. - Understanding of Network Concepts: A solid grasp of fundamental networking principles is non-negotiable. This includes:
- IP Addressing and Subnetting: Understanding how IP addresses are assigned, the concept of network masks, and how different subnets communicate (or don't) is vital. You'll need to know your Docker bridge network IP range, your host's IP, and the IP range assigned by your VPN.
- Routing Tables: Knowing what a routing table is, how to view it (
ip route show), and how entries (default gateway, specific routes) dictate traffic flow is critical. You'll often be manipulating these tables. - Network Address Translation (NAT): Understanding how NAT allows multiple private IPs (like those of your containers) to share a single public IP (your host's) is key, especially when setting up
iptablesrules for forwarding. - Firewall Concepts (
iptables/nftables): Familiarity with how firewalls filter and forward traffic, particularlyiptableson Linux, is essential. You'll be adding rules to permit VPN traffic, forward container traffic, and potentially prevent leakage.
- A Running Container Environment: You'll need a functional Docker installation. This could be Docker Desktop, Docker Engine on a Linux server, or a Kubernetes cluster. For the initial steps, a simple Docker Engine on a single Linux VM or server is recommended due to its directness and ease of inspection. Ensure you can build images, run containers, and interact with them using
docker exec. - A VPN Server Setup (or a Plan to Set One Up): This guide assumes you have access to a VPN server that you can connect to. This could be a commercial VPN service, a self-hosted OpenVPN or WireGuard server, or a corporate VPN gateway. You'll need its connection details:
- Server IP address or hostname.
- Authentication credentials (username/password, client certificates, pre-shared keys).
- Port number.
- Configuration files (e.g.,
.ovpnfor OpenVPN,.conffor WireGuard). - The VPN server must be configured to allow clients to route all traffic through it (often called "full tunnel") if you want containers to completely egress via the VPN. It might also need to push routes to clients for specific internal networks.
Network Topology Design and Protocol Choice
Before writing a single line of code or command, sketch out your desired network topology. * Where are your containers? On a single host? In a Swarm? A Kubernetes cluster? * Where is your VPN server? In the cloud? On-premises? * What resources do the containers need to access via VPN? Specific IPs? Entire subnets? The entire internet?
Consider the following when designing your setup: * VPN Protocol Selection: * OpenVPN: Mature, highly secure, flexible, supports TCP and UDP. Can be more resource-intensive and configuration-heavy. Excellent for robust, secure tunnels. * WireGuard: Modern, extremely fast, lightweight, uses UDP. Simpler configuration. Gaining rapid adoption. Ideal for performance-critical scenarios. * IPSec: Often used for site-to-site VPNs. Can be complex to configure for client-side scenarios but offers strong security. * Your choice impacts the client software needed, the required kernel modules (for WireGuard), and the complexity of integration. For this guide, we will primarily focus on OpenVPN and WireGuard examples due to their popularity and ease of client-side setup.
- Network Segmentation and Isolation:
- Do you want all container traffic to go through the VPN, or just specific containers?
- Do you need strict separation between containers that use the VPN and those that don't? Custom Docker bridge networks can help here.
- How will you prevent accidental traffic leakage outside the VPN tunnel (a "kill switch")? This is a critical security consideration.
- DNS Resolution: When connected to a VPN, your DNS queries often go through the VPN's DNS servers. Ensure your containers correctly resolve domain names while connected to the VPN. This might involve custom DNS settings in Docker or directly within the container.
By meticulously preparing and planning, you lay a strong foundation for a secure, functional, and maintainable container-VPN routing solution.
Method 1: Container-Specific VPN Client (Within the Container)
This method involves installing and running a VPN client directly inside a Docker container. Each container that needs VPN access will encapsulate its own VPN client and configuration.
Concept and Principles
In this approach, the application container itself becomes a VPN client. When the container starts, it initiates a connection to the VPN server, and all network traffic originating from that container is then routed through its internal VPN tunnel. This method provides the highest degree of isolation and granular control, as each container manages its own VPN connection independently. It is particularly suitable for scenarios where only a few specific containers require VPN access, or when different containers need to connect to different VPN endpoints. The container's internal network stack, which includes its virtual network interface and routing table, is directly manipulated by the VPN client, ensuring that its egress traffic uses the VPN gateway provided by the VPN server.
Pros and Cons
Pros: * Granular Control: Each container has its own VPN configuration, allowing for different VPN servers, protocols, or credentials per application. * Isolation: The VPN connection is confined to the specific container, preventing unintended routing of other host or container traffic. * Portability: The VPN configuration is bundled within the container image or mounted as a volume, making the container self-contained and easily deployable across different hosts. * Clear Ownership: It's explicit that a given container relies on a VPN for its operation, simplifying debugging and security audits for that specific service.
Cons: * Increased Container Image Size: Adding a VPN client (like OpenVPN or WireGuard) and its dependencies will increase the size of your Docker images. * Complexity per Container: Each container requiring VPN access needs to be individually configured, which can become cumbersome for a large number of containers. * Resource Overhead: Each VPN client instance consumes its own CPU and memory resources. * Privileged Operations: VPN clients often require elevated capabilities (NET_ADMIN, NET_RAW, CAP_ADD) to manipulate network interfaces and routing tables within the container, which can be a security concern if not managed carefully. * Kernel Module Dependencies: WireGuard, for example, often requires a specific kernel module, which might not be readily available or easily loaded within a standard container without additional host configuration.
Step-by-Step Guide (Example with OpenVPN)
This example uses OpenVPN, a widely adopted VPN solution, to demonstrate how to embed a VPN client within a Docker container.
1. Prepare Your VPN Configuration
Ensure you have your OpenVPN client configuration file (.ovpn). This file typically contains server address, port, protocol, certificate authorities, client certificates, keys, and potentially authentication details. Let's assume you name it client.ovpn.
# Example client.ovpn content (simplified)
client
dev tun
proto udp
remote your.vpn.server.com 1194
resolv-retry infinite
nobind
persist-key
persist-tun
cipher AES-256-CBC
auth SHA256
key-direction 1
remote-cert-tls server
comp-lzo
verb 3
<ca>
-----BEGIN CERTIFICATE-----
...
-----END CERTIFICATE-----
</ca>
<cert>
-----BEGIN CERTIFICATE-----
...
-----END CERTIFICATE-----
</cert>
<key>
-----BEGIN PRIVATE KEY-----
...
-----END PRIVATE KEY-----
</key>
Store this file securely. For this example, we'll place it in the same directory as our Dockerfile.
2. Create a Custom Dockerfile
We'll build a Docker image that includes the OpenVPN client and a simple application that uses the VPN.
# Start with a base image that has OpenVPN pre-installed or is suitable for installing it.
# Alpine is lightweight. Ubuntu/Debian are also common.
FROM alpine:3.18

# Install OpenVPN client and required network utilities
RUN apk add --no-cache openvpn curl iproute2

# Set working directory
WORKDIR /app

# Copy the OpenVPN client configuration file into the container
# In a real-world scenario, you might mount this as a volume for better security and flexibility.
COPY client.ovpn /etc/openvpn/client.ovpn

# Create a simple script to wait for the VPN to connect and then run the application
COPY run-app.sh /app/run-app.sh
RUN chmod +x /app/run-app.sh

# Expose any ports your application needs (e.g., if it's a web server)
# EXPOSE 8080

# Define the entrypoint for the container
ENTRYPOINT ["/app/run-app.sh"]
3. Create the run-app.sh Script
This script will start the OpenVPN client in the background, wait for the tunnel to establish, and then launch your actual application. This ensures your application only runs once the VPN is active.
#!/bin/sh

echo "Starting OpenVPN client..."
# Run OpenVPN in the background. --daemon option is better for non-interactive containers.
# --config specifies the config file. --log logs to stderr.
openvpn --config /etc/openvpn/client.ovpn --daemon --log-append /var/log/openvpn.log &

# Wait for the VPN tunnel device (tun0 or similar) to appear.
# This loop ensures the app doesn't start before the VPN is up.
echo "Waiting for VPN tunnel (tun0) to be established..."
until ip link show tun0 > /dev/null 2>&1; do
    echo "Still waiting for tun0..."
    sleep 2
done

echo "VPN tunnel (tun0) is up!"
ip addr show tun0
ip route show

echo "Verifying VPN IP address..."
VPN_IP=$(curl -s ifconfig.me) # Use an external service to check the public IP
echo "Container public IP (via VPN): $VPN_IP"

# You can add a check to ensure the IP is indeed your VPN server's public IP or a VPN-assigned IP
# For example:
# if ! echo "$VPN_IP" | grep -q "YOUR_VPN_EXPECTED_IP_PREFIX"; then
#     echo "WARNING: VPN IP check failed! Public IP might not be via VPN."
# fi

echo "Starting actual application..."
# Replace this with your actual application command
# For demonstration, we'll just keep the container alive and check connectivity.
# For example, if it's a web server: python -m http.server 8080
# Or if it's a curl command to a VPN-only resource: curl http://internal-vpn-resource.com
# For a basic example, let's keep it simple:
tail -f /var/log/openvpn.log # Keep the container running and show VPN logs
# Or just sleep indefinitely
# while true; do sleep 1000; done
4. Build the Docker Image
Navigate to the directory containing your Dockerfile, client.ovpn, and run-app.sh, then build the image:
docker build -t my-vpn-app .
5. Run the Container with Appropriate Capabilities
VPN clients need elevated privileges to create and manage network interfaces and modify routing tables. Specifically, the NET_ADMIN capability is required.
docker run --cap-add=NET_ADMIN --name my-secure-app my-vpn-app
Explanation of Flags: * --cap-add=NET_ADMIN: Grants the container the ability to perform network administration tasks, such as modifying network interfaces and routing tables. This is crucial for OpenVPN to function correctly. * --name my-secure-app: Assigns a readable name to your container.
6. Verification
Once the container is running, observe its logs using docker logs my-secure-app. You should see output indicating that OpenVPN is connecting, the tun0 device is created, and your application is starting.
To further verify: * Open a new terminal and inspect the running container: bash docker exec -it my-secure-app ip addr show tun0 docker exec -it my-secure-app ip route show docker exec -it my-secure-app curl ifconfig.me The curl ifconfig.me command inside the container should report the public IP address of your VPN server, not your Docker host's public IP. The ip route show command should indicate that the default gateway for the container is now routing traffic through the tun0 interface.
Security Implications
Running containers with --cap-add=NET_ADMIN grants significant power within the container's network namespace. While necessary for VPN functionality, it's a privilege that should be granted judiciously and only to trusted images. Always ensure your base image is minimal and your Dockerfile doesn't introduce unnecessary packages or vulnerabilities. Consider using read-only root filesystems if your application allows, and always keep your VPN configuration files secure, preferably mounted as read-only secrets or volumes rather than baked directly into the image in production environments.
This method offers robust isolation but requires careful image design and privilege management. For many scenarios, especially those involving multiple containers needing VPN access, alternative methods might be more efficient.
Method 2: Host-Level VPN Routing (Container Traffic via Host's VPN)
This method involves establishing a VPN connection on the Docker host machine itself, and then configuring the host's network and firewall rules to force container traffic through that existing VPN tunnel. The host effectively becomes the gateway for its containers, passing their traffic through its own VPN connection.
Concept and Principles
Instead of each container running its own VPN client, the Docker host machine (e.g., your Linux server) establishes a single VPN connection. All other applications on the host, including the Docker daemon and its associated container networks, then leverage this host-level VPN. The core idea is to manipulate the host's iptables rules and potentially its routing table to redirect traffic originating from Docker's internal networks (like the docker0 bridge) through the VPN tunnel interface (e.g., tun0 for OpenVPN, wg0 for WireGuard). This creates a scenario where the host's VPN client acts as the central egress gateway for all container traffic, as if the containers themselves were directly connected to the VPN.
Pros and Cons
Pros: * Simpler for Multiple Containers: All containers on the host automatically gain VPN access without individual configuration, reducing overhead and image size. * Centralized Management: The VPN connection is managed at the host level, making it easier to start, stop, and monitor a single VPN client. * Reduced Container Overhead: Containers remain lightweight as they don't need VPN client binaries or configurations. * Performance: A single, well-optimized VPN client on the host can often achieve better performance than multiple clients within containers, especially if the host has dedicated VPN hardware acceleration. * No NET_ADMIN for Containers: Application containers do not need elevated privileges for VPN functionality.
Cons: * Less Granular Control: All host and container traffic might be routed through the VPN, which may not always be desirable. Selective routing requires complex iptables rules. * Potential for Leakage: If the host's VPN connection drops, container traffic might revert to using the host's default internet connection, leading to IP leakage if a "kill switch" isn't implemented. * Host Dependency: The containers are completely reliant on the host's VPN connection, meaning the VPN client and its state are outside the container's lifecycle management. * Debugging Can Be Tricky: Tracing network flows can be more complex as traffic traverses multiple layers (container -> Docker bridge -> host iptables -> VPN tunnel).
Step-by-Step Guide (Example with OpenVPN on Host)
This example assumes your Docker host is a Linux machine and you have an OpenVPN client installed and configured on it. We'll focus on the iptables and routing configurations.
1. Ensure OpenVPN is Running on the Host
First, ensure your OpenVPN client is successfully connected on your Docker host. Verify its status:
sudo systemctl status openvpn@client # Replace 'client' with your actual OpenVPN config name
ip addr show tun0 # Check for the tun0 interface
ip route show # Check if default route points to tun0
curl ifconfig.me # Verify your host's public IP is the VPN server's IP
Your host's default route should point through the tun0 interface, indicating that all outgoing traffic from the host is currently traversing the VPN.
2. Identify Docker's Network Interfaces and Subnets
By default, Docker creates a bridge network, typically docker0, with a subnet like 172.17.0.0/16. Identify your specific Docker bridge interface and its IP range:
ip addr show docker0
# Example output:
# 3: docker0: <BROADCAST,MULTICAST,UP,LOWER_UP> mtu 1500 qdisc noqueue state UP group default
#     link/ether 02:42:be:03:7d:68 brd ff:ff:ff:ff:ff:ff
#     inet 172.17.0.1/16 brd 172.17.255.255 scope global docker0
#     ...
In this example, docker0 has the IP 172.17.0.1 and the subnet is 172.17.0.0/16. Note these down. The docker0 interface acts as the gateway for containers on this default bridge.
3. Configure iptables for NAT and Forwarding
This is the most critical step. We need to tell the host's kernel to: 1. Allow forwarding of packets from the Docker bridge network to the VPN tunnel. 2. Perform Source NAT (SNAT) on these packets, so they appear to originate from the VPN tunnel's IP address.
a. Enable IP Forwarding (if not already enabled):
sudo sysctl -w net.ipv4.ip_forward=1
echo "net.ipv4.ip_forward=1" | sudo tee -a /etc/sysctl.conf
b. iptables Rules for Routing Container Traffic through VPN:
Replace docker0 and 172.17.0.0/16 with your actual Docker bridge interface and subnet. Replace tun0 with your VPN tunnel interface (e.g., wg0 for WireGuard).
# Flush existing Docker-related NAT rules to avoid conflicts if you want full control.
# Exercise caution: This might temporarily disrupt Docker's default networking.
# sudo iptables -t nat -F POSTROUTING
# sudo iptables -t nat -D POSTROUTING -s 172.17.0.0/16 ! -o docker0 -j MASQUERADE # Remove existing MASQUERADE if present

# 1. Allow forwarding from Docker bridge to VPN tunnel
# This rule tells the kernel that packets coming from the docker0 interface (your containers)
# are allowed to be forwarded out through the tun0 interface (your VPN tunnel).
sudo iptables -A FORWARD -i docker0 -o tun0 -j ACCEPT
sudo iptables -A FORWARD -i tun0 -o docker0 -j ACCEPT # Allow return traffic

# 2. Perform Source NAT (Masquerading) for container traffic exiting via VPN
# This is the crucial rule. It takes packets originating from your Docker subnet
# and destined for *any* interface EXCEPT docker0 (i.e., outgoing to the VPN)
# and changes their source IP address to that of the tun0 interface.
# This makes it appear as if the packets came from the VPN tunnel itself.
sudo iptables -t nat -A POSTROUTING -s 172.17.0.0/16 ! -o docker0 -j MASQUERADE

# 3. Add a "kill switch" (optional but highly recommended for security)
# These rules ensure that if the VPN connection drops (tun0 goes down),
# traffic from your Docker subnet cannot escape via your regular internet interface (e.g., eth0).
# Replace eth0 with your actual main internet-facing interface.
# This essentially blocks any traffic from the Docker subnet from going out via eth0.
# A more sophisticated kill switch might also block all traffic until tun0 is up.
# sudo iptables -A FORWARD -i docker0 ! -o tun0 -j DROP
# sudo iptables -t nat -A POSTROUTING -s 172.17.0.0/16 ! -o tun0 -j DROP

# Save iptables rules (if using iptables-persistent)
# sudo apt-get install iptables-persistent
# sudo netfilter-persistent save
Important Note: iptables rules are volatile and reset on reboot unless saved. Use iptables-persistent (Debian/Ubuntu) or firewalld (CentOS/RHEL) with rich rules to make them permanent.
4. Configure Docker Containers
Now, when you run Docker containers, they will automatically use the host's VPN connection. You don't need any special flags for the containers themselves.
docker run -it --rm ubuntu bash
Inside the container, test the public IP:
root@<container-id>:/# apt update && apt install -y curl
root@<container-id>:/# curl ifconfig.me
The IP address reported by curl ifconfig.me inside the container should be the same public IP as your host when it's connected to the VPN.
5. Handling DNS Resolution
When the host connects to a VPN, it often receives new DNS servers from the VPN server. Ensure your containers use these DNS servers to resolve domain names that might only be accessible via the VPN. Docker containers inherit DNS settings from the host by default, but sometimes the resolv.conf in the container might not fully reflect the VPN's DNS.
You can explicitly configure Docker to use specific DNS servers: * For individual containers: bash docker run --dns 1.2.3.4 --dns 8.8.8.8 -it --rm ubuntu bash (Replace 1.2.3.4 with your VPN's DNS server and 8.8.8.8 with a fallback if needed). * For all containers (edit /etc/docker/daemon.json): json { "dns": ["1.2.3.4", "8.8.8.8"] } After editing daemon.json, restart the Docker daemon: sudo systemctl restart docker.
6. Verification and Troubleshooting
- No Internet Access: Check your
iptablesrules carefully. EnsureFORWARDrules allow traffic andMASQUERADEis correctly set. Check VPN connection on the host. - IP Leakage: If
curl ifconfig.meshows your host's non-VPN IP, youriptables -t nat -A POSTROUTINGrule might be incorrect or overridden. The "kill switch" rules are essential here. - DNS Issues: Verify
resolv.confinside the container. Trypingto IP addresses (e.g.,8.8.8.8) to isolate DNS problems from general connectivity.
This host-level approach simplifies container management but places a greater burden on host network configuration and security. It's an excellent choice when all containers on a given host need to share the same VPN egress gateway.
APIPark is a high-performance AI gateway that allows you to securely access the most comprehensive LLM APIs globally on the APIPark platform, including OpenAI, Anthropic, Mistral, Llama2, Google Gemini, and more.Try APIPark now! 👇👇👇
Method 3: Dedicated VPN Container (VPN as a Sidecar or Gateway Container)
This method strikes a balance between the isolation of Method 1 and the centralized management of Method 2. Here, a dedicated container is responsible for establishing and maintaining the VPN connection, and other application containers are configured to route their traffic through this VPN container, which acts as a network gateway for them.
Concept and Principles
Instead of running a VPN client in every application container or on the host, a specialized "VPN container" is created. This container runs the VPN client (e.g., OpenVPN, WireGuard) and exposes its network interface. Other application containers then connect to this VPN container either by sharing its network namespace or by routing their traffic through a custom Docker network where the VPN container acts as the default gateway. This approach compartmentalizes the VPN logic into a single, manageable unit, allowing application containers to remain clean and focused on their primary function. The VPN container effectively serves as a transparent proxy or a network gateway, funneling all designated outbound traffic through its secure tunnel.
Pros and Cons
Pros: * Centralized VPN Management within Docker: The VPN client is managed as a Docker container, fitting naturally into container orchestration workflows (Docker Compose, Kubernetes). * Application Container Cleanliness: Application containers remain lightweight, don't require VPN binaries, and run without elevated privileges (NET_ADMIN). * Isolation of VPN Logic: VPN credentials and client software are isolated within the VPN container. * Flexibility: Easily connect multiple application containers to a single VPN gateway container. * Portability (within Orchestration): The entire setup (VPN container + app containers) can be easily deployed with docker-compose or Kubernetes YAMLs.
Cons: * More Complex Orchestration: Requires careful docker-compose or Kubernetes configuration to set up network sharing or custom routing. * Single Point of Failure: If the VPN container fails, all dependent application containers lose their VPN access. * Resource Usage: The VPN container still consumes resources for running the VPN client. * Privileged VPN Container: The VPN container itself still requires NET_ADMIN capabilities.
Step-by-Step Guide (Example with Docker Compose using network_mode: service:)
This is a common and relatively straightforward way to implement a dedicated VPN container, especially with Docker Compose. It leverages Docker's --network=container:<id|name> or network_mode: service: feature, which allows containers to share the same network namespace. This means they will have the same IP address, network interfaces, and routing table.
1. Prepare Your VPN Configuration
As in Method 1, have your VPN client configuration file ready. For WireGuard, this would be a .conf file. For OpenVPN, a .ovpn file. Let's assume it's wg0.conf for WireGuard, as it's often simpler to configure.
# Example wg0.conf for WireGuard client (simplified)
[Interface]
PrivateKey = <YOUR_CLIENT_PRIVATE_KEY>
Address = 10.0.0.2/24 # IP assigned by VPN server
DNS = 1.1.1.1

[Peer]
PublicKey = <VPN_SERVER_PUBLIC_KEY>
Endpoint = your.vpn.server.com:51820
AllowedIPs = 0.0.0.0/0 # Route all traffic through VPN
Place this wg0.conf file in a vpn/ subdirectory.
2. Create a Dockerfile for the VPN Container
This Dockerfile will build a minimal image that runs the WireGuard client.
# File: vpn/Dockerfile
FROM debian:stable-slim

# Install WireGuard and iproute2
RUN apt-get update && \
    apt-get install -y wireguard-tools iproute2 curl netcat-traditional && \
    apt-get clean && \
    rm -rf /var/lib/apt/lists/*

# Copy the WireGuard config file
# In production, mount this as a volume for secrets management.
COPY wg0.conf /etc/wireguard/wg0.conf

# Add a script to start WireGuard and keep the container alive
COPY start-vpn.sh /usr/local/bin/start-vpn.sh
RUN chmod +x /usr/local/bin/start-vpn.sh

# Entrypoint to start the VPN and then loop indefinitely
CMD ["/usr/local/bin/start-vpn.sh"]
3. Create the start-vpn.sh Script for the VPN Container
This script starts WireGuard and then waits for the wg0 interface to come up before keeping the container alive.
#!/bin/bash

echo "Starting WireGuard VPN client..."
# Bring up the WireGuard interface (wg0 is the default name for /etc/wireguard/wg0.conf)
# This requires NET_ADMIN capability.
wg-quick up wg0 &

# Wait for the wg0 interface to be up and have an IP address
echo "Waiting for wg0 interface..."
until ip link show wg0 > /dev/null 2>&1 && ip addr show wg0 | grep -q 'inet '; do
    echo "Still waiting for wg0..."
    sleep 2
done

echo "WireGuard interface wg0 is up and configured!"
ip addr show wg0
ip route show

echo "Verifying VPN IP address..."
# Use netcat with a timeout for a more robust check in a script
PUBLIC_IP=$(nc -w 5 ifconfig.me 80 < /dev/null | grep -E -o "([0-9]{1,3}\.){3}[0-9]{1,3}")
echo "VPN container public IP: ${PUBLIC_IP}"

# Keep the container running indefinitely
echo "VPN container running. App containers can now share its network."
tail -f /dev/null
Place this start-vpn.sh file in the vpn/ subdirectory.
4. Create a docker-compose.yml File
This file orchestrates the VPN container and your application container, making the application container share the VPN container's network.
# File: docker-compose.yml
version: '3.8'

services:
  vpn-client:
    build:
      context: ./vpn # Build from the 'vpn' subdirectory
      dockerfile: Dockerfile
    container_name: vpn-client
    cap_add:
      - NET_ADMIN # Required for WireGuard to manipulate network interfaces
      - SYS_MODULE # Required to load WireGuard kernel module if not built-in or pre-loaded on host
    # Volumes: Mount your WireGuard config if you don't want to bake it into the image
    # - ./vpn/wg0.conf:/etc/wireguard/wg0.conf:ro
    restart: unless-stopped
    sysctls:
      - net.ipv4.conf.all.src_valid_mark=1 # Required for WireGuard on some setups

  my-application:
    image: alpine/git # Example application container
    container_name: my-application
    network_mode: service:vpn-client # IMPORTANT: Share the network namespace of vpn-client
    # You can specify other parameters for your application
    # command: sh -c "sleep 5 && echo 'Checking public IP from app container:' && curl ifconfig.me"
    # To demonstrate a long-running app checking IP continuously:
    command: sh -c "apk add --no-cache curl && while true; do echo 'My public IP from app container:'; curl -s ifconfig.me; sleep 10; done"
    restart: unless-stopped
5. Build and Run with Docker Compose
Navigate to the directory containing your docker-compose.yml file and the vpn/ subdirectory.
docker compose up --build -d
6. Verification
- Check VPN Container Logs:
bash docker logs vpn-clientYou should see WireGuard starting,wg0coming up, and the public IP being reported. - Check Application Container Logs:
bash docker logs my-applicationThe application container should report the same public IP as the VPN container, confirming it's routing through the VPN. - Inspect Network Interfaces:
bash docker exec vpn-client ip addr show docker exec my-application ip addr showYou will notice that both containers report the exact same network interfaces (e.g.,eth0,lo, andwg0). This is because they share the same network namespace. Their routing tables will also be identical.
Alternative: VPN Container as a Routed Gateway (More Complex)
Instead of network_mode: service:, you could create a custom Docker network and configure the VPN container to act as a router (a gateway) for other containers on that network. This involves: 1. Creating a custom Docker bridge network. 2. Connecting the VPN container to this custom network and its own VPN tunnel. 3. Configuring iptables rules inside the VPN container to forward traffic from the custom Docker network to its VPN tunnel, and perform NAT. 4. Configuring application containers to use this custom network and manually set the VPN container's IP on that network as their default gateway.
This method offers more network isolation between the VPN gateway and application containers (they don't share the same IP/interfaces), but significantly increases iptables and routing complexity within the VPN container itself. For most use cases, network_mode: service: is simpler and sufficient.
Regardless of the chosen sub-method, the core benefit is centralizing the VPN gateway functionality into a dedicated, manageable container, abstracting the VPN complexity away from your core application logic.
Method 4: Kubernetes Specifics and VPN Integration
Integrating VPN routing into a Kubernetes cluster introduces additional layers of abstraction and complexity due to Kubernetes's own networking model (Pods, Services, Ingress, CNI plugins). However, the fundamental principles remain similar to Docker, adapting the methods for a distributed, orchestrated environment. Kubernetes environments benefit greatly from the robust traffic management and lifecycle features offered by tools like APIPark. Just as a VPN gateway ensures secure ingress and egress for your services, a platform like APIPark provides an advanced API gateway functionality, ensuring secure, efficient, and monitored access to your APIs, whether they reside behind a VPN or are exposed publicly.
Concepts in Kubernetes Networking
- Pods: The smallest deployable unit in Kubernetes, typically containing one or more containers that share network and storage resources. All containers within a Pod share the same network namespace and IP address.
- Cluster Network: Kubernetes uses a Container Network Interface (CNI) plugin (e.g., Calico, Flannel, Cilium) to provide Pod-to-Pod communication across the cluster, ensuring each Pod gets its own IP address within a flat network.
- Services: Abstract ways to expose a set of Pods as a network service.
- Network Policies: Kubernetes resource to control traffic flow between Pods/namespaces.
Options for VPN Integration in Kubernetes
- Node-Level VPN:
- Concept: Similar to Method 2 (Host-Level VPN Routing). Each Kubernetes worker node connects to the VPN server.
- Implementation: Install the VPN client (OpenVPN, WireGuard) directly on each worker node. Configure
iptableson each node to route all Pod traffic originating from that node's CNI-managed network interface through the node's VPN tunnel. This essentially makes each node's VPN connection the egress gateway for its Pods. - Pros: Simplest to manage for application Pods, as they don't need any VPN-specific configuration. Centralized VPN management on nodes.
- Cons: Less granular (all Pods on a node share the VPN). Requires privileged access to each node. If a node's VPN drops, its Pods might leak traffic. Scaling requires configuring VPN on new nodes.
- Considerations: This works best when all Pods on all nodes need to route through the same VPN. Requires
hostNetwork: truefor the VPN client itself, or careful routing to ensure it can reach the VPN server.
- Sidecar VPN Container within a Pod:
- Concept: Similar to Method 1 and Method 3's
network_mode: service:. A dedicated VPN client container runs alongside the application container(s) within the same Pod. Since containers in a Pod share the same network namespace, the application container's traffic naturally flows through the VPN tunnel established by the sidecar. - Implementation: Define a multi-container Pod where one container runs the VPN client (e.g., a WireGuard client) and the other runs your application. The VPN container needs
NET_ADMINcapability. AninitContainercan be used to wait for the VPN tunnel to establish before the main application container starts. - Pros: Excellent isolation per Pod. Application containers remain clean. Very granular control. Highly portable with Pod YAML definitions.
- Cons: Increases Pod complexity. Each Pod needs its own VPN connection and credentials (though secrets can help). Resource overhead per Pod.
NET_ADMINcapability granted to the VPN sidecar. - Example Kubernetes YAML for a Sidecar:
``yaml apiVersion: v1 kind: Pod metadata: name: my-vpn-app-pod spec: # If the VPN client needs to load kernel modules like WireGuard, # it might need to run with host privileges or require kernel module pre-loading. # For WireGuard specifically, hostNetwork is often used for simplicity, # or a specific WireGuard CNI plugin might be deployed. # For a pure sidecar,initContainersandcapabilities` are key.# An initContainer to ensure the VPN is up before the app starts initContainers: - name: wait-for-vpn image: debian:stable-slim command: ["sh", "-c", "echo 'Waiting for VPN tunnel (wg0) in sidecar...'; until ip link show wg0 > /dev/null 2>&1; do sleep 2; done; echo 'VPN tunnel up!'"] # This initContainer shares the network namespace of the main Pod, # so it can check for wg0 created by the 'vpn-client' sidecar. # No special capabilities are needed for just checking.containers: - name: vpn-client # The dedicated VPN client sidecar image: your-wireguard-client-image:latest # Build this image similar to Method 3 (vpn/Dockerfile) command: ["/usr/local/bin/start-vpn.sh"] # The script to bring up WireGuard securityContext: capabilities: add: ["NET_ADMIN", "NET_RAW"] # Required for WireGuard # Mount VPN config as a secret or configMap volumeMounts: - name: vpn-config mountPath: /etc/wireguard/wg0.conf subPath: wg0.conf readOnly: true # Optionally expose status port for health checks # ports: # - containerPort: 8080 # Example for a VPN status servervolumes: - name: vpn-config secret: secretName: wireguard-config-secret # Kubernetes secret holding your wg0.conf items: - key: wg0.conf path: wg0.conf**Creating the Kubernetes Secret for WireGuard Config:**bash kubectl create secret generic wireguard-config-secret --from-file=wg0.conf=/path/to/your/wg0.conf ```- name: my-application # Your actual application container image: alpine/git # Replace with your application image command: ["sh", "-c", "apk add --no-cache curl && while true; do echo 'My public IP from app container:'; curl -s ifconfig.me; sleep 10; done"] # No special network configuration needed, it shares the Pod's network with vpn-client. # It inherently uses the VPN tunnel established by the sidecar.
- Concept: Similar to Method 1 and Method 3's
- Dedicated VPN Egress Pod/Deployment:
- Concept: A dedicated Pod or Deployment (e.g., named
vpn-egress-gateway) runs the VPN client. Other application Pods are then configured to route their traffic through this egress gateway Pod. This is more complex and often involves advanced CNI features, network policies, or a service mesh. - Implementation:
- The VPN egress Pod needs
hostNetwork: true(or carefuliptablesand routing) andNET_ADMIN. - You'd configure your CNI (e.g., Calico, Cilium) to route specific egress traffic from application Pods to the IP address of the
vpn-egress-gatewayPod. This often involves creating custom network policies or using features like "egress gateway" in some CNI plugins. - This effectively makes the VPN egress Pod a centralized network gateway for a subset of your cluster's traffic.
- The VPN egress Pod needs
- Pros: Centralized VPN management, application Pods are clean, high degree of network segmentation.
- Cons: Most complex to set up, heavily reliant on specific CNI plugin features, high operational overhead.
- Concept: A dedicated Pod or Deployment (e.g., named
Considerations for Kubernetes
hostNetwork: true: While useful for VPN clients that need direct access to host network interfaces, it compromises Pod network isolation and should be used cautiously.initContainers: Essential for ensuring the VPN tunnel is fully established before the application attempts to use it, preventing application startup failures and potential traffic leaks.securityContext.capabilities: Always restrict capabilities to the minimum required (NET_ADMINis often necessary for VPN clients).- Secrets Management: Store VPN configuration files (keys, certificates) in Kubernetes Secrets and mount them into the VPN container. Avoid baking them into images.
- Health Checks: Implement readiness probes for your application containers that check external connectivity after the VPN is expected to be up, to ensure the application only serves traffic when the VPN tunnel is functional.
- CNI Plugin Compatibility: Some CNI plugins (e.g., Cilium with BPF) offer advanced routing and policy capabilities that can simplify egress traffic redirection to a VPN gateway Pod.
- Network Policies: Use Kubernetes Network Policies to enforce that application Pods can only egress traffic through the VPN gateway (or sidecar) and cannot bypass it.
Kubernetes offers powerful tools for orchestrating containerized VPN solutions, but requires a deeper understanding of its networking model and security implications. The choice between node-level, sidecar, or dedicated egress Pods depends on the specific security, isolation, and operational requirements of your deployment.
Advanced Considerations and Best Practices
Beyond the fundamental setup, several advanced considerations and best practices are crucial for building a robust, secure, and performant container-VPN routing solution. These elements ensure reliability, maintainability, and address potential pitfalls that can arise in production environments.
Security Best Practices
Security should always be at the forefront when dealing with network configurations and VPNs. * Least Privilege: Grant containers and host processes only the minimum necessary capabilities and permissions. If a container needs NET_ADMIN, ensure it's a trusted image and only performs VPN-related tasks. Avoid running containers as root unless absolutely necessary. * Firewall Rules (Host and Container): Implement strict iptables rules on the Docker host to control traffic flow. Block incoming connections to container ports unless explicitly needed. Within containers, consider using ufw or similar if supported by the base image, or more granular iptables if the container has NET_ADMIN. Ensure the VPN gateway itself is protected from unauthorized access. * Secure VPN Server Configuration: Your VPN server is the linchpin of your secure tunnel. Ensure it's configured with strong encryption, robust authentication (client certificates, multi-factor authentication), and kept up-to-date. Regularly audit its logs. * Certificate and Key Management: Never hardcode sensitive VPN credentials (private keys, certificates) directly into Docker images. Use Docker secrets, Kubernetes Secrets, or volume mounts (read-only) for secure injection at runtime. Implement proper certificate rotation policies. * Docker Content Trust: Enable Docker Content Trust to verify the integrity and authenticity of container images, protecting against supply chain attacks. * Regular Security Audits: Periodically review your iptables rules, VPN configurations, and container capabilities to ensure they align with your security posture and haven't introduced new vulnerabilities.
Performance Optimization
Routing traffic through a VPN inherently introduces some overhead due to encryption and decryption. Optimizing performance can be crucial for high-throughput applications. * Choosing Efficient VPN Protocols: WireGuard is generally faster and more lightweight than OpenVPN, especially on constrained resources, due to its modern cryptography and simplified design. If performance is critical, WireGuard is often the preferred choice. * Hardware Acceleration: Some CPUs support AES-NI instruction sets, which can significantly accelerate AES encryption/decryption. Ensure your VPN client and kernel are configured to utilize this if available on your host hardware. * Network Tuning: Optimize kernel network parameters (e.g., net.core.somaxconn, net.ipv4.tcp_tw_reuse) on the host if you encounter network bottlenecks. Ensure sufficient bandwidth between your Docker host and the VPN server. * Minimize Hops: Position your Docker host or Kubernetes cluster geographically close to your VPN server to reduce latency.
Monitoring and Logging
Visibility into your network traffic and VPN status is paramount for troubleshooting, security, and performance. * VPN Client Logs: Configure your VPN client (OpenVPN, WireGuard) to log verbosely. Monitor these logs for connection status, errors, and traffic statistics. Integrate them with your centralized logging solution (e.g., ELK stack, Prometheus/Loki). * Container Network Logs: Tools like tcpdump or tshark can be run within a container (if NET_ADMIN or NET_RAW is granted) or on the host (filtering by container interfaces) to inspect packet flow. * Host Network Logs: Monitor iptables logs (dmesg, /var/log/syslog) for dropped packets or unusual activity related to your routing rules. * Importance for Troubleshooting: Comprehensive logging is your first line of defense against connectivity issues, misconfigurations, or suspected security breaches. Detailed logs allow you to trace the path of packets, identify where they are being dropped or misrouted, and understand the state of your VPN connection. * Data Analysis: Analyzing historical network and API call data can reveal long-term trends, performance degradation, and potential bottlenecks before they escalate into critical issues. Solutions that provide powerful data analysis capabilities are invaluable for preventive maintenance and operational intelligence. For organizations managing a myriad of services, particularly those exposed as APIs, robust logging and analytics are vital. APIPark, for instance, an Open Source AI Gateway & API Management Platform, offers detailed API call logging and powerful data analysis features. This can be immensely helpful in monitoring the health and performance of your services, especially when they rely on complex network infrastructure like container-VPN routing. Such platforms enable businesses to quickly trace and troubleshoot issues in API calls, ensuring system stability and data security, much like monitoring your VPN gateway itself ensures the stability of your secure tunnel.
Handling DNS Resolution
Correct DNS resolution is often a subtle point of failure in VPN setups. * VPN Client's DNS: Ensure your VPN client pushes appropriate DNS servers to the client or that you configure your Docker daemon/containers to use the VPN's DNS servers. * Custom DNS Servers in Docker: Use docker run --dns or the dns option in /etc/docker/daemon.json to explicitly configure DNS resolvers for your containers. * resolv.conf Management: Be aware that Docker containers have their own /etc/resolv.conf. Verify its contents after VPN connection to ensure it reflects the correct DNS servers. If using network_mode: host or network_mode: service:vpn-client, the container inherits the host's DNS settings, which should be updated by the VPN client.
Persistent VPN Connections
For production environments, ensure your VPN connection is resilient and automatically re-establishes itself after disconnections or reboots. * Systemd Services: Create systemd service units for your VPN client (e.g., openvpn@client.service, wg-quick@wg0.service) on the host or within a dedicated VPN container (if using systemd in the container, though often not recommended). This ensures the VPN starts at boot and restarts on failure. * supervisord: Within containers, supervisord can manage processes like the VPN client and your application, ensuring they stay running and restarting them if they crash.
Traffic Leakage Prevention (Kill Switch)
A crucial security measure to prevent container traffic from bypassing the VPN tunnel if the connection drops. * iptables Rules: Implement strict iptables rules on the host (Method 2) or within the VPN container (Method 3) that block all traffic from your container subnets from exiting via any interface other than the VPN tunnel. * VPN Client Features: Some VPN clients or third-party tools offer built-in "kill switch" functionality that automatically blocks internet access if the VPN connection is lost.
Network Segmentation
For advanced scenarios, further segmenting your container networks enhances security and control. * Custom Docker Networks: Instead of relying solely on docker0, create custom Docker bridge networks for different groups of containers. This allows you to apply specific routing and firewall rules to each segment. * Subnetting: Plan your IP address ranges carefully to avoid conflicts with your VPN's assigned subnet and to enable clear segmentation.
By diligently addressing these advanced considerations, you can transform a basic container-VPN setup into a robust, secure, and highly reliable component of your infrastructure.
Troubleshooting Common Issues
Even with careful planning and execution, problems can arise when routing container traffic through a VPN. Here's a guide to diagnosing and resolving common issues.
1. VPN Connection Failure
Symptom: The VPN client (on host or in container) fails to connect, or the tun0/wg0 interface doesn't appear. * Check VPN Client Logs: The most important first step. Look for error messages in the OpenVPN log (/var/log/openvpn.log or specified log file) or WireGuard (journalctl -u wg-quick@wg0 on host, or container logs). Common errors include: * TLS handshake failed: Often indicates certificate/key issues, incorrect server IP/port, or firewall blocking. * auth_failed: Incorrect username/password. * Connection refused: Server not running, wrong port, or server firewall blocking. * Cannot allocate TUN/TAP device: Missing NET_ADMIN capability (for containers) or tun kernel module (on host), or dev/net/tun not available. * Firewall on Host/Server: Ensure the Docker host's firewall (e.g., ufw, firewalld, iptables) or the VPN server's firewall isn't blocking the VPN port (e.g., UDP 1194 for OpenVPN, UDP 51820 for WireGuard). * VPN Server Status: Verify the VPN server itself is up and running and accepting connections. * Network Connectivity to VPN Server: From the host or VPN container, try ping or nc -vz <vpn_server_ip> <vpn_port> to ensure basic network reachability to the VPN server. * Kernel Modules: For WireGuard, ensure the wireguard kernel module is loaded (lsmod | grep wireguard). If running in a container, this usually needs to be loaded on the host.
2. No Internet Access from Container (VPN Connected)
Symptom: The VPN appears connected (e.g., tun0 is up, logs show success), but curl ifconfig.me in the container shows your host's IP or fails to connect. * Verify Host-Level VPN Connection (Method 2): If the host-level VPN is used, first ensure the host itself can access the internet via the VPN. curl ifconfig.me on the host should show the VPN IP. If not, the issue is with the host's VPN setup, not Docker. * iptables Rules (Method 2 & 3 - Router Container): This is the most common culprit. * IP Forwarding: Ensure net.ipv4.ip_forward is enabled on the host (sysctl net.ipv4.ip_forward). * FORWARD Chain: Verify iptables -vnL FORWARD shows rules allowing traffic from your Docker bridge (docker0 or custom bridge) to the VPN tunnel interface (tun0/wg0) and vice-versa. * POSTROUTING (NAT) Rule: Crucially, check iptables -t nat -vnL POSTROUTING. There MUST be a MASQUERADE rule (or SNAT) for traffic originating from your Docker subnet (172.17.0.0/16 or your custom range) that is leaving via the VPN tunnel interface (-o tun0). Without this, the VPN server won't know where to send return traffic. * Routing Tables: * On Host: ip route show should show a default route via tun0/wg0 when the VPN is up. * In VPN Container (Method 3 - Network Share): docker exec <app-container> ip route show should show the VPN tunnel interface and routes pushed by the VPN. * Kill Switch Interference: If you've implemented a kill switch (e.g., iptables -j DROP rules), temporarily disable them to see if they are inadvertently blocking legitimate traffic.
3. Incorrect Routing / IP Leakage
Symptom: Some traffic goes via VPN, some via regular internet. curl ifconfig.me shows your host's real IP, even with VPN seemingly active. * Order of iptables Rules: The order of iptables rules matters. Ensure your MASQUERADE and FORWARD rules for VPN routing are not being overridden by more general rules or Docker's default rules. Specific rules for Docker traffic should come before general MASQUERADE rules for the host. * VPN AllowedIPs (WireGuard) or redirect-gateway def1 (OpenVPN): Ensure your VPN client configuration is set to route all traffic through the VPN (a "full tunnel"). In WireGuard, this is AllowedIPs = 0.0.0.0/0. In OpenVPN, redirect-gateway def1 ensures the default route is pushed. * Conflicting Routes: Check ip route show on the host or inside the VPN container. Look for specific routes that might be taking precedence over the VPN's default route. Sometimes, static routes or DHCP options can create conflicts.
4. DNS Resolution Problems
Symptom: Can ping 8.8.8.8 (Google DNS) but cannot ping google.com from the container. * resolv.conf in Container: Check the /etc/resolv.conf file inside the container: docker exec <container-name> cat /etc/resolv.conf. Ensure it lists valid and reachable DNS servers, preferably those provided by your VPN. * Docker DNS Configuration: * If running docker run --dns <ip>, verify the IP is correct and reachable. * If using /etc/docker/daemon.json, ensure the dns array has the correct VPN DNS servers and you've restarted Docker (systemctl restart docker). * For network_mode: service:vpn-client, the application container shares the VPN container's DNS. Ensure the VPN container is configured to use the VPN's DNS or passes it down. * VPN DNS Servers Reachability: Ensure the DNS servers provided by the VPN are actually reachable through the VPN tunnel. Try ping <vpn_dns_ip> from within the VPN tunnel.
5. Permission Errors (NET_ADMIN)
Symptom: VPN client fails with errors like "Cannot create TUN/TAP device", "Permission denied", or "Operation not permitted". * --cap-add=NET_ADMIN: Ensure you're running the VPN container or a container with an embedded VPN client with docker run --cap-add=NET_ADMIN. For Kubernetes Pods, this means adding NET_ADMIN to the securityContext.capabilities.add section of the VPN container. * dev/net/tun Device: Ensure the /dev/net/tun device exists on your host and is accessible. Docker typically mounts this by default, but some minimal Linux installations might not have the tun module loaded (modprobe tun).
6. iptables Conflicts or Unexpected Behavior
Symptom: Network behaves erratically, or your iptables rules don't seem to take effect. * Rule Persistence: Remember that iptables rules are volatile. If you reboot, they disappear unless explicitly saved. Use iptables-persistent or firewalld to make them permanent. * Conflicting Firewalls: If you have ufw or firewalld running on the host, they might be overriding or conflicting with your manual iptables rules. It's often best to manage rules consistently through one system. * Docker's iptables Management: Docker itself adds iptables rules for its bridge networks. Avoid directly flushing all iptables rules (e.g., iptables -F) unless you know how to restore Docker's essential rules or you are rebuilding Docker's network from scratch. Carefully inspect iptables -vnL and iptables -t nat -vnL to understand the full set of rules.
By systematically going through these troubleshooting steps, examining logs, and inspecting network configurations, you can effectively diagnose and resolve most issues encountered when routing container traffic through a VPN. Patience and a methodical approach are key.
Conclusion
Routing container traffic through a Virtual Private Network is a powerful and versatile technique that significantly enhances the security, privacy, and connectivity of your containerized applications. As we've meticulously explored through various methods, from embedding VPN clients directly within containers to leveraging host-level VPNs and orchestrating dedicated VPN gateway containers in Docker Compose and Kubernetes, there's a solution tailored for almost every operational requirement. Each approach offers distinct advantages and trade-offs, making the choice dependent on your specific needs for isolation, ease of management, and performance.
The fundamental concepts of container networking, VPN tunneling, and the critical role of a network gateway underpin all these methods. Understanding how packets traverse virtual bridges, how iptables rules modify their path, and how VPN protocols encrypt and encapsulate data is not merely academic; it's the bedrock for successful implementation and effective troubleshooting. This guide has aimed to demystify these complex interactions, providing you with a step-by-step blueprint to configure and verify your secure container network.
Beyond the initial setup, we delved into advanced considerations such as rigorous security best practices, performance optimization, comprehensive monitoring and logging, robust DNS management, and the crucial implementation of kill switches to prevent traffic leakage. These elements are not mere afterthoughts but essential components for building production-ready, resilient systems. For enterprises managing a complex landscape of services, the ability to monitor and analyze network traffic, including detailed API call logs, becomes paramount. Platforms like APIPark, an Open Source AI Gateway & API Management Platform, offer advanced capabilities in API lifecycle management, traffic forwarding, and robust data analytics. Such tools complement secure container routing by providing deeper insights into service interactions, enabling proactive maintenance and ensuring system stability, much like the diligent management of your VPN gateway ensures the integrity of your network tunnel.
The landscape of containerization and networking continues to evolve rapidly, with new CNI plugins, service mesh technologies, and security paradigms constantly emerging. However, the core principles of routing and network segmentation remain timeless. By mastering the techniques outlined in this guide, you equip yourself with the knowledge to build more secure, compliant, and globally accessible containerized applications, ready to meet the challenges of modern distributed systems. The journey to a fully secure and optimized container infrastructure is continuous, but with a solid foundation in VPN integration, you are well on your way to achieving network excellence.
Frequently Asked Questions (FAQ)
1. Why should I route my containers through a VPN instead of just using the host's direct internet connection? Routing containers through a VPN provides enhanced security, privacy, and access control. It encrypts all network traffic, protecting sensitive data from interception on public networks. It can also mask the container's (and thus your host's) real IP address, bypass geo-restrictions, and securely connect to private corporate or cloud networks that are otherwise inaccessible from the public internet. This is crucial for compliance, accessing internal resources, and ensuring data confidentiality.
2. Which VPN protocol is best for routing container traffic, OpenVPN or WireGuard? Both OpenVPN and WireGuard are excellent choices, each with distinct advantages. * OpenVPN is mature, highly flexible, and very secure, supporting both TCP and UDP. It's well-suited for robust, secure connections but can be more resource-intensive and complex to configure. * WireGuard is a newer, modern VPN protocol known for its extreme speed, lightweight nature, and simpler configuration, relying on UDP. It's often preferred for performance-critical applications and is gaining rapid adoption. The best choice depends on your specific needs for performance, security, and ease of deployment.
3. What are the key differences between running a VPN client inside a container vs. on the host machine? * VPN Client Inside Container: Offers granular control, isolation (VPN connection is specific to that container), and portability. However, it increases container image size, requires NET_ADMIN capabilities for each VPN container, and can be more complex to manage for many containers. * VPN Client on Host: Provides centralized management, lighter application containers (no VPN client needed), and simpler setup for multiple containers on the same host. The host's VPN acts as a central gateway. However, it offers less granular control (all host/container traffic might use VPN), and requires careful iptables configuration to prevent IP leakage if the VPN drops.
4. How can I ensure my container's traffic doesn't "leak" to the internet if the VPN connection drops? Implementing a "kill switch" is crucial for preventing IP leakage. This typically involves configuring iptables rules on your Docker host (for host-level VPNs) or within your dedicated VPN container (for sidecar/gateway methods). These rules should explicitly block all traffic originating from your container's subnet from exiting via any network interface other than the active VPN tunnel interface (e.g., tun0 or wg0). Some VPN clients also offer built-in kill switch features that can be enabled.
5. Can I use these methods with Kubernetes, and what are the main considerations? Yes, these methods can be adapted for Kubernetes. The main approaches include: * Node-Level VPN: Installing a VPN client on each Kubernetes worker node, similar to the host-level method. * Sidecar VPN Container: Deploying a VPN client as a sidecar container within the same Pod as your application, sharing its network namespace. This is a very common and effective Kubernetes approach. * Dedicated VPN Egress Pod: A more advanced method where a specific Pod acts as a VPN gateway for other application Pods, often involving advanced CNI features or network policies. Key considerations for Kubernetes include managing NET_ADMIN capabilities, using initContainers to ensure VPN readiness, handling secrets for VPN credentials, and understanding Kubernetes networking (Pods, CNI plugins, Network Policies) to correctly route traffic.
🚀You can securely and efficiently call the OpenAI API on APIPark in just two steps:
Step 1: Deploy the APIPark AI gateway in 5 minutes.
APIPark is developed based on Golang, offering strong product performance and low development and maintenance costs. You can deploy APIPark with a single command line.
curl -sSO https://download.apipark.com/install/quick-start.sh; bash quick-start.sh

In my experience, you can see the successful deployment interface within 5 to 10 minutes. Then, you can log in to APIPark using your account.

Step 2: Call the OpenAI API.