How to Create a Proxy in MuleSoft: A Step-by-Step Guide


In the rapidly evolving landscape of digital connectivity, Application Programming Interfaces (APIs) have emerged as the foundational building blocks for modern software development, enabling seamless communication between disparate systems and services. As organizations increasingly rely on a complex web of internal and external APIs to drive their digital transformations, the need for robust, secure, and manageable API infrastructure becomes paramount. This is where the concept of an API proxy – and more broadly, an API gateway – takes center stage.
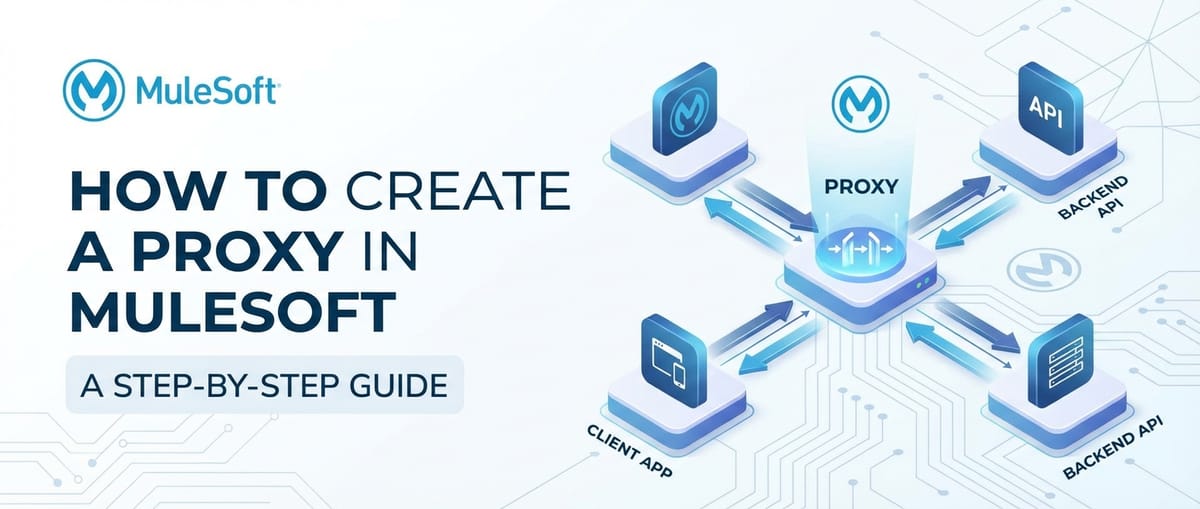
MuleSoft, with its Anypoint Platform, offers a comprehensive solution for API-led connectivity, allowing enterprises to design, build, deploy, and manage APIs with exceptional agility and control. A key component of this platform is its ability to create proxies, which act as a crucial intermediary layer between API consumers and the backend services they wish to access. These proxies are far more than simple forwarding agents; they are intelligent gateways that can enforce policies, manage traffic, provide security, and gather invaluable insights into API usage.
This extensive guide will delve deep into the mechanics of creating a proxy in MuleSoft, providing a step-by-step walkthrough suitable for both seasoned developers and those new to the Anypoint Platform. We will explore the "why" behind using proxies, the myriad benefits they offer, and the practical "how-to" of implementing them, ensuring you gain a thorough understanding of this critical API management capability. By the end of this article, you will be equipped with the knowledge to leverage MuleSoft proxies effectively, enhancing your API security, performance, and overall governance.
Understanding the Landscape: APIs, Proxies, and Gateways
Before we dive into the practical aspects of MuleSoft, it's essential to establish a clear understanding of the core concepts we'll be discussing: APIs, API proxies, and API gateways. These terms are often used interchangeably, but each plays a distinct yet interconnected role in the modern digital architecture.
An API (Application Programming Interface) is essentially a set of rules and protocols for building and interacting with software applications. It defines how software components should interact, specifying the types of calls or requests that can be made, how to make them, the data formats to use, and the conventions to follow. Think of an API as a menu in a restaurant: it tells you what you can order, but not how the kitchen prepares it.
An API proxy, in its simplest form, is an intermediary service that sits in front of a backend API. When a consumer makes a request to the proxy, the proxy forwards that request to the actual backend service. It then receives the response from the backend service and forwards it back to the consumer. This might seem like an unnecessary extra step, but the true power of a proxy lies in the capabilities it can add to this forwarding process. It can intercept requests and responses to apply policies, transform data, route traffic, and perform various other functions without requiring any changes to the backend service itself.
An API gateway is a more sophisticated and comprehensive version of an API proxy. While a proxy typically focuses on a single API or a small group, an API gateway often serves as a single entry point for all APIs within an organization or a specific domain. It acts as a central management layer, handling concerns such as authentication, authorization, rate limiting, traffic management, monitoring, and even caching for a multitude of backend services. The API gateway pattern is fundamental to modern microservices architectures, providing a unified facade for a complex ecosystem of services. In essence, all API gateways incorporate proxying capabilities, but not all proxies are full-fledged API gateways. MuleSoft's Anypoint Platform is designed to function as a robust API gateway, providing extensive features beyond basic proxying.
The Indispensable Role of an API Proxy (and Gateway)
Why would an organization intentionally introduce an additional layer between its consumers and its backend services? The reasons are compelling and touch upon almost every facet of API management, from security to scalability to user experience. A well-implemented API gateway or proxy offers a multitude of benefits:
Enhanced Security Posture
One of the primary drivers for deploying an API gateway is to bolster security. By acting as the sole entry point, the gateway can enforce a consistent security policy across all exposed APIs. This includes:
- Authentication and Authorization: The gateway can handle user authentication (e.g., OAuth 2.0, OpenID Connect, JWT) and ensure that only authorized users or applications can access specific resources. This offloads security responsibilities from individual backend services, simplifying their development and ensuring consistency.
- Threat Protection: Proxies can filter malicious requests, detect and prevent denial-of-service (DoS) attacks, validate input parameters, and shield backend systems from common web vulnerabilities.
- IP Whitelisting/Blacklisting: Control access based on source IP addresses, allowing only trusted networks or blocking known malicious ones.
- Data Masking and Encryption: Sensitive data in requests or responses can be masked or encrypted by the proxy before reaching the backend or the consumer, adding an extra layer of protection.
- Policy Enforcement: Security policies, such as requiring API keys or specific headers, can be centrally enforced at the gateway level.
Without an API gateway, each backend service would need to implement its own security mechanisms, leading to potential inconsistencies, increased development effort, and a higher risk of security vulnerabilities.
Centralized Traffic Management and Load Balancing
As API usage grows, managing the incoming request traffic becomes crucial for maintaining performance and availability. An API gateway excels at this:
- Rate Limiting and Throttling: Prevent abuse and ensure fair usage by limiting the number of requests an individual consumer can make within a given timeframe. This protects backend services from being overwhelmed.
- Load Balancing: Distribute incoming traffic across multiple instances of a backend service, ensuring optimal resource utilization and high availability. If one instance fails, the gateway can intelligently route requests to healthy instances.
- Circuit Breaking: Implement patterns like circuit breakers to prevent cascading failures. If a backend service is unresponsive, the gateway can temporarily stop sending requests to it, allowing it to recover, and can return a default error message or fall back to an alternative service.
- Traffic Routing: Route requests to different backend services or different versions of the same service based on various criteria (e.g., request headers, query parameters, user groups). This is vital for A/B testing or blue/green deployments.
Enhanced Performance and Scalability
While adding an extra hop, a well-optimized API gateway can actually improve overall performance and scalability:
- Caching: The gateway can cache responses from backend services, serving subsequent identical requests directly from the cache without hitting the backend. This significantly reduces latency and load on backend systems for frequently accessed data.
- Request Aggregation: For complex operations that require data from multiple backend services, the gateway can aggregate these calls into a single API request for the consumer, reducing network round trips and simplifying client-side logic.
- Protocol Transformation: Convert requests between different protocols (e.g., HTTP to JMS, SOAP to REST), allowing backend services to use their preferred protocols while presenting a unified interface to consumers.
Streamlined API Versioning and Evolution
APIs are rarely static; they evolve over time. Managing these changes and different versions is a significant challenge:
- Version Management: An API gateway allows organizations to run multiple versions of an API simultaneously, routing consumers to their preferred version. This enables seamless upgrades for some consumers while others continue to use older versions, preventing breaking changes.
- Deprecation Management: Gracefully deprecate old API versions by redirecting requests or returning informative messages, giving consumers time to migrate.
- Backward Compatibility: The gateway can apply transformations to ensure older API consumers can still interact with newer backend services, bridging compatibility gaps without requiring client-side updates.
Centralized Monitoring and Analytics
Understanding how APIs are being used is crucial for informed decision-making and continuous improvement:
- Detailed Logging: The gateway can log every API call, capturing details such as request/response payloads, latency, errors, and consumer information.
- Performance Metrics: Collect metrics on response times, error rates, throughput, and other key performance indicators (KPIs).
- Usage Analytics: Generate insights into who is using which APIs, how frequently, and from where. This data is invaluable for capacity planning, business intelligence, and identifying popular or underutilized APIs.
- Alerting: Configure alerts based on predefined thresholds for error rates, latency spikes, or unusual traffic patterns, enabling proactive incident response.
Simplified Developer Experience and Onboarding
For consumers, interacting with a well-managed API gateway simplifies the process of consuming APIs:
- Unified Access: Instead of learning how to connect to various backend services, developers interact with a single, consistent gateway endpoint.
- Clear Documentation: The gateway can be integrated with a developer portal to provide comprehensive and interactive documentation for all exposed APIs.
- Self-Service Capabilities: Developers can register applications, generate API keys, and monitor their own usage through the developer portal, reducing the burden on support teams.
Given these extensive benefits, it's clear that establishing an API gateway is not just a best practice but often a necessity for any organization serious about its digital strategy. MuleSoft's Anypoint Platform provides all the necessary tools and functionalities to implement these capabilities effectively.
MuleSoft Anypoint Platform: Your API Gateway Solution
MuleSoft's Anypoint Platform is an integrated, low-code platform designed to help organizations realize API-led connectivity and digital transformation initiatives. It provides a comprehensive set of tools for designing, building, deploying, and managing APIs and integrations. When it comes to acting as an API gateway, Anypoint Platform offers several key components:
- Anypoint Design Center: For designing APIs (API specifications using RAML or OpenAPI) and implementing integration flows.
- Anypoint Exchange: A marketplace for discovering, sharing, and reusing APIs, templates, and assets.
- Anypoint API Manager: The core component for managing all aspects of an API's lifecycle, including creating proxies, applying policies, configuring routing rules, and tracking API usage. This is where we will spend most of our time.
- Anypoint Runtime Manager: For deploying and managing Mule applications (which underpin the proxies) to CloudHub (MuleSoft's cloud platform) or on-premises servers.
- Anypoint Monitoring: For gaining deep visibility into API performance, health, and usage patterns.
- Anypoint Visualizer: To automatically map all APIs and their dependencies, providing a clear architectural view.
By leveraging these components, MuleSoft enables organizations to transform their complex backend services into easily consumable, secure, and well-governed APIs accessible through a powerful API gateway.
Prerequisites for Creating a MuleSoft Proxy
Before embarking on the step-by-step guide, ensure you have the following prerequisites in place:
- MuleSoft Anypoint Platform Account: You'll need an active Anypoint Platform account. If you don't have one, you can sign up for a free trial.
- Basic Understanding of APIs: Familiarity with RESTful APIs, HTTP methods (GET, POST, PUT, DELETE), and request/response structures will be beneficial.
- A Backend API Endpoint: To demonstrate the proxy functionality, you'll need an existing API that the proxy can target. This could be a public test API, an API you've developed yourself, or even a simple mock service. For example, you could use
https://jsonplaceholder.typicode.com/postsas a backend. - MuleSoft Anypoint Studio (Optional but Recommended for complex scenarios): While basic proxies can be configured entirely within API Manager, more advanced scenarios involving data transformations or custom logic might require developing a Mule application in Anypoint Studio. For this guide, we'll focus on the API Manager for a simple proxy.
With these prerequisites in place, you're ready to start building your first API proxy in MuleSoft.
Step-by-Step Guide: Creating a Proxy in MuleSoft Anypoint Platform
This section will walk you through the process of creating and deploying a simple API proxy using MuleSoft's Anypoint API Manager.
Step 1: Login to Anypoint Platform
Open your web browser and navigate to the Anypoint Platform login page (anypoint.mulesoft.com). Enter your username and password to log in.
Upon successful login, you'll be presented with the Anypoint Platform dashboard, which provides an overview of various services like Design Center, Exchange, API Manager, Runtime Manager, and Monitoring. This central hub is where all your API management activities will originate. Take a moment to familiarize yourself with the navigation pane on the left, which grants access to these different modules. Each module serves a specific purpose in the API lifecycle management, from design to deployment and beyond. For our task of creating an API proxy, our primary destination will be the API Manager.
Step 2: Navigate to API Manager
From the Anypoint Platform dashboard, click on "API Manager" in the left-hand navigation pane.
The API Manager is the control center for all your APIs. Here, you can define your APIs, apply policies, configure proxy settings, and gain insights into their performance and usage. When you first enter API Manager, you might see a list of existing APIs (if any), or a prompt to add a new API. This interface is specifically designed for API governance and lifecycle management, allowing you to treat your APIs as first-class products within your organization. It's the core of MuleSoft's API gateway capabilities, providing the tools necessary to enforce security, manage traffic, and provide a consistent interface to consumers.
Step 3: Add a New API
On the API Manager page, click the "Add API" button (usually located in the top right corner or center if no APIs exist).
You'll be presented with several options for adding an API:
- From Exchange: Import an API definition (RAML, OpenAPI) that has already been published to Anypoint Exchange. This is common for reusing existing API designs.
- From a file: Upload an API definition file from your local machine.
- New API: Manually define a new API specification from scratch.
- Import a URI: Import an existing API by providing its URL.
For the purpose of creating a proxy, we typically start by either importing an existing API definition from Exchange or a file, or if we don't have one yet, we'll design one from scratch (or just define basic parameters for a simple proxy). Let's choose "New API" for a fresh start, allowing us to explicitly configure it as a proxy.
You'll be prompted to provide basic information about your API:
- API Name: A descriptive name for your API (e.g., "MyBackendProxy").
- Asset Type: Usually "REST API" for most web services.
- Versioning: Select an appropriate version (e.g., "v1").
- Description (Optional): A brief explanation of what the API does.
- Tags (Optional): Keywords for categorization.
Click "Next" after filling in these details.
The next step is crucial for defining your API's specification. You have two main approaches:
- Design it in Design Center: If you want to create a full RAML or OpenAPI specification for your API, you can link it to Design Center. This is the "design first" approach and is highly recommended for robust API governance.
- Use a pre-defined endpoint: For a simple proxy, you can just define the endpoint without a full specification.
Let's proceed with creating a specification. Select "Define a new API specification" and choose "RAML 1.0" or "OpenAPI 3.0 (OAS)". For simplicity, you can just click "Save and continue" without writing a full spec right now; we'll focus on the proxy implementation.
Step 4: Configure Proxy Settings (Implementation)
After defining the basic API information, you'll be brought to the "API Configuration" page. This is where you specify how your API will be implemented and how the proxy will operate.
Under the "API implementation" section, you'll see options for how your API is implemented. To create a proxy, you will select the "Proxy" option. This clearly signals to Anypoint Platform that this API will act as a gateway to another service.
Crucially, you need to provide the "Implementation URL". This is the URL of your actual backend API that this proxy will protect and manage.
For example, if your backend service is https://jsonplaceholder.typicode.com/posts, you would enter this URL here.
Important considerations for the Implementation URL:
- Protocol: Ensure the protocol (HTTP/HTTPS) matches your backend service.
- Host and Port: The domain name or IP address and port where your backend service is listening.
- Base Path: The base path of your backend API. The proxy will forward requests relative to this path.
Below the Implementation URL, you'll find deployment options. This is where you decide where your proxy application will run:
- CloudHub: MuleSoft's cloud platform, offering elastic scalability and managed runtime. This is the most common and recommended deployment option.
- On-Premises / Hybrid: Deploy to your own servers running Anypoint Runtime Fabric or a standalone Mule runtime.
For this guide, we'll choose CloudHub. This will create a new Mule application in CloudHub that acts as your proxy.
You'll need to specify:
- Deployment Target: Select "CloudHub" and then choose a region (e.g., "US East (N. Virginia)").
- Runtime Version: Select a compatible Mule runtime version.
- Worker Size: The computational resources allocated to your proxy application (e.g., 0.1 vCore, 0.2 vCore). Start with a smaller size and scale up if needed.
- Workers: The number of instances of your proxy application to run (for high availability and load balancing). Start with 1.
- Application Name: A unique name for the CloudHub application that will run your proxy (e.g.,
mybackendproxy-app-v1). Anypoint Platform usually pre-fills this based on your API name, but you can change it.
After configuring these settings, click "Save & Deploy".
MuleSoft will now provision the necessary resources on CloudHub and deploy your proxy application. This process usually takes a few minutes. You can monitor the deployment status in the API Manager. Once deployed, the status will change to "Active" or "Running."
Step 5: Verify Proxy Deployment and Test
Once your proxy is deployed, you'll see a "Proxy URL" in the API Configuration details. This is the public URL that consumers will use to access your backend API through the proxy.
To test your proxy:
- Copy the Proxy URL.
- Open a tool like Postman, Insomnia, curl, or even your web browser.
- Make a request to the Proxy URL, appending any paths or query parameters that your backend API expects.
- Example: If your backend is
https://jsonplaceholder.typicode.com/postsand your proxy URL ishttp://mybackendproxy-app-v1.us-e1.cloudhub.io/api, then to access a specific post, you would callhttp://mybackendproxy-app-v1.us-e1.cloudhub.io/api/1.
- Example: If your backend is
If everything is configured correctly, the proxy will forward your request to the backend service, receive the response, and then forward that response back to you. You should see the same response as if you had called the backend API directly.
Congratulations! You have successfully created and deployed an API proxy in MuleSoft. This proxy now acts as a basic API gateway, standing between your consumers and your backend service.
APIPark is a high-performance AI gateway that allows you to securely access the most comprehensive LLM APIs globally on the APIPark platform, including OpenAI, Anthropic, Mistral, Llama2, Google Gemini, and more.Try APIPark now! 👇👇👇
Advanced Proxy Configurations: Unleashing the Power of the API Gateway
The basic proxy we just created is a fundamental step. The true power of MuleSoft as an API gateway comes from its ability to apply various policies and configurations to these proxies. These advanced features are crucial for managing security, ensuring performance, and controlling access to your APIs.
To access these advanced configurations, navigate back to your API in API Manager, and select the "Policies" or "Settings" tabs.
Applying Policies
Policies are the heart of API gateway functionality, allowing you to enforce rules and apply cross-cutting concerns without modifying your backend services. MuleSoft offers a rich set of out-of-the-box policies. To add a policy:
- In API Manager, select your deployed API.
- Go to the "Policies" tab.
- Click "Apply New Policy".
- Choose a policy type from the list.
Here are some commonly used policies:
- Rate Limiting Policy: This policy controls the number of requests an API client can make within a specified time window. This is essential for preventing API abuse, ensuring fair usage, and protecting your backend services from being overwhelmed by traffic spikes. You can configure the maximum number of requests, the time period (e.g., 60 seconds), and whether the limit applies globally or per client ID.
- SLA Based Rate Limiting Policy: Similar to rate limiting, but allows you to define different rate limits based on Service Level Agreements (SLAs) or client tiers. For instance, premium clients might get higher request limits than free-tier clients. This is a powerful feature for API monetization and managing differentiated services.
- Client ID Enforcement Policy: Requires clients to provide a valid client ID and client secret (obtained through Anypoint Exchange) to access the API. This policy is fundamental for identifying consumers and tracking their usage, enabling more granular control and analytics.
- JWT Validation Policy: Validates JSON Web Tokens (JWTs) provided in the incoming request headers. JWTs are a common and secure way to transmit information between parties as a JSON object, often used for authentication and authorization. This policy ensures the token is valid, hasn't expired, and has the expected claims (e.g., issuer, audience).
- IP Whitelist/Blacklist Policy: Allows or denies access to the API based on the client's IP address. This is a simple yet effective security measure for restricting access to specific networks or blocking known malicious IP ranges.
- CORS Policy: Manages Cross-Origin Resource Sharing (CORS) headers, which are crucial for enabling web browsers to safely make requests to your API from a different domain than the one that served the web page. This policy configures allowed origins, methods, and headers.
- Header Removal/Injection Policy: Modifies HTTP headers in either the request or response. For example, you might remove sensitive headers before forwarding to the backend or inject custom headers for internal tracking.
- Message Logging Policy: Logs details about incoming requests and outgoing responses, useful for auditing, debugging, and general monitoring.
When applying a policy, you'll often have options to configure its behavior and target specific API paths or methods. Always test your API after applying new policies to ensure they are functioning as expected and not inadvertently blocking legitimate traffic.
Traffic Management and Routing
Beyond policies, the API gateway offers sophisticated traffic management capabilities:
- Proxy Endpoint Configuration: You can configure multiple proxy endpoints for a single backend service, perhaps for different versions or different access patterns.
- Dynamic Routing: While our simple proxy has a static Implementation URL, MuleSoft allows for dynamic routing based on request parameters, headers, or even custom logic within a Mule application. This enables complex routing patterns, A/B testing, and blue/green deployments.
- Load Balancers: When deploying to CloudHub, MuleSoft automatically provides load balancing across multiple worker instances of your proxy application, ensuring high availability and distributing traffic efficiently.
Monitoring and Analytics
Anypoint Monitoring provides deep insights into your proxy's performance and usage. From the Anypoint Platform dashboard, navigate to "Monitoring." Here you can:
- View API health dashboards.
- Track key metrics like response times, error rates, and throughput.
- Analyze API usage by consumers, identifying top users or potential abuse.
- Set up custom alerts to be notified of anomalies or issues.
This comprehensive monitoring capability is a significant advantage of using an API gateway like MuleSoft, as it provides a single pane of glass for all your API operations.
API Versioning
As your APIs evolve, versioning becomes critical. MuleSoft helps manage this gracefully:
- URL Versioning: Include the version number in the API path (e.g.,
/api/v1/resource,/api/v2/resource). This is a common and straightforward approach. - Header Versioning: Use custom HTTP headers (e.g.,
X-API-Version: 1.0) to specify the desired API version. - Accept Header Versioning: Leverage the
Acceptheader with a custom media type (e.g.,application/vnd.myapi.v1+json).
By creating separate API definitions and proxies for different versions, you can manage their lifecycles independently, allowing consumers to migrate at their own pace without disruption. The API gateway ensures that requests for different versions are routed to the appropriate backend service or API implementation.
Best Practices for MuleSoft API Proxies
To maximize the benefits of your MuleSoft proxies and ensure the long-term success of your API program, consider the following best practices:
- Design First: Always start with an API specification (RAML or OpenAPI) using Design Center. This ensures a consistent contract between consumers and providers, facilitates collaboration, and improves discoverability through Exchange.
- Apply Security Policies Religiously: Never expose an API without appropriate security policies. At a minimum, consider Client ID Enforcement, Rate Limiting, and potentially JWT Validation. MuleSoft's API gateway is your first line of defense.
- Monitor Extensively: Leverage Anypoint Monitoring to keep a close eye on your API's performance, errors, and usage patterns. Set up alerts for critical metrics to proactively address issues.
- Document Thoroughly: Publish clear, concise, and comprehensive documentation for your APIs in Anypoint Exchange. A well-documented API is a consumable API.
- Version APIs Strategically: Plan your API versioning strategy from the outset. Clearly communicate changes to consumers and provide ample time for migration.
- Test Rigorously: Before deploying any API or policy change to production, test it thoroughly in lower environments. Ensure all functionalities, including policy enforcement, work as expected.
- Optimize for Performance: Use caching policies where appropriate to reduce load on backend systems. Monitor latency and optimize your proxy configurations.
- Leverage Anypoint Exchange: Publish your APIs and reusable assets to Exchange. This promotes discoverability, reuse, and consistency across your organization.
- Consider Environment-Specific Configurations: Use environment variables and configuration properties to manage differences between development, staging, and production environments, especially for sensitive data or backend URLs.
- Regularly Review Policies: Periodically review your API gateway policies to ensure they are still relevant and effective, adjusting them as your API landscape and security requirements evolve.
The Broader Context: API Gateways in Enterprise Architecture
The concept of an API gateway extends far beyond simple proxying. In modern enterprise architecture, especially within microservices deployments, an API gateway is a critical architectural pattern. It centralizes common concerns that would otherwise need to be implemented in every microservice, leading to reduced complexity, improved maintainability, and greater consistency.
An API gateway serves as a single, unified entry point for all client requests, routing them to the appropriate backend microservice. This decouples clients from the specific implementations of individual services, allowing microservices to evolve independently. For example, a mobile client might only interact with the API gateway, which then fan-outs requests to various backend services, aggregates their responses, and transforms them into a format suitable for the mobile application.
This architectural pattern not only simplifies client development but also provides a crucial layer for implementing cross-cutting concerns such as security, monitoring, and rate limiting in a consistent and efficient manner. It acts as a resilient facade, protecting the underlying complexity of your service mesh.
Different organizations might opt for various API gateway solutions based on their specific needs, infrastructure, and budget. While MuleSoft provides a comprehensive commercial solution, the open-source community also offers robust alternatives. For instance, APIPark is an open-source AI gateway and API management platform that stands out in this space. It's designed to help developers and enterprises manage, integrate, and deploy AI and REST services with ease, offering features like quick integration of 100+ AI models, unified API format for AI invocation, and prompt encapsulation into REST API. Its focus on AI capabilities complements traditional API gateway functions, making it a powerful choice for organizations leveraging artificial intelligence. You can learn more about APIPark and its capabilities at its official website. Such platforms demonstrate the versatility and evolving nature of API gateway solutions, addressing specific industry needs while maintaining core API management functionalities.
The choice of an API gateway is a strategic decision that impacts the scalability, security, and agility of an entire enterprise. MuleSoft's Anypoint Platform, with its robust API gateway capabilities, empowers organizations to build resilient, secure, and future-proof API ecosystems.
Troubleshooting Common Issues
Even with a clear guide, you might encounter issues. Here are some common problems and their potential solutions:
| Issue | Possible Causes | Solutions |
|---|---|---|
| Proxy not deployed or in 'Starting' state | Network issues, incorrect CloudHub region, insufficient worker resources, Anypoint Platform temporary glitches. | Check Anypoint Runtime Manager for deployment logs. Ensure worker size and count are sufficient. Retry deployment. Check MuleSoft status page for platform outages. |
| 404 Not Found error from Proxy URL | Incorrect Proxy URL, incorrect base path configured in API Manager, backend service not reachable or incorrect URL. | Double-check the Proxy URL from API Manager. Verify the "Implementation URL" in API Manager exactly matches your backend service. Ensure the backend service is running and accessible from where your Mule app is deployed (e.g., CloudHub). |
| 500 Internal Server Error from Proxy | Backend service returning an error, proxy application unable to connect to backend, policy misconfiguration causing failures. | Check your backend service logs directly. Review MuleSoft proxy application logs in Runtime Manager for errors during forwarding. Temporarily disable policies to isolate the issue. |
| 401/403 Unauthorized/Forbidden | Missing or incorrect API key/credentials, security policies blocking access. | Ensure you're sending required headers (e.g., client_id, client_secret). Review applied security policies in API Manager. Check client permissions in Exchange. |
| Latency issues / Slow responses | Backend service is slow, insufficient worker resources for proxy, network latency between proxy and backend. | Monitor backend service performance. Increase worker size/count for proxy in Runtime Manager. Use Anypoint Monitoring to pinpoint bottlenecks. Implement caching policies if applicable. |
| Policies not working as expected | Policy configuration errors, policy applied to wrong API/resource. | Double-check policy configurations (e.g., rate limits, IP ranges). Verify the policy is applied to the correct API and the correct path/method. Check the order of policies if multiple are applied. |
| CORS errors in browser | CORS policy not configured correctly or missing. | Ensure a CORS policy is applied to your API in API Manager. Verify that Allowed Origins, Allowed Methods, and Allowed Headers are correctly configured to permit requests from your client application's domain. |
When troubleshooting, always start by checking the logs in Anypoint Runtime Manager for your proxy application. These logs provide crucial insights into how requests are being processed and where potential failures might be occurring within the API gateway layer.
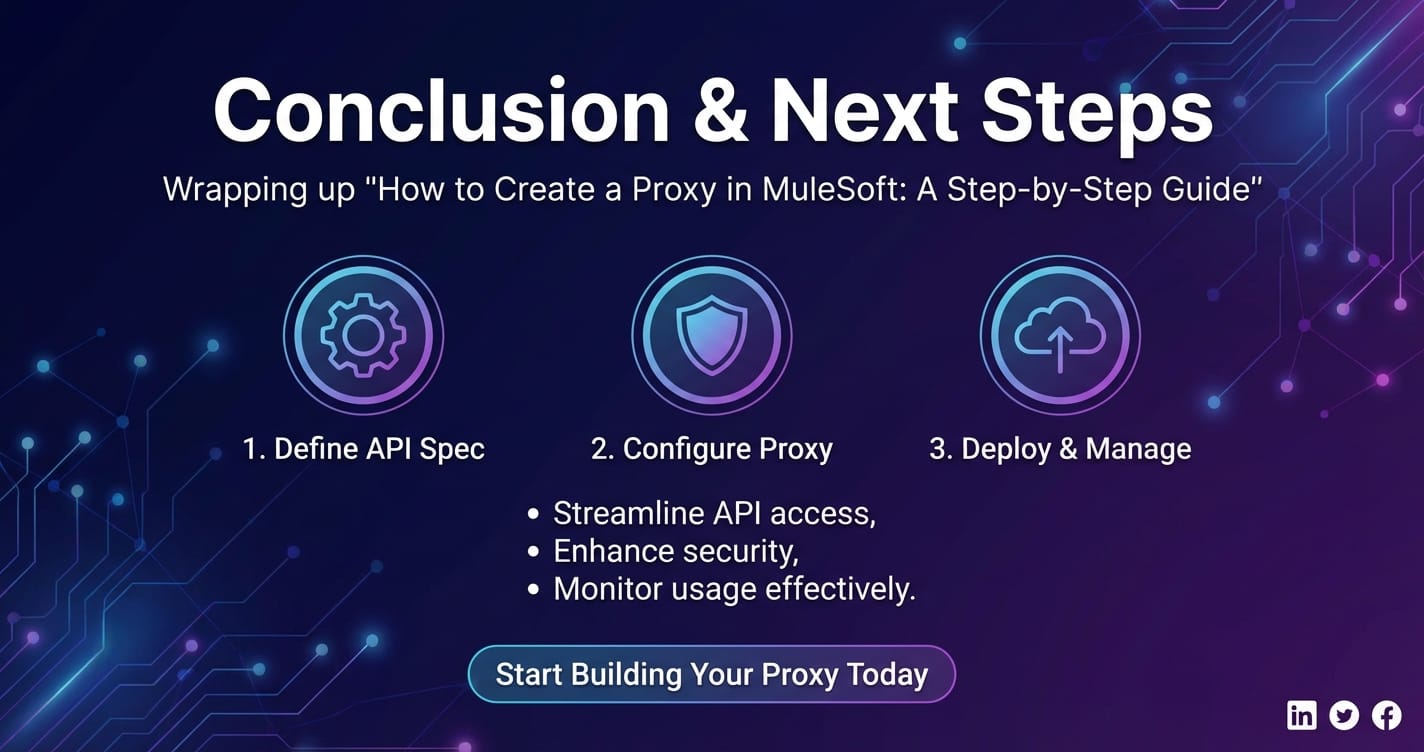
Conclusion: Mastering API Connectivity with MuleSoft Proxies
In the increasingly interconnected digital world, APIs are the lifeblood of innovation, facilitating communication, integration, and the seamless exchange of data across diverse systems. The ability to effectively manage, secure, and scale these APIs is no longer a luxury but a fundamental requirement for business success. MuleSoft's Anypoint Platform, with its robust API gateway capabilities, provides an unparalleled solution for this challenge.
Throughout this comprehensive guide, we've explored the profound importance of API proxies and API gateways, understanding how they serve as indispensable intermediaries for enhancing security, optimizing performance, streamlining traffic management, and simplifying API governance. We've walked through a detailed, step-by-step process of creating a basic API proxy in MuleSoft, from initial setup in Anypoint Manager to deployment on CloudHub and initial testing.
Furthermore, we delved into the advanced configurations that transform a simple proxy into a sophisticated API gateway, discussing the application of various policies—such as rate limiting, JWT validation, and client ID enforcement—that are critical for securing and controlling access to your digital assets. We also touched upon traffic management strategies, robust monitoring and analytics features, and best practices essential for building a resilient and scalable API ecosystem. The mention of APIPark also highlighted the diverse landscape of API gateway solutions, catering to specific needs like AI service management.
By leveraging MuleSoft's Anypoint Platform, organizations can establish a mature API management strategy that not only protects their backend services but also empowers developers, fosters innovation, and accelerates digital transformation. The API gateway becomes the cornerstone of a well-architected API-led connectivity approach, ensuring that your APIs are not just functional, but also secure, performant, and easily consumable. Mastering the creation and management of proxies in MuleSoft is a critical skill for anyone looking to build a modern, connected enterprise, paving the way for sustained growth and agility in the digital age.
5 FAQs about MuleSoft API Proxies and Gateways
Q1: What is the primary difference between a MuleSoft API Proxy and a MuleSoft API Gateway? A1: In MuleSoft's context, an API proxy is a specific type of Mule application that acts as an intermediary, forwarding requests to a backend API. It sits in front of your service and can apply various policies. An API gateway is a broader architectural pattern and capability set, and MuleSoft's Anypoint Platform functions as an API gateway through its API Manager and runtime capabilities. When you create an API proxy in API Manager and apply policies, you are essentially leveraging MuleSoft's API gateway functionality for that specific API. The API gateway encompasses the entire suite of features for managing, securing, and analyzing multiple APIs.
Q2: Can a MuleSoft proxy perform data transformations or complex routing logic? A2: Yes, absolutely. While a basic proxy configured solely in API Manager primarily forwards requests, the underlying Mule application that forms the proxy can be extended. If you need to perform data transformations (e.g., changing XML to JSON), aggregate responses from multiple backend services, or implement complex routing logic based on dynamic conditions, you would typically develop a full Mule application in Anypoint Studio. This Mule application would then be deployed and managed by API Manager as your API implementation, acting as a highly intelligent API gateway that goes beyond simple forwarding.
Q3: How does MuleSoft ensure the security of APIs exposed through its gateway? A3: MuleSoft ensures API security through a multi-layered approach at the API gateway level. Key mechanisms include: Client ID Enforcement (requiring valid credentials), JWT Validation (verifying token authenticity and claims), IP Whitelisting/Blacklisting (controlling access by IP address), Rate Limiting (preventing abuse and DoS attacks), and OAuth 2.0 enforcement. These policies are centrally applied via API Manager, ensuring consistent security posture across all exposed APIs without requiring changes to backend services. Additionally, Anypoint Platform supports secure communication protocols (HTTPS) and integrates with enterprise identity providers.
Q4: Is it possible to manage API versions using MuleSoft proxies? A4: Yes, MuleSoft provides robust features for API versioning through its API gateway. You can manage different versions of an API concurrently by creating separate API definitions and associated proxies for each version (e.g., /api/v1/users and /api/v2/users). The API gateway then routes incoming requests to the appropriate backend service version. This allows consumers to migrate to newer versions at their own pace, and policies can be applied specifically to each version, ensuring smooth API lifecycle management and backward compatibility.
Q5: What are the benefits of using CloudHub for deploying MuleSoft API proxies compared to on-premises deployment? A5: Deploying MuleSoft API proxies to CloudHub offers several significant advantages: 1. Scalability: CloudHub provides automatic horizontal and vertical scaling, allowing your proxies to handle fluctuating traffic without manual intervention. 2. High Availability: Applications deployed on CloudHub benefit from built-in high availability across multiple availability zones. 3. Managed Service: MuleSoft manages the underlying infrastructure, reducing operational overhead for your teams. 4. Global Reach: Deploy proxies to various global regions to reduce latency for geographically dispersed consumers. 5. Simplified Management: Seamless integration with Anypoint API Manager and Runtime Manager for deployment, monitoring, and policy enforcement. While on-premises deployments offer greater control over infrastructure, CloudHub streamlines operations and accelerates time-to-market for your APIs.
🚀You can securely and efficiently call the OpenAI API on APIPark in just two steps:
Step 1: Deploy the APIPark AI gateway in 5 minutes.
APIPark is developed based on Golang, offering strong product performance and low development and maintenance costs. You can deploy APIPark with a single command line.
curl -sSO https://download.apipark.com/install/quick-start.sh; bash quick-start.sh

In my experience, you can see the successful deployment interface within 5 to 10 minutes. Then, you can log in to APIPark using your account.

Step 2: Call the OpenAI API.