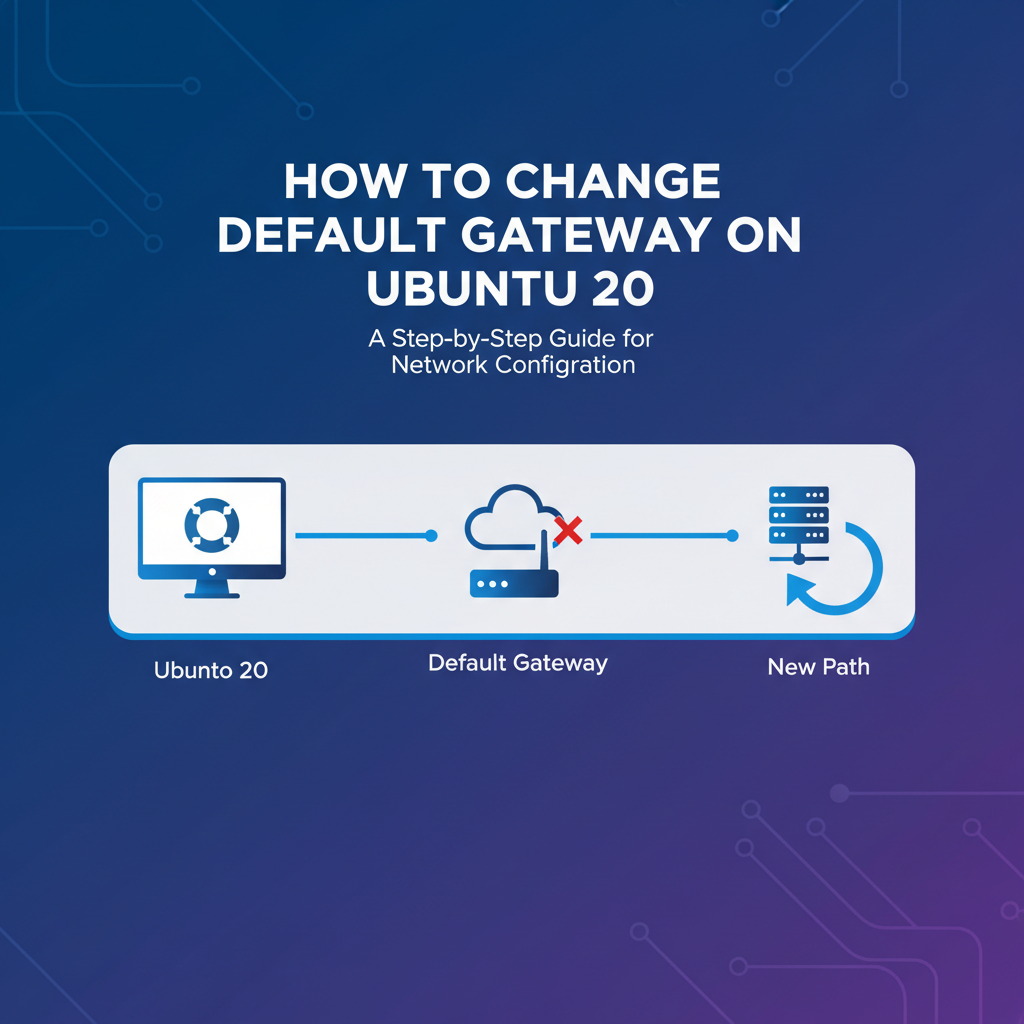
How to Change Default Gateway on Ubuntu 20


In the vast and intricate landscape of computer networking, the default gateway stands as a critical pillar, acting as the primary exit point for all network traffic destined for external networks. On a robust operating system like Ubuntu 20.04, understanding how to configure and, more importantly, how to change this default gateway is a fundamental skill for system administrators, network engineers, and even advanced users. This guide delves into the core concepts, practical methodologies, and intricate details involved in managing your network gateway, ensuring you gain a profound understanding that extends far beyond a simple command execution.
Navigating the complexities of network configurations on a server operating system can often feel like deciphering an ancient script. However, with the right knowledge and a methodical approach, mastering network settings, particularly the default gateway, becomes an empowering skill. Ubuntu 20.04, with its reliance on Netplan for network configuration, presents a modern and streamlined way to manage these settings, moving away from older, often disparate configuration files. This transition, while offering enhanced consistency and predictability, also necessitates a clear understanding of its declarative YAML syntax. Whether you're setting up a new server, troubleshooting connectivity issues, or optimizing network performance, the ability to precisely control your default gateway is indispensable.
Understanding the Foundation: What is a Default Gateway?
Before we embark on the journey of changing the default gateway, it is imperative to grasp its fundamental role within an IP network. Imagine your local network as a self-contained city. Within this city, you can communicate directly with other residents (devices on the same subnet) without any special intervention. However, if you wish to send a letter (network packet) to someone outside your city (a device on a different subnet or the internet), you need a post office, a single designated point of exit. In networking terms, this post office is your default gateway.
Specifically, a gateway is a network device, typically a router, that serves as an access point to another network. When a device (like your Ubuntu machine) needs to send an IP packet to a destination outside its current local area network (LAN), it forwards that packet to its configured default gateway. The gateway then takes responsibility for routing that packet towards its ultimate destination, potentially across multiple other networks. Without a properly configured default gateway, your Ubuntu machine would be isolated, able to communicate only with devices on its immediate subnet, but completely cut off from the vast resources of the internet or other remote networks.
The Anatomy of IP Routing
To further appreciate the gateway's significance, let's briefly review the mechanics of IP routing:
- IP Addresses and Subnets: Every device on a network has a unique IP address, which consists of a network portion and a host portion. Devices with the same network portion are considered to be on the same subnet.
- Network Masks: A network mask (or subnet mask) determines which part of an IP address identifies the network and which part identifies the host. It helps a device understand if a destination IP address is local or remote.
- Routing Table: Each operating system maintains a routing table, which is essentially a list of rules that dictate how to forward IP packets. When a packet needs to be sent, the system consults this table to find the most appropriate path.
- The Default Route: The default gateway is represented in the routing table by a "default route." This is a special entry that specifies where to send packets if no other specific route in the table matches the destination IP address. It's the "catch-all" route, the last resort for outbound traffic.
When your Ubuntu system wants to send data: 1. It checks if the destination IP address is on the same local network (based on its IP address and network mask). 2. If the destination is local, it sends the packet directly to that device. 3. If the destination is remote, it looks for a specific route in its routing table that matches the destination network. 4. If no specific route matches, it sends the packet to the address specified by the default route – which is the IP address of your default gateway.
This intricate dance of packet forwarding underscores why a correctly configured gateway is not just a desirable feature but an absolute necessity for full network connectivity.
Why Would You Need to Change the Default Gateway?
While most systems automatically receive their gateway configuration via DHCP (Dynamic Host Configuration Protocol) when they connect to a network, there are several compelling scenarios where manually changing or adjusting the default gateway on your Ubuntu 20.04 system becomes essential. These situations range from routine network adjustments to advanced troubleshooting and specialized server configurations.
Common Scenarios for Gateway Modification:
- Network Topology Changes:
- Router Replacement or Upgrade: If your physical router (which serves as the gateway) is replaced or its IP address changes, your Ubuntu system will need its default gateway setting updated to reflect the new address to maintain external connectivity.
- Subnet Restructuring: In larger organizations, network administrators might re-segment or re-address subnets. Such changes often involve assigning new IP addresses to gateways, necessitating updates on all connected devices.
- Multiple ISPs / Multi-homing:
- Load Balancing: In environments requiring higher bandwidth or redundancy, a server might be connected to multiple internet service providers (ISPs), each with its own gateway. You might want to direct certain types of traffic or traffic from specific applications through one gateway and other traffic through another to distribute the load.
- Failover: For critical applications, you might configure a primary gateway and a secondary, backup gateway. If the primary fails, you would manually (or automatically via scripting) switch the default gateway to the secondary to maintain uptime.
- Dedicated Servers and Specific Services:
- Firewall/Proxy Gateway: A server might be configured to route all its traffic through a specific firewall or proxy server before it reaches the external gateway. In such cases, the default gateway of the Ubuntu server would point to the internal firewall/proxy, which then has its own gateway to the internet.
- VPN Tunnels: When a VPN connection is established, it often creates a new virtual network interface and can modify routing tables, potentially setting a new default gateway for traffic through the tunnel. You might need to adjust the system's default gateway to control which traffic goes through the VPN and which goes directly.
- Testing Environments: When setting up isolated test environments or sandboxes, you might need to temporarily change the gateway to simulate different network conditions or restrict external access.
- Network Troubleshooting:
- Connectivity Issues: If your Ubuntu machine is unable to reach the internet or other remote networks, a misconfigured or unreachable default gateway is often a prime suspect. Temporarily changing the gateway (e.g., to a known working router) can help diagnose if the issue lies with the current gateway device itself or with the Ubuntu system's configuration.
- Identifying Bottlenecks: In some cases, a particular gateway might be overloaded or experiencing performance issues. Changing to an alternative gateway (if available) can help determine if the gateway itself is the source of network latency.
- Security and Compliance:
- Restricted Access: In high-security environments, you might want to ensure that a server's default gateway points only to a highly controlled internal router that enforces strict access policies, rather than allowing it to pick up any gateway via DHCP.
- Compliance Requirements: Certain regulatory compliance frameworks might dictate specific network routing configurations, which could involve manually setting a non-standard default gateway.
Understanding these scenarios not only justifies the need to manipulate the default gateway but also provides context for choosing the appropriate method—whether a temporary change for troubleshooting or a permanent modification for a production system. Each scenario highlights the default gateway's pivotal role in dictating a system's network reach and behavior.
Prerequisites and Best Practices Before Making Changes
Modifying network configurations, especially something as critical as the default gateway, carries inherent risks. An incorrect change can lead to complete network isolation, particularly if you are accessing the server remotely. Therefore, a meticulous approach, coupled with a solid understanding of best practices, is absolutely essential. Before you type a single command, take a moment to prepare your environment and understand the implications of your actions.
1. Identify Current Network Configuration
Before making any changes, you must know your current network settings. This includes:
- Current IP Address: The IP address assigned to your network interface.
- Subnet Mask: The network mask associated with your IP address.
- Current Default Gateway: The IP address of the currently configured gateway.
- Network Interface Name: The name of the network adapter you intend to configure (e.g.,
eth0,enp0s3,ens33). These names can vary between systems and virtual machines. - DNS Servers: The IP addresses of the DNS (Domain Name System) servers your system is using. While not directly related to the gateway, incorrect DNS can often be mistaken for gateway issues.
Commands to gather this information:
ip aorip addr show: Displays IP addresses, network interfaces, and other details. Look for theinetline for your active interface.ip route showorip r: Shows the kernel's IP routing table. The line starting withdefault viawill indicate your current default gateway.cat /etc/netplan/*.yaml: On Ubuntu 20.04, this will show your persistent Netplan configuration.cat /etc/resolv.conf: Displays the configured DNS servers.
2. Ensure Remote Access Safeguards (Crucial for Remote Servers)
If you are modifying the gateway on a remote server, extreme caution is advised. A single misstep can lock you out.
- Console Access / IPMI / KVM: If available, always have out-of-band access (like a virtual console provided by your cloud provider, IPMI for physical servers, or a KVM switch) ready. This allows you to revert changes even if the network interface becomes unreachable.
- Backup Connectivity: If possible, ensure an alternative network path (e.g., a secondary network interface on a different subnet, or a separate management network) is available and functional.
- Test Commands First: For permanent changes, always use
sudo netplan trybeforesudo netplan apply. This command will apply the changes for a short period (typically 120 seconds) and automatically revert if you don't confirm them, providing a crucial safety net.
3. Backup Configuration Files
Before making any permanent changes, always back up the relevant configuration files. On Ubuntu 20.04, this primarily means your Netplan YAML files.
sudo cp /etc/netplan/01-netcfg.yaml /etc/netplan/01-netcfg.yaml.bak
(Adjust 01-netcfg.yaml to match your actual Netplan file name).
This simple step can save immense time and effort if something goes wrong, allowing for quick restoration to a known working state.
4. Understand Permissions
Modifying network settings requires superuser privileges. All commands mentioned in this guide will require sudo. Ensure your user account has sudo privileges.
5. Plan Your New Configuration
Know the exact new IP address, subnet mask, and especially the new default gateway IP address you intend to use. Double-check these values with your network administrator or network diagram. A single incorrect digit can lead to connectivity failure.
6. Consider Network Manager (for Desktop Editions)
While this guide primarily focuses on server environments using Netplan, if you are on a desktop version of Ubuntu 20.04 with a graphical environment, you might be using Network Manager. Although Netplan is the underlying system, Network Manager provides a GUI that simplifies gateway changes for desktop users. We will briefly touch upon nmcli for command-line Network Manager interaction, but Netplan remains the primary method for server configurations.
By meticulously following these prerequisites and best practices, you significantly mitigate the risks associated with network configuration changes, setting the stage for a smooth and successful modification of your default gateway. Precision and caution are your best allies in this endeavor.
Method 1: Temporarily Changing the Default Gateway using ip route
For immediate, non-persistent modifications to your network's default gateway, the ip route command is the tool of choice. This method is incredibly useful for troubleshooting network issues, performing quick tests, or temporarily rerouting traffic without making permanent changes to configuration files. It's a powerful command that directly manipulates the kernel's routing table.
Understanding the ip route Command
The ip command is a comprehensive utility for showing and manipulating routing, network devices, policy routing, and tunnels. The ip route subcommand specifically deals with the kernel's routing table.
ip route show: Displays the current routing table.ip route add: Adds a new route.ip route del: Deletes an existing route.
Steps for Temporary Gateway Change:
Let's assume your current gateway is 192.168.1.1 and you want to temporarily change it to 192.168.1.254. Your network interface is enp0s3.
Step 1: Identify the Current Default Gateway
First, confirm your existing default gateway.
ip route show
You'll see output similar to this:
default via 192.168.1.1 dev enp0s3 proto dhcp metric 100
192.168.1.0/24 dev enp0s3 proto kernel scope link src 192.168.1.100 metric 100
The line default via 192.168.1.1 dev enp0s3 indicates that your current default gateway is 192.168.1.1 and it's reachable through the enp0s3 interface.
Step 2: Delete the Existing Default Route
Before adding a new default gateway, it's crucial to remove the old one. If you try to add a new default route without removing the old one, you might end up with multiple default routes, leading to unpredictable routing behavior.
sudo ip route del default via 192.168.1.1 dev enp0s3
sudo: Executes the command with superuser privileges.ip route del: Instructs theipcommand to delete a route.default: Specifies that we are deleting the default route.via 192.168.1.1: Indicates the IP address of the gateway to be removed.dev enp0s3: Specifies the network interface associated with this route. While sometimes optional, it's good practice to include it for clarity and precision, especially in multi-interface setups.
After executing this command, your system will likely lose external network connectivity until a new default route is added. This is normal.
Step 3: Add the New Default Route
Now, add the new default gateway IP address (192.168.1.254 in our example).
sudo ip route add default via 192.168.1.254 dev enp0s3
ip route add: Instructs theipcommand to add a route.default: Specifies that we are adding the default route.via 192.168.1.254: The IP address of the new default gateway.dev enp0s3: The network interface through which the gateway is reachable.
Step 4: Verify the Change
Immediately after adding the new route, verify that the change has taken effect.
ip route show
The output should now reflect your new default gateway:
default via 192.168.1.254 dev enp0s3
192.168.1.0/24 dev enp0s3 proto kernel scope link src 192.168.1.100 metric 100
To confirm external connectivity, try pinging an external IP address (e.g., Google's DNS server 8.8.8.8):
ping -c 4 8.8.8.8
If the pings are successful, your temporary gateway change has worked. If you relied on DNS for name resolution, you might also want to test with a hostname:
ping -c 4 google.com
Limitations of the ip route Method:
- Non-Persistent: Changes made with
ip routeare temporary. They will be lost upon network service restart or system reboot. This is precisely why it's ideal for troubleshooting but unsuitable for permanent configurations. - Manual Intervention: This method requires manual execution of commands each time you want the gateway to change or after a reboot if you desire the change to persist.
- Potential for Errors: Deleting the wrong route or adding an incorrect one can easily disrupt connectivity.
This method serves as an excellent immediate solution when flexibility and rapid adjustments are prioritized over permanence. It provides direct, low-level control over the routing table, making it an indispensable tool in a network administrator's toolkit for diagnosis and quick fixes.
APIPark is a high-performance AI gateway that allows you to securely access the most comprehensive LLM APIs globally on the APIPark platform, including OpenAI, Anthropic, Mistral, Llama2, Google Gemini, and more.Try APIPark now! 👇👇👇
Method 2: Permanently Changing the Default Gateway using Netplan (Recommended for Ubuntu 20.04)
Ubuntu 20.04, like its predecessor 18.04, leverages Netplan for declarative network configuration. Netplan simplifies network management by allowing you to define your network interfaces in human-readable YAML files. It then generates the necessary configurations for either networkd (the default backend) or Network Manager. This is the recommended and most robust way to permanently change your default gateway on a server-grade Ubuntu system.
Introduction to Netplan
Netplan is a utility for configuring network interfaces on Linux. It uses YAML configuration files to describe the desired network configuration for all network interfaces. Netplan parses these YAML files and passes the configuration to one of its renderers, systemd-networkd (default for servers) or NetworkManager (default for desktops), which then applies the settings.
The key advantages of Netplan are: * Simplicity and Readability: YAML format is generally easy to read and write. * Consistency: Provides a unified way to configure network settings across different Ubuntu versions. * Declarative: You describe the desired state of your network, and Netplan handles the underlying implementation details. * Atomic Changes: netplan apply attempts to apply all changes at once, and netplan try offers a rollback mechanism.
Locating Netplan Configuration Files
Netplan configuration files are typically located in the /etc/netplan/ directory. You might find one or more .yaml files there. Common file names include 00-installer-config.yaml, 01-netcfg.yaml, or others depending on how your system was installed.
To find your current Netplan file:
ls /etc/netplan/*.yaml
Once identified, inspect its contents:
cat /etc/netplan/01-netcfg.yaml # Replace with your actual file name
Step-by-Step Guide to Permanent Gateway Change with Netplan:
Let's assume your existing Netplan configuration uses DHCP and you want to switch to a static IP address with a new default gateway.
Scenario: * Interface: enp0s3 * New Static IP: 192.168.1.101/24 (meaning IP 192.168.1.101 with a 24-bit subnet mask, i.e., 255.255.255.0) * New Default Gateway: 192.168.1.254 * DNS Servers: 8.8.8.8 and 8.8.4.4
Step 1: Backup Your Existing Netplan Configuration
This is a critical step. Always create a backup of your current working configuration.
sudo cp /etc/netplan/01-netcfg.yaml /etc/netplan/01-netcfg.yaml.bak
Step 2: Edit the Netplan Configuration File
Open your Netplan YAML file using a text editor like nano or vi.
sudo nano /etc/netplan/01-netcfg.yaml
Original (DHCP) Example:
# This is the network config written by 'subiquity'
network:
  version: 2
  renderer: networkd
  ethernets:
    enp0s3:
      dhcp4: true
Modified (Static IP with new Default Gateway) Example:
# This is the network config written by 'subiquity'
network:
  version: 2
  renderer: networkd
  ethernets:
    enp0s3:
      dhcp4: false             # Disable DHCP for IPv4
      addresses:
        - 192.168.1.101/24    # Set your new static IP address and subnet mask
      routes:
        - to: default         # This specifies the default route
          via: 192.168.1.254  # This is your new default gateway IP address
      nameservers:
        addresses: [8.8.8.8, 8.8.4.4] # Configure DNS servers
Explanation of the changes:
dhcp4: false: Explicitly disables DHCP for IPv4 on this interface.addresses: [192.168.1.101/24]: This list defines the static IP addresses for the interface. The/24denotes the subnet mask (equivalent to255.255.255.0).routes:: This section is where you define specific routes, including the default route.- to: default: This crucial line indicates that the followingviaentry defines the default route.via: 192.168.1.254: This specifies the IP address of your new default gateway.- Note: Older Netplan versions used
gateway4: 192.168.1.254. While it might still work for some setups, theroutesdirective withto: defaultis the more modern and flexible approach, especially for complex routing. It's recommended to useroutes.
nameservers:: Configures the DNS servers, which are essential for resolving hostnames.addresses:specifies a list of DNS server IPs.
Step 3: Test and Apply the New Configuration
Netplan offers a fantastic safety mechanism: netplan try.
sudo netplan try
netplan trywill apply the new configuration. If you do not confirm the changes within 120 seconds (by pressing Enter), Netplan will automatically revert to the previous working configuration. This is invaluable when working on remote servers, as it prevents you from locking yourself out due to a configuration error.- If everything works as expected after running
netplan try, press Enter to confirm and make the changes permanent.
Alternatively, if you are confident in your changes or have physical access:
sudo netplan apply
netplan applyapplies the configuration changes directly and permanently without the rollback timer.
Step 4: Verify the Changes
After applying the configuration, verify that your new default gateway and IP address are correctly set.
- Check IP Address and Gateway:
bash ip addr show enp0s3 # Replace enp0s3 with your interface name ip route showYou should see your new static IP address and thedefault viaentry pointing to your new gateway. - Test Connectivity:
bash ping -c 4 8.8.8.8 # Ping an external IP ping -c 4 google.com # Ping a hostname to test DNS and gatewaySuccessful pings confirm that your new gateway is functional and your system can reach external networks.
Troubleshooting Netplan Issues:
- YAML Syntax Errors: YAML is sensitive to indentation. Even a single space out of place can cause errors. If
netplan applyfails, it often points to a specific line number.- Use a YAML linter if you're making complex changes.
- Ensure consistent indentation (usually 2 spaces).
netplan --debug apply: Ifnetplan applyfails or acts unexpectedly, run it with the--debugflag for more verbose output, which can help pinpoint the problem.bash sudo netplan --debug apply- Network Interface Name: Double-check that the interface name (
enp0s3in our example) matches your actual network adapter. - IP Address Conflicts: Ensure your chosen static IP address is not already in use on your network.
- Incorrect Gateway IP: The new default gateway IP must be on the same subnet as your system's static IP address and must be a valid, active router.
- Revert to Backup: If all else fails, you can always revert to your backed-up configuration:
bash sudo cp /etc/netplan/01-netcfg.yaml.bak /etc/netplan/01-netcfg.yaml sudo netplan applyThen reboot your system or restart the network service if needed.
Using Netplan for permanent gateway changes provides a robust, manageable, and auditable way to configure your Ubuntu 20.04 server's network settings. Its declarative nature and built-in safety mechanisms make it the preferred method for production environments.
Method 3: Using NetworkManager (for Desktop Environments or nmcli)
While Netplan is the primary and recommended tool for server network configuration on Ubuntu 20.04, especially for programmatic and consistent deployments, desktop editions of Ubuntu often rely on NetworkManager for a more user-friendly experience, particularly through its graphical interface. However, NetworkManager also provides a powerful command-line interface called nmcli, which can be used on servers if NetworkManager is installed and active.
Understanding NetworkManager
NetworkManager is a daemon that manages network connections. It aims to make networking configuration "painless and automatic" by handling things like switching between wired and wireless networks, VPNs, and, of course, IP address and gateway configuration. On desktop Ubuntu, the GUI elements (like the network settings in the top panel or System Settings) interact with NetworkManager.
For server environments where a GUI is absent, nmcli (NetworkManager Command Line Interface) provides full control over NetworkManager.
Steps for Gateway Change with nmcli:
First, confirm that NetworkManager is running and managing your interface.
nmcli device status
Look for your interface (e.g., enp0s3) and ensure its state is "connected".
Step 1: Identify Your Connection Name
NetworkManager manages "connections" which are profiles for network interfaces. Find the connection name associated with your network interface.
nmcli connection show
You'll see a list of connections. Identify the one corresponding to your enp0s3 (or similar) interface. It might be named "Wired connection 1", "enp0s3", or something similar. Let's assume it's "enp0s3-profile".
Step 2: Set the IPv4 Method to Manual (if currently DHCP)
If your connection is currently using DHCP, you'll need to change it to manual (static) before setting a static IP and gateway.
sudo nmcli connection modify enp0s3-profile ipv4.method manual
Replace enp0s3-profile with your actual connection name.
Step 3: Set the IP Address and Subnet Mask
sudo nmcli connection modify enp0s3-profile ipv4.addresses 192.168.1.102/24
Here, 192.168.1.102 is the new static IP and /24 is the subnet mask.
Step 4: Set the New Default Gateway
Now, specify your new default gateway.
sudo nmcli connection modify enp0s3-profile ipv4.gateway 192.168.1.254
Step 5: Configure DNS Servers (Optional, but Recommended)
sudo nmcli connection modify enp0s3-profile ipv4.dns "8.8.8.8,8.8.4.4"
You can list multiple DNS servers separated by commas.
Step 6: Apply the Changes
For the changes to take effect, you usually need to bring the connection down and then up again.
sudo nmcli connection down enp0s3-profile
sudo nmcli connection up enp0s3-profile
Alternatively, you can reload all connections:
sudo nmcli networking off
sudo nmcli networking on
This will temporarily disconnect all interfaces managed by NetworkManager.
Step 7: Verify the Changes
ip addr show enp0s3
ip route show
nmcli device show enp0s3
Confirm the IP address, default gateway, and DNS settings are correct. Then test connectivity:
ping -c 4 8.8.8.8
ping -c 4 google.com
Graphical User Interface (GUI) Method (for Desktop Users):
If you are using a desktop version of Ubuntu 20.04 with a GUI, changing the default gateway is often more intuitive through the graphical settings:
- Open Settings: Click on the top-right corner, then select the wrench/screwdriver icon (Settings).
- Navigate to Network: In the left sidebar, click on "Network".
- Select Your Connection: Find your wired or wireless connection and click the gear icon next to it.
- Go to IPv4 Tab: In the new window, select the "IPv4" tab.
- Change Method: Change "IPv4 Method" from "Automatic (DHCP)" to "Manual".
- Enter Details:
- Addresses: Enter your new IP address, Netmask (e.g.,
255.255.255.0), and crucially, your new default Gateway IP address. - DNS: Manually add your DNS server IP addresses.
- Addresses: Enter your new IP address, Netmask (e.g.,
- Apply and Restart: Click "Apply" in the top right, then you may need to turn the network connection off and on again (e.g., by clicking the toggle switch next to the connection name in the network settings overview) for changes to take effect.
When to Use NetworkManager vs. Netplan:
- Netplan: Preferred for server installations, headless systems, or environments where consistency and programmatic configuration through YAML are priorities. It's the underlying system.
- NetworkManager (
nmclior GUI): Excellent for desktop environments where users interact graphically.nmcliis suitable for server environments where NetworkManager is already installed and preferred for managing connections (e.g., if you're frequently switching VPNs or Wi-Fi networks). However, for fundamental, static server configurations, Netplan is generally more robust and less prone to conflicts with other services trying to manage interfaces.
It's important to remember that Netplan is generally the lower-level configuration tool on Ubuntu 20.04. NetworkManager can override Netplan settings if both are trying to manage the same interface. For dedicated server configurations, sticking to Netplan is often the simplest approach to avoid conflicts and ensure predictable behavior.
Advanced Scenarios and Considerations for Default Gateway Management
Beyond the basic temporary and permanent changes, managing the default gateway can involve more complex scenarios, particularly in sophisticated network environments. Understanding these advanced considerations is crucial for building resilient, high-performance, and secure network infrastructures.
1. Multiple Gateways and Policy Routing
While most systems have a single default gateway, there are situations where you might want to utilize multiple gateways. This is often for load balancing, failover, or routing specific traffic through different paths. This is achieved through policy routing.
- Concept: Instead of a single global routing table, policy routing allows you to have multiple routing tables and rules that determine which table to use based on criteria like source IP, destination IP, user ID, or network interface.
- Use Cases:
- Multi-homed Servers: A server with two network cards, each connected to a different ISP's gateway, can use policy routing to send outbound traffic through the most appropriate gateway or to ensure failover if one gateway becomes unreachable.
- VPN Integration: Route all traffic from a specific application or user through a VPN tunnel's gateway, while other traffic uses the regular internet gateway.
- Traffic Shaping/QoS: Direct traffic to specific internal services through a high-bandwidth internal gateway, while less critical traffic uses a general-purpose gateway.
- Implementation (using
ip ruleandip route table):Example: To route traffic from a specific source IP (192.168.1.100) through a secondary gateway (192.168.1.2), you might do:bash sudo ip route add default via 192.168.1.2 dev enp0s3 table 100 # Add a default route to a custom table sudo ip rule add from 192.168.1.100 table 100 # Add a rule to use table 100 for traffic from 192.168.1.100This is a complex topic beyond simple gateway changes, often requiring intricate Netplan configuration for persistence, or dedicated routing software like FRR (Free Range Routing).- Define New Routing Tables: Create custom routing tables with
sudo ip route add <route> table <table_id>. - Add Rules: Use
sudo ip rule add from <source_ip> table <table_id>orsudo ip rule add fwmark <mark> table <table_id>to specify when to use a particular routing table. - Set Default Gateway for Each Table: Within each custom table, you can define a default gateway.
- Define New Routing Tables: Create custom routing tables with
2. Metric Values and Route Preference
When multiple routes exist for the same destination (e.g., two default routes via different gateways), the metric value in the routing table determines preference. A lower metric indicates a more preferred route.
default via 192.168.1.1 dev enp0s3 proto dhcp metric 100
default via 10.0.0.1 dev enp0s4 proto dhcp metric 200
In this example, traffic would preferentially go through 192.168.1.1 because it has a lower metric (100). If that gateway becomes unreachable, the system might automatically failover to 10.0.0.1 (metric 200), though this behavior depends on the network configuration and daemon. You can manually assign metrics in Netplan or with ip route add commands.
3. VPNs and Their Impact on Gateways
When a Virtual Private Network (VPN) connection is established on your Ubuntu system, it typically creates a new virtual network interface (e.g., tun0, ppp0). The VPN client then often modifies the system's routing table to direct all or specific traffic through this new interface, effectively making the VPN server's internal address the new default gateway for that traffic.
- "Full Tunnel" VPN: All internet-bound traffic is routed through the VPN. The VPN client sets a new default route pointing to the VPN server's private gateway.
- "Split Tunnel" VPN: Only traffic destined for specific networks (e.g., your corporate network) goes through the VPN, while other internet traffic uses your regular default gateway. This requires more complex routing rules.
If you encounter connectivity issues after connecting to a VPN, check your routing table (ip route show) to see how the VPN client has altered the default gateway and other routes. You might need to adjust your VPN client's settings or use policy routing to achieve your desired traffic flow.
4. Security Implications of Gateway Configuration
The default gateway is a critical point of control and potential vulnerability:
- Trusted Gateways: Always ensure your default gateway is a trusted device within your controlled network. An attacker who can trick your system into using a malicious gateway can intercept all your outbound traffic (Man-in-the-Middle attack).
- Unauthorized Changes: Protect your Netplan configuration files with appropriate permissions. Prevent unauthorized users from modifying network settings, as this could lead to rerouting traffic to untrusted destinations.
- Network Segmentation: In advanced setups, using different gateways for different network segments (e.g., a DMZ, internal LAN, and guest Wi-Fi) helps contain security breaches and enforces stricter access controls.
5. Automating Gateway Configuration
For large deployments or highly dynamic environments, manual gateway configuration is impractical. Configuration management tools automate this process:
- Ansible: You can write Ansible playbooks to modify Netplan YAML files or execute
nmclicommands across multiple Ubuntu servers. This ensures consistency and reduces human error. - Puppet/Chef: Similar to Ansible, these tools can define the desired state of network configurations, including the default gateway, and automatically enforce it.
- Cloud-Init: For virtual machines or cloud instances,
cloud-initscripts can be used during provisioning to inject static IP and gateway configurations into Netplan files.
These tools are indispensable for maintaining scalable and reliable infrastructure where precise control over the default gateway and other network settings is paramount.
Leveraging Intelligent Network Management with APIPark
While the nuanced control of an individual machine's gateway is fundamental, modern distributed systems, especially those built on microservices or leveraging vast AI capabilities, demand a far more sophisticated approach to network and service management. The complexities multiply when you're not just routing packets to a gateway, but orchestrating hundreds or thousands of API calls between internal and external services, often incorporating diverse AI models. This is where the broader context of network and API management becomes critical.
In environments where complex network routing dictates how applications communicate, especially when dealing with a multitude of AI and REST services, robust API management becomes paramount. For organizations wrestling with the intricacies of integrating, managing, and securing their API landscape, solutions like APIPark offer a comprehensive platform. APIPark is an open-source AI gateway and API management platform designed to streamline the integration, management, and deployment of both AI and REST services with remarkable ease.
Imagine a scenario where your applications rely on multiple AI models for tasks like sentiment analysis, translation, or data processing, each potentially residing in different network segments or cloud providers. Manually managing the routing, authentication, and performance of these service calls across various gateways and network paths would be an insurmountable task. APIPark steps in as a powerful intermediary, abstracting away much of this underlying network and service complexity.
Here's how APIPark aligns with and extends the principles of intelligent network and service management discussed above:
- Unified API Format for AI Invocation: Just as a well-configured gateway provides a unified exit point for network traffic, APIPark provides a unified invocation format for over 100+ AI models. This ensures that changes in underlying AI models or prompts do not disrupt your applications, simplifying integration and reducing maintenance costs, much like a stable network configuration reduces troubleshooting.
- End-to-End API Lifecycle Management: Beyond merely routing traffic, APIPark assists with managing the entire lifecycle of APIs, from design and publication to invocation and decommissioning. This involves regulating API management processes, managing traffic forwarding, load balancing across services (akin to managing multiple network gateways for optimal performance), and versioning of published APIs. This high-level orchestration directly benefits from a robust underlying network configuration, ensuring that the gateway directs traffic efficiently to APIPark itself.
- Performance Rivaling Nginx: For a platform that acts as a central gateway for API traffic, performance is non-negotiable. APIPark's ability to achieve over 20,000 TPS with modest hardware, supporting cluster deployment for large-scale traffic, means it can handle immense loads without becoming a bottleneck. This high performance ensures that your investment in optimized network routing (including gateway configuration) is fully realized at the application layer.
- Detailed API Call Logging and Data Analysis: Just as you monitor your network devices and routing tables for issues, APIPark provides comprehensive logging for every API call. This visibility is crucial for quickly tracing and troubleshooting issues in API calls, which might originate from network problems, service misconfigurations, or even an overloaded gateway. Its powerful data analysis capabilities further help predict and prevent issues by displaying long-term trends and performance changes, offering a proactive approach to system stability that complements granular network monitoring.
- Security and Access Control: APIPark enhances security by enabling features like subscription approval for API access, preventing unauthorized API calls and potential data breaches. This forms an additional, higher layer of access control on top of your existing network security, ensuring that even if traffic reaches your network gateway, only authorized API consumers can interact with your services.
In essence, while understanding how to change your Ubuntu system's default gateway provides granular control over individual machine's network egress, platforms like APIPark elevate this control to the application and service layer. They bridge the gap between low-level network configurations and high-level service orchestration, making complex, AI-driven architectures manageable, secure, and performant. For enterprises building sophisticated digital products, integrating such a comprehensive API management solution is as critical as ensuring their underlying network infrastructure, including the humble default gateway, is flawlessly configured.
Troubleshooting Common Gateway Issues
Even with the most meticulous planning, network issues can arise. A misconfigured or unreachable default gateway is a frequent culprit when a system loses external connectivity. Here's a systematic approach to troubleshooting common gateway problems.
1. Verify Basic Network Connectivity
- Check Interface Status: Ensure your network interface is up and has an IP address.
bash ip addr show enp0s3Look forstate UPand aninetaddress. If it'sDOWN, trysudo ip link set enp0s3 up. - Ping Local Host: Confirm your system's network stack is functioning.
bash ping -c 4 127.0.0.1 - Ping Same Subnet: Ping another device on the same local network to confirm local segment connectivity.
bash ping -c 4 192.168.1.10(Replace192.168.1.10with an actual device IP on your subnet).
2. Verify Gateway Reachability
- Ping the Gateway: The most direct test. If you can't ping your default gateway, it's the source of your problem.
bash ping -c 4 192.168.1.254 # Replace with your gateway IPIf this fails:- Is the gateway device powered on and connected? Check the physical router/firewall.
- Is its IP address correct? Double-check the gateway IP in your Netplan configuration.
- Are there any firewalls blocking ICMP? Temporarily disable
ufwon your Ubuntu machine (sudo ufw disable) and/or check the firewall on the gateway itself. - Is the gateway on the same subnet? Your system's IP and gateway IP must be on the same subnet.
3. Inspect the Routing Table
- Check Default Route: Confirm the default route points to the correct gateway.
bash ip route showLook for the linedefault via <gateway_ip> dev <interface>. If it's missing or incorrect, that's your issue. netstat -rn(Older Command): Provides similar routing table information.bash netstat -rnLook for an entry withDestinationas0.0.0.0ordefault.
4. Trace the Route to External Destinations
tracerouteortracepath: These tools show the path (hops) packets take to reach a destination. This helps identify where traffic stops.bash traceroute google.com # Or for a specific IP: traceroute 8.8.8.8Iftraceroutestops at your gateway IP, but doesn't go further, the issue is likely with the gateway device's ability to forward traffic (e.g., its own internet connection, internal routing, or firewall). If it doesn't even reach the gateway, the problem is upstream (your system's configuration or local network segment).
5. Check DNS Resolution
Sometimes, what appears to be a gateway issue is actually a DNS problem. If you can ping 8.8.8.8 but not google.com, your gateway is likely fine, but your DNS servers are not resolving hostnames.
- Check
resolv.conf:bash cat /etc/resolv.confEnsurenameserverentries are present and point to valid, reachable DNS servers. - Ping DNS Servers:
bash ping -c 4 8.8.8.8If your DNS servers are unreachable, you'll have hostname resolution issues.
6. Review Netplan Configuration (for Persistent Issues)
- Check YAML Syntax: A small typo or incorrect indentation in your Netplan YAML file can break everything.
bash sudo netplan try # Or sudo netplan --debug applyThe debug output is very helpful for syntax errors. - Interface Name: Ensure the interface name in your Netplan file matches the actual name of your network adapter.
7. Look at System Logs
journalctl -u systemd-networkd: Ifsystemd-networkdis your Netplan renderer, check its logs for errors related to network configuration.dmesg: Check kernel messages for issues with the network interface hardware or driver.tail -f /var/log/syslog: Monitor general system logs for any network-related errors as you attempt to apply changes or ping destinations.
By following these troubleshooting steps systematically, you can isolate the root cause of your gateway connectivity problems, distinguishing between local system configuration, physical network issues, and external network failures. Patience and a methodical approach are key to effective network troubleshooting.
Conclusion: Mastering Your Ubuntu Network Gateway
The default gateway is far more than just an IP address; it's the very lifeline connecting your Ubuntu 20.04 system to the broader network and the internet. A deep understanding of its function, coupled with the practical skills to configure and troubleshoot it, is an indispensable asset for anyone managing server environments. From the fundamental principles of IP routing to the nuanced specifics of Netplan configuration and advanced policy routing, mastering this critical component grants you profound control over your system's network behavior.
We've explored various methodologies for modifying the default gateway, ranging from temporary adjustments using the ip route command – ideal for quick diagnostics and transient needs – to the robust and persistent configurations achieved through Netplan's declarative YAML files. Netplan, as the modern standard for Ubuntu, offers a streamlined, error-resistant approach, especially when coupled with its try command for safe rollbacks. For those on desktop environments or preferring a command-line alternative to Netplan, nmcli provides another avenue for configuration via NetworkManager.
Beyond mere configuration, we delved into the intricacies of advanced scenarios such as handling multiple gateways for load balancing or failover, understanding the impact of VPNs on routing, and critically, the security implications of gateway choices. The journey concluded with a comprehensive troubleshooting guide, equipping you with the tools and techniques to diagnose and resolve common connectivity issues, turning potential frustrations into solvable challenges.
In the rapidly evolving landscape of IT infrastructure, where applications increasingly rely on complex interactions with numerous services and AI models, the foundational knowledge of network configuration becomes even more vital. Tools like APIPark emerge as essential components, sitting atop a well-configured network to manage the flow of API traffic, enhance security, and ensure the performance of distributed applications. They highlight how precise control over components like the default gateway underpins the stability and efficiency of entire service ecosystems.
Ultimately, whether you're a seasoned system administrator orchestrating a fleet of servers or an enthusiastic user keen on optimizing your local machine, the ability to command your network's default gateway is a powerful skill. It empowers you not just to solve problems, but to design, build, and maintain network infrastructures that are resilient, efficient, and perfectly tailored to your operational needs. The network, in all its complexity, begins with a single, crucial exit point – the default gateway.
Frequently Asked Questions (FAQs)
1. What is the "default gateway" and why is it important for my Ubuntu system?
The default gateway is the IP address of the router or device that serves as the exit point for all network traffic from your Ubuntu system that is destined for external networks (i.e., outside your local area network, such as the internet). It's crucial because without a correctly configured default gateway, your Ubuntu machine can only communicate with other devices on its immediate local network; it will be unable to access the internet or any remote networks. It acts as the "post office" for sending packets out of your local "city" network.
2. What's the difference between temporarily and permanently changing the default gateway on Ubuntu 20.04?
Temporarily changing the gateway is done using the ip route command. These changes are applied directly to the kernel's routing table and are not persistent, meaning they will be lost upon network service restart or system reboot. This method is excellent for troubleshooting or quick, short-term rerouting. Permanently changing the gateway on Ubuntu 20.04 is primarily done through Netplan configuration files (located in /etc/netplan/). Changes made here are saved to YAML files and are applied automatically upon system boot or network service restarts, ensuring the configuration persists across reboots. This is the recommended method for production systems.
3. I've changed my default gateway using Netplan, but I lost all network connectivity. What should I do?
This is a common issue, often due to a typo in the Netplan YAML file, an incorrect IP address for the gateway, or an incorrect network interface name. 1. If you used sudo netplan try: Wait 120 seconds, and it should automatically revert to the previous working configuration. If it does, check your YAML file for syntax errors or incorrect values. 2. If you used sudo netplan apply or netplan try reverted: * Access the server via console/IPMI: If it's a remote server, use out-of-band management. * Revert to your backup: Copy your backed-up Netplan file back (sudo cp /etc/netplan/01-netcfg.yaml.bak /etc/netplan/01-netcfg.yaml). * Apply the old config: sudo netplan apply. * Check for errors: Use sudo netplan --debug apply to get detailed error messages when trying to apply your new configuration next time. * Verify YAML syntax: YAML is sensitive to indentation and syntax. Ensure all values are correct and properly indented.
4. Can I have multiple default gateways on my Ubuntu system?
Yes, technically, you can have multiple default routes in your kernel's routing table, often distinguished by different metric values. However, only one "active" default gateway is typically used at any given time for most outbound traffic. The system will use the route with the lowest metric. For more sophisticated scenarios like load balancing or failover, where you want to intelligently route different types of traffic through different gateways or switch to a backup gateway upon failure, you would use policy routing with ip rule and custom routing tables. This allows you to define rules that dictate which traffic uses which default gateway.
5. What role do DNS servers play when configuring my network, and how are they related to the gateway?
DNS (Domain Name System) servers are responsible for translating human-readable hostnames (like google.com) into IP addresses (like 172.217.160.142). While not directly part of the default gateway configuration, correct DNS server settings are absolutely crucial for your system's overall network functionality. If your DNS servers are not configured or are unreachable, your system won't be able to resolve hostnames, leading to an inability to access websites or services by name, even if your default gateway is perfectly functional and you can ping IP addresses directly (e.g., 8.8.8.8). You typically configure DNS server IP addresses alongside your static IP and gateway in Netplan or NetworkManager.
🚀You can securely and efficiently call the OpenAI API on APIPark in just two steps:
Step 1: Deploy the APIPark AI gateway in 5 minutes.
APIPark is developed based on Golang, offering strong product performance and low development and maintenance costs. You can deploy APIPark with a single command line.
curl -sSO https://download.apipark.com/install/quick-start.sh; bash quick-start.sh

In my experience, you can see the successful deployment interface within 5 to 10 minutes. Then, you can log in to APIPark using your account.

Step 2: Call the OpenAI API.