How to Change Default Gateway on Ubuntu 20


The intricate dance of data packets across networks relies heavily on a fundamental component: the default gateway. On any operating system, including Ubuntu 20.04, understanding and managing this crucial network parameter is essential for ensuring robust and reliable connectivity. Whether you are a system administrator tasked with configuring a server, a developer setting up a local development environment, or simply a power user seeking to fine-tune your network settings, the ability to correctly change the default gateway is a skill that opens up a world of control over your network topology. This comprehensive guide will delve deep into the methods, underlying concepts, and best practices for altering your default gateway on Ubuntu 20.04, ensuring you possess the knowledge to approach this task with confidence and precision.
The Fundamental Role of a Default Gateway in Network Communication
Before we embark on the practical steps of modifying the default gateway, it's imperative to establish a clear understanding of what a gateway is and its indispensable role in network communication. Imagine your local network as a distinct country, and the internet as the rest of the world. To send a letter (data packet) from your country to another country, you need a designated exit point – a post office or a border crossing. In the realm of networking, this exit point is precisely what the default gateway represents.
Technically, a gateway is a node on a computer network that serves as an access point to another network. When a device on a local network (like your Ubuntu machine) needs to send data to a destination outside its immediate network segment (e.g., to a website on the internet or a server in a different subnet), it doesn't know the direct path. Instead, it forwards all such traffic to its default gateway. The gateway, typically a router, is responsible for knowing how to reach other networks and then forwarding the packet appropriately. Without a correctly configured default gateway, your Ubuntu machine would be an island, capable of communicating only with devices on its local subnet and utterly isolated from the vast expanse of the internet or any other external network. This critical function underpins nearly all modern network interactions, making its proper configuration paramount for any connected system.
Why You Might Need to Change Your Default Gateway
The default gateway isn't a setting that typically requires frequent alteration in a stable environment. However, various scenarios necessitate its modification. Understanding these situations will provide context and highlight the importance of mastering this network configuration skill.
Firstly, network migration or redesign is a common driver. If your organization migrates to a new network infrastructure, updates its routing policies, or changes the IP scheme of its core routers, your Ubuntu server or workstation might need to point to a new default gateway. For instance, moving a server from one VLAN to another, where each VLAN has a different router serving as the gateway, would require this change.
Secondly, troubleshooting network connectivity issues often involves inspecting and potentially modifying the default gateway. If your machine suddenly loses internet access but can still communicate with local devices, a misconfigured or unreachable gateway is a prime suspect. Changing it temporarily to test an alternative path or to reconnect to a newly provisioned router can be a quick diagnostic step.
Thirdly, advanced network configurations for specific applications or security requirements might demand a custom gateway setup. This could involve setting up policy-based routing where certain types of traffic are routed through a specific gateway (e.g., a VPN tunnel or a security appliance), while general internet traffic uses another. Similarly, in multi-homed servers (machines with multiple network interfaces), you might need to specify which gateway is primary for outbound traffic.
Fourthly, performance optimization can sometimes play a role. In complex networks, a particular gateway might offer a more efficient or less congested path to critical resources. Adjusting your default gateway could steer traffic towards a faster route, although this is less common for a simple default gateway change and more typical in enterprise environments with sophisticated routing protocols.
Lastly, security hardening might involve directing traffic through a specific security appliance acting as a gateway that performs deep packet inspection or other protective measures before allowing egress to the internet. Ensuring your system points to this secure gateway is a vital part of maintaining network integrity. Each of these reasons underscores the versatility and necessity of knowing how to properly adjust your Ubuntu machine's default gateway.
Understanding Ubuntu's Network Configuration Landscape
Ubuntu 20.04, like its immediate predecessors, primarily uses Netplan for network configuration, a significant departure from the ifupdown system used in older versions or NetworkManager which is often found in desktop editions. To effectively change the default gateway, one must first grasp the tools and files involved in managing network settings on this specific operating system.
At the core of Ubuntu's network management, especially for server installations, lies Netplan. Netplan acts as a high-level abstraction, allowing users to configure network interfaces using YAML files. It then generates the necessary backend configurations for either networkd (the default) or NetworkManager. This design simplifies network setup by providing a consistent, human-readable format, abstracting away the complexities of different backend tools. The configuration files for Netplan are typically located in /etc/netplan/ and usually have a .yaml extension, for example, 01-netcfg.yaml or 50-cloud-init.yaml. Understanding the YAML syntax, including proper indentation and key-value pairs, is crucial for successful Netplan configuration.
While Netplan is the primary method for persistent network configurations on Ubuntu 20.04, other tools and concepts remain relevant. The ip command (part of the iproute2 suite) is an indispensable utility for viewing and temporarily manipulating network interfaces, routing tables, and ARP caches. Commands like ip a (show addresses), ip r (show routing table), and ip link (show link state) are fundamental for diagnosing network issues and verifying configurations. This tool offers granular control and is often used for quick, non-persistent changes or for debugging purposes.
For desktop environments, NetworkManager often takes precedence, providing a graphical user interface (GUI) and a command-line utility (nmcli) for managing network connections. While Netplan can also configure NetworkManager as a backend, direct interaction with nmcli or the graphical network settings is common for users preferring these methods, particularly for Wi-Fi or dynamic configurations. NetworkManager stores its configurations in /etc/NetworkManager/ and in user-specific profiles.
Finally, the routing table is a conceptual, yet critical, element. It's a data table stored in the kernel that lists the routes to particular network destinations. Every packet sent from your Ubuntu machine consults this table to determine the next hop. The default gateway is essentially an entry in this routing table, specified as the route for default destination (0.0.0.0/0), meaning "send all traffic that doesn't have a more specific route to this IP address." Understanding how to read and interpret the output of ip route show is fundamental to verifying your gateway configuration.
By familiarizing yourself with Netplan's YAML structure, the ip command's capabilities, and the role of the routing table, you gain a holistic understanding of how network settings, including the default gateway, are managed and applied on Ubuntu 20.04.
Prerequisites and Essential Safety Measures
Before you initiate any changes to your network configuration, especially those as critical as the default gateway, it's paramount to ensure you have the necessary prerequisites in place and adhere to crucial safety measures. Neglecting these steps can lead to unintended network outages, data loss, or even render your system inaccessible, particularly in remote server environments.
First and foremost, administrative privileges are non-negotiable. Modifying network settings requires root access. You will invariably use the sudo command to execute administrative tasks. Ensure your user account has sudo privileges configured correctly. If you are operating as the root user directly, you can omit sudo, but for best practice and security, using sudo with a regular user account is generally preferred.
Secondly, understanding your current network configuration is critical. Before making any changes, you must know what your existing IP address, subnet mask, default gateway, and DNS servers are. You can glean this information using several commands: * ip a: Displays IP addresses and network interfaces. Look for your active interface (e.g., enp0s3, eth0). * ip r: Shows the current routing table, explicitly listing the default gateway entry. It will typically look like default via <gateway_ip> dev <interface>. * cat /etc/netplan/*.yaml: Reveals your current Netplan configurations. * cat /etc/resolv.conf: Shows configured DNS servers.
This baseline understanding serves as a reference point, allowing you to verify changes and revert if necessary.
Thirdly, and arguably most importantly, back up your configuration files. This step cannot be overstressed. A simple typo or incorrect YAML indentation in Netplan can prevent your network interfaces from coming up after a reboot or even after applying changes. Create copies of relevant files before you modify them: * sudo cp /etc/netplan/01-netcfg.yaml /etc/netplan/01-netcfg.yaml.bak (adjust filename as appropriate). * If you're modifying /etc/network/interfaces (unlikely for Ubuntu 20.04's default setup but good to know), back that up too. * Consider backing up /etc/resolv.conf if you plan to change DNS settings. Having these backups provides a quick and reliable way to restore your previous configuration if something goes awry.
Fourthly, ensure you have out-of-band access or local console access if you are performing these changes on a remote server. If you are connected via SSH and you misconfigure your network (e.g., set an incorrect default gateway or IP address), you will immediately lose your SSH connection. Without an alternative means to access the server (like a KVM over IP, a hypervisor console, or physical access), you could lock yourself out, requiring a server reboot and potentially a trip to the data center. For local machines, this is less of a concern, as you can simply access the console directly.
Finally, test connectivity thoroughly after making changes. Do not assume success. After applying your new gateway settings: * ip r: Verify the default route points to your new gateway. * ping <new_gateway_ip>: Confirm reachability of the new gateway. * ping 8.8.8.8: Test reachability to a public IP address (e.g., Google's DNS). * ping google.com: Test DNS resolution and overall internet connectivity. * If applicable, test access to internal network resources that rely on the new routing.
By diligently following these prerequisites and safety measures, you significantly mitigate the risks associated with altering such a fundamental network parameter as the default gateway, ensuring a smoother and more secure configuration process.
Method 1: Using the ip Command (Temporary Changes)
The ip command, part of the iproute2 utility suite, is a powerful and versatile tool for manipulating network objects in Linux. It allows for granular control over network interfaces, routing tables, and more. While changes made with ip are not persistent across reboots, this method is invaluable for temporary adjustments, troubleshooting, or testing new configurations without committing them to permanent files. It provides immediate feedback and is an excellent way to understand how routing entries function at a low level.
Understanding ip route
The ip route subcommand is specifically designed for managing the kernel's routing tables. When you execute ip route show, you're peeking directly into the heart of your system's routing decisions. Each line in the output represents a rule dictating where network traffic should be sent based on its destination.
Let's dissect a typical ip route show output:
default via 192.168.1.1 dev enp0s3 proto dhcp metric 100
10.0.0.0/8 dev tun0 proto kernel scope link src 10.8.0.2 metric 50
192.168.1.0/24 dev enp0s3 proto kernel scope link src 192.168.1.100 metric 100
In this example: * default via 192.168.1.1 dev enp0s3: This is our default gateway entry. * default: Specifies that this route applies to any destination not covered by a more specific route. It's equivalent to 0.0.0.0/0. * via 192.168.1.1: Indicates that packets destined for the "default" route should be sent to the IP address 192.168.1.1. This IP is the default gateway. * dev enp0s3: Specifies the outgoing network interface through which the packets should be sent to reach the gateway. * proto dhcp: Indicates how this route was learned (in this case, via DHCP). * metric 100: A cost associated with this route. Lower metrics are preferred if multiple routes to the same destination exist.
The other lines represent more specific routes: 10.0.0.0/8 is routed via tun0 (a VPN tunnel), and 192.168.1.0/24 is directly accessible on the enp0s3 interface (your local subnet).
Deleting the Existing Default Gateway
Before you can add a new default gateway, it's often necessary to remove the old one. If you simply try to add another default route, the system might reject it (if they have the same metric) or create an ambiguous situation.
To delete the current default gateway, you use the ip route del command:
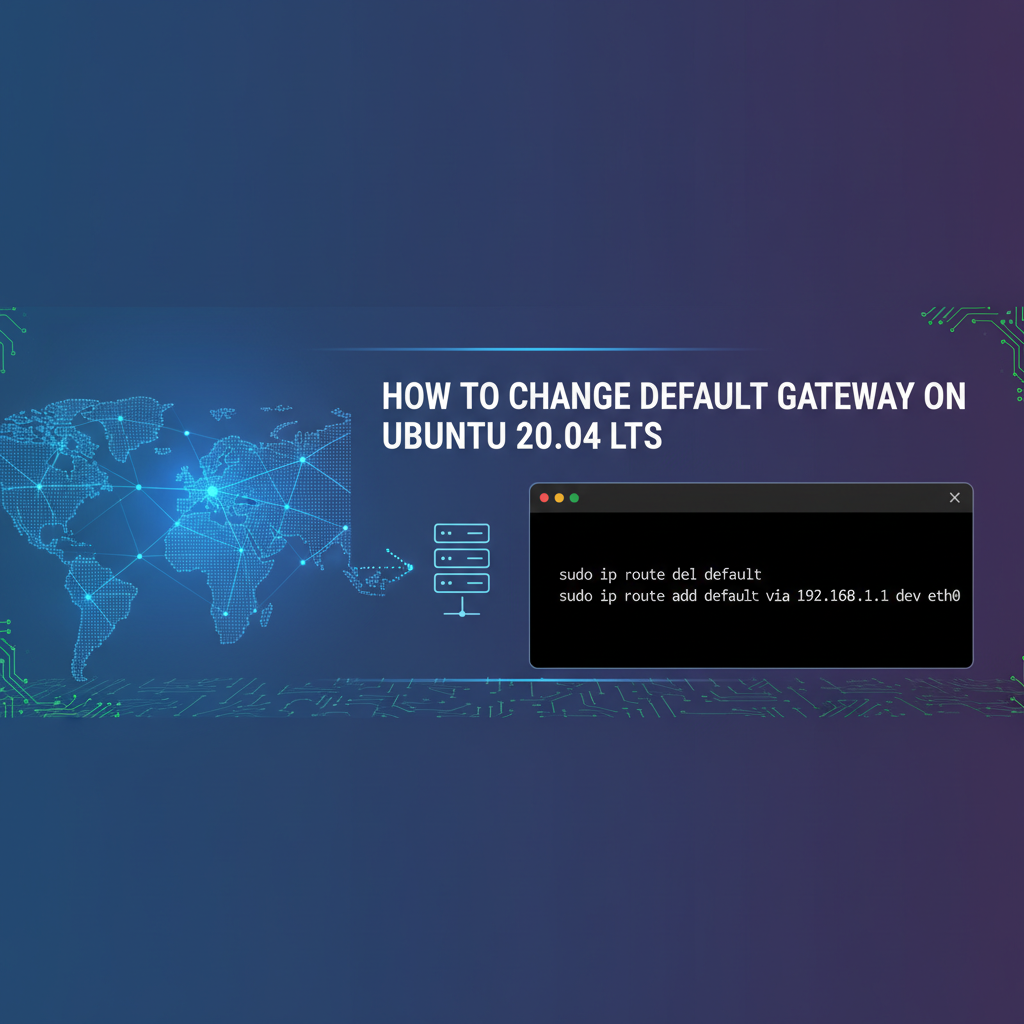
sudo ip route del default
This command instructs the kernel to remove the entry in the routing table that specifies the default route. After executing this, if you run ip route show, you will notice the default entry is gone. Your system will temporarily lose external network connectivity until a new default route is established. It's crucial to have the new gateway IP ready for the next step.
Let's consider an example. Suppose your current gateway is 192.168.1.1 and your interface is enp0s3.
# Current routing table
ip route show
# Output example:
# default via 192.168.1.1 dev enp0s3 proto dhcp metric 100
# 192.168.1.0/24 dev enp0s3 proto kernel scope link src 192.168.1.100 metric 100

# Delete the default route
sudo ip route del default

# Verify deletion
ip route show
# Output example:
# 192.168.1.0/24 dev enp0s3 proto kernel scope link src 192.168.1.100 metric 100
# Notice the 'default' route is gone. You cannot reach the internet now.
This deletion step is critical and immediate in its effect. Be prepared to immediately add the new gateway.
Adding a New Default Gateway
Once the old default route is cleared (or if you are adding one for the first time), you can introduce the new gateway using the ip route add command.
The syntax for adding a default gateway is:
sudo ip route add default via <new_gateway_ip> dev <interface>
default: As before, specifies the target for this route – all traffic without a more specific route.via <new_gateway_ip>: This is the IP address of your new default gateway. This must be an IP address that is directly reachable on your local network segment. If it's not on the same subnet as your device, the system won't know how to reach it.dev <interface>: Specifies the local network interface through which the gateway is reachable. For example,enp0s3oreth0. It's important to specify the correct interface to ensure the system sends traffic out the right physical or virtual port.
Let's continue our example. Suppose you want to change your default gateway from 192.168.1.1 to 192.168.1.254 on the enp0s3 interface. After deleting the old route:
# Add the new default gateway
sudo ip route add default via 192.168.1.254 dev enp0s3

# Verify the new default gateway
ip route show
# Output example:
# default via 192.168.1.254 dev enp0s3
# 192.168.1.0/24 dev enp0s3 proto kernel scope link src 192.168.1.100 metric 100

# Test connectivity
ping 192.168.1.254  # Should succeed
ping 8.8.8.8        # Should succeed
ping google.com     # Should succeed
If you encounter errors like RTNETLINK answers: File exists when trying to add a default route, it indicates that a default route already exists. In such cases, you should remove the existing one first, as demonstrated, or modify it directly if supported by your ip version (though del and add is often clearer).
Limitations of ip Command Changes
It is crucial to remember that changes made using the ip command are temporary. They reside only in the kernel's current routing table and will be lost upon a system reboot or if the network interface is brought down and then back up (e.g., sudo ip link set dev enp0s3 down followed by up). This non-persistence makes the ip command ideal for: * Troubleshooting: Quickly testing if a different gateway resolves an issue. * Temporary access: Gaining internet access briefly for software updates or diagnostics. * Learning and experimentation: Understanding how routing works without altering permanent configuration files.
For persistent changes that survive reboots, you must modify the network configuration files, which brings us to the next method, utilizing Netplan. The ip command serves as an immediate, tactical tool, but for strategic, long-term network stability, other approaches are required.
Method 2: Using Netplan (Persistent Changes - Recommended for Ubuntu 20.04)
For Ubuntu 20.04, Netplan is the officially sanctioned and recommended tool for configuring network interfaces persistently. It provides a simple, declarative way to specify network settings using YAML syntax, abstracting the complexities of underlying network daemons like systemd-networkd or NetworkManager. This method ensures your default gateway setting, along with other network parameters, survives system reboots and remains consistent over time.
Introduction to Netplan and its Configuration Files
Netplan works by reading YAML configuration files located in /etc/netplan/. These files define the desired state of your network interfaces. When Netplan processes these files, it generates the appropriate configuration for its chosen backend (by default, systemd-networkd for server installations, or NetworkManager for desktop installations).
A typical Netplan configuration file might be named 00-installer-config.yaml or 50-cloud-init.yaml, depending on how your Ubuntu system was installed or provisioned. You can list the contents of the /etc/netplan/ directory to identify your primary configuration file:
ls /etc/netplan/
It's essential to work with the correct file, as multiple .yaml files in this directory are merged, with later files overriding earlier ones (based on alphabetical order of filenames). For simplicity, you'll usually modify the existing primary configuration file.
Backup Existing Netplan File
Before making any modifications, creating a backup of your existing Netplan configuration file is a critical safety step. This allows you to easily revert to a working state if your changes inadvertently cause network issues.
sudo cp /etc/netplan/00-installer-config.yaml /etc/netplan/00-installer-config.yaml.bak
Replace 00-installer-config.yaml with the actual name of your Netplan configuration file.
Changing Default Gateway for DHCP Configuration
If your network interface is configured to obtain its IP address and network settings automatically via DHCP (Dynamic Host Configuration Protocol), the default gateway is typically assigned by the DHCP server. In most cases, you won't explicitly set the gateway in the Netplan file for DHCP. However, you might want to override the DNS servers or add static routes even with DHCP.
Here's an example of a Netplan configuration for an interface using DHCP:
# /etc/netplan/00-installer-config.yaml
network:
  version: 2
  renderer: networkd
  ethernets:
    enp0s3:
      dhcp4: yes
      nameservers:
          addresses: [8.8.8.8, 8.8.4.4] # Optional: Override DHCP-provided DNS
      # You generally do NOT specify gateway for dhcp4: yes
      # The DHCP server provides it.
In this scenario, the DHCP server is responsible for providing the default gateway. If you need to change the gateway for a DHCP-configured interface, you would typically configure the DHCP server itself to hand out the new gateway address. However, if you have a specific requirement to add a static route (including a default route) in addition to or instead of a DHCP-provided one for specific scenarios, you can use the routes directive. This is less common for the default gateway with DHCP enabled, but it's technically possible if your intent is to override or add to the DHCP-provided routing table:
network:
  version: 2
  renderer: networkd
  ethernets:
    enp0s3:
      dhcp4: yes
      routes:
        - to: default
          via: 192.168.1.254 # This would specify the default gateway
          # Note: This might conflict with a DHCP-provided gateway if not handled carefully.
          # Generally, avoid if dhcp4: yes is true and you expect DHCP to provide the gateway.
          # Use this for static IP or specific routing policies.
For most practical purposes, if dhcp4: yes is set, you rely on the DHCP server for the default gateway. If you need to fix a gateway, static configuration is usually the way to go.
Changing Default Gateway for Static IP Configuration
This is the most common scenario for manually changing the default gateway on a server. When you configure an interface with a static IP address, you must explicitly define the gateway.
Open your Netplan configuration file using a text editor like nano or vim:
sudo nano /etc/netplan/00-installer-config.yaml
Locate the section for your network interface (e.g., enp0s3). Here's a typical static IP configuration before modification:
network:
  version: 2
  renderer: networkd
  ethernets:
    enp0s3:
      dhcp4: no
      addresses:
        - 192.168.1.100/24
      routes:
        - to: default
          via: 192.168.1.1 # Old default gateway
      nameservers:
          addresses: [8.8.8.8, 8.8.4.4]
To change the default gateway, you simply modify the IP address specified after via: in the routes section:
network:
  version: 2
  renderer: networkd
  ethernets:
    enp0s3:
      dhcp4: no
      addresses:
        - 192.168.1.100/24
      routes:
        - to: default
          via: 192.168.1.254 # New default gateway
      nameservers:
          addresses: [8.8.8.8, 8.8.4.4]
Important Considerations for YAML Syntax: * Indentation is critical: YAML uses spaces, not tabs, for indentation. Ensure consistent two-space or four-space indentation throughout your file. Incorrect indentation will lead to syntax errors. * IP addresses and CIDR notation: The addresses entry takes a list, where each item is an IP address followed by a CIDR mask (e.g., 192.168.1.100/24). * routes: This is a list of routing entries. to: default signifies the default route, and via: specifies the gateway IP address.
Example with Multiple Interfaces and IPv6 (Advanced)
For more complex setups, such as a server with multiple network cards or IPv6 connectivity, the routes section can be expanded.
network:
  version: 2
  renderer: networkd
  ethernets:
    enp0s3: # Primary interface
      dhcp4: no
      addresses:
        - 192.168.1.100/24
        - "2001:db8::100/64" # IPv6 address
      routes:
        - to: default
          via: 192.168.1.254 # IPv4 default gateway for enp0s3
        - to: default
          via: "2001:db8::1" # IPv6 default gateway for enp0s3
          on-link: true # Often needed for IPv6 default routes
      nameservers:
          addresses: [8.8.8.8, 8.8.4.4, "2001:4860:4860::8888", "2001:4860:4860::8844"]

    enp0s8: # Secondary interface for specific traffic
      dhcp4: no
      addresses:
        - 10.0.0.5/24
      routes:
        - to: 10.0.1.0/24 # Route specific subnet via this interface's gateway
          via: 10.0.0.1
In this advanced example, we configure both IPv4 and IPv6 default gateways for enp0s3 and a specific route via enp0s8. The on-link: true directive for IPv6 routes specifies that the gateway is on the same link as the routing host, which is often implicitly understood for IPv4 but sometimes needs explicit declaration for IPv6.
Applying and Testing Netplan Changes
After saving your modifications to the Netplan YAML file, you must apply them. Netplan provides a two-stage process for this: netplan try and netplan apply.
- Test Changes with
netplan try: This command is your best friend for avoiding lockouts.netplan tryapplies the new configuration but starts a 120-second countdown. If you don't confirm the changes within that time (by pressing Enter), Netplan automatically reverts to the previous working configuration. This is invaluable when making changes remotely via SSH.bash sudo netplan tryIfnetplan tryreports syntax errors, correct them in your YAML file and try again. If it succeeds, you should be prompted to press Enter to keep the configuration. Crucially, test your network connectivity immediately afternetplan trytakes effect, but before confirming. - Apply Changes Persistently with
netplan apply: Once you're confident that the new configuration works (and you've either confirmednetplan tryor skipped it after thorough testing), usenetplan applyto make the changes permanent. This command applies the configuration without the rollback timer.bash sudo netplan applynetplan applywill not provide a rollback mechanism, so ensure you have verified connectivity beforehand.
Troubleshooting Netplan Issues
Netplan issues typically stem from YAML syntax errors or incorrect network parameters. * Syntax Errors: If netplan try or netplan apply reports Error in network definition ... YAML parse error, it means there's an issue with your indentation, colons, or dashes. Double-check every line for proper YAML structure. Tools like online YAML validators can help. * netplan generate: You can use sudo netplan generate to explicitly generate backend configuration files without applying them. This can sometimes provide more detailed error messages or allow you to inspect the generated configurations. * netplan apply --debug: For more verbose output and debugging information during the application process, use the --debug flag. * Network Service Status: Check the status of the systemd-networkd service (if using networkd renderer): bash systemctl status systemd-networkd journalctl -u systemd-networkd --no-pager Look for errors related to your network interfaces or routing. * ip route show and ip a: Always verify the actual applied routing table and interface addresses after applying Netplan changes. If the default gateway isn't as expected, or if the interface is down, it indicates a problem with the Netplan configuration.
This table summarizes common Netplan directives related to configuring the default gateway for both DHCP and static IP assignments:
| Directive | Description | DHCP Example | Static IP Example | Notes |
|---|---|---|---|---|
dhcp4 |
Enable/disable IPv4 DHCP | dhcp4: yes |
dhcp4: no |
If yes, gateway usually provided by DHCP server. |
addresses |
List of IP addresses and CIDR masks for static assignment | N/A | - 192.168.1.100/24 |
Required for static IP configuration. |
routes |
List of static routes, including default gateway | (Rarely used for default) | - to: default via: 192.168.1.254 |
Explicitly defines the default gateway for static configs. Can be used for specific routes with DHCP. |
to: default |
Specifies the default route (0.0.0.0/0) | (If routes is used) |
- to: default |
Must be paired with via. |
via |
The IP address of the next-hop gateway | (If routes is used) |
via: 192.168.1.254 |
The actual IP address of the gateway. Must be reachable on the local subnet. |
nameservers |
DNS server configuration | nameservers: addresses: [8.8.8.8] |
nameservers: addresses: [8.8.8.8, 8.8.4.4] |
Defines DNS servers. Can override DHCP-provided ones. |
renderer |
Specifies the backend network daemon (networkd or NetworkManager) | renderer: networkd |
renderer: networkd |
networkd is default for servers, NetworkManager for desktops. |
By diligently following the Netplan configuration steps, paying close attention to YAML syntax, and utilizing the netplan try and apply commands with verification, you can reliably and persistently change your default gateway on Ubuntu 20.04 servers and workstations. This method offers the most robust and future-proof way to manage network settings in the Ubuntu ecosystem.
Method 3: Using NetworkManager (for Desktop Environments/GUI)
While Netplan is the preferred method for server installations and programmatic configuration, Ubuntu desktop users (including Ubuntu 20.04) often interact with NetworkManager. NetworkManager provides both a graphical user interface (GUI) and a powerful command-line interface (nmcli) for managing network connections. If your Ubuntu desktop relies on NetworkManager, using these tools is the most intuitive way to change your default gateway.
Introduction to NetworkManager
NetworkManager is a dynamic network configuration and management utility that attempts to keep network devices and connections up and active when they are available. It is commonly found on desktop Linux distributions because it handles a wide array of connection types (Ethernet, Wi-Fi, VPN, mobile broadband) and allows for easy switching between them. Netplan can even be configured to use NetworkManager as its backend, especially on desktop installs.
NetworkManager stores its configurations in /etc/NetworkManager/system-connections/ for system-wide connections and in user-specific directories. Each connection (e.g., an Ethernet profile or Wi-Fi SSID) has its own configuration file.
Using nmcli (Command-Line Interface for NetworkManager)
nmcli is a powerful command-line tool that allows you to manage NetworkManager connections without a GUI. It's particularly useful for users comfortable with the terminal or for scripts.
1. List Existing Connections: First, identify the connection you want to modify.
nmcli connection show
You'll see a list like this:
NAME                UUID                                  TYPE      DEVICE
Wired connection 1  a1b2c3d4-e5f6-7890-1234-567890abcdef  ethernet  enp0s3
My_WiFi             f1e2d3c4-b5a6-9876-5432-10fedcba9876  wifi      wlp2s0
Note the NAME of your active wired connection (e.g., "Wired connection 1" or "enp0s3").
2. Modify Connection to Use Static IP and Set Gateway: If your connection is currently set to DHCP and you want to switch to a static IP with a specific gateway, you'll need to change the IPv4 method and then set the address and gateway. If it's already static, you can skip setting the method.
Let's assume your connection name is "Wired connection 1" and you want to set IP 192.168.1.100/24, gateway 192.168.1.254, and DNS 8.8.8.8.
- Set IPv4 method to manual (static):
bash sudo nmcli con mod "Wired connection 1" ipv4.method manual - Set the IP address:
bash sudo nmcli con mod "Wired connection 1" ipv4.addresses 192.168.1.100/24 - Set the default gateway:
bash sudo nmcli con mod "Wired connection 1" ipv4.gateway 192.168.1.254 - Set DNS servers (optional but recommended for static IPs):
bash sudo nmcli con mod "Wired connection 1" ipv4.dns 8.8.8.8,8.8.4.4If you wish to remove a previously set gateway and let DHCP provide it (if you're switching back to DHCP), you can use:bash sudo nmcli con mod "Wired connection 1" ipv4.gateway ""
3. Reactivate the Connection: For the changes to take effect, you must bring the connection down and then back up.
sudo nmcli con down "Wired connection 1"
sudo nmcli con up "Wired connection 1"
You might temporarily lose network connectivity during this process.
4. Verify Changes: After reactivating, verify the new configuration:
nmcli device show enp0s3  # Replace enp0s3 with your device name
ip route show             # Check for the new default gateway
ping google.com           # Test internet connectivity
Using the Graphical User Interface (GUI)
For most Ubuntu desktop users, the graphical network settings provide the most straightforward way to manage connections.
1. Open Network Settings: * Click on the System Menu (usually top-right corner, depicting network/Wi-Fi status). * Select Settings. * In the Settings window, navigate to the Network section in the left sidebar.
2. Select Your Connection: * Under the "Network" settings, you'll see a list of your network interfaces (e.g., "Wired (enp0s3)"). * Click the gear icon (⚙️) next to the wired connection you wish to modify.
3. Configure IPv4 Settings: * In the connection details window, go to the IPv4 tab. * By default, "IPv4 Method" might be set to "Automatic (DHCP)". To set a static IP and gateway: * Change "IPv4 Method" to Manual. * Addresses: Click the "+" button under Addresses. * Enter your desired IP Address (e.g., 192.168.1.100). * Enter the Netmask (e.g., 255.255.255.0 or 24 in CIDR). * Enter your new Gateway IP address (e.g., 192.168.1.254). * DNS: Toggle "Automatic DNS" off if it's enabled. Enter your preferred DNS server IP addresses, separated by commas (e.g., 8.8.8.8, 8.8.4.4). * Routes: For basic default gateway changes, you typically don't need to touch the "Routes" section here, as the gateway field handles it. This section is for more advanced static routes.
4. Apply and Verify: * Click the Apply button in the top-right corner of the window. * Your network connection might briefly disconnect and reconnect as the changes are applied. * Close the Settings window. * Open a terminal and verify your default gateway using ip route show and test internet connectivity with ping google.com.
When to Use NetworkManager vs. Netplan
The choice between NetworkManager (via GUI/nmcli) and Netplan depends largely on your Ubuntu installation and use case: * NetworkManager (GUI/nmcli) is ideal for desktop environments where dynamic connections, easy switching between networks, and a user-friendly interface are priorities. It's also suitable for single-user workstations where direct, interactive control is desired. * Netplan is the robust solution for server environments and cloud instances where network configurations need to be consistent, automated, and less prone to accidental GUI modifications. It's text-file based, making it excellent for version control and infrastructure as code.
While NetworkManager can handle quite complex configurations, Netplan's declarative YAML approach makes it superior for programmatic deployment and managing a large number of servers. For an Ubuntu 20.04 server, Netplan is almost always the recommended path for persistent default gateway changes. For a desktop, either nmcli or the GUI method will serve you well.
Advanced Scenarios and Considerations
Modifying the default gateway is a foundational skill, but real-world networking often presents more complex scenarios. Understanding these advanced considerations can help you design more robust networks, troubleshoot intricate issues, and deploy critical services with confidence.
Multiple Gateways and Policy-Based Routing
While a system typically has only one default gateway, there are scenarios where you might need to manage multiple egress points or route specific traffic through different gateways. This is known as policy-based routing (PBR).
Why multiple gateways? * Redundancy/Failover: If one gateway fails, traffic can automatically switch to another. This often involves dynamic routing protocols (like OSPF or BGP) or simpler mechanisms like track options in specific network tools. * Traffic Segregation: Directing specific types of traffic (e.g., VPN traffic, management traffic, or traffic for a particular service) through a dedicated gateway to meet security policies, performance requirements, or regulatory compliance. * Multi-homing: Servers with multiple network interfaces, each connected to a different network or ISP, might use different gateways for each interface, or even route specific traffic out a particular interface's gateway.
Implementing PBR on Linux involves using ip rule to define rules that select different routing tables based on criteria like source IP, destination IP, port, or user ID. Each routing table can then have its own default gateway.
Example of a basic policy rule:
# Create a new routing table named 'vpn_table' (table ID 100)
sudo ip route add default via 10.8.0.1 dev tun0 table 100

# Add a rule: any traffic originating from IP 192.168.1.200 should use 'vpn_table'
sudo ip rule add from 192.168.1.200 table 100
This configuration would effectively give the IP 192.168.1.200 a different default gateway (10.8.0.1 via tun0) than the system's primary default gateway. Managing multiple gateways with Netplan typically involves defining multiple routes sections with specific table or metric parameters, which can become quite intricate.
Metric Values
When the kernel has multiple routes to the same destination (e.g., two default gateway entries), it uses a "metric" value to decide which route to prefer. A lower metric value indicates a more preferred route.
You can specify metrics when adding routes with ip route or within Netplan:
# ip command example
sudo ip route add default via 192.168.1.254 dev enp0s3 metric 100
sudo ip route add default via 192.168.1.253 dev enp0s3 metric 200 # Less preferred
In Netplan, you can add metric: <value> to your route entry:
      routes:
        - to: default
          via: 192.168.1.254
          metric: 100
        - to: default
          via: 192.168.1.253
          metric: 200
The system will prioritize the route with metric: 100. This is fundamental for failover scenarios where you want a backup gateway to be used only if the primary one becomes unreachable.
Troubleshooting Network Connectivity
Despite careful configuration, network issues can arise. A systematic approach to troubleshooting is crucial:
- Verify IP Address and Routing Table:
ip a: Confirm your interface has the correct IP address and isUP.ip r: Ensure the default route (default via <gateway_ip> dev <interface>) is present and points to the correct gateway.ip neigh: Check the ARP cache to ensure your system knows the MAC address of the gateway. If the gateway entry showsNOARPor is missing, it might be unreachable.
- Test Reachability (Ping):
ping 127.0.0.1: Test your loopback interface. If this fails, your network stack is severely broken.ping <your_own_ip_address>: Test your network interface.ping <new_gateway_ip>: Test connectivity to the gateway. If this fails, the gateway is either down, misconfigured on the gateway itself, or there's a physical layer issue (cable, switch port).ping <another_local_device_ip>: Test connectivity to another device on the same subnet.ping 8.8.8.8: Test connectivity to a public IP address (e.g., Google's DNS). This bypasses DNS resolution issues.ping google.com: Test full internet connectivity, including DNS resolution.
- Trace Route (
traceroute/mtr):traceroute google.com: Shows the path packets take to a destination, identifying where connectivity breaks down.mtr google.com: A more advanced tool that combinespingandtraceroute, providing continuous statistics and highlighting packet loss at each hop. Excellent for diagnosing intermittent issues.
- Check DNS Resolution (
dig/nslookup):- If
ping 8.8.8.8works butping google.comfails, the issue is likely with DNS. dig google.com: Tests DNS resolution.cat /etc/resolv.conf: Verifies the configured DNS servers. Ensure they are correct and reachable.
- If
- Firewall Rules (
ufw/iptables):sudo ufw status: If UFW (Uncomplicated Firewall) is enabled, check its rules. A firewall might be blocking outbound traffic or specific ports.sudo iptables -L -n -v: For more detailediptablesrules. Ensure no rules are inadvertently blocking essential network traffic.
Security Implications
Changing the default gateway has significant security implications. * Trustworthiness: The new gateway must be a trusted device. If you point your traffic to a malicious gateway, all your outbound traffic could be intercepted, logged, or rerouted, leading to data breaches or Man-in-the-Middle attacks. * Access Control: Ensure that only authorized personnel can modify network configurations, especially the default gateway. Strong password policies and limiting sudo access are crucial. * Network Segmentation: In secure environments, different gateways might lead to different network segments, each with its own security posture. Ensure your system is correctly configured to use the gateway appropriate for its security zone.
Performance Considerations
While not directly tied to changing the gateway itself, the choice of gateway can impact network performance. * Gateway Load: An overloaded or underpowered gateway router can become a bottleneck, increasing latency and reducing throughput for all traffic passing through it. * Path Efficiency: In complex networks, different gateways might lead to paths with varying numbers of hops or different network segments. Choosing a gateway that offers the most direct or least congested path to critical resources can improve performance. * Latency: The physical distance and the quality of the network links between your system and the gateway, and then from the gateway to the destination, directly affect latency.
For example, when dealing with highly available, performant services, the underlying network infrastructure must be impeccably configured. Platforms like APIPark, an open-source AI gateway and API management solution, demand a robust and stable network environment. A correctly configured default gateway ensures that traffic flows efficiently and reliably to and from critical API services. This is essential for features such as quick integration of 100+ AI models, unified API invocation, and end-to-end API lifecycle management, all of which rely on high-performance network connectivity. With APIPark's ability to achieve over 20,000 transactions per second (TPS) with modest hardware, the importance of a well-tuned gateway and network backbone becomes even more evident, ensuring that AI and REST services are delivered with minimal latency and maximum reliability.
These advanced considerations transform the simple act of changing a default gateway into a strategic network management decision, highlighting the need for a holistic understanding of your network environment and its implications for security and performance.
Conclusion
Mastering the art of changing your default gateway on Ubuntu 20.04 is a fundamental skill for anyone managing Linux systems, from individual workstations to sprawling server farms. This comprehensive guide has walked you through the critical "why" behind this task, the underlying network principles, and the various "how-to" methods, each tailored to different scenarios and levels of persistence.
We began by demystifying the concept of a default gateway, illustrating its role as the indispensable bridge connecting your local network to the wider digital world. Understanding why you might need to alter this setting – be it for network migration, troubleshooting, advanced configurations, or security – underscores its importance. The journey then led us through Ubuntu's evolving network configuration landscape, highlighting Netplan as the modern, declarative approach for persistent settings, alongside NetworkManager for desktop environments and the versatile ip command for temporary diagnostics.
The practical methods detailed, from the immediate effects of ip route for quick testing to the robust, persistent configuration via Netplan's YAML files, and the user-friendly NetworkManager options, provide a complete toolkit. Emphasis was placed on critical safety measures, such as backing up configurations and maintaining out-of-band access, to prevent common pitfalls and ensure a smooth, risk-averse process. Finally, we explored advanced scenarios, including the complexities of multiple gateways, policy-based routing, and the vital role of metrics, alongside a structured approach to troubleshooting and key considerations for network security and performance.
As you configure and reconfigure your network settings, remember that precision and verification are your closest allies. Every change, especially to a component as central as the default gateway, should be followed by thorough testing to ensure desired connectivity and functionality. By embracing these principles and utilizing the tools and knowledge shared in this guide, you are well-equipped to manage your Ubuntu network configurations with confidence and expertise, ensuring your systems remain reliably connected and performing optimally within any network topology.
Frequently Asked Questions (FAQ)
1. What is the default gateway and why is it important? The default gateway is a network device, typically a router, that serves as an entry and exit point for data packets on a local network. It's crucial because it enables your Ubuntu machine to communicate with devices outside its immediate local network segment, such as servers on the internet or in different subnets. Without a correctly configured default gateway, your system would be isolated to its local network.
2. What's the main difference between changing the gateway with ip route and Netplan? The primary difference is persistence. Changes made with the ip route command are temporary; they only last until the system reboots or the network interface is reset. This is useful for troubleshooting or temporary adjustments. Netplan, on the other hand, provides persistent changes by modifying YAML configuration files. These changes survive reboots and are the recommended method for permanent network configurations on Ubuntu 20.04 servers.
3. What should I do if I change my default gateway remotely via SSH and lose connection? This is a common and critical risk. If you lose your SSH connection, it likely means your new gateway configuration is incorrect or unreachable. If you used netplan try, it will revert after 120 seconds if you don't confirm, potentially restoring connectivity. If you used netplan apply or ip route without a rollback mechanism, you'll need out-of-band access (e.g., KVM over IP, hypervisor console, or physical access) to correct the configuration. Always test with netplan try and have a backup plan when making remote network changes.
4. Can I have multiple default gateways on Ubuntu? Yes, it's possible but requires advanced configuration, often involving policy-based routing. Typically, a system has one primary default gateway for all general traffic. However, you can configure multiple default routes with different "metrics" (preference values) for failover purposes, or use ip rule and ip route table to implement policy-based routing, directing specific types of traffic through different gateways based on criteria like source IP or destination.
5. What troubleshooting steps should I take if my network connectivity breaks after changing the default gateway? First, check your new default gateway using ip route show to ensure it's correctly listed. Second, ping your new gateway's IP address (ping <new_gateway_ip>) to confirm it's reachable on your local network. Third, test external connectivity with a public IP address (e.g., ping 8.8.8.8) to bypass DNS issues, then ping google.com to test DNS resolution. If you used Netplan, double-check your YAML file for syntax errors (indentation, typos) and use sudo netplan try for safer testing or sudo netplan apply --debug for verbose error messages. Also, review firewall rules with sudo ufw status or sudo iptables -L.
🚀You can securely and efficiently call the OpenAI API on APIPark in just two steps:
Step 1: Deploy the APIPark AI gateway in 5 minutes.
APIPark is developed based on Golang, offering strong product performance and low development and maintenance costs. You can deploy APIPark with a single command line.
curl -sSO https://download.apipark.com/install/quick-start.sh; bash quick-start.sh

In my experience, you can see the successful deployment interface within 5 to 10 minutes. Then, you can log in to APIPark using your account.

Step 2: Call the OpenAI API.