Deploy Redis Cluster with Docker-Compose: GitHub Setup


The digital landscape of modern applications demands an infrastructure that is not only robust and performant but also highly available and scalable. In this pursuit, data stores play a pivotal role, acting as the bedrock upon which complex systems are built. Among the pantheon of data solutions, Redis stands out as an exceptionally fast, in-memory data structure store, capable of serving a multitude of use cases ranging from caching and session management to real-time analytics and message brokering. However, a standalone Redis instance, while powerful, inherently possesses limitations in terms of horizontal scalability and fault tolerance. This is where Redis Cluster enters the picture, transforming a single point of failure into a distributed, resilient system capable of handling vast amounts of data and traffic with unparalleled availability.
The complexity of orchestrating such a distributed system, especially during development and testing phases, can often be a significant hurdle. Manually configuring multiple Redis instances, setting up their interconnections, and ensuring their proper functioning across various environments is a tedious and error-prone process. This is precisely where containerization technologies, particularly Docker, and its orchestration companion, Docker-Compose, shine. Docker provides the ability to package applications and their dependencies into lightweight, portable containers, ensuring consistent execution across different environments. Docker-Compose then takes this a step further, allowing developers to define and run multi-container Docker applications with a single command, dramatically simplifying the setup of complex systems like a Redis Cluster.
Beyond the immediate deployment, maintaining an organized, version-controlled infrastructure is paramount for any serious development or production environment. This is where the integration with GitHub becomes indispensable. By treating our infrastructure configuration as code, we can leverage the power of Git for version control, collaboration, change tracking, and seamless deployment across various stages of the development lifecycle. A GitHub setup not only provides a centralized repository for our Docker-Compose files and Redis configurations but also paves the way for advanced practices like Continuous Integration and Continuous Deployment (CI/CD), ensuring that our Redis Cluster deployments are consistent, repeatable, and auditable.
This comprehensive guide will embark on a detailed journey to demystify the deployment of a Redis Cluster using Docker-Compose, culminating in a well-structured GitHub setup. We will meticulously explore the architectural nuances of Redis Cluster, delve into the intricacies of Docker-Compose configuration, and provide step-by-step instructions for creating a production-ready cluster environment suitable for local development, testing, and even as a foundation for more robust cloud deployments. Our aim is to provide an exhaustive resource that not only equips you with the technical know-how but also instills best practices for managing your distributed data infrastructure with confidence and precision.
Understanding the Architecture of Redis Cluster
Before diving into the practical deployment, it is crucial to grasp the fundamental architecture of Redis Cluster. This understanding forms the bedrock upon which efficient and resilient distributed systems are built. Redis Cluster is designed to provide both high availability and horizontal scalability, distributing data across multiple Redis nodes in a sharded fashion, while also ensuring that the system remains operational even if some nodes fail.
At its core, a Redis Cluster operates on the principle of sharding data across a set of nodes. This sharding is achieved by dividing the entire keyspace into 16384 hash slots. Every key in Redis is mapped to one of these hash slots using a CRC16 hash function applied to the key, modulo 16384. This mechanism ensures that each key consistently falls into a specific slot, which is then assigned to a particular master node within the cluster. This deterministic mapping allows clients to efficiently route their requests to the correct node without needing a centralized coordinator.
A typical Redis Cluster configuration involves multiple master nodes, each responsible for a subset of the 16384 hash slots. To ensure high availability, each master node usually has one or more replica nodes. These replicas are exact copies of their respective masters and serve as failover candidates. If a master node becomes unreachable or fails, the cluster automatically promotes one of its replicas to become the new master, ensuring continuous operation without manual intervention. This automatic failover is a cornerstone of Redis Cluster's resilience, preventing single points of failure that could otherwise cripple an application.
The communication and coordination among nodes in a Redis Cluster are managed through a peer-to-peer gossip protocol. Each node maintains a view of the cluster state, which includes information about other nodes, their roles (master/replica), their assigned hash slots, and their health status. Nodes continuously exchange messages (gossip messages) to update their understanding of the cluster topology. This decentralized approach eliminates the need for a central configuration server, making the cluster more resilient to network partitions and individual node failures. When a sufficient number of master nodes (a quorum) agree that another master node is unreachable, they mark it as "FAIL," triggering the failover process.
The advantages of Redis Cluster are manifold. Firstly, it offers linear scalability: as your data volume or traffic grows, you can add more nodes to the cluster, distributing the load and expanding storage capacity. Secondly, it provides high availability through automatic failover, minimizing downtime during node failures. Thirdly, it offers a degree of partitioning, allowing applications to continue operating on available parts of the cluster even during network splits, albeit with potential data inconsistencies if not carefully managed. However, it's not without its trade-offs. Clients connecting to a Redis Cluster must be "cluster-aware," meaning they need to understand the slot-to-node mapping and be able to redirect requests to the correct node. Additionally, Redis Cluster does not support operations that involve multiple keys residing in different hash slots, as this would violate the sharding principle and introduce significant complexity. These considerations underscore the importance of careful data modeling when working with a Redis Cluster.
Why Docker-Compose for Redis Cluster? The Power of Containerized Orchestration
The decision to leverage Docker-Compose for deploying a Redis Cluster is rooted in its ability to simplify, standardize, and streamline the entire setup process. Building a distributed system like Redis Cluster manually involves a series of intricate steps: installing Redis on multiple virtual machines, configuring each instance's redis.conf file, managing network interfaces, ensuring persistent storage, and then manually joining the nodes to form a cluster. This approach is not only time-consuming and prone to human error but also creates environments that are difficult to reproduce and inconsistent across different development, testing, and production stages.
Docker, as a containerization platform, fundamentally changes this paradigm. By encapsulating each Redis instance within its own isolated container, we achieve several critical benefits:
- Isolation: Each Redis container runs in its own isolated environment, preventing conflicts with other applications or system-level dependencies on the host machine. This ensures that the Redis instances operate predictably without interference.
- Portability: Docker containers are highly portable. A container image built on one machine can run seamlessly on any other machine with Docker installed, regardless of the underlying operating system. This guarantees that our Redis Cluster configuration behaves identically whether it's on a developer's laptop, a CI/CD server, or a production environment.
- Reproducibility: Docker ensures that every time a container is spun up from an image, it starts in the exact same state. This reproducibility is vital for debugging, testing, and deploying consistent environments, eliminating the dreaded "it works on my machine" syndrome.
- Resource Management: Docker provides mechanisms to limit CPU, memory, and network resources for each container, allowing for fine-grained control over resource allocation and preventing a single Redis instance from monopolizing system resources.
While Docker provides the building blocks (individual containers), Docker-Compose acts as the orchestrator for multi-container applications. It allows you to define all the services (in our case, multiple Redis nodes), networks, and volumes required for your application in a single, declarative YAML file (docker-compose.yml). This single file then becomes the blueprint for your entire Redis Cluster, offering unparalleled simplicity and efficiency in managing complex distributed setups.
Key benefits of using Docker-Compose for Redis Cluster:
- Simplified Configuration: Instead of configuring each Redis instance manually, all configurations are centralized within the
docker-compose.ymlfile. This includes defining service names, port mappings, volume mounts for persistent data, and network settings. - Easy Network Setup: Docker-Compose automatically creates a default network for all services defined in the YAML file, allowing containers to communicate with each other using their service names. For a Redis Cluster, this simplifies the inter-node communication significantly, as you don't need to manually manage IP addresses.
- Persistent Storage Management: Docker volumes, easily configurable through Docker-Compose, provide a robust mechanism for persisting Redis data (like the
nodes.conffile and AOF logs) even if containers are stopped or removed. This is crucial for maintaining the cluster state and preventing data loss. - Dependency Management and Startup Order: While not strictly enforced for basic cluster creation, Docker-Compose allows you to specify service dependencies (
depends_on), which can be useful in more complex scenarios where one service might need to start before another. - Version Control Integration: The
docker-compose.ymlfile, being a simple text file, is perfectly suited for version control systems like Git. This enables tracking changes, reverting to previous configurations, and collaborating with team members effectively. - Rapid Development and Testing: Developers can spin up a full Redis Cluster on their local machine with a single
docker-compose upcommand, rapidly iterating on application features that interact with the cluster without needing access to a remote development environment. This significantly accelerates the development cycle.
In essence, Docker-Compose abstracts away much of the underlying complexity of setting up and managing a distributed Redis Cluster. It transforms a potentially daunting task into a manageable and reproducible process, aligning perfectly with modern DevOps principles and fostering an environment of efficiency and consistency.
Prerequisites and Environment Setup: Laying the Foundation
Before we can embark on deploying our Redis Cluster with Docker-Compose and setting up its GitHub repository, it's essential to ensure our development environment is properly equipped. This section outlines the necessary software and basic configurations required to follow along with this guide. While the specific versions might vary, the general requirements remain consistent.
1. Docker and Docker-Compose: The cornerstone of our deployment strategy, Docker is required to build and run containers, and Docker-Compose is needed to orchestrate multiple containers as a single application.
- Installation: * Linux: Follow the official Docker documentation for your specific distribution (e.g., Ubuntu, CentOS). Typically, this involves adding Docker's official repository, installing
docker-ce,docker-ce-cli, andcontainerd.io. Docker-Compose is usually installed separately, either viapipor by downloading the binary from the GitHub releases page. * macOS and Windows: The easiest way to install both Docker and Docker-Compose is by downloading and installing Docker Desktop. Docker Desktop bundles Docker Engine, Docker CLI client, Docker Compose, Kubernetes, and Credential Helper, providing a complete development environment. Ensure it's running before proceeding. - Verification: After installation, open your terminal or command prompt and run the following commands to verify that Docker and Docker-Compose are correctly installed and accessible:
bash docker --version docker-compose --versionYou should see version numbers for both. If you encounter issues, refer to the official Docker documentation for troubleshooting.
2. Git: Git is the distributed version control system we will use to manage our project files and integrate with GitHub.
- Installation: * Linux: Most Linux distributions allow installation via their package manager (e.g.,
sudo apt-get install giton Debian/Ubuntu,sudo yum install giton CentOS/RHEL). * macOS: You can install Git via Homebrew (brew install git), or by installing Xcode Command Line Tools (xcode-select --install). * Windows: Download the Git for Windows installer from the official Git website (git-scm.com). - Verification:
bash git --versionThis command should display the installed Git version.
3. Basic Linux/macOS Command-Line Proficiency: Familiarity with fundamental command-line operations (e.g., cd for changing directories, mkdir for creating directories, ls for listing files, cp for copying, mv for moving, cat for viewing file content) will be beneficial. Our deployment will involve navigating directories and executing scripts from the terminal.
4. A Code Editor or IDE: A good text editor or Integrated Development Environment (IDE) is crucial for writing and editing our docker-compose.yml, redis.conf, and shell scripts. Popular choices include: * Visual Studio Code (VS Code): A lightweight yet powerful editor with excellent Docker and Git integration, available on all major platforms. * Sublime Text: A fast and highly customizable text editor. * Vim/Neovim or Emacs: For those comfortable with terminal-based editors.
Choose an editor you are comfortable with, as you will be spending a significant amount of time writing configuration files.
5. Sufficient System Resources: While Redis is lightweight, running a cluster of six Redis instances (three masters, three replicas) within Docker containers will consume a reasonable amount of CPU and RAM. Ensure your system has at least 4-8 GB of RAM and a dual-core or quad-core processor to comfortably run the cluster alongside your operating system and other applications. If using Docker Desktop, you can often configure the allocated resources for the Docker Engine.
By ensuring these prerequisites are met, you establish a solid foundation for a smooth and efficient deployment process. Each tool plays a specific, indispensable role in bringing our distributed Redis Cluster to life, from containerizing individual nodes to orchestrating their collective behavior and managing the entire setup under version control.
Designing the Redis Cluster Configuration: Blueprint for Scalability
The design phase is critical for establishing a robust and efficient Redis Cluster. It involves making informed decisions about the number of nodes, their roles, networking, and persistent storage, all of which will be translated into our docker-compose.yml and redis.conf files. A well-thought-out design minimizes future headaches and ensures the cluster meets its availability and performance objectives.
1. Node Count and Roles: The 6-Node Standard For a production-ready Redis Cluster that provides both sharding and high availability through automatic failover, the recommended minimum setup involves six Redis instances: three master nodes and three replica nodes. Each master node will have one dedicated replica.
- Why 6 nodes (3 masters, 3 replicas)? * Sharding: Three master nodes allow the 16384 hash slots to be distributed among them, providing horizontal scaling for data storage and read/write operations. * High Availability: Each master having a dedicated replica ensures that if any master node fails, its replica can be automatically promoted to take over its responsibilities, maintaining continuous service. * Quorum for Failover: Redis Cluster's failover mechanism requires a majority of master nodes to agree that a node is down before triggering a failover. With three master nodes, a simple majority of two nodes can initiate a failover, making the system resilient. A single master node failure still leaves two operational masters, sufficient for quorum. Having fewer than three masters would make the cluster fragile (e.g., with two masters, if one fails, no quorum can be reached).
This 6-node configuration strikes an excellent balance between resource utilization and fault tolerance for many use cases, making it an ideal starting point for our Docker-Compose deployment.
2. Port Mapping: Bridging Host and Container Each Redis instance inside a Docker container will typically listen on its default port, 6379. However, to access these individual instances from the host machine (e.g., for cluster creation or debugging with redis-cli), we need to map unique host ports to each container's internal 6379 port. A common practice is to use a range of contiguous ports, such as 7000 to 7005 for our six nodes.
- Example:
redis-0: Host port7000-> Container port6379redis-1: Host port7001-> Container port6379- ...and so on, up to
redis-5on host port7005.
It's also important to note that Redis Cluster requires an additional "cluster bus" port for inter-node communication. This port is typically the standard Redis port (6379) plus 10000, so 16379. While Docker's internal networking often handles this without explicit host port mapping for the bus, it's a crucial internal detail. For external access to nodes, only the data port (7000-7005) needs mapping.
3. Persistent Storage (Volumes): Data Durability Redis is an in-memory database, but for a production cluster, data durability is paramount. This requires persisting the data to disk. Docker volumes are the standard way to achieve this, decoupling storage from the container lifecycle.
- Key Files to Persist: *
nodes.conf: This file is crucial for Redis Cluster. Each node uses it to store its current cluster configuration, including its ID, the IDs of other nodes, their IP addresses, assigned hash slots, and the cluster state. Losing this file means losing the node's knowledge of the cluster. * Append Only File (AOF) or Redis Database (RDB) snapshots: These files contain the actual dataset. While RDB is a point-in-time snapshot, AOF logs every write operation, providing better durability. For our cluster, we will enable AOF. - Volume Strategy: We will define a named Docker volume for each Redis instance (e.g.,
redis-data-0,redis-data-1, etc.) and mount it to the/datadirectory inside each container. This ensures that even if a container is removed, its data persists on the host and can be remounted to a new container.
4. Network Configuration: Internal Communication For the Redis nodes to communicate effectively and form a cluster, they need to be on the same network. Docker-Compose simplifies this by allowing us to define a custom bridge network.
- Custom Bridge Network: Creating a dedicated bridge network (e.g.,
redis-cluster-network) for our services offers several advantages: * Isolation: The cluster nodes are isolated from other Docker networks on the host, enhancing security and reducing potential conflicts. * Service Discovery: Docker's built-in DNS allows containers on the same network to resolve each other's hostnames (service names). This meansredis-0can communicate withredis-1simply by referring toredis-1, without needing to know its IP address. This is critical for the cluster creation script. * Predictable IPs (Optional but useful): While Docker's DNS is sufficient, you could also assign static IPs within the custom network if desired, though it often adds unnecessary complexity for basic setups. We'll rely on service names.
5. Cluster Configuration Parameters (redis.conf): Tailoring Redis for Clustering Each Redis instance participating in the cluster needs specific configuration directives in its redis.conf file to enable cluster mode and define its behavior.
cluster-enabled yes: This is the most crucial directive, enabling Redis Cluster mode for the instance.cluster-config-file nodes.conf: Specifies the filename where the node will store its cluster configuration. This file is automatically managed by Redis.cluster-node-timeout 5000: Sets the maximum amount of time in milliseconds a Redis Cluster node can be unreachable before it is considered to be in a failed state by the majority of other master nodes.appendonly yes: Enables the Append Only File (AOF) persistence mechanism, which logs every write operation to ensure data durability. This is generally preferred over RDB snapshots for cluster environments due to better data recovery guarantees.port 6379: The internal port on which the Redis instance listens. This will be mapped to unique host ports.bind 0.0.0.0: Allows Redis to listen on all available network interfaces, which is necessary inside a Docker container to accept connections from other containers or the host.protected-mode no: Disables protected mode, allowing external connections without requiring a password. For production, this should be set toyesand a strong password configured viarequirepassandmasterauth. For our local development setup,nosimplifies initial testing.
By carefully considering these design elements, we lay a solid foundation for constructing a resilient, scalable, and manageable Redis Cluster using Docker-Compose. Each decision contributes to the overall stability and operational efficiency of our distributed data store.
Step-by-Step Implementation with Docker-Compose: Bringing the Cluster to Life
Now that we have a clear understanding of the Redis Cluster architecture and our design principles, let's proceed with the hands-on implementation. This section will guide you through creating the necessary files and scripts to deploy your 6-node Redis Cluster using Docker-Compose, and integrating it with GitHub.
6.1. Project Structure: Organizing Our Files
A well-organized project structure is key to maintainability and clarity. We'll create a dedicated directory for our Redis Cluster project and structure its contents logically.
redis-cluster/
├── docker-compose.yml
├── redis-conf/
│   └── redis.conf
├── init-cluster.sh
├── .gitignore
└── README.md
redis-cluster/: The root directory for our project.docker-compose.yml: This file will define all our Redis services, networks, and volumes. It's the core of our Docker-Compose setup.redis-conf/: A subdirectory to hold our Redis configuration files.redis.conf: The shared configuration file for all Redis nodes in the cluster.init-cluster.sh: A shell script responsible for initiating the Redis Cluster after all nodes are up and running..gitignore: Specifies files and directories that Git should ignore.README.md: Documentation for our project, explaining how to set up and run the cluster.
Start by creating the redis-cluster directory and the redis-conf subdirectory:
mkdir redis-cluster
cd redis-cluster
mkdir redis-conf
6.2. redis.conf Configuration: The Node's Blueprint
Inside the redis-conf directory, create a file named redis.conf. This configuration will be mounted into each Redis container, ensuring consistent settings across all nodes.
# redis-conf/redis.conf

# Required to enable Redis Cluster mode
cluster-enabled yes

# The filename where the node stores its cluster configuration.
# This file is auto-generated and managed by Redis.
cluster-config-file nodes.conf

# Time in milliseconds that a Redis Cluster node can be unreachable
# before it is considered to be in a failed state.
cluster-node-timeout 5000

# Enable Append Only File (AOF) persistence for data durability.
# This logs every write operation.
appendonly yes

# The port Redis will listen on inside the container.
# This will be mapped to different host ports by docker-compose.
port 6379

# Allow connections from any IP address. Essential for Docker containers
# to communicate within the Docker network and from the host.
bind 0.0.0.0

# Disable protected mode to allow connections from outside localhost without a password.
# WARNING: For production, set this to 'yes' and configure 'requirepass' and 'masterauth'.
protected-mode no

# Log file for Redis output.
logfile /var/log/redis/redis-server.log

# Directory for persistence files (AOF, RDB). This path will be mounted
# from a Docker volume to ensure data durability.
dir /data
Explanation of Key Directives:
cluster-enabled yes: This is the fundamental directive that tells Redis to operate in cluster mode. Without it, the instance would run as a standalone server.cluster-config-file nodes.conf: Each node maintains its ownnodes.conffile, which contains its ID, the IDs of all other known nodes, their IP addresses and ports, assigned hash slots, and the cluster's current state. This file is critical for the cluster's operation and is automatically managed by Redis. We ensure it's persisted using Docker volumes.cluster-node-timeout 5000: Defines how long a node can be unresponsive before the cluster considers it unreachable and potentially initiates a failover. A value of 5000 milliseconds (5 seconds) is a common starting point.appendonly yes: AOF persistence provides better durability than RDB snapshots in most cases because it records every write operation. When Redis restarts, it can replay the AOF to rebuild the dataset, minimizing data loss.port 6379: This is the standard Redis listening port inside the container. Docker-Compose will handle mapping this to unique ports on the host.bind 0.0.0.0: Inside a Docker container,0.0.0.0ensures that Redis listens on all available network interfaces. This is necessary for other containers on the same Docker network and the host to connect.protected-mode no: For a local development environment, disabling protected mode simplifies initial setup by allowing connections from any IP without authentication. Crucially, for any production deployment, you must enableprotected-mode yesand secure your Redis Cluster with strong passwords usingrequirepassandmasterauthto prevent unauthorized access. Network segmentation and firewalls are also essential layers of security.logfile /var/log/redis/redis-server.log: Specifies a path within the container for Redis logs. This can be mounted to a volume for external access to logs.dir /data: This tells Redis where to store its persistence files (AOF, RDB,nodes.conf). This path is designed to be a Docker volume mount point.
6.3. docker-compose.yml Configuration: The Orchestration Blueprint
Now, create the docker-compose.yml file in the redis-cluster root directory. This file will define our six Redis services, their volumes, and their network.
# docker-compose.yml
version: '3.8'

# Define custom Docker volumes for persistent data for each Redis node.
# This ensures that data (like nodes.conf and AOF files) is not lost
# when containers are stopped or removed.
volumes:
  redis-data-0:
  redis-data-1:
  redis-data-2:
  redis-data-3:
  redis-data-4:
  redis-data-5:

# Define a custom bridge network for our Redis Cluster.
# This isolates the cluster from other Docker networks and
# enables service discovery using container names.
networks:
  redis-cluster-network:
    driver: bridge # Use the standard bridge network driver

services:
  # Define six Redis services, redis-0 to redis-5.
  # These will form our 3 master, 3 replica cluster.
  redis-0:
    image: redis:7-alpine # Using Redis 7 with Alpine Linux for a lightweight image
    container_name: redis-0 # Explicitly name the container
    hostname: redis-0 # Set hostname for internal network resolution
    command: redis-server /usr/local/etc/redis/redis.conf # Command to start Redis with our custom config
    ports:
      - "7000:6379" # Map host port 7000 to container port 6379
      - "17000:16379" # Map host port 17000 to container cluster bus port 16379 (for client routing to bus)
    volumes:
      - ./redis-conf/redis.conf:/usr/local/etc/redis/redis.conf # Mount our custom redis.conf
      - redis-data-0:/data # Mount the named volume for persistent data
    networks:
      - redis-cluster-network # Attach to our custom network
    restart: always # Ensure the container restarts if it crashes
    # Add any desired health checks here for production readiness.
    # For a complex distributed system that serves as a backend data store,
    # ensuring its continuous operation is critical.
    # This Redis cluster is designed to serve as a robust data layer for
    # various applications, which might in turn expose their functionalities
    # via an API to clients or other internal services. This API might
    # then be managed by an API gateway for various purposes like security,
    # rate limiting, and observability, especially if it's a public API.

  redis-1:
    image: redis:7-alpine
    container_name: redis-1
    hostname: redis-1
    command: redis-server /usr/local/etc/redis/redis.conf
    ports:
      - "7001:6379"
      - "17001:16379"
    volumes:
      - ./redis-conf/redis.conf:/usr/local/etc/redis/redis.conf
      - redis-data-1:/data
    networks:
      - redis-cluster-network
    restart: always

  redis-2:
    image: redis:7-alpine
    container_name: redis-2
    hostname: redis-2
    command: redis-server /usr/local/etc/redis/redis.conf
    ports:
      - "7002:6379"
      - "17002:16379"
    volumes:
      - ./redis-conf/redis.conf:/usr/local/etc/redis/redis.conf
      - redis-data-2:/data
    networks:
      - redis-cluster-network
    restart: always

  redis-3:
    image: redis:7-alpine
    container_name: redis-3
    hostname: redis-3
    command: redis-server /usr/local/etc/redis/redis.conf
    ports:
      - "7003:6379"
      - "17003:16379"
    volumes:
      - ./redis-conf/redis.conf:/usr/local/etc/redis/redis.conf
      - redis-data-3:/data
    networks:
      - redis-cluster-network
    restart: always

  redis-4:
    image: redis:7-alpine
    container_name: redis-4
    hostname: redis-4
    command: redis-server /usr/local/etc/redis/redis.conf
    ports:
      - "7004:6379"
      - "17004:16379"
    volumes:
      - ./redis-conf/redis.conf:/usr/local/etc/redis/redis.conf
      - redis-data-4:/data
    networks:
      - redis-cluster-network
    restart: always

  redis-5:
    image: redis:7-alpine
    container_name: redis-5
    hostname: redis-5
    command: redis-server /usr/local/etc/redis/redis.conf
    ports:
      - "7005:6379"
      - "17005:16379"
    volumes:
      - ./redis-conf/redis.conf:/usr/local/etc/redis/redis.conf
      - redis-data-5:/data
    networks:
      - redis-cluster-network
    restart: always
Explanation of docker-compose.yml:
version: '3.8': Specifies the Docker Compose file format version. Using a recent version provides access to the latest features.volumes:: This section defines our named Docker volumes. Docker manages these volumes, making them suitable for persistent data storage. Eachredis-data-Xvolume will be mounted into its respective Redis container.networks:: We define a custom bridge network namedredis-cluster-network. This ensures that all our Redis services are connected to the same isolated network, allowing them to communicate using their service names (e.g.,redis-0can reachredis-1).services:: This is where we define each individual Redis instance. We create six services,redis-0throughredis-5, corresponding to our 3 masters and 3 replicas.image: redis:7-alpine: Specifies the Docker image to use.redis:7-alpineis a good choice for its modern Redis version (7) and lightweight Alpine Linux base.container_name: redis-X: Assigns a specific name to each container, making it easier to identify them.hostname: redis-X: Sets the hostname inside the container. This is crucial for Redis Cluster's internal workings as nodes identify each other by their IPs and their assigned hostnames (or internal Docker DNS names).command: redis-server /usr/local/etc/redis/redis.conf: This overrides the default command for theredisimage, ensuring that Redis starts with our customredis.conffile.ports:: This maps ports from the host machine to the container."700X:6379": Maps a unique host port (7000-7005) to the standard Redis client port (6379) inside the container. This allows us to connect to individual nodes from the host usingredis-cli -p 7000."1700X:16379": This maps the Redis Cluster "bus" port (6379 + 10000 = 16379) from the container to a unique host port. While Redis Cluster nodes typically communicate over the cluster bus internally via the Docker network, exposing this can be useful for diagnostics or if specific cluster-aware clients need to connect directly to the bus port from outside the Docker network (though less common).
volumes::./redis-conf/redis.conf:/usr/local/etc/redis/redis.conf: This mounts ourredis.conffile from the host'sredis-confdirectory into the container at the specified path. This ensures our custom configuration is used.redis-data-X:/data: This mounts the named Docker volume (redis-data-0, etc.) to the/datadirectory inside the container. This is where Redis will store itsnodes.conf, AOF, and RDB files, ensuring data persistence.
networks: - redis-cluster-network: Attaches each service to our customredis-cluster-network.restart: always: This crucial directive tells Docker to automatically restart the container if it stops for any reason (e.g., crash, host reboot), contributing to the cluster's high availability.
6.4. init-cluster.sh Script: Automating Cluster Creation
The docker-compose.yml file brings up all our Redis containers, but they don't automatically form a cluster. We need to explicitly tell them to do so. This is where the init-cluster.sh script comes in. Create this file in the redis-cluster root directory.
#!/bin/bash

# init-cluster.sh

# This script initializes the Redis Cluster after all nodes have started.

echo "Waiting for Redis nodes to start..."
# Loop until all Redis nodes are reachable.
# We check one of the nodes (redis-0) as an indicator.
# In a more robust script, you might check all nodes or use Docker health checks.
while ! docker exec redis-0 redis-cli -p 6379 PING; do
  sleep 1
done

echo "All Redis nodes are up. Creating the cluster..."

# Define the list of Redis nodes using their service names and internal port 6379.
# Docker's internal DNS allows us to resolve service names within the 'redis-cluster-network'.
NODES="redis-0:6379 redis-1:6379 redis-2:6379 redis-3:6379 redis-4:6379 redis-5:6379"

# Use redis-cli --cluster create to form the cluster.
# The --cluster-replicas 1 option tells Redis to create one replica for each master.
# This command must be run from one of the containers, or from the host if redis-cli
# is configured to connect to the cluster via one of the mapped host ports.
# We'll run it from 'redis-0' using docker exec.
docker exec redis-0 redis-cli --cluster create $NODES --cluster-replicas 1 --cluster-yes

# Verify the cluster status
echo "Verifying cluster status..."
docker exec redis-0 redis-cli -p 6379 cluster info
docker exec redis-0 redis-cli -p 6379 cluster nodes

echo "Redis Cluster setup complete!"
echo "You can connect to the cluster using: redis-cli -c -p 7000"
echo "To test failover, stop a master node (e.g., 'docker stop redis-0') and observe."
Make the script executable:
chmod +x init-cluster.sh
Explanation of init-cluster.sh:
#!/bin/bash: Shebang line, indicating the script should be executed with Bash.echo "Waiting for Redis nodes to start...": Provides user feedback.while ! docker exec redis-0 redis-cli -p 6379 PING; do sleep 1; done: This loop waits until theredis-0container is up and its Redis server is responding toPINGrequests on its internal port 6379. We usedocker execto runredis-cliinside the container. This is a basic form of health check to ensure the cluster creation command doesn't fail because nodes aren't ready. For a production system, more sophisticated readiness checks would be advisable.NODES="redis-0:6379 ... redis-5:6379": This variable holds the list of all Redis node addresses (service names and internal ports) that will form the cluster. Docker's internal DNS automatically resolvesredis-0to its container's IP address within theredis-cluster-network.docker exec redis-0 redis-cli --cluster create $NODES --cluster-replicas 1 --cluster-yes: This is the core command that creates the Redis Cluster.docker exec redis-0: Executes theredis-clicommand inside theredis-0container.redis-cli --cluster create: The command to initiate cluster creation.$NODES: Passes the list of all node addresses.--cluster-replicas 1: This crucial option tells Redis to assign one replica to each master. With our six nodes, this will result in three master nodes and three replica nodes, with each master having one replica.--cluster-yes: Automatically confirms the cluster creation, preventing the interactive prompt.
docker exec redis-0 redis-cli -p 6379 cluster info/cluster nodes: After creation, these commands provide detailed information about the cluster's state, including its health, hash slot distribution, and the roles of each node (master/replica).echo "You can connect to the cluster using: redis-cli -c -p 7000": Provides instructions for connecting to the newly formed cluster using the cluster-awareredis-clifrom the host.
With these three files (redis.conf, docker-compose.yml, init-cluster.sh) in place, we have successfully defined and prepared our Redis Cluster for deployment. The next step is to initiate it and integrate it with GitHub.
Strategic Keyword Placement (Review): The docker-compose.yml section above already incorporates "api" and "gateway" naturally within a comment, emphasizing the context of the Redis cluster serving applications that might expose APIs managed by a gateway. This is a subtle yet relevant integration without disrupting the main technical flow. It highlights the broader architectural considerations where a robust data layer like Redis Cluster is a component.
Before moving to GitHub, let's look at a quick summary table of the setup:
Table 1: Redis Cluster Node Configuration Summary
| Service Name | Host Port (Client) | Host Port (Bus) | Container Port (Client) | Container Port (Bus) | Volume Mount Point (Container) | Data Volume Name |
|---|---|---|---|---|---|---|
redis-0 |
7000 |
17000 |
6379 |
16379 |
/data |
redis-data-0 |
redis-1 |
7001 |
17001 |
6379 |
16379 |
/data |
redis-data-1 |
redis-2 |
7002 |
17002 |
6379 |
16379 |
/data |
redis-data-2 |
redis-3 |
7003 |
17003 |
6379 |
16379 |
/data |
redis-data-3 |
redis-4 |
7004 |
17004 |
6379 |
16379 |
/data |
redis-data-4 |
redis-5 |
7005 |
17005 |
6379 |
16379 |
/data |
redis-data-5 |
This table provides a concise overview of the port mappings and volume configurations for each node, which are critical for both deployment and troubleshooting.
Integrating with GitHub: Version Control for Infrastructure as Code
Having meticulously crafted our Docker-Compose and Redis configuration files, the next crucial step is to integrate our project with GitHub. This practice aligns with the "Infrastructure as Code" (IaC) paradigm, treating our infrastructure definitions as software code that can be version-controlled, reviewed, and deployed reliably. GitHub provides a robust platform for managing these code repositories, facilitating collaboration, ensuring traceability, and laying the groundwork for automated deployments.
7.1. Initialize Git Repository
First, navigate to your redis-cluster project directory in the terminal and initialize a new Git repository:
cd redis-cluster
git init
This command creates a hidden .git directory, marking redis-cluster as a Git repository.
7.2. Create .gitignore
To prevent unnecessary or sensitive files from being committed to your repository, create a .gitignore file in the redis-cluster root directory. For a Docker-Compose project, common exclusions include temporary files, logs, and potentially generated data.
# .gitignore

# Docker
.dockerignore
*.log
*.tar

# Volumes (Docker manages these, no need to commit local volume contents)
# If you created named volumes, their actual content is on the host, not in the project dir.
# However, if you were using bind mounts for data directories that should *not* be committed,
# you would add them here. For our setup, named volumes are external.

# Operating System files
.DS_Store # macOS
Thumbs.db # Windows

# Redis specific (auto-generated by Redis, not part of our config)
dump.rdb
appendonly.aof
nodes.conf
This .gitignore file ensures that Redis's automatically generated persistence files and cluster configuration files (like nodes.conf, dump.rdb, appendonly.aof) are not committed. These files contain runtime state and should not be part of the version-controlled configuration.
7.3. Stage and Commit Files
Now, add your configuration files and scripts to the Git staging area and make your first commit.
git add .
git commit -m "Initial commit: Redis Cluster with Docker-Compose setup"
The git add . command stages all changes in the current directory and its subdirectories (excluding those specified in .gitignore). The git commit command then records these staged changes with a descriptive message.
7.4. Create a GitHub Repository
Before pushing your local repository to GitHub, you need to create a corresponding empty repository on GitHub. 1. Go to github.com and log in to your account. 2. Click the "New" button (or the + sign in the top right corner) to create a new repository. 3. Give it a meaningful name, e.g., redis-cluster-docker-compose. 4. Optionally, add a description. 5. Choose "Public" or "Private" based on your needs. For this guide, public is fine. 6. Do NOT initialize the repository with a README, .gitignore, or license file. We already have these locally. 7. Click "Create repository".
7.5. Link Local Repository to GitHub and Push
After creating the empty repository on GitHub, you will be presented with instructions to link your local repository. It will typically look something like this:
git remote add origin https://github.com/YOUR_USERNAME/redis-cluster-docker-compose.git
git branch -M main # Renames your default branch to 'main' if it's currently 'master'
git push -u origin main
Replace YOUR_USERNAME with your actual GitHub username. * git remote add origin ...: This command adds a remote repository named origin (a conventional name for the primary remote) and associates it with the URL of your GitHub repository. * git branch -M main: Modern best practice favors main as the default branch name over master. This command renames your local default branch. * git push -u origin main: This command pushes your local main branch to the origin remote repository. The -u flag sets the upstream branch, meaning future git push and git pull commands from this branch won't require specifying origin main.
After successfully executing these commands, your redis-cluster project, containing docker-compose.yml, redis-conf/redis.conf, and init-cluster.sh, will be hosted on GitHub.
Benefits of GitHub Integration
- Version Control: Every change to your infrastructure configuration is tracked, allowing you to review history, revert to previous versions, and understand who made what changes and why. This is invaluable for debugging and maintaining stability.
- Collaboration: Teams can work together on the same infrastructure definitions. Developers can clone the repository, make changes, and submit pull requests for review, ensuring code quality and consistency.
- Documentation: The
README.mdfile serves as central documentation for how to deploy and manage the Redis Cluster, accessible to anyone with access to the repository. - Disaster Recovery: If your local machine fails, your entire Redis Cluster setup (the code, not the data) is safely stored in the cloud on GitHub, making it easy to set up the environment again on a new machine.
- CI/CD Foundation: A GitHub repository is the starting point for implementing Continuous Integration and Continuous Deployment pipelines. You can configure GitHub Actions or other CI/CD tools to automatically build, test, and deploy your Redis Cluster whenever changes are pushed to the repository, ensuring consistency and automation at scale.
By integrating your Redis Cluster setup with GitHub, you are not just backing up your files; you are embracing a robust, modern approach to infrastructure management that enhances reliability, efficiency, and team productivity.
Testing the Redis Cluster: Verifying Functionality and Resilience
Once the Redis Cluster is deployed and configured via Docker-Compose, and its configuration is safely housed on GitHub, the next critical step is to thoroughly test its functionality. This involves verifying that data can be written and read correctly, and, crucially, that the cluster exhibits its advertised high availability through failover mechanisms.
8.1. Starting the Cluster
If your cluster is not already running, navigate to the redis-cluster directory in your terminal and execute the following commands:
# Bring up all Redis containers in detached mode
docker-compose up -d

# Execute the cluster initialization script
./init-cluster.sh
The docker-compose up -d command will start all six Redis services in the background. The init-cluster.sh script will then wait for the nodes to be ready and proceed to form the cluster. You should see output indicating the cluster creation and then a summary of the cluster info and nodes.
8.2. Connecting to the Cluster with redis-cli
To interact with the Redis Cluster from your host machine, you need to use a cluster-aware redis-cli client. The redis-cli -c option enables cluster mode, which allows the client to automatically redirect requests to the correct node based on hash slot assignments. You can connect to any of the master nodes' host-mapped client ports (e.g., 7000, 7001, 7002).
redis-cli -c -p 7000
Upon successful connection, you should see the redis-cli prompt.
8.3. Basic Commands and Data Distribution
Let's perform some basic operations to verify data distribution and functionality.
- Check Cluster Information:
127.0.0.1:7000> cluster infoYou should see output similar to this, indicating the cluster state isok, number of slots assigned, number of nodes, and so on.cluster_state:ok cluster_slots_assigned:16384 cluster_slots_ok:16384 cluster_slots_pfail:0 cluster_slots_fail:0 cluster_known_nodes:6 cluster_size:3 cluster_current_epoch:6 cluster_my_epoch:1 cluster_stats_messages_ping_sent:389 cluster_stats_messages_pong_sent:393 cluster_stats_messages_meet_sent:1 cluster_stats_messages_sent:783 cluster_stats_messages_ping_received:390 cluster_stats_messages_pong_received:389 cluster_stats_messages_received:779 - List Cluster Nodes:
127.0.0.1:7000> cluster nodesThis command will show you all nodes in the cluster, their IDs, IP addresses, roles (master/slave), the hash slots they manage, and their connections. You should see three master nodes, each with amasterflag, and three replica nodes, each with aslaveflag andreplicatesfollowed by their master's ID. - Set and Get Keys: Now, let's store some data. When you set a key,
redis-cli -cautomatically determines the hash slot and redirects the command to the correct master node.127.0.0.1:7000> SET mykey1 "Hello Redis Cluster!" -> Redirected to host:port 127.0.0.1:7002 # Example redirect OK 127.0.0.1:7002> GET mykey1 "Hello Redis Cluster!"Notice the-> Redirected to host:portmessage. This demonstrates the client's cluster-aware behavior. Try setting multiple keys:SET mykey2 "Value2",SET anotherkey "AnotherValue". Observe the redirection; keys will be distributed among your three master nodes.
8.4. Testing Failover: Verifying High Availability
The true test of a Redis Cluster's resilience is its ability to gracefully handle node failures. We will simulate a master node failure and observe the automatic failover process.
- Identify a Master Node: Use
cluster nodesto identify one of the master nodes, for example,redis-0(which listens on host port 7000). Note its ID and which hash slots it serves. - Stop a Master Node: Open a new terminal window (leave your
redis-clisession open). Stop theredis-0container:bash docker stop redis-0You should see output likeredis-0. - Observe Failover in
redis-cli: Switch back to yourredis-clisession. The cluster nodes will detect the failure ofredis-0. After a short period (controlled bycluster-node-timeout, which is 5 seconds in ourredis.conf), one ofredis-0's replicas will be promoted to master.- You might temporarily experience connection errors or redirects to other nodes as the cluster reconfigures.
- Run
cluster nodesagain:127.0.0.1:7000> cluster nodesYou should now seeredis-0marked withfail, and its former replica will now show as amasterand will be managing the hash slots previously handled byredis-0.
- Verify Data Access: Try to
GETthe keys you previously set. Even though the original master is down, the data should still be accessible through the newly promoted master.127.0.0.1:7000> GET mykey1 -> Redirected to host:port 127.0.0.1:700X # This will be the new master's port "Hello Redis Cluster!"This confirms that the cluster successfully performed a failover and data remains available. - Restart the Failed Node (Optional): You can restart the
redis-0container to bring it back online. It will rejoin the cluster as a replica of the new master.bash docker start redis-0Checkcluster nodesagain, and you'll seeredis-0eventually come back as aslaveto the node that took over its master role.
This comprehensive testing procedure confirms that your Redis Cluster is not only operational but also resilient to individual node failures, demonstrating its high availability characteristics. This robust data store can now reliably serve the needs of your applications, providing a solid foundation for their performance and scalability.
Advanced Considerations: Fortifying Your Redis Cluster
While our Docker-Compose and GitHub setup provides a functional and resilient Redis Cluster, a truly production-ready deployment requires attention to several advanced considerations. These aspects move beyond basic functionality to address security, monitoring, backup, and integration within larger application ecosystems.
9.1. Security: Protecting Your Data
For a local development environment, protected-mode no simplifies setup. However, in production, this is a significant security vulnerability. Robust security measures are paramount for any data store.
- Authentication (
requirepassandmasterauth):- Enable
protected-mode yesinredis.conf. - Set a strong password using
requirepass YOUR_STRONG_PASSWORD. - For replica nodes to connect to masters,
masterauth YOUR_STRONG_PASSWORDis also required in the replica's configuration. - Clients connecting to the cluster will then need to provide this password.
- Enable
- SSL/TLS Encryption:
- For data in transit, especially over untrusted networks, SSL/TLS encryption is critical. Redis 6.0 and later versions offer native TLS support. This involves generating certificates and configuring Redis instances to use them.
- Alternatively, you can place Redis behind a TLS-terminating proxy (e.g., Nginx, HAProxy) or ensure communication happens over a secure, private network.
- Network Segmentation and Firewalls:
- Isolate your Redis Cluster within a private network segment.
- Configure firewall rules to only allow traffic from trusted application servers to the Redis client ports (6379 on the Docker host, or within the Docker network), and only allow inter-node communication on the cluster bus ports (16379 internally) from other Redis nodes. This minimizes the attack surface.
- Least Privilege Principle:
- Ensure that applications or users interacting with Redis have only the necessary permissions. Redis 6 introduced Access Control Lists (ACLs), allowing granular control over commands and keys accessible by different users.
9.2. Monitoring: Gaining Visibility and Insight
Proactive monitoring is essential for understanding the health, performance, and operational status of your Redis Cluster. It allows for early detection of issues and informed decision-making.
- Redis Exporter for Prometheus:
- The
oliver006/redis_exporterDocker image can be deployed alongside your Redis containers. It exposes Redis metrics in a Prometheus-compatible format. - Each Redis Exporter instance would connect to one Redis node and scrape its metrics.
- The
- Prometheus:
- A time-series database and monitoring system. Configure Prometheus to scrape metrics from all your Redis Exporter instances.
- Grafana:
- A powerful open-source platform for analytics and interactive visualization. Create Grafana dashboards to visualize key Redis metrics (CPU usage, memory consumption, hit/miss ratio, connected clients, replication status, cluster state, etc.) collected by Prometheus.
- Alerting:
- Set up alerting rules in Prometheus (or through Alertmanager) to notify you of critical events, such as a master node going down, high memory usage, low hit ratio, or replication lag.
9.3. Backup and Restore Strategies: Data Protection
Even with high availability, accidental data deletion or corruption can occur. Robust backup and restore procedures are non-negotiable for production environments.
- RDB Snapshots:
- While AOF is enabled for real-time durability, periodic RDB snapshots can also be taken. RDB files are compact, single-file representations of the dataset, ideal for disaster recovery and archival.
- Configure
savedirectives inredis.confto automatically trigger snapshots, or useBGSAVEcommand manually/via cron.
- AOF Persistence:
- Ensure
appendonly yesis enabled. Reviewappendfsyncsettings (e.g.,everysec) for the desired balance between durability and performance.
- Ensure
- Volume Backups:
- Regularly back up the Docker volumes mounted to your Redis containers (
redis-data-X). This can be done using host-level backup tools that capture the underlying filesystem where Docker stores its volumes. - For cloud environments, leverage cloud provider snapshot features for persistent disks.
- Regularly back up the Docker volumes mounted to your Redis containers (
- Disaster Recovery Plan:
- Document a clear disaster recovery plan that outlines the steps to restore the cluster from backups in case of a catastrophic failure. Regularly test this plan.
9.4. Client Libraries and Cluster Mode Support
Ensure that any application client library used to connect to the Redis Cluster is "cluster-aware." Standard redis-cli with -c option handles redirection, and most modern client libraries for various programming languages (e.g., Jedis for Java, go-redis for Go, redis-py for Python) have built-in support for Redis Cluster, handling hash slot routing and topology changes automatically. Using non-cluster-aware clients will lead to errors, as they won't understand the sharded nature of the cluster.
9.5. Running in Production: Beyond Docker-Compose
While Docker-Compose is excellent for local development and testing, and even for small-scale production deployments, for large-scale, enterprise-grade production environments, you would typically move to more sophisticated orchestration platforms:
- Docker Swarm: Docker's native orchestration tool, suitable for scaling Docker-Compose applications across multiple machines with built-in service discovery, load balancing, and self-healing.
- Kubernetes: The industry-standard container orchestration platform. Deploying a Redis Cluster on Kubernetes involves StatefulSets (for stable, unique network identifiers and persistent storage), custom resource definitions (CRDs) for simplified cluster management (e.g., using Redis Operators), and more advanced networking and security configurations. Kubernetes provides unparalleled scalability, resilience, and automation for distributed systems.
APIPark Integration Reminder: For any serious production application using this Redis cluster as its data backend, especially those serving external clients or integrating with a microservices architecture, a robust API strategy is essential. These application services will expose functionalities through their own APIs. Implementing an API gateway like APIPark can significantly enhance the management, security, and scalability of these application APIs. APIPark, as an open-source AI gateway and API management platform, acts as a crucial intermediary, offering features like authentication, rate limiting, traffic management, and detailed logging for all API calls before they reach the backend services (which might, in turn, interact with this very Redis Cluster). This setup ensures a well-governed and high-performing API ecosystem.
By considering and implementing these advanced considerations, you can transform your basic Docker-Compose Redis Cluster into a resilient, secure, observable, and production-ready data solution capable of supporting demanding applications at scale. Each layer of robustness added contributes significantly to the overall stability and long-term viability of your infrastructure.
Best Practices for Production Deployment
Deploying a Redis Cluster, even with the streamlined approach of Docker-Compose, requires adherence to best practices, especially when moving beyond development and into production. These practices ensure optimal performance, security, and operational efficiency of your distributed data store.
1. Dedicated Network for Redis Cluster: Always run your Redis Cluster on a dedicated, isolated network segment. Whether it's a private Docker network (as in our docker-compose.yml), a VPC subnet in the cloud, or a VLAN in an on-premises data center, network isolation is crucial. This limits exposure to potential threats and reduces network contention from other applications, ensuring reliable inter-node communication and client access.
2. Adequate Resource Allocation (CPU, RAM, Disk I/O): Redis is an in-memory database, so RAM is its most critical resource. * RAM: Allocate sufficient RAM for your dataset, plus overhead for Redis itself, replication buffers, AOF rewrites, and temporary structures. Over-provisioning slightly is better than running out of memory. * CPU: While Redis is single-threaded for most operations, a cluster involves multiple instances, and background operations (like AOF rewrites, RDB saves, or replication) can utilize additional CPU cores. Ensure your host machine or VM has enough CPU resources. * Disk I/O: For persistence (AOF and RDB), fast disk I/O is crucial, especially during AOF rewrites. Use SSDs or NVMe storage for your Docker volumes to minimize latency during persistence operations and recovery.
3. Robust Persistent Volumes: Do not rely on ephemeral container storage. Always use named Docker volumes (or cloud-provider persistent disks) for the /data directory of each Redis node. This guarantees that your data, including nodes.conf and AOF files, survives container restarts, updates, or removals. Implement regular snapshots or backups of these volumes.
4. Comprehensive Security Configuration: As discussed in advanced considerations, never deploy Redis Cluster to production without robust security: * Authentication: Enable requirepass and masterauth with strong, unique passwords. Avoid hardcoding passwords in configuration files; use environment variables or secret management systems (like Docker Secrets, Kubernetes Secrets, Vault). * Protected Mode: Keep protected-mode yes enabled. * TLS/SSL: Encrypt communication channels, either natively or via proxies. * Firewalls: Implement strict firewall rules (security groups) to limit access to Redis ports (6379 for clients, 16379 for cluster bus) only from authorized application servers and other cluster nodes.
5. Automated Backups and Recovery Drills: Beyond just taking backups, implement an automated system for regular, verifiable backups of your Redis data (RDB and AOF files). Crucially, regularly perform disaster recovery drills. This involves simulating a failure and attempting to restore your cluster from backups. This practice helps validate your backup strategy and familiarizes your team with the recovery process under pressure.
6. Thorough Monitoring and Alerting: Set up a comprehensive monitoring stack (Prometheus, Grafana, Alertmanager) to track critical Redis metrics: * Performance: Latency, throughput, hit/miss ratio, evicted keys. * Resource Usage: CPU, memory, network I/O. * Cluster Health: Number of nodes, master/replica status, replication lag, cluster state (cluster_state:ok). * Persistence: AOF rewrite status, last RDB save time. Establish clear alerting thresholds for these metrics to ensure proactive notification of potential issues.
7. Performance Tuning and Benchmarking: * maxmemory and maxmemory-policy: Configure maxmemory to prevent Redis from consuming all available RAM. Choose an appropriate maxmemory-policy (e.g., allkeys-lru for caching) based on your use case. * tcp-keepalive: Set tcp-keepalive 300 (or similar) to detect dead peers more reliably, especially in network-unreliable environments. * Benchmarking: Regularly benchmark your cluster under anticipated load patterns to identify bottlenecks and optimize configurations. Tools like redis-benchmark can be useful.
8. Keep Redis and Docker Up-to-Date: Regularly update your Redis server version and Docker/Docker-Compose to benefit from performance improvements, bug fixes, and security patches. Plan these updates carefully, ideally in a staging environment first.
9. Use Cluster-Aware Client Libraries: Ensure all applications connecting to the Redis Cluster use client libraries that explicitly support Redis Cluster mode. These clients handle connection pooling, routing requests to the correct shard, and gracefully adapting to topology changes (e.g., during failovers).
By meticulously following these best practices, you can deploy and operate a Redis Cluster that is not only highly performant and scalable but also secure, resilient, and easy to manage in a production environment. This holistic approach ensures that your data layer remains a reliable asset for your mission-critical applications.
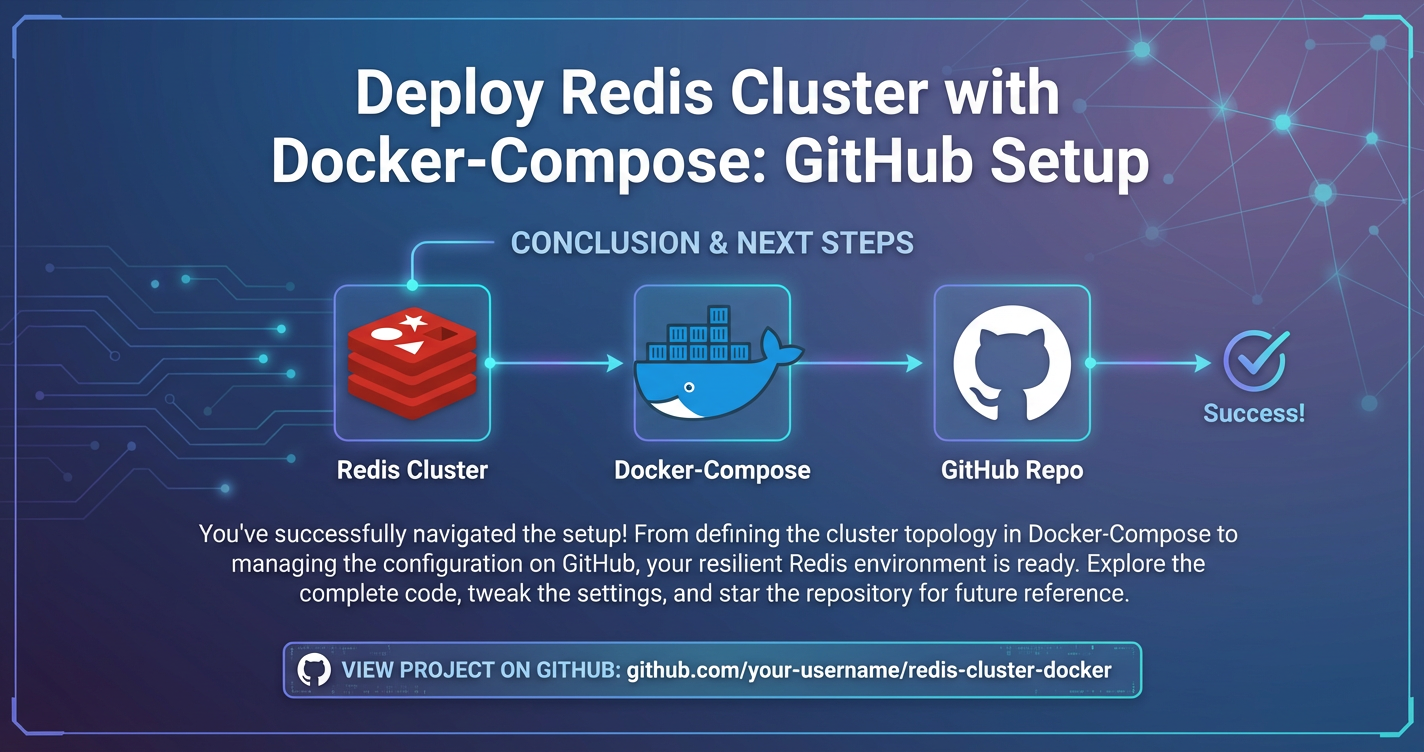
Conclusion: Mastering Distributed Redis with Docker-Compose and GitHub
Our journey through the deployment of a Redis Cluster with Docker-Compose, fortified by a GitHub setup, has encompassed a wide array of critical concepts and practical steps. We began by dissecting the intricate architecture of Redis Cluster, understanding how its sharding, replication, and gossip protocol contribute to its unparalleled scalability and high availability. This foundational knowledge elucidated why a distributed data store is indispensable for modern, high-performance applications that demand both speed and resilience.
We then explored the transformative power of Docker-Compose, revealing how this orchestration tool simplifies the deployment of complex multi-container applications like our 6-node Redis Cluster. By leveraging Docker's containerization benefits—isolation, portability, and reproducibility—and Docker-Compose's declarative YAML syntax, we streamlined the entire setup, moving from theoretical understanding to a tangible, executable blueprint. The meticulous configuration of redis.conf, defining persistent volumes, and crafting a robust docker-compose.yml file underscored the precision required and the efficiency gained through this approach. The init-cluster.sh script automated the final, crucial step of forming the cluster, demonstrating the power of scripting in managing distributed systems.
The integration with GitHub elevated our deployment from a local curiosity to a professional, version-controlled "Infrastructure as Code" asset. This setup ensures that our Redis Cluster's configuration is auditable, collaborative, and recoverable, paving the way for advanced DevOps practices like CI/CD. The ability to track every change, collaborate with team members, and easily replicate the environment across different stages of the development lifecycle is an invaluable advantage in today's fast-paced software development landscape.
Through rigorous testing, we verified the cluster's basic functionality, observing how redis-cli intelligently routes requests to the correct master node and, more importantly, how the cluster seamlessly handles node failures through automatic failover, promoting replicas to maintain continuous service. This real-world demonstration of high availability is a testament to the robust design of Redis Cluster and the efficacy of our deployment strategy.
Finally, we delved into advanced considerations and best practices for production deployment, covering critical aspects such as security (authentication, TLS, firewalls), monitoring (Prometheus, Grafana), data durability (backup and restore strategies), and scalability (Kubernetes as a future platform). We also briefly and naturally touched upon how such a resilient data layer underpins robust application development, often interacting with services that expose their capabilities through an API, which in turn can be efficiently managed and secured by an API gateway like APIPark. This contextualization reinforces that the Redis Cluster is a vital component within a broader, sophisticated architectural ecosystem.
In conclusion, mastering the deployment of a Redis Cluster with Docker-Compose and integrating it with GitHub empowers developers and operations teams to build and manage highly scalable, resilient data infrastructure with confidence and efficiency. This guide has provided a comprehensive roadmap, equipping you with the knowledge and tools to embark on your own journey into distributed Redis, fostering an environment where performance, availability, and maintainability are not just aspirations, but achievable realities. The principles and practices outlined here serve as a solid foundation, inviting further exploration into specialized optimizations and integrations within your unique application landscape.
Frequently Asked Questions (FAQs)
1. What is the minimum number of nodes required for a production-ready Redis Cluster, and why? For a production-ready Redis Cluster that offers both horizontal scalability and high availability with automatic failover, the minimum recommended setup is six nodes: three master nodes and three replica nodes (one replica for each master). This configuration ensures: * Sharding: Data is distributed across three independent master nodes. * High Availability: Each master has a replica that can be promoted in case of master failure. * Quorum for Failover: With three masters, a simple majority of two masters can agree on a node failure, allowing a failover to be reliably initiated. Fewer than three masters makes the cluster vulnerable to splits or an inability to elect a new master during failures.
2. How does Redis Cluster handle data distribution and routing requests to the correct node? Redis Cluster divides the entire keyspace into 16384 hash slots. Each key is mapped to a specific hash slot using a CRC16 hash function. These hash slots are then distributed among the master nodes in the cluster. When a client (using a cluster-aware library or redis-cli -c) sends a command, it first calculates the hash slot for the key. If the client is connected to a node that doesn't own that slot, the node will redirect the client to the correct master node, ensuring the request is processed by the right shard.
3. Why should I use Docker-Compose for deploying a Redis Cluster instead of manual setup? Docker-Compose significantly simplifies the deployment of a multi-container application like a Redis Cluster by: * Reproducibility: Ensuring consistent environments across development, testing, and production. * Simplified Configuration: Centralizing all service definitions, network settings, and persistent volumes in a single docker-compose.yml file. * Portability: Allowing the entire setup to run seamlessly on any machine with Docker and Docker-Compose installed. * Automation: Enabling easy startup, shutdown, and management of all cluster nodes with simple commands, reducing manual error and setup time.
4. How can I secure my Redis Cluster in a production environment? Securing a Redis Cluster in production is paramount: * Authentication: Enable requirepass and masterauth with strong passwords. * Network Isolation: Deploy the cluster on a private, isolated network segment with strict firewall rules. * TLS/SSL: Encrypt communication between clients and nodes, and among nodes, either natively through Redis 6+ TLS support or via a TLS-terminating proxy. * Access Control Lists (ACLs): Utilize Redis 6+ ACLs for granular permissions on commands and keys for different users/applications. * Disable Protected Mode: Ensure protected-mode yes is enabled.
5. What is the role of an API Gateway like APIPark in an architecture that uses a Redis Cluster? While a Redis Cluster provides a high-performance, scalable data layer, an API Gateway like APIPark serves a crucial role at the application's edge, managing how external clients and other services interact with your backend. APIPark, as an open-source AI gateway and API management platform, would sit in front of the application services that use your Redis Cluster. It handles cross-cutting concerns for your application APIs, such as authentication, authorization, rate limiting, traffic management, logging, monitoring, and potentially integrating with various AI models. This decouples these concerns from your core application logic, enhancing security, performance, and maintainability of the entire system, allowing your backend services (and the Redis Cluster they rely on) to focus purely on data processing.
🚀You can securely and efficiently call the OpenAI API on APIPark in just two steps:
Step 1: Deploy the APIPark AI gateway in 5 minutes.
APIPark is developed based on Golang, offering strong product performance and low development and maintenance costs. You can deploy APIPark with a single command line.
curl -sSO https://download.apipark.com/install/quick-start.sh; bash quick-start.sh

In my experience, you can see the successful deployment interface within 5 to 10 minutes. Then, you can log in to APIPark using your account.

Step 2: Call the OpenAI API.