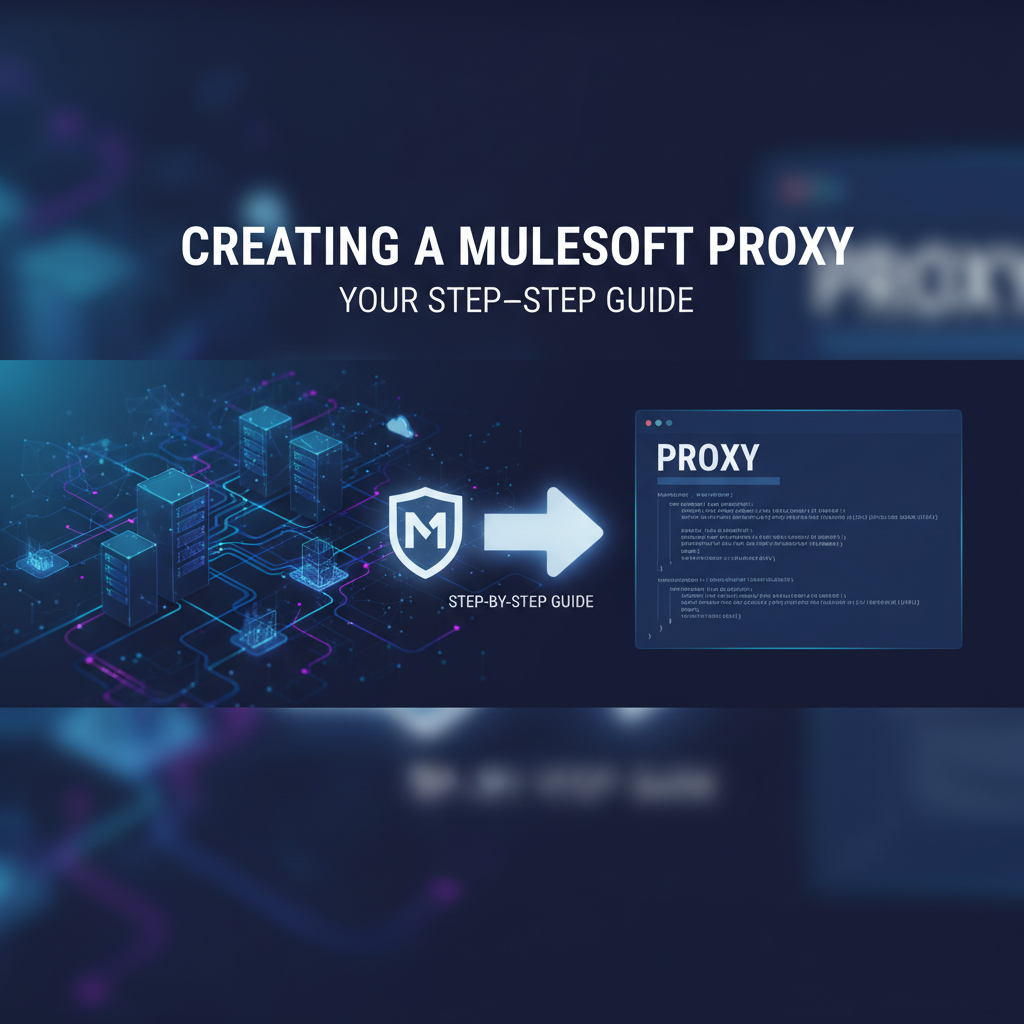
Creating a MuleSoft Proxy: Your Step-by-Step Guide


In the rapidly evolving landscape of digital transformation, Application Programming Interfaces (APIs) have emerged as the foundational pillars connecting disparate systems, enabling seamless data exchange, and fostering innovation across industries. From powering intricate microservices architectures to facilitating robust partner integrations and mobile applications, APIs are the lifeblood of modern software ecosystems. However, as the number and complexity of these APIs grow, so does the imperative for effective management, security, and governance. This is where the concept of an API proxy becomes not just beneficial, but absolutely critical.
An API proxy acts as an intermediary, sitting between the consumer of an API and the backend service that actually implements the API's logic. It intercepts incoming requests, applies various policies, transforms messages, and routes them to the appropriate backend, before sending the response back to the client. This architectural pattern offers a plethora of advantages, ranging from enhanced security and performance optimization to simplified API versioning and centralized monitoring. For enterprises leveraging MuleSoft's Anypoint Platform, the creation and management of such proxies are integral to establishing a scalable, secure, and resilient API gateway strategy.
MuleSoft, renowned for its leading integration platform, provides a powerful and flexible environment for designing, building, deploying, and managing APIs and integrations. Its Anypoint Platform offers comprehensive capabilities that encompass the entire API lifecycle, from design and development to deployment and governance. Within this ecosystem, creating an API proxy is a streamlined process that allows organizations to exert granular control over their API landscape without modifying the underlying backend services. By offloading cross-cutting concerns like security, rate limiting, and analytics to the proxy layer, developers can focus on core business logic, while operations teams gain unparalleled visibility and control. This guide will meticulously walk you through the process of creating a MuleSoft proxy, detailing each step, elucidating the underlying principles, and arming you with the knowledge to establish a robust api gateway that stands ready to meet the demands of enterprise-grade integration. We will delve into the intricacies of API definition, deployment strategies, policy application, and testing, ensuring you gain a comprehensive understanding of how to leverage MuleSoft's capabilities to their fullest potential.
Understanding API Proxies and MuleSoft's Pivotal Role
Before we embark on the practical steps of proxy creation, it's crucial to solidify our understanding of what an API proxy is and why it holds such significance within an integration platform like MuleSoft. At its core, an API proxy is a facade that stands in front of your actual backend api. It acts as a single point of entry for consumers, abstracting away the complexities and potential volatilities of the underlying services. Think of it as a sophisticated digital doorman for your backend services, controlling access, inspecting credentials, and directing traffic efficiently.
The functions of an API proxy are diverse and transformative. Firstly, it provides a crucial layer of security, acting as the first line of defense against malicious attacks or unauthorized access. By enforcing authentication and authorization policies at the proxy level, organizations can shield their backend services from direct exposure to the public internet. Secondly, it offers immense flexibility in managing API traffic. Features like rate limiting, throttling, and caching can be applied at the proxy, preventing service overload, ensuring fair usage, and improving response times without altering the backend code. Thirdly, proxies facilitate seamless API versioning and evolution. As backend services change or new versions are introduced, the proxy can be configured to route requests to the appropriate version, minimizing disruption for existing consumers. Furthermore, proxies centralize monitoring and analytics, collecting valuable data on API usage, performance, and errors, which is indispensable for operational insights and business intelligence. This abstraction layer also allows for easy application of common policies across multiple APIs, ensuring consistency and reducing development overhead.
MuleSoft's Anypoint Platform elevates the concept of an API proxy to an enterprise-grade solution. It provides a comprehensive suite of tools for the entire API lifecycle, where the proxy acts as a critical component of its api gateway capabilities. Anypoint Platform encompasses Anypoint Design Center for API specification, Anypoint Exchange for API discovery and sharing, Anypoint API Manager for governance and policy enforcement, and Anypoint Runtime Manager for deployment and operational monitoring. When you create a proxy in MuleSoft, you're not just setting up a simple redirection; you're leveraging a sophisticated ecosystem that allows you to:
- Define API contracts: Using industry standards like RAML or OpenAPI Specification (OAS), you can meticulously define the interface of your API, ensuring consistency and clarity.
- Apply policies dynamically: From security policies like OAuth 2.0 and JWT validation to operational policies like rate limiting and caching, MuleSoft's policy engine allows for granular control over API behavior without coding.
- Monitor API performance: Gain deep insights into API health, usage patterns, and potential bottlenecks through Anypoint Monitoring.
- Deploy flexibly: Proxies can be deployed to CloudHub (MuleSoft's cloud platform), on-premise Mule runtimes, or Kubernetes-based Runtime Fabric (RTF), offering versatility to match your infrastructure needs.
- Automate lifecycle management: Seamlessly manage the entire lifecycle of your api, from design to retirement, ensuring compliance and efficiency.
By acting as a unified api gateway, MuleSoft's proxy capabilities enable organizations to present a clean, consistent, and secure interface to their consumers, regardless of the underlying complexity of their backend systems. This strategic positioning makes MuleSoft an indispensable tool for enterprises aiming to build scalable, resilient, and well-governed api ecosystems. The detailed steps that follow will illuminate how these theoretical advantages translate into practical implementation within the Anypoint Platform.
Prerequisites for Creating a MuleSoft Proxy
Before diving into the mechanics of building an API proxy within MuleSoft, it's essential to ensure that you have the necessary groundwork laid. Successfully creating and deploying a proxy relies on having access to specific tools, accounts, and a foundational understanding of MuleSoft's ecosystem. Addressing these prerequisites upfront will streamline your process and prevent common stumbling blocks, allowing for a more efficient and focused implementation journey.
Here’s a detailed breakdown of what you'll need:
- Anypoint Platform Account:
- Description: This is the absolute cornerstone. Anypoint Platform is MuleSoft's unified, single-solution platform for API design, development, deployment, and management. You'll need an active account to access its various components, including API Manager, Design Center, and Runtime Manager.
- Importance: All aspects of proxy creation—from defining the API to deploying and applying policies—are managed through this web-based console. Without an account, you cannot proceed.
- How to Obtain: If you don't already have one, you can sign up for a free trial on the MuleSoft website. This trial typically offers sufficient access to explore and implement proxy functionalities. For enterprise-level work, a paid subscription will be required, often with specific organizational roles and permissions configured.
- Mule Runtime Environment:
- Description: A Mule runtime is the engine that executes your Mule applications and, in this context, your API proxies. Proxies themselves are specialized Mule applications. You need a deployed or deployable runtime environment where your proxy can reside and operate.
- Importance: Without a runtime, your proxy has nowhere to live and process requests. The choice of runtime environment impacts scalability, operational overhead, and integration with existing infrastructure.
- Options:
- CloudHub: MuleSoft's fully managed, multi-tenant cloud platform. This is often the simplest and quickest option for deploying proxies, as MuleSoft handles all infrastructure concerns. You select a region, worker size, and number of workers.
- On-Premise Mule Runtime: For organizations with specific compliance, security, or data locality requirements, Mule runtimes can be installed on your own servers or virtual machines. This gives you maximum control but requires more operational management.
- Runtime Fabric (RTF): A containerized, managed runtime environment that combines the control of on-premise deployments with the agility and scalability of cloud-native architectures. RTF can be deployed on Kubernetes (EKS, AKS, GKE) or OpenShift.
- Configuration: Ensure that your chosen runtime environment is properly configured and accessible from Anypoint Platform. For CloudHub, this is largely automatic. For on-premise or RTF, you'll need to set up connected apps and agents for communication with Anypoint Platform.
- Basic Understanding of Mule Applications and API Definitions:
- Description: While you won't be writing complex Mule code for a basic proxy, a foundational understanding of how Mule applications function and how APIs are defined is beneficial.
- Importance:
- API Definitions (RAML/OAS): Proxies are often built upon an API specification. Knowing how to read and interpret a RAML (RESTful API Modeling Language) or OpenAPI Specification (OAS, formerly Swagger) file will help you understand the API's contract (endpoints, methods, parameters, responses). MuleSoft Design Center is a common place to create or import these specifications.
- Mule Concepts: Familiarity with concepts like flows, message processors, and connectors will provide context, even if the proxy configuration is primarily declarative through API Manager. You should understand the basic request-response cycle.
- Learning Resources: MuleSoft offers extensive documentation, tutorials, and certifications (e.g., MCD - MuleSoft Certified Developer) that can help you build this foundational knowledge.
- A Target Backend API to Proxy:
- Description: A proxy by definition needs a service to proxy. This could be any existing backend service that exposes an api endpoint. It could be a legacy SOAP service, a modern RESTful microservice, a database endpoint, or even another Mule application.
- Importance: You need a live, accessible api endpoint to test your proxy against. Without a target, the proxy has no requests to forward and no responses to retrieve.
- Considerations:
- Accessibility: Ensure the target API is network-accessible from your chosen Mule runtime environment. If your proxy is on CloudHub, the target API must be accessible from CloudHub IP ranges or through a VPN/VPC peering.
- Testability: Ideally, the target API should have predictable behavior for testing purposes, allowing you to easily verify if the proxy is functioning as expected.
- Security: If the target API requires authentication, note down the necessary credentials or mechanisms (e.g., API keys, OAuth tokens) as you might need to configure the proxy to pass these through or generate them.
By meticulously preparing these prerequisites, you will establish a solid foundation, enabling you to proceed with confidence and efficiency through the subsequent steps of creating and deploying your MuleSoft API proxy. This preparation phase is not merely a formality but a critical component of successful api gateway implementation.
Step-by-Step Guide: Creating a MuleSoft Proxy
Now, with the prerequisites firmly in place, let's dive into the practical, detailed steps required to create a MuleSoft API proxy. This process leverages various components of the Anypoint Platform, primarily API Manager, to establish a robust and governable intermediary for your backend services. We'll focus on a common scenario: proxying a RESTful api using CloudHub for deployment, which offers a great balance of ease of use and powerful features.
Step 1: Define Your API Specification (RAML/OAS)
The first and arguably most crucial step in creating any well-governed api is to define its contract. This specification acts as a blueprint, outlining what the api does, how it should be invoked, and what responses it provides. While it's possible to create a proxy without a formal specification, defining one first promotes a contract-first approach, which leads to more consistent, understandable, and maintainable APIs.
- Importance of a Contract-First Approach: By defining the api contract before implementation, you ensure that consumers and producers agree on the interface from the outset. This minimizes miscommunications, facilitates parallel development, and makes the api easier to document and consume. It also provides a clear reference point for applying policies and testing.
- Using Anypoint Design Center or External Tools:
- Anypoint Design Center: MuleSoft provides an intuitive web-based editor within the Anypoint Platform for creating and managing API specifications. Navigate to
Design Center->APIsand clickCreate new API. You can choose between RAML 1.0 or OpenAPI 3.0 (or 2.0). The editor offers syntax highlighting, auto-completion, and instant documentation generation, making it an excellent tool for beginners and experienced designers alike. - External Tools: Alternatively, you can use external tools like Visual Studio Code with appropriate extensions (e.g., RAML or OpenAPI extensions) to write your specifications locally and then import them into Anypoint Platform.
- Anypoint Design Center: MuleSoft provides an intuitive web-based editor within the Anypoint Platform for creating and managing API specifications. Navigate to
- Defining Resources, Methods, Request/Response Bodies, and Security Schemes:
- Resources: These represent the entities or collections that your api exposes (e.g.,
/users,/products/{productId}). - Methods: For each resource, you define the HTTP methods supported (GET, POST, PUT, DELETE, PATCH) and their specific behaviors.
- Request/Response Bodies: Detail the structure of data expected in requests and the format of data returned in responses, typically using JSON or XML schemas. Define examples for clarity.
- Parameters: Specify query parameters, URI parameters, and header parameters, including their data types, whether they are required, and descriptions.
- Security Schemes: Outline how the api is secured (e.g., Basic Authentication, OAuth 2.0, API Key). This information is critical for later policy application.
- Resources: These represent the entities or collections that your api exposes (e.g.,
- Example RAML Snippet (for a simple
usersAPI): ```raml #%RAML 1.0 title: User Management API version: v1 baseUri: http://api.example.com/{version}types: User: type: object properties: id: integer name: string email: string status: string | enum: [active, inactive] example: id: 101 name: "Jane Doe" email: "jane.doe@example.com" status: "active"/users: get: description: Retrieve a list of all users queryParameters: status: type: string enum: [active, inactive, all] default: all description: Filter users by their status responses: 200: body: application/json: type: User[] examples: usersList: - id: 101 name: "Jane Doe" email: "jane.doe@example.com" status: "active" - id: 102 name: "John Smith" email: "john.smith@example.com" status: "inactive" post: description: Create a new user body: application/json: type: User properties: id?: type: integer description: ID is usually auto-generated example: name: "Alice Wonderland" email: "alice@example.com" status: "active" responses: 201: body: application/json: type: User example: id: 103 name: "Alice Wonderland" email: "alice@example.com" status: "active" 400: description: Invalid user data provided/users/{userId}: uriParameters: userId: type: integer description: The ID of the user to retrieve or modify get: description: Retrieve a specific user by ID responses: 200: body: application/json: type: User example: id: 101 name: "Jane Doe" email: "jane.doe@example.com" status: "active" 404: description: User not found put: description: Update an existing user body: application/json: type: User properties: id?: type: integer example: name: "Jane Doe Updated" email: "jane.doe.updated@example.com" status: "active" responses: 200: body: application/json: type: User example: id: 101 name: "Jane Doe Updated" email: "jane.doe.updated@example.com" status: "active" 404: description: User not found`` Once your API specification is complete and saved in Design Center, it becomes an "API asset" in Anypoint Exchange. This asset will have a uniqueAsset ID(e.g.,orgId/api-name:version`) which is crucial for the next step.
Step 2: Create a New API in Anypoint Platform's API Manager
With your API specification published to Anypoint Exchange, the next step is to register this api within API Manager. API Manager is the central hub for governing, securing, and analyzing your APIs. It's where you define the runtime instance of your api, which will eventually become your proxy.
- Navigate to Anypoint Platform -> API Manager: Log into your Anypoint Platform account. On the left-hand navigation pane, find and click on
API Manager. This will take you to the dashboard where you can manage all your APIs. - Add New API: On the API Manager dashboard, click the
Add APIbutton (orManage APIfor existing assets). You will be presented with several options for creating a new api instance. - Configure API Details:
- Method: Choose
From Exchange. This allows you to link to the API specification you created and published in Design Center (which automatically publishes to Exchange). - Search for your API: Type in the name of your API (e.g., "User Management API") or its
Asset ID. Select the correct version. - API Name: This will usually auto-populate from your API specification. You can adjust it if needed, but it's best to keep it consistent. This is the name displayed in API Manager.
- API ID: A unique identifier that MuleSoft generates. You generally don't need to change this.
- Asset Type: This will be
API. - Version: This will correspond to the version defined in your specification (e.g.,
v1). - API Instance Label: This is a human-readable label for this specific instance of the api, particularly useful if you have multiple instances (e.g., "User Management API Production," "User Management API Staging").
- Type: Select
REST. If you were proxying a SOAP service, you would chooseSOAP. - Asset Version: This refers to the version of the API specification asset in Exchange (e.g.,
1.0.0). - Deployment Options: For now, focus on registering the API. The deployment choice comes next.
- Method: Choose
After confirming these details, click Next or Save. Your API is now registered in API Manager, but it's not yet deployed as a proxy.
Step 3: Choose Proxy Deployment Model
MuleSoft offers flexibility in how you deploy your api gateway proxy, catering to different architectural needs and operational preferences. The choice of deployment model has implications for management, scalability, and integration with your existing infrastructure.
- Option A: Runtime Manager (CloudHub Proxy/Dedicated Load Balancer):
- CloudHub Proxy: This is often the simplest and most common approach for rapidly deploying an api proxy. When you choose to deploy a proxy on CloudHub, MuleSoft automatically provisions and manages a Mule runtime worker dedicated to running your proxy application. It handles all infrastructure, scaling, and patching.
- Pros: Minimal operational overhead, high availability and scalability handled by MuleSoft, quick deployment, integrated with Anypoint Platform monitoring and logging.
- Cons: Less control over underlying infrastructure, dependency on MuleSoft's cloud environment, potential latency for very specific geographically dispersed users if regions are not optimized.
- Dedicated Load Balancer (DLB): If you have multiple APIs deployed on CloudHub and require a single public entry point with custom SSL certificates, URL rewrites, or IP whitelisting, you can front your proxies with a DLB. The proxy itself still runs on CloudHub.
- CloudHub Proxy: This is often the simplest and most common approach for rapidly deploying an api proxy. When you choose to deploy a proxy on CloudHub, MuleSoft automatically provisions and manages a Mule runtime worker dedicated to running your proxy application. It handles all infrastructure, scaling, and patching.
- Option B: API Gateway Runtime (On-Premise/RTF):
- On-Premise API Gateway: For organizations that need to keep their data and integrations entirely within their own data centers due to compliance, security, or existing infrastructure mandates, an on-premise Mule runtime can host the api gateway.
- Pros: Maximum control over environment, data locality, integration with existing on-premise security and network infrastructure.
- Cons: Higher operational burden (patching, scaling, monitoring), requires managing hardware/VMs, more complex setup.
- Runtime Fabric (RTF): A modern, containerized deployment option that allows you to run Mule applications (including proxies) on Kubernetes clusters (on-premise or cloud-managed like EKS, AKS, GKE) or OpenShift.
- Pros: Cloud-native benefits (portability, scalability, resource isolation), centralized control through Anypoint Platform, optimized resource utilization.
- Cons: Requires Kubernetes expertise, initial setup can be more complex than CloudHub.
- On-Premise API Gateway: For organizations that need to keep their data and integrations entirely within their own data centers due to compliance, security, or existing infrastructure mandates, an on-premise Mule runtime can host the api gateway.
For the purpose of this detailed guide, we will focus on deploying a CloudHub Proxy due to its widespread use and ease of initial setup.
Step 4: Configure the Proxy in API Manager
Once your API is registered, you'll be prompted to configure its deployment. This is where you specify the target backend URL and other crucial proxy settings.
- Select "Proxy" Type: Within the API Manager interface for your newly added API, you'll see a section for deployment. Click
Deploy API. UnderDeployment Target, selectCloudHub. - Specify the Target URL of the Backend API: This is the most critical piece of information for your proxy. Enter the full URL of your actual backend service that the proxy will forward requests to.
- Example: If your backend user management service is accessible at
http://backend-userservice.internal.com/api/v1, you would enter this URL. - Important: Ensure this URL is accessible from the CloudHub workers that will host your proxy. If your backend is internal, you might need to set up a Virtual Private Cloud (VPC) in CloudHub or use a VPN.
- Example: If your backend user management service is accessible at
- Configure Advanced Settings:
- Base Path: This is the public facing path for your api gateway. It typically defaults to a generated path, but you can customize it. For instance,
/api/users/v1. This is the URL that consumers will use to access your proxy. - CORS (Cross-Origin Resource Sharing): If your api will be consumed by web applications running on different domains, you'll need to enable and configure CORS. This includes specifying allowed origins, allowed methods, allowed headers, and expose headers. Proper CORS configuration prevents browser-based security errors.
- Caching Strategy: For read-heavy APIs, configuring a caching policy at the proxy level can significantly improve performance and reduce the load on your backend. MuleSoft allows you to define caching rules based on HTTP methods, headers, and query parameters.
- API Autodiscovery: By default, when you deploy a proxy from API Manager, Anypoint Platform automatically configures API Autodiscovery. This mechanism links your deployed proxy instance to the API definition in API Manager, allowing policies to be applied and metrics to be collected. Ensure
API Autodiscoveryis enabled and theAPI IDandAPI Versionare correctly populated (they usually auto-populate if you selected "From Exchange"). - Port: For CloudHub, typically
8081(HTTP) or8082(HTTPS). Ensure you select the appropriate protocol for your public endpoint.
- Base Path: This is the public facing path for your api gateway. It typically defaults to a generated path, but you can customize it. For instance,
After configuring these settings, click Deploy.
Step 5: Deploy the Proxy
Once you initiate the deployment, MuleSoft's Anypoint Platform takes over the process of provisioning resources and deploying your proxy application to the chosen runtime environment.
- Select Environment, Runtime Version, Worker Size:
- Environment: Choose the Anypoint Platform environment where you want to deploy (e.g., "Development," "Staging," "Production"). Policies and configurations can vary by environment.
- Runtime Version: Select the desired Mule runtime version (e.g.,
4.4.0). It's generally recommended to use the latest stable version unless specific compatibility issues exist. - Worker Size and Number of Workers: For CloudHub, you specify the computing power (vCores) and memory allocated to your proxy application. Options range from
0.1 vCoreto16 vCores. For production environments, you'll typically need multiple workers for high availability and load balancing. Start with0.1or0.2vCore for development/testing, and scale up as needed.
- Review and Deploy: Review all your configurations (target URL, base path, worker settings). Click
Deploy Application. MuleSoft will then begin the deployment process. - Monitor Deployment Status: You can monitor the deployment progress directly within API Manager or by navigating to
Runtime Manager->Applications. You'll see status updates (e.g., "Starting," "Applying changes," "Running"). A successful deployment will show your application status as "Started." It can take a few minutes for the application to fully deploy and start.- Once deployed, the proxy will have a public URL, typically in the format
http://<appname>.region.cloudhub.io/<basepath>. Note this URL down, as it's what you'll use to access your proxy.
- Once deployed, the proxy will have a public URL, typically in the format
Step 6: Apply Policies to Your Proxy
One of the most powerful features of a MuleSoft api gateway is its ability to apply various policies to your proxy without modifying the backend code. Policies are modular, reusable rules that enforce security, manage traffic, improve performance, and collect valuable data. This is where the true value of centralized api management shines.
- Introduction to MuleSoft Policies: MuleSoft offers a rich library of out-of-the-box policies, categorized for different purposes:
- Security Policies: Client ID Enforcement, JWT Validation, OAuth 2.0 Token Enforcement, IP Whitelisting/Blacklisting, Basic Authentication, Rate Limiting SLAS.
- Traffic Management Policies: Rate Limiting, Throttling, Spike Arrest.
- Quality of Service Policies: Caching.
- Transformation Policies: Headers, Query Parameters.
- Compliance Policies: Audit Logging.
- Detailed Explanation of Applying a "Client ID Enforcement" Policy as an Example: This is a very common policy to ensure that only registered applications can access your api.
- Navigate to your API: In API Manager, select your deployed API instance.
- Go to "Policies" section: On the left navigation for your API, click
Policies. - Apply New Policy: Click
Apply New Policy. - Select Policy: Choose
Client ID Enforcementfrom the list. - Configure Policy:
- Client ID Expression: This defines where the policy should look for the Client ID in the incoming request. Common options are
#[attributes.headers['client_id']](looking in theclient_idheader) or#[attributes.queryParams['client_id']](looking in a query parameter). - Client Secret Expression: Similarly, for the client secret, typically
#[attributes.headers['client_secret']]or#[attributes.queryParams['client_secret']]. - Enable Client ID and Secret Header Injection (Optional): If your backend api also expects the Client ID and Secret, you can configure the proxy to inject them into the request headers before forwarding to the backend. This allows the backend to perform its own validation if necessary.
- Client ID Expression: This defines where the policy should look for the Client ID in the incoming request. Common options are
- Apply: Click
Apply. The policy will be deployed to your proxy application. This usually happens very quickly.
- How Policies Enhance Security and Manage Traffic:
- Security: Policies act as gatekeepers. For example,
IP Whitelistingensures only approved IP addresses can access the api.OAuth 2.0andJWT Validationensure only authenticated and authorized consumers (applications and users) can call your api, protecting sensitive data and preventing unauthorized access. - Traffic Management:
Rate Limitingprevents abuse and ensures fair usage by restricting the number of requests an application can make within a given time frame.Spike Arrestprotects your backend from sudden surges in traffic that could overwhelm it. These policies are critical for maintaining the stability and availability of your backend services, especially when dealing with public-facing APIs or services exposed to partners.
- Security: Policies act as gatekeepers. For example,
You can apply multiple policies, and they execute in the order they are listed in API Manager. Carefully consider the order, as it can affect their behavior. For instance, an IP Whitelisting policy should typically execute before an authentication policy.
Step 7: Test Your MuleSoft Proxy
After deploying your proxy and applying policies, rigorous testing is crucial to ensure everything is functioning as expected. This involves making requests to your proxy's public URL and verifying its behavior, including policy enforcement and correct routing to the backend.
- Using Tools Like Postman, curl:
- Postman: A popular API development and testing tool.
- Open Postman and create a new request.
- Set the HTTP method (GET, POST, etc.) corresponding to your API definition.
- Enter the proxy's public URL (e.g.,
http://my-user-proxy.us-e2.cloudhub.io/api/users/v1). - If you applied a
Client ID Enforcementpolicy:- You'll need to create an
API Consumer Applicationin Anypoint Exchange first. Go toExchange->Your API->Request Access. Create a new application (e.g., "My Test App"). This will generate a Client ID and Client Secret. - Include these
client_idandclient_secretin your request headers or query parameters, depending on how you configured the policy in Step 6. For example, addclient_idandclient_secretasKey-Valuepairs in theHeaderstab in Postman.
- You'll need to create an
- Add any other required headers, query parameters, or request body as per your API specification.
- Send the request.
- Postman: A popular API development and testing tool.
curl: A command-line tool for making HTTP requests, useful for quick tests and scripting. ```bash # Example for GET request with Client ID/Secret in headers curl -X GET \ "http://my-user-proxy.us-e2.cloudhub.io/api/users/v1/users?status=active" \ -H "client_id: YOUR_CLIENT_ID" \ -H "client_secret: YOUR_CLIENT_SECRET"
Example for POST request
curl -X POST \ "http://my-user-proxy.us-e2.cloudhub.io/api/users/v1/users" \ -H "Content-Type: application/json" \ -H "client_id: YOUR_CLIENT_ID" \ -H "client_secret: YOUR_CLIENT_SECRET" \ -d '{ "name": "Test User", "email": "test@example.com", "status": "active" }' `` * **Verifying Policy Enforcement:** * **Client ID Enforcement:** Try making a request without theclient_idor with an incorrect one. You should receive a401 Unauthorizedor403 Forbiddenerror, indicating the policy is working. * **Rate Limiting:** If you applied a rate limiting policy (e.g., 5 requests per minute), send more than 5 requests within a minute. You should receive a429 Too Many Requestserror once the limit is exceeded. * **Caching:** If you applied a caching policy, the first request should take longer, and subsequent identical requests (within the cache TTL) should be significantly faster, indicating the response is served from the cache without hitting the backend. * **Checking Logs in Anypoint Runtime Manager:** * Go toRuntime Manager->Applications, and select your proxy application. * Click on theLogs` tab. Here you can see the detailed logs generated by your Mule application (the proxy). Look for messages indicating successful request forwarding, policy application, or any errors encountered. This is invaluable for troubleshooting. * For example, if the proxy cannot connect to the backend api, you'll likely see connection refused errors in the logs. If a policy fails, you'll see messages related to that policy.
Thorough testing at this stage is crucial. It validates not only the proxy's connectivity but also the effective enforcement of all applied policies, ensuring your api gateway is behaving exactly as intended before it's exposed to actual consumers.
Advanced MuleSoft Proxy Concepts
Beyond the foundational steps of creating and deploying a basic proxy, MuleSoft's Anypoint Platform offers a suite of advanced features and considerations that empower you to build highly sophisticated, resilient, and manageable API ecosystems. Understanding these concepts is key to fully leveraging the power of your api gateway.
Custom Policies: When Built-in Policies Aren't Enough
While MuleSoft provides a rich library of out-of-the-box policies for common scenarios, there will inevitably be situations where your specific business requirements demand unique logic that isn't covered by standard policies. This is where custom policies come into play.
- What are Custom Policies? Custom policies are essentially mini-Mule applications or a set of configurable rules that you develop yourself and then deploy to Anypoint Platform. They extend the functionality of the api gateway by allowing you to inject custom logic into the API request/response flow.
- Use Cases:
- Complex Transformation: Performing intricate data transformations (e.g., converting legacy XML to specific JSON schemas) that go beyond simple header or query parameter modifications.
- External System Integration for Validation: Calling out to an external fraud detection service, a custom identity provider, or a specialized data validation service before allowing a request to proceed.
- Proprietary Security Mechanisms: Implementing a unique authentication or authorization scheme specific to your organization that isn't covered by standard protocols like OAuth 2.0 or JWT.
- Advanced Logging/Auditing: Integrating with a specific enterprise logging system or enriching log data with custom business context.
- Conditional Routing: Implementing dynamic routing logic based on complex criteria derived from request headers, payload content, or external data sources.
- Development and Deployment: Custom policies are developed using MuleSoft's Anypoint Studio. They are packaged as
.jarfiles and then uploaded to Anypoint Platform's Exchange or API Manager. Once deployed, they appear in the list of available policies and can be applied to any API instance just like built-in policies, offering a seamless integration experience. This capability makes the MuleSoft api gateway extremely extensible and adaptable to highly specific enterprise needs.
API Auto-Discovery: How Mule Applications Self-Register with API Manager
API Auto-Discovery is a crucial mechanism in MuleSoft that enables deployed Mule applications (whether they are proxies or actual api implementations) to automatically register and synchronize their status with Anypoint API Manager. This ensures that API Manager always has an up-to-date view of your running APIs, allowing policies to be applied and metrics to be collected in real-time.
- How it Works: When you deploy a Mule application (e.g., your proxy) that implements an api defined in API Manager, you configure it with a specific API ID and version. At runtime, the application communicates with API Manager, sending status updates and identifying itself as the runtime instance for that particular API definition.
- Benefits:
- Centralized Management: API Manager remains the single source of truth for all API definitions and their runtime instances, regardless of where they are deployed.
- Policy Enforcement: Auto-discovery is fundamental for policies to be applied dynamically. When a policy is updated in API Manager, the change is automatically pushed to the auto-discovered runtime instance, taking effect without requiring a redeployment of the application.
- Monitoring and Analytics: Metrics and logs from the running API are automatically aggregated and sent to Anypoint Monitoring and Analytics, providing a holistic view of API performance and usage.
- Simplified Operations: Developers don't need to manually configure runtime instances in API Manager; the applications discover their corresponding API definitions.
For proxies deployed directly from API Manager, auto-discovery is typically configured automatically in the background. For proxies or implementations deployed from Anypoint Studio or CI/CD pipelines, you manually add the api-gateway-autodiscovery global element to your Mule application's configuration and point it to the correct API ID and version.
Proxying SOAP Services: Special Considerations for WSDLs
While REST APIs dominate much of the modern integration landscape, many enterprises still rely on legacy SOAP (Simple Object Access Protocol) web services. MuleSoft's api gateway is fully capable of proxying SOAP services, but there are some unique considerations due to SOAP's XML-based nature and WSDL (Web Services Description Language) contracts.
- WSDL-Driven Proxies: When proxying a SOAP service, you typically provide its WSDL URL to API Manager. MuleSoft uses this WSDL to understand the service's operations, input/output messages, and data types.
- Key Differences:
- Message Format: SOAP messages are XML-based, often wrapped in a
<soap:Envelope>. The proxy needs to understand and potentially validate this XML structure. - Operations vs. Resources: Instead of HTTP methods on resources, SOAP services expose operations. The proxy maps incoming requests to these specific operations.
- Policy Application: While many REST policies (e.g., Client ID enforcement, rate limiting) can be applied to SOAP, some might be more tailored to HTTP headers and JSON bodies. However, you can still apply policies that inspect XML payloads or handle specific SOAP headers for security or routing.
- Virtualization: MuleSoft can "virtualize" a SOAP service, presenting it as a REST api to consumers while translating requests into SOAP calls to the backend. This is a powerful feature for modernizing legacy services without altering their backend implementation.
- Message Format: SOAP messages are XML-based, often wrapped in a
- Configuration: When creating the API instance in API Manager, you would select
SOAPas theTypeand provide the WSDL URL. MuleSoft then generates the necessary proxy configuration based on the WSDL. This allows you to centralize management and apply governance policies to your SOAP services, just as you would with RESTful APIs, bridging the gap between old and new architectures.
Load Balancing and High Availability: Dedicated Load Balancers, Clustering
For production-grade api gateway deployments, ensuring high availability and scalable performance is paramount. MuleSoft provides mechanisms to achieve both.
- CloudHub Dedicated Load Balancers (DLBs):
- Purpose: A DLB acts as a specialized load balancer within CloudHub, sitting in front of your deployed Mule applications (including proxies). It provides a static IP address, allows for custom domain names, SSL termination with custom certificates, and can route traffic to multiple workers across different CloudHub regions for disaster recovery.
- Benefits: Enhanced security (control over network access, custom SSL), improved routing flexibility, ability to use custom domains for cleaner API URLs.
- Mule Runtime Clusters (On-Premise/RTF):
- Purpose: For on-premise or Runtime Fabric deployments, you can configure Mule runtimes in a cluster. This means multiple Mule instances work together, sharing information (like object store data for caching or rate limiting counters) and providing failover capabilities. If one instance goes down, others can take over its workload.
- Benefits: High availability (no single point of failure), horizontal scalability (add more instances to handle increased load), improved resource utilization.
- Considerations:
- Session Management: For stateful APIs, careful consideration is needed to ensure session affinity if you're load balancing across multiple proxy instances. However, most modern APIs and proxies are designed to be stateless.
- Traffic Distribution: External load balancers (hardware or software like Nginx, AWS ELB, Azure Application Gateway) can be placed in front of your MuleSoft API gateway deployments (especially for on-premise/RTF) to distribute incoming traffic.
Monitoring and Analytics: Anypoint Monitoring, Custom Dashboards
An effective api gateway is not just about forwarding requests; it's also about providing deep insights into API usage, performance, and health. MuleSoft's Anypoint Monitoring and Analytics suite is integral to this.
- Anypoint Monitoring:
- Real-time Metrics: Provides out-of-the-box dashboards for CPU usage, memory consumption, thread counts, response times, throughput, and error rates for your deployed proxies.
- Alerting: Configure alerts based on predefined thresholds (e.g., notify if error rate exceeds 5% for 5 minutes), integrating with notification channels like email, Slack, PagerDuty.
- Log Management: Centralized log aggregation from all your Mule applications, with powerful search and filtering capabilities, invaluable for troubleshooting.
- Tracing: Distributed tracing capabilities allow you to visualize the flow of a single request across multiple services in your architecture, helping identify bottlenecks.
- Anypoint Analytics:
- Historical Data: Provides insights into API usage patterns over time (e.g., top consumers, most used APIs, traffic trends).
- Custom Dashboards: Create tailored dashboards to visualize specific metrics relevant to your business or operational needs, such as API consumption by partner, revenue generated by API, or SLA compliance.
- Policy Analytics: Analyze the impact and effectiveness of applied policies, such as how often rate limiting policies are triggered.
Robust monitoring and analytics are critical for ensuring the reliability, performance, and business value of your api gateway. They enable proactive problem solving, informed capacity planning, and data-driven decision making.
API Versioning and Lifecycle Management: How Proxies Facilitate Smooth Transitions
Managing different versions of an api and its entire lifecycle (from creation to deprecation) is a complex challenge that proxies simplify significantly.
- Seamless Versioning:
- URL-based Versioning: The proxy can route
v1requests to one backend service andv2requests to another, distinct backend service or a different version of the same service. For example,api.example.com/v1/usersversusapi.example.com/v2/users. - Header-based Versioning: Consumers can specify the desired API version in a request header (e.g.,
X-API-Version: 2). The proxy can then inspect this header and route accordingly. - Granular Control: This allows you to introduce new api versions without breaking existing consumers, providing a controlled transition period where both old and new versions are simultaneously supported.
- URL-based Versioning: The proxy can route
- Lifecycle Stages: API Manager allows you to define lifecycle stages for your APIs (e.g.,
Design,Development,Testing,Production,Deprecated,Retired). Proxies play a role by:- Enforcing Access: You can restrict access to APIs in
DevelopmentorDeprecatedstates, ensuring only authorized testers or internal applications can use them. - Communication: The proxy's documentation (via Exchange) can clearly communicate the status of an API version, guiding consumers.
- Controlled Deprecation: When an api version is deprecated, the proxy can be configured to return specific warning headers or even reject requests after a grace period, facilitating a smooth retirement process.
- Enforcing Access: You can restrict access to APIs in
By abstracting the backend and providing flexible routing, the api gateway empowers organizations to manage their api versions and their entire lifecycle with precision and minimal disruption to consumers.
APIPark is a high-performance AI gateway that allows you to securely access the most comprehensive LLM APIs globally on the APIPark platform, including OpenAI, Anthropic, Mistral, Llama2, Google Gemini, and more.Try APIPark now! 👇👇👇
Benefits of Using MuleSoft for API Proxies
The decision to implement an api gateway using MuleSoft is backed by a compelling array of benefits that address critical enterprise needs in connectivity, security, performance, and governance. Leveraging MuleSoft's Anypoint Platform for creating API proxies transforms the way organizations manage their digital assets, delivering significant value across various dimensions.
Centralized API Management
One of the most profound advantages of using MuleSoft for API proxies is the establishment of a centralized API management paradigm. Instead of disparate services scattered across an organization, each with its own security and operational concerns, MuleSoft brings everything under one roof.
- Single Pane of Glass: Anypoint API Manager provides a unified console where all your APIs, regardless of their backend implementation (Mule application, third-party service, legacy system), are registered, configured, and governed. This drastically simplifies the oversight and administration of a complex api landscape.
- Consistent Governance: With a central point for applying policies, you can ensure that all APIs adhere to corporate standards for security, compliance, and operational best practices. This consistency minimizes risks and streamlines auditing efforts.
- Improved Discoverability: By publishing API specifications to Anypoint Exchange, a centralized catalog, developers can easily discover, understand, and reuse existing APIs. This fosters an internal API economy, accelerating development cycles and reducing redundancy.
- Simplified Troubleshooting: Having all API configurations, policies, and runtime instances managed from a single platform significantly eases the process of diagnosing and resolving issues, as all relevant information is readily available.
Enhanced Security
Security is non-negotiable in today's digital landscape, and MuleSoft's API gateway capabilities provide an essential line of defense for your backend services.
- Perimeter Defense: The proxy acts as a secure perimeter, shielding your backend APIs from direct exposure to the internet. This reduces the attack surface and isolates internal systems from external threats.
- Policy-Driven Security: MuleSoft's extensive policy library allows you to enforce robust security measures without altering backend code. This includes:
- Authentication & Authorization: Client ID enforcement, OAuth 2.0, JWT validation, Basic Authentication ensure that only legitimate and authorized consumers can access your APIs.
- IP Whitelisting/Blacklisting: Control network access by permitting or denying requests from specific IP addresses or ranges.
- Threat Protection: Policies can detect and block common threats like SQL injection attempts or XML external entity (XXE) attacks.
- Data Masking/Transformation: Proxies can be configured to mask sensitive data in responses or transform payloads to meet specific security standards before they reach the consumer, protecting privacy and compliance.
- Reduced Backend Burden: Offloading security tasks to the proxy frees up backend services to focus solely on their core business logic, improving their performance and reducing their complexity.
Improved Performance and Scalability
An effective api gateway not only secures but also optimizes the performance and scalability of your api ecosystem.
- Caching: Implementing caching policies at the proxy level significantly reduces latency for read-heavy APIs by serving responses directly from the cache, thereby reducing the load on backend systems and improving response times for consumers.
- Rate Limiting & Throttling: These policies prevent API abuse and protect backend services from being overwhelmed by traffic surges, ensuring stable performance even under heavy load. This allows you to manage resources effectively and avoid costly downtime.
- Load Balancing: MuleSoft's deployment options (CloudHub workers, RTF clusters, Dedicated Load Balancers) inherently support load balancing across multiple instances of your proxy, distributing incoming traffic and ensuring high availability and resilience.
- Elastic Scalability: CloudHub and Runtime Fabric provide elastic scaling capabilities, allowing your proxies to automatically scale up or down based on demand, ensuring consistent performance without manual intervention, which is crucial for handling unpredictable traffic patterns.
- Protocol Transformation: The proxy can efficiently handle protocol transformations (e.g., HTTP to HTTPS, SOAP to REST), optimizing communication and allowing backend services to use their preferred protocols while presenting a consistent interface to consumers.
Observability and Monitoring
Understanding the health and usage patterns of your APIs is vital for operational excellence and strategic decision-making. MuleSoft offers comprehensive observability through its API gateway.
- Centralized Logging: All API requests and responses, along with policy enforcement details, are logged centrally, providing a complete audit trail for compliance and troubleshooting.
- Real-time Metrics: Anypoint Monitoring provides real-time visibility into API performance (response times, throughput, error rates), resource utilization (CPU, memory), and health status, allowing for proactive issue detection.
- Custom Dashboards & Analytics: Beyond out-of-the-box metrics, you can create custom dashboards to track business-specific KPIs, identify usage trends, and analyze the impact of changes. Anypoint Analytics provides historical data for deeper insights.
- Alerting Capabilities: Configure automated alerts based on predefined thresholds for critical metrics (e.g., high error rates, slow response times), ensuring that operations teams are immediately notified of potential problems.
- Distributed Tracing: Gain end-to-end visibility into transactions as they flow through multiple services, helping pinpoint bottlenecks and identify service dependencies. This is invaluable in complex microservices architectures.
Developer Experience
A well-managed api gateway significantly enhances the experience for both internal and external developers consuming your APIs.
- Consistent API Interfaces: Proxies present a clean, consistent, and well-documented interface to consumers, abstracting away backend complexities, different protocols, and internal service changes.
- Self-Service Discovery: Anypoint Exchange acts as a developer portal, allowing developers to easily find, understand, and test APIs, complete with interactive documentation (e.g., Swagger UI).
- Simplified Integration: Developers can integrate with a single, stable api gateway endpoint, rather than having to deal with multiple backend URLs, differing authentication mechanisms, or varying error handling patterns.
- Accelerated Development: By providing stable API contracts and self-service access, developers can start consuming APIs faster, reducing the time-to-market for new applications and features.
- Clear Error Handling: The proxy can standardize error messages and formats, providing clearer and more actionable feedback to consumers when issues arise, improving debugging efficiency.
Reduced Complexity
Finally, employing MuleSoft for API proxies fundamentally reduces the overall complexity of managing an enterprise integration landscape.
- Abstraction Layer: The proxy acts as a powerful abstraction layer, decoupling consumers from specific backend implementations. This means changes to backend services (e.g., migrating databases, rewriting microservices) can occur without impacting consumers, as long as the api contract exposed by the proxy remains stable.
- Standardization: It enforces standardization across all exposed APIs, ensuring consistent security, governance, and operational practices, which simplifies maintenance and reduces technical debt.
- Focus on Core Logic: By offloading cross-cutting concerns (security, logging, traffic management) to the api gateway, backend developers can concentrate solely on delivering business value through their core application logic.
- Simplified DevOps: The integrated nature of Anypoint Platform streamlines the CI/CD pipeline for APIs and proxies, making it easier to automate testing, deployment, and monitoring.
In summary, choosing MuleSoft for your API gateway and proxy strategy is not merely about technical implementation; it's a strategic decision that empowers organizations to build more secure, performant, scalable, and manageable api ecosystems, ultimately accelerating digital transformation and fostering innovation.
Real-World Use Cases and Best Practices
The strategic deployment of a MuleSoft API proxy extends far beyond basic request forwarding, addressing complex integration challenges across diverse enterprise scenarios. Understanding real-world use cases and adhering to best practices ensures that your api gateway delivers maximum value and remains a robust component of your architecture.
Real-World Use Cases
The versatility of a MuleSoft API proxy makes it indispensable across various integration patterns:
- Microservices Communication:
- Scenario: In a microservices architecture, numerous small, independent services communicate with each other. Direct communication can become a mesh of point-to-point connections, leading to complexity and security vulnerabilities.
- Proxy Role: An API gateway (MuleSoft proxy) can act as a single entry point for external clients and even for inter-service communication. It aggregates calls to multiple microservices, handles service discovery, applies common policies (authentication, logging, rate limiting) before routing requests to the appropriate backend microservice. This reduces the burden on individual microservices to handle these cross-cutting concerns, making the architecture cleaner and more manageable. For instance, a customer profile service might call an order history microservice and a billing microservice through the gateway, which ensures consistent security and observability across all interactions.
- Legacy System Integration:
- Scenario: Many enterprises still rely on monolithic legacy systems that expose archaic interfaces (e.g., SOAP, mainframe transactions, custom protocols). Modern applications, mobile apps, or SaaS platforms need to interact with these systems using RESTful APIs.
- Proxy Role: The MuleSoft proxy can act as a modernization layer. It can expose a modern, RESTful api to consumers, while internally transforming these requests into the legacy system's required format (e.g., converting JSON to SOAP XML, or calling a COBOL program via a custom connector). This allows organizations to expose valuable data and functionality from legacy systems without undertaking a costly and risky "rip and replace" of the entire system, effectively extending the life and value of existing investments. Policies can also be applied to secure these legacy services, which might lack modern security features.
- Exposing Internal Services Externally:
- Scenario: An organization has internal-facing services that contain valuable data or functionality. To enable partnerships, public-facing applications, or external developer ecosystems, these services need to be exposed externally, but with stringent security and control.
- Proxy Role: The API gateway provides a secure, controlled, and standardized way to expose internal services. It acts as a demilitarized zone (DMZ) for your APIs. All external traffic hits the proxy first, which enforces authentication (e.g., OAuth 2.0 with external partners), rate limiting (to prevent abuse), IP whitelisting, and logging before forwarding requests to the internal service. This ensures that internal services are never directly exposed, mitigating security risks and maintaining strict governance over what data and functionality are made available to external parties.
- API Monetization and Partner Ecosystems:
- Scenario: Companies want to monetize their data or services by offering them as APIs to partners or third-party developers, requiring tiered access, billing, and clear usage analytics.
- Proxy Role: MuleSoft proxies can implement SLA-based rate limiting policies (e.g., "Bronze" tier gets 100 requests/min, "Gold" gets 1000 requests/min). They can also integrate with billing systems by recording api call metrics for each consumer application. The api gateway acts as the enforcement point for these business rules, allowing for differentiated service offerings and robust tracking of consumption for invoicing and revenue generation. The proxy can also manage client application registrations and access approvals through API Manager, streamlining partner onboarding.
Best Practices for MuleSoft API Proxy Implementation
To maximize the effectiveness and longevity of your MuleSoft api gateway, consider these best practices:
- 1. Adopt a Contract-First API Design:
- Detail: Always start by defining your api specification (RAML/OAS) meticulously in Anypoint Design Center or a similar tool. This contract should be agreed upon by both consumers and producers.
- Why: It ensures consistency, clarity, and predictability, forming a stable foundation for your proxy. Changes to the backend can be made without affecting consumers as long as the contract remains stable. It also facilitates mocking and parallel development.
- 2. Implement Strong Security Policies Early and Consistently:
- Detail: Apply a layered security approach at your api gateway. This includes Client ID Enforcement, OAuth 2.0/JWT validation, IP whitelisting/blacklisting, and potentially threat protection policies.
- Why: The proxy is your first line of defense. Enforcing security here protects your backend services, ensures compliance, and provides a consistent security posture across all your APIs. Do not rely solely on backend security.
- 3. Leverage Caching for Performance Optimization:
- Detail: For read-heavy APIs or endpoints with static data, apply MuleSoft's caching policies. Configure appropriate cache TTLs (Time-To-Live) and ensure cache invalidation strategies are in place if the underlying data changes frequently.
- Why: Caching significantly reduces latency, decreases the load on backend systems, and improves the overall responsiveness of your APIs, enhancing the consumer experience.
- 4. Implement Robust Rate Limiting and Throttling:
- Detail: Protect your backend systems from abuse and unexpected traffic spikes by applying rate limiting policies. Define appropriate limits per application or API, considering your backend's capacity.
- Why: Prevents denial-of-service attacks, ensures fair usage among consumers, and maintains the stability and availability of your backend services, preventing costly outages.
- 5. Standardize Error Handling:
- Detail: Configure your api gateway to standardize error responses. Instead of forwarding cryptic backend error messages, transform them into consistent, clear, and consumer-friendly error formats (e.g., JSON with
code,message,details). - Why: Improves developer experience for API consumers, making it easier for them to debug and integrate with your APIs, and maintains a professional image.
- Detail: Configure your api gateway to standardize error responses. Instead of forwarding cryptic backend error messages, transform them into consistent, clear, and consumer-friendly error formats (e.g., JSON with
- 6. Utilize API Versioning Strategically:
- Detail: Plan your api versioning strategy (e.g., URL-based, header-based) and use the proxy to manage multiple API versions concurrently. Support older versions for a defined deprecation period.
- Why: Allows you to evolve your APIs without breaking existing consumers, ensuring backward compatibility and a smooth transition to newer functionalities.
- 7. Enable Comprehensive Monitoring and Alerting:
- Detail: Make full use of Anypoint Monitoring and Analytics. Set up dashboards for key performance indicators (KPIs) like response time, throughput, and error rates. Configure alerts for critical thresholds.
- Why: Provides deep visibility into API health and usage, enabling proactive identification and resolution of issues, facilitating capacity planning, and supporting business intelligence.
- 8. Automate Deployment with CI/CD:
- Detail: Integrate your API proxy deployment and policy management into your Continuous Integration/Continuous Deployment (CI/CD) pipeline. Use Anypoint Platform's APIs or Maven plugins for automated deployments.
- Why: Ensures consistent deployments, reduces manual errors, accelerates release cycles, and improves overall operational efficiency and reliability.
- 9. Document Your APIs Thoroughly:
- Detail: Ensure your API specifications are complete and up-to-date. Leverage Anypoint Exchange as a developer portal to host interactive documentation (e.g., auto-generated from RAML/OAS) and provide usage examples.
- Why: A well-documented api is a usable api. It empowers developers to quickly understand and integrate, reducing support requests and accelerating adoption.
- 10. Consider Custom Policies for Unique Requirements:
- Detail: If standard policies do not meet specific business logic or integration needs, develop custom policies. Follow best practices for Mule application development for these custom policies.
- Why: Extends the capabilities of your api gateway to handle highly specialized use cases, maintaining flexibility and adaptability within the unified management framework.
By diligently applying these real-world use cases and adhering to best practices, organizations can transform their MuleSoft api gateway into a strategic asset, driving efficiency, security, and innovation across their entire digital ecosystem.
Integrating with Other API Management Solutions
While MuleSoft's Anypoint Platform offers a comprehensive API gateway and management solution, the real world often involves diverse technology stacks and specific organizational needs that may necessitate the use of complementary or alternative API management tools. Understanding how MuleSoft can coexist or even integrate with a broader API management ecosystem is crucial for building a truly agile and future-proof architecture.
MuleSoft excels at enterprise integration and API management within its ecosystem, particularly for complex backend integration flows and sophisticated policy enforcement directly tied to Mule applications. However, organizations might also leverage specialized API management platforms for specific functionalities, such as advanced AI gateway capabilities, enhanced developer portals, or simplified open-source deployments. This is where solutions like APIPark come into focus.
APIPark (ApiPark) is an excellent example of an open-source AI gateway and API management platform that could either complement a MuleSoft deployment or serve as a robust alternative for certain use cases. While MuleSoft provides powerful capabilities for proxying traditional REST and SOAP services and integrating them into complex flows, APIPark distinguishes itself with a strong emphasis on AI model integration and management. For instance, if your organization's strategy heavily involves leveraging a multitude of AI models, APIPark offers quick integration of over 100+ AI models with a unified management system for authentication and cost tracking. This contrasts with MuleSoft, where integrating specific AI models might require custom connectors or more involved development.
Furthermore, APIPark provides a unified API format for AI invocation, standardizing request data across various AI models. This simplifies AI usage and maintenance, ensuring that changes in AI models or prompts do not disrupt consuming applications or microservices. For organizations building intelligent applications, this standardization is a significant advantage, reducing the operational overhead associated with managing diverse AI endpoints. You can also rapidly encapsulate prompts into REST APIs using APIPark, allowing you to quickly combine AI models with custom prompts to create new APIs for sentiment analysis, translation, or data analysis. This rapid prototyping of AI-powered APIs offers a distinct benefit for teams focused on AI innovation.
APIPark also offers end-to-end API lifecycle management, assisting with design, publication, invocation, and decommission, much like MuleSoft. Its focus on shared API services within teams, independent API and access permissions for each tenant, and subscription approval features provides a robust governance framework. The platform's impressive performance, rivaling Nginx with over 20,000 TPS on modest hardware, indicates its capability to handle large-scale traffic, making it a viable option for high-performance api gateway needs. Detailed API call logging and powerful data analysis capabilities are also core features that align with the comprehensive observability requirements of modern API ecosystems, providing businesses with the insights needed for proactive maintenance and issue resolution.
From a deployment perspective, APIPark offers a remarkably quick setup, capable of being deployed in just 5 minutes with a single command line. This ease of deployment makes it highly attractive for startups or teams looking to rapidly provision an api gateway without extensive setup. While MuleSoft offers various deployment options including CloudHub and Runtime Fabric, APIPark's open-source nature and straightforward deployment can appeal to those prioritizing flexibility and cost-effectiveness for certain segments of their api management needs.
In a hybrid scenario, MuleSoft might continue to manage complex enterprise integrations and mission-critical backend APIs, while APIPark could serve as a dedicated AI gateway or a secondary api gateway for specific developer portals focused on AI services. MuleSoft could potentially route requests to APIs managed by APIPark, creating a layered api gateway architecture where each platform optimizes for its strengths. This architectural flexibility allows enterprises to select the best tool for each specific job, ensuring that their overall api management strategy is both robust and adaptive. The open-source nature of APIPark, coupled with commercial support for advanced features, makes it a compelling consideration for evolving API strategies.
Troubleshooting Common MuleSoft Proxy Issues
Even with meticulous planning and execution, encountering issues during the deployment or operation of a MuleSoft API proxy is a common part of the development lifecycle. Knowing how to diagnose and resolve these problems efficiently is crucial for maintaining the stability and reliability of your api gateway. Here's a breakdown of common issues and their troubleshooting steps.
1. Deployment Failures
Symptom: Your proxy application fails to deploy in CloudHub, on-premise, or RTF, often with a "Failed to deploy" message in Runtime Manager.
Possible Causes & Troubleshooting:
- Insufficient Resources:
- CloudHub: You might have exhausted your vCore allocation or are trying to deploy an application size larger than available.
- On-Premise/RTF: The target server/node may lack sufficient CPU, memory, or disk space.
- Troubleshooting: Check your Anypoint Platform subscription limits. Reduce the worker size for the proxy if testing, or increase allocated resources. For on-premise/RTF, verify server resource availability.
- Invalid Configuration:
- Errors in the proxy configuration, such as an invalid
target.uri(backend URL), incorrect environment variables, or malformed XML in custom proxy files (if applicable). - Troubleshooting: Double-check all configuration parameters in API Manager. Review the proxy application's
pom.xmlandmule-artifact.jsonif it's a custom proxy or deployed via CI/CD.
- Errors in the proxy configuration, such as an invalid
- Network Connectivity Issues:
- The Mule runtime might not be able to reach internal Anypoint Platform services during deployment.
- Troubleshooting: Verify network configurations (firewalls, proxies) if on-premise. For CloudHub, deployment issues are less common but could indicate platform-wide problems (check MuleSoft status page).
- Runtime Version Mismatch:
- Attempting to deploy a proxy configured for one Mule runtime version to an incompatible runtime.
- Troubleshooting: Ensure the selected runtime version during deployment matches any specific requirements of your proxy or policies.
2. Policy Not Applying
Symptom: You've applied a policy (e.g., Client ID Enforcement, Rate Limiting) in API Manager, but it doesn't seem to take effect when you test the API. Requests are still processed as if no policy exists.
Possible Causes & Troubleshooting:
- API Auto-Discovery Issue:
- The deployed proxy instance isn't correctly reporting its status to API Manager, or the
api-gateway-autodiscoveryelement is misconfigured. API Manager cannot apply policies if it doesn't "see" the runtime instance. - Troubleshooting:
- In API Manager, navigate to your API instance. Check the
API Statussection. It should show a green "Active" status and indicate that an application is discovered. If not, the issue is with auto-discovery. - For a proxy deployed from API Manager, auto-discovery is usually automatic. If it's a custom Mule application acting as a proxy, ensure the
api-gateway-autodiscoverycomponent is correctly configured in your Mule application's XML, pointing to the correct API ID and API version. - Check application logs in Runtime Manager for any
autodiscoveryrelated errors.
- In API Manager, navigate to your API instance. Check the
- The deployed proxy instance isn't correctly reporting its status to API Manager, or the
- Policy Configuration Error:
- The policy itself is misconfigured. For example, the
Client ID Expressionis pointing toqueryParamswhen the client ID is actually inheaders. - Troubleshooting: Carefully review the policy configuration in API Manager. Test with exact header/query parameter names.
- The policy itself is misconfigured. For example, the
- Policy Order:
- If multiple policies are applied, their order matters. A policy might be executing but its effect is nullified by a later policy, or an earlier policy might be preventing the execution flow from reaching a specific policy.
- Troubleshooting: Adjust the order of policies in API Manager. Policies are executed from top to bottom.
- Deployment Propagation Delay:
- Sometimes, it takes a few moments for policy changes to propagate from API Manager to the running proxy instance, especially across large distributed environments.
- Troubleshooting: Wait a minute or two and retest. If the issue persists, it's likely not a delay.
3. Connectivity Issues to Backend
Symptom: Requests to the proxy result in 5xx errors (e.g., 500 Internal Server Error, 502 Bad Gateway, 504 Gateway Timeout), and the proxy logs indicate connection failures to the backend API.
Possible Causes & Troubleshooting:
- Incorrect Target URL:
- The
target.uriconfigured in API Manager points to an incorrect or non-existent backend URL. - Troubleshooting: Verify the backend URL is absolutely correct and accessible independently (e.g., using
curlfrom a machine that has network access to the backend).
- The
- Network Accessibility from Mule Runtime:
- The Mule runtime (CloudHub worker, on-premise server, RTF pod) cannot reach the backend API due to firewalls, VPN issues, or DNS resolution problems.
- Troubleshooting:
- CloudHub: If your backend is internal, ensure your CloudHub VPC is correctly configured and peered with your internal network. Check firewall rules on your internal network to allow traffic from CloudHub IP ranges. Test connectivity from a CloudHub worker if possible (e.g., via a simple Mule app that pings the backend).
- On-Premise/RTF: Verify network connectivity from the host machine/pod to the backend service. Check firewall rules, network ACLs, and DNS resolution settings.
- Backend Service Down or Unresponsive:
- The backend api itself is offline, overloaded, or experiencing issues.
- Troubleshooting: Check the status of the backend api directly. Use a tool like Postman or
curlto directly call the backend to isolate if the issue is with the proxy or the backend.
- TLS/SSL Handshake Issues:
- The proxy might be trying to connect to a backend API over HTTPS, but there are issues with SSL certificates (e.g., expired, untrusted CA, hostname mismatch).
- Troubleshooting: Verify the backend's SSL certificate. If using a self-signed or internal CA, ensure the Mule runtime's trust store is configured to trust that CA. For CloudHub, you might need to import custom trust stores if your backend uses non-standard certificates.
4. Authentication/Authorization Errors (Proxy to Backend)
Symptom: The proxy successfully receives requests, but the backend API returns 401 Unauthorized or 403 Forbidden errors, even though the proxy seems to have valid credentials.
Possible Causes & Troubleshooting:
- Proxy Not Forwarding Credentials:
- The proxy is not configured to pass through or generate the necessary authentication credentials (API keys, tokens, basic auth headers) required by the backend.
- Troubleshooting: If the backend requires authentication, ensure your proxy is configured to inject these credentials. This might involve setting specific headers or query parameters in the proxy configuration or via a custom policy. If the proxy generates tokens (e.g., OAuth client credentials flow), verify the token generation logic and its refresh mechanism.
- Incorrect Credentials:
- The credentials configured for the proxy to use when calling the backend are incorrect or expired.
- Troubleshooting: Double-check the API keys, usernames/passwords, or OAuth client credentials being used by the proxy to authenticate with the backend.
- Backend Policy/Role Mismatch:
- The credentials provided by the proxy are valid but lack the necessary permissions or roles to access the specific resource on the backend.
- Troubleshooting: Verify the roles and permissions assigned to the credentials the proxy is using on the backend system.
5. Performance Bottlenecks
Symptom: Requests to the proxy are slow, exhibit high latency, or time out, even if the backend API responds quickly when called directly.
Possible Causes & Troubleshooting:
- Insufficient Proxy Resources:
- The Mule runtime worker allocated to the proxy is undersized for the traffic volume or complexity of policies.
- Troubleshooting: Scale up the worker size (vCores) or add more workers in Runtime Manager. Monitor CPU and memory usage in Anypoint Monitoring.
- Expensive Policies:
- Some policies, especially those involving external calls (e.g., custom policies calling a database or another API), can introduce significant latency.
- Troubleshooting: Review the impact of each applied policy. Optimize custom policies for performance. Consider if a policy is strictly necessary or can be optimized.
- Network Latency between Proxy and Backend:
- Even if both are accessible, geographical distance or intermediate network hops can add latency.
- Troubleshooting: Deploy the proxy and backend in geographically closer regions if possible. Optimize network paths (e.g., dedicated connections, better routing).
- Ineffective Caching:
- Caching is configured but not working effectively (e.g., cache TTL is too short, cache key isn't correct, or the API is not cacheable).
- Troubleshooting: Review caching policy configuration. Ensure it's correctly applied to cacheable methods (GET). Monitor cache hit/miss ratios in Anypoint Monitoring if available.
- Too Many Hops:
- If the proxy is part of a chain of proxies or gateways, each hop adds latency.
- Troubleshooting: Simplify the architecture if possible, or optimize each intermediary component.
When troubleshooting, always leverage Anypoint Monitoring for real-time metrics, logs, and tracing. Start by isolating the problem – is it the client, the proxy, the network between the proxy and backend, or the backend itself? A systematic approach will lead you to the root cause more quickly.
Conclusion
The journey through creating a MuleSoft API proxy reveals it to be a powerful, indispensable tool for modern API management. In an era where APIs serve as the digital connectors of enterprise ecosystems, the ability to effectively govern, secure, and optimize these interfaces is paramount. MuleSoft's Anypoint Platform, with its robust api gateway capabilities, empowers organizations to achieve precisely this, transforming complex integration challenges into streamlined, resilient, and observable operations.
We've meticulously walked through the foundational steps, beginning with the critical importance of defining your API specification to establish a clear contract. From there, we delved into registering your API in Anypoint API Manager, selecting the appropriate deployment model (with a focus on the simplicity and power of CloudHub), and meticulously configuring the proxy to mediate traffic to your backend services. A significant part of this process involved understanding the application of diverse policies—from vital security measures like Client ID enforcement to performance enhancers such as caching and traffic controllers like rate limiting—all without touching a single line of backend code. Rigorous testing, both for functionality and policy enforcement, was emphasized as the crucial validation step.
Beyond the basics, we explored advanced concepts that elevate your api gateway to an enterprise-grade solution. Custom policies offer unparalleled extensibility for unique business logic, while API Auto-Discovery ensures seamless synchronization with API Manager. We considered the special nuances of proxying legacy SOAP services and the critical role of load balancing and high availability mechanisms for production deployments. The profound benefits of using MuleSoft for this purpose—encompassing centralized management, enhanced security, improved performance, deep observability, and a superior developer experience—were thoroughly articulated, underscoring the platform's holistic value proposition. Real-world use cases, ranging from microservices communication to legacy system modernization and API monetization, illustrated the practical impact of a well-implemented proxy, complemented by best practices for ensuring its longevity and effectiveness. We even touched upon how MuleSoft can integrate within a broader API management landscape, acknowledging complementary solutions like APIPark (ApiPark) that excel in specific domains like AI gateway capabilities and rapid, open-source deployment for modern API strategies. Finally, a comprehensive troubleshooting guide equipped you with the knowledge to diagnose and resolve common issues, reinforcing the practical aspects of operationalizing your api gateway.
In essence, a MuleSoft API proxy is far more than just a traffic director; it is a strategic control point that decouples consumers from providers, enforces governance, fortifies security, and provides invaluable insights into your digital assets. By following this step-by-step guide and embracing the best practices outlined, you are not merely creating an API proxy; you are building a resilient, scalable, and intelligent api gateway that will serve as the backbone of your organization's connected future, enabling agility, fostering innovation, and driving business value in the ever-expanding API economy. Embrace the power of MuleSoft to unlock the full potential of your APIs and navigate the complexities of modern integration with confidence and control.
Frequently Asked Questions (FAQs)
1. What is the fundamental difference between an API Proxy and an API Gateway in MuleSoft? In MuleSoft's context, an API proxy is a specific type of Mule application deployed on the Anypoint Platform (e.g., CloudHub, RTF, on-premise) that acts as an intermediary for a single backend API. It forwards requests to the backend and returns responses to the client, while also enforcing policies defined in API Manager. An API Gateway, on the other hand, is a broader architectural pattern or a set of functionalities that an API proxy provides, often encompassing multiple APIs. MuleSoft's API Manager, combined with deployed API proxies, forms the comprehensive API gateway solution, providing centralized management, policy enforcement, security, and monitoring across an entire API portfolio. So, while an API proxy is a deployed instance, the API gateway represents the overall system and capabilities managing those proxies.
2. Can a MuleSoft API proxy also perform data transformations between the client and the backend API? Yes, absolutely. While the basic proxying functionality involves direct forwarding, MuleSoft proxies are built on the Mule runtime, meaning they can leverage the full power of Mule flows for complex data transformations. You can inject transformation logic (e.g., using DataWeave to convert JSON to XML or vice-versa, or to enrich data) either through custom policies or by deploying a custom Mule application as a proxy. This capability is particularly useful when modernizing legacy services that expect different data formats than what modern consumers provide, or when you need to standardize request/response payloads across different backend APIs.
3. How does MuleSoft ensure the security of APIs exposed through its proxy? MuleSoft ensures API security through a multi-layered approach at the API gateway level. Firstly, proxies act as a perimeter defense, shielding backend services from direct exposure. Secondly, Anypoint API Manager allows the application of a wide range of security policies without writing code, including Client ID Enforcement, OAuth 2.0 token validation, JWT validation, Basic Authentication, and IP Whitelisting/Blacklisting. These policies verify the identity and authorization of consumers before requests ever reach the backend. Additionally, features like TLS/SSL termination, data masking in responses, and threat protection policies further enhance the security posture, making the API gateway a critical enforcement point for your organization's security standards.
4. What are the main benefits of deploying a MuleSoft proxy on CloudHub versus an on-premise Mule Runtime or Runtime Fabric (RTF)? Deploying a MuleSoft proxy on CloudHub offers maximum ease of use, with MuleSoft managing all infrastructure, scaling, and maintenance (fully managed service). It provides high availability and elastic scalability with minimal operational overhead, making it ideal for rapid deployment and cloud-native strategies. On-premise Mule Runtimes provide maximum control over the environment, data locality, and deep integration with existing on-premise infrastructure and security, suitable for strict compliance or existing data center mandates but with higher operational burden. Runtime Fabric (RTF) bridges the gap, offering cloud-native benefits (portability, containerization, optimized resource utilization) on Kubernetes clusters (on-premise or cloud-managed), combining control with agility, though it requires Kubernetes expertise. The choice depends on your organization's specific requirements for control, compliance, operational resources, and cloud strategy.
5. Can a MuleSoft API proxy be used for API monetization and managing different service tiers for consumers? Yes, MuleSoft API proxies are excellent tools for API monetization and managing different service tiers. Through Anypoint API Manager, you can apply Rate Limiting SLA (Service Level Agreement) policies. These policies allow you to define different usage limits (e.g., requests per minute/hour) for various client applications or "tiers" (e.g., Bronze, Silver, Gold). When consumers request access to your API in Anypoint Exchange, they can be assigned to a specific tier, and the proxy will automatically enforce the corresponding rate limits. Furthermore, the detailed logging and analytics capabilities of MuleSoft allow you to track API consumption per application, providing the necessary data for billing, usage reports, and understanding the value generated by your API programs.
🚀You can securely and efficiently call the OpenAI API on APIPark in just two steps:
Step 1: Deploy the APIPark AI gateway in 5 minutes.
APIPark is developed based on Golang, offering strong product performance and low development and maintenance costs. You can deploy APIPark with a single command line.
curl -sSO https://download.apipark.com/install/quick-start.sh; bash quick-start.sh

In my experience, you can see the successful deployment interface within 5 to 10 minutes. Then, you can log in to APIPark using your account.

Step 2: Call the OpenAI API.